First, I’m not proposing anybody modify any of their guns (especially carry guns) but figured since triggers are a FAQ, I’d share my experience. That said, here are words on improving the trigger on my latest SW 1911, 299 target model.
When I got the gun, the trigger was about as expected /what I had in my other SW1911’s as far as “pull quality”. About 4# 12 oz and reasonably crisp. What I didn’t like was the free play this trigger had. i.e. It could move the trigger blade in all 3 directions about 0.025”. Not horribly sloppy but distracting and certainly not as precise in fit as my other early production SW1911’s. I had heard about these “loose triggers” on the SW 1911 line but never experienced one until this purchase.
So, here is what I did.
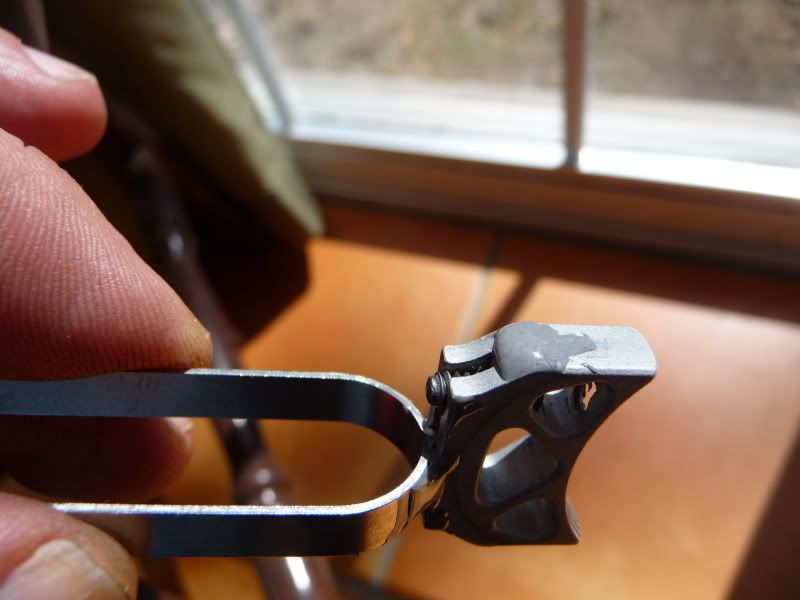
First I I took a pencil and marked where the trigger shoe met/was covered by the frame. Then I took some basic measurements ( with calipers) on for/aft play to ID how much slack I needed to take out.
Next, I disassembled the gun down to it’s minimal basic components and got the trigger out. It was my first time doing this with a 1911 so I was a bit nervous. However with the wonders of the internet and some good advice here, I had the trigger out in short time. From there I used my calipers to check (and record) the rest of the trigger shoe dimensions.
Now it was time to fatten the trigger up in the right places. I roughed up a few spots on the shoe & bow that I wanted to build up with JB Weld. ( Being sure that any areas that got built up, would not be over the pencil/visible line.). A swap of alcohol to clean then a couple of small dabs of mixed JB and the 15 hr cure time wait was on.
See attached pics of JB build-up:
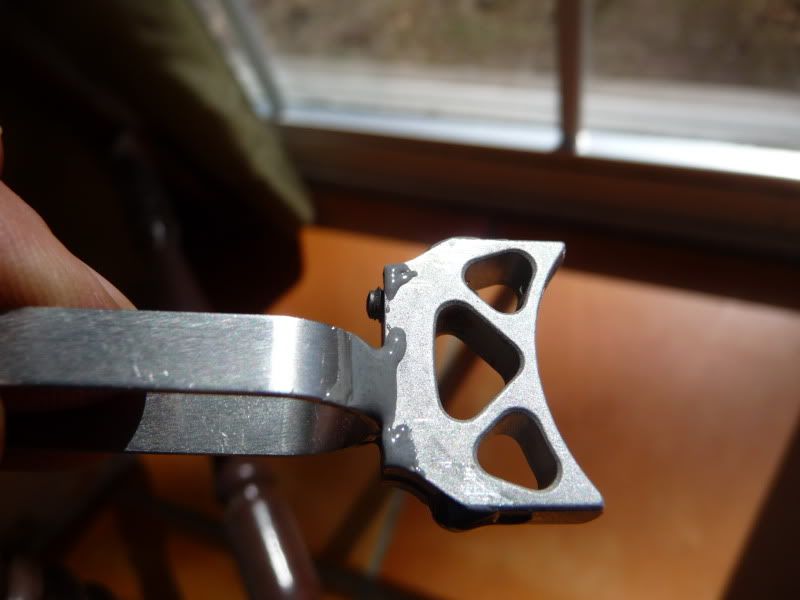
Note it’s in very small quantities and that I extended the triggers top and bottom bearing surfaces for a smooth, distributed contact area.
After letting the trigger set for a day, the fitting started. I simply got out a jewelers file and started filing the JB spots until I had overall and uniform dimensions of 0.015” side to side and 0.025” top to bottom over the bare/raw trigger. For the for/aft play, I filed the JB at the base of the trigger on the bow to about 0.30 over. I took my time and assured things staye square.
File a few swipes, measure, trial fit, repeat. The whole trigger fitting process took maybe 30 min. ( BTW: YES I know I could have just replaced the trigger but I liked the style of this one and wanted to test/practice my fitting skills. New trigger was plan B.)
AS my last improvement, on reassembly, I replaced the sear spring with a Cylinder and Slide spring (CS094)designed to lighten pull.
Results: The trigger now has only the SLIGHTEST play side to side and the slack top-bottom and fore/aft is gone completely. Yet, it’s pull quality is not hampered by the mod at all. Pull is actual down to a equally crisp 3# 9 oz which is a little better than a 25% reduction. I’m very happy with the results . $7 and a hour well spent IMHO.
FWIW, I’ve since installed that same CS Sear spring in two other S&W 1911’s with similar results.
hth somebody