I blew off doing the magazines today. I decided to be lazy instead

I did however do a little fiddling this evening.
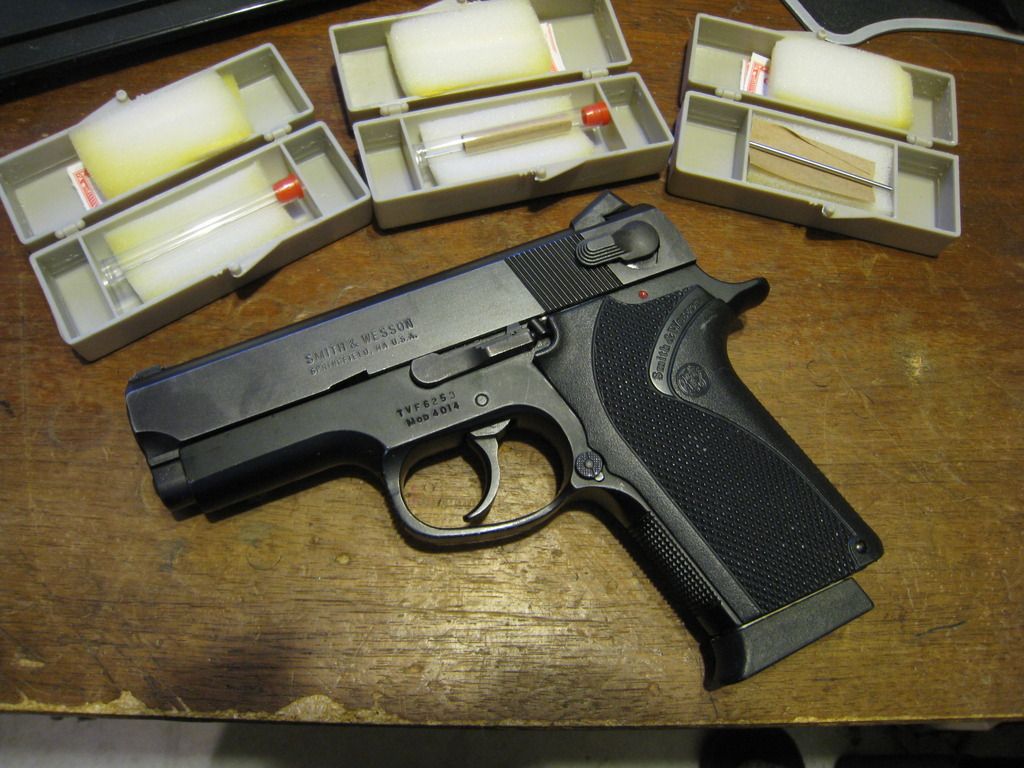
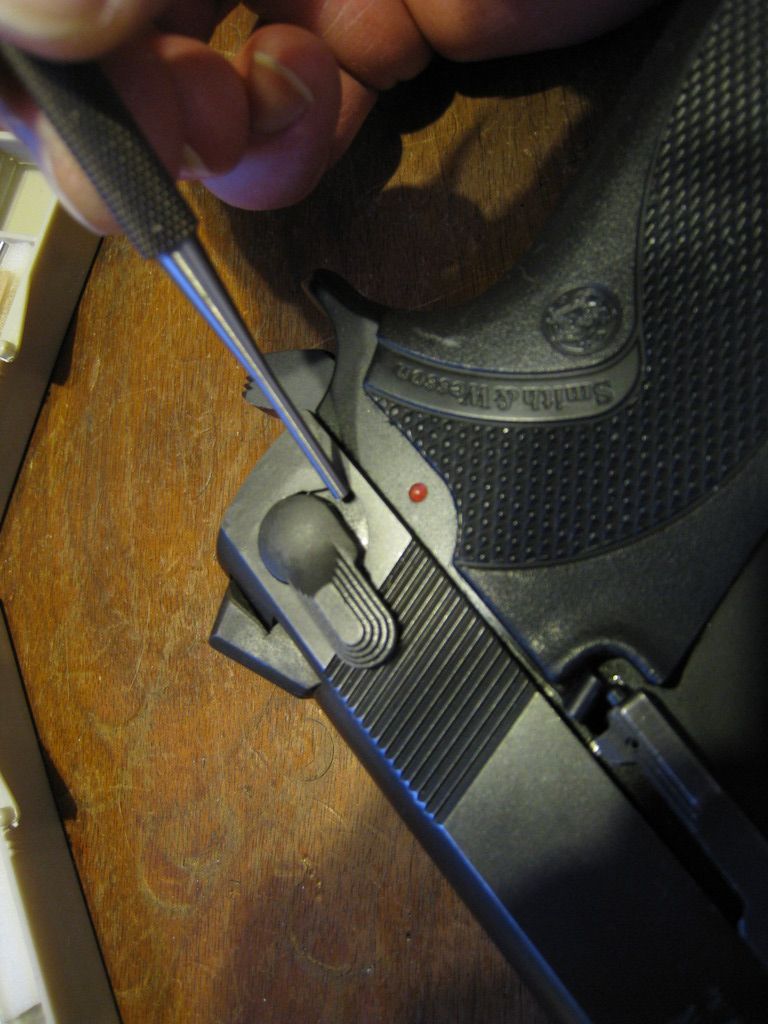
I installed a set of plain Novaks and finished assembling the 4014 slide.
I figured before i get much further along here I best check the decocker timing. This is especially important because the spring loaded decocker I installed in the slide is new to this gun and I do not know the state of the sear release lever in the frame.
So lets get to it shall we
Here's the new to me "1014" and above it are the three pin gauges I'll use to evaluate the timing.
Those pin gauges are 0.025", 0.045" and 0.078"

Now you don't need fancy pin gauges to check this, I just happen to have a bunch. Drill bits work perfectly, you just use the shank end as a pin gauge NOT the cutting end. Drill blanks are even better. Either way, you need one each in twenty five, forty five and seventy eight thousandths diameter.
You might think whats all the fuss? As long as the hammer drops it's OK right? Well, not necessarily. You see there are some other events going on out of sight that need to happen before the hammer falls.
Here, if we erase the slide leaving the decocker & firing pin alone. With the decocker in the up or fire position you can see the firing pin is free to travel forward.
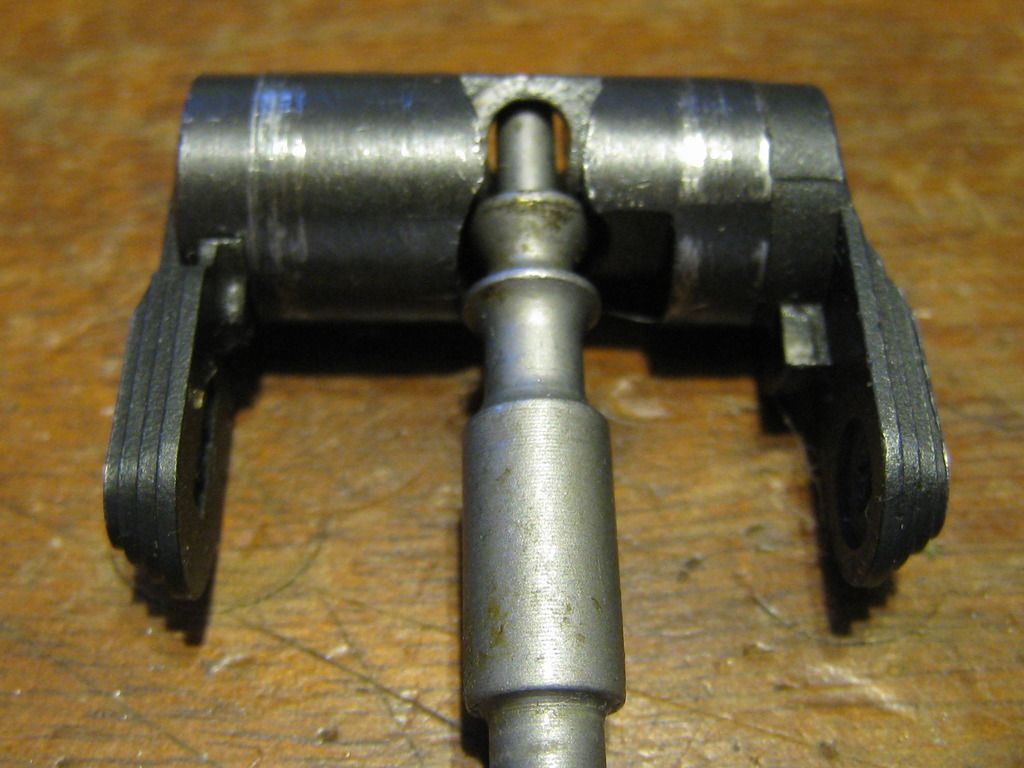
Now lower the decocker and you can see there is a dovetail cut that captures the firing pin preventing forward movement.
And viewing from aft you can see the firing pin is now shielded from hammer strikes.
We need to insure those two events occur before the hammer is released so....
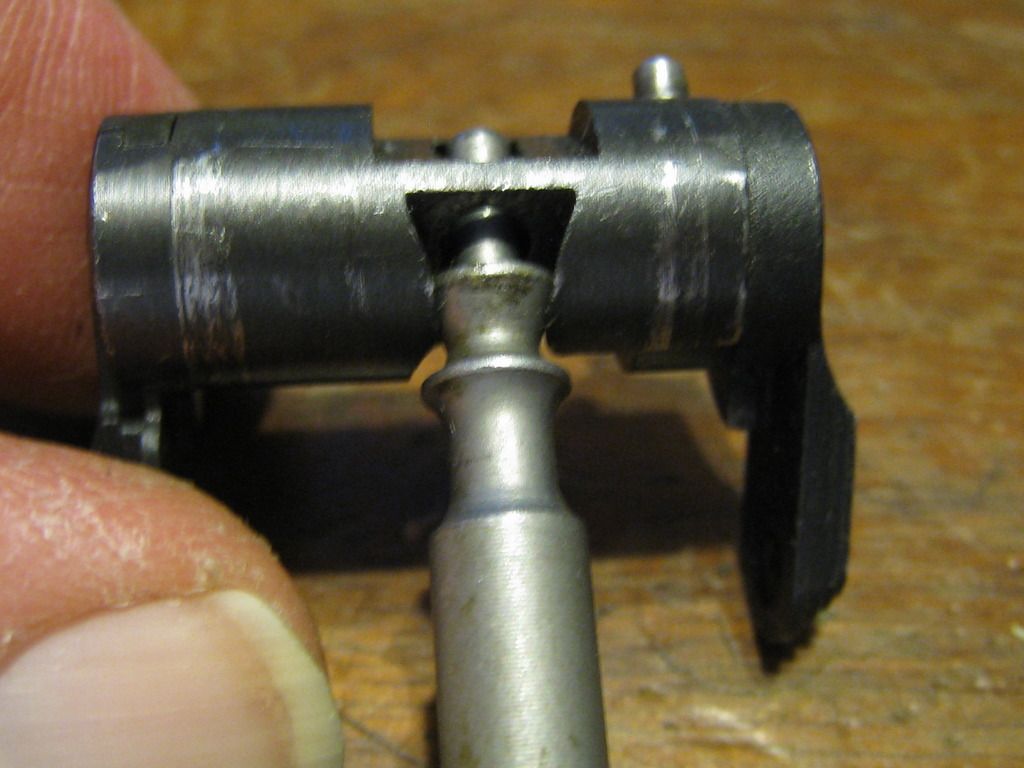
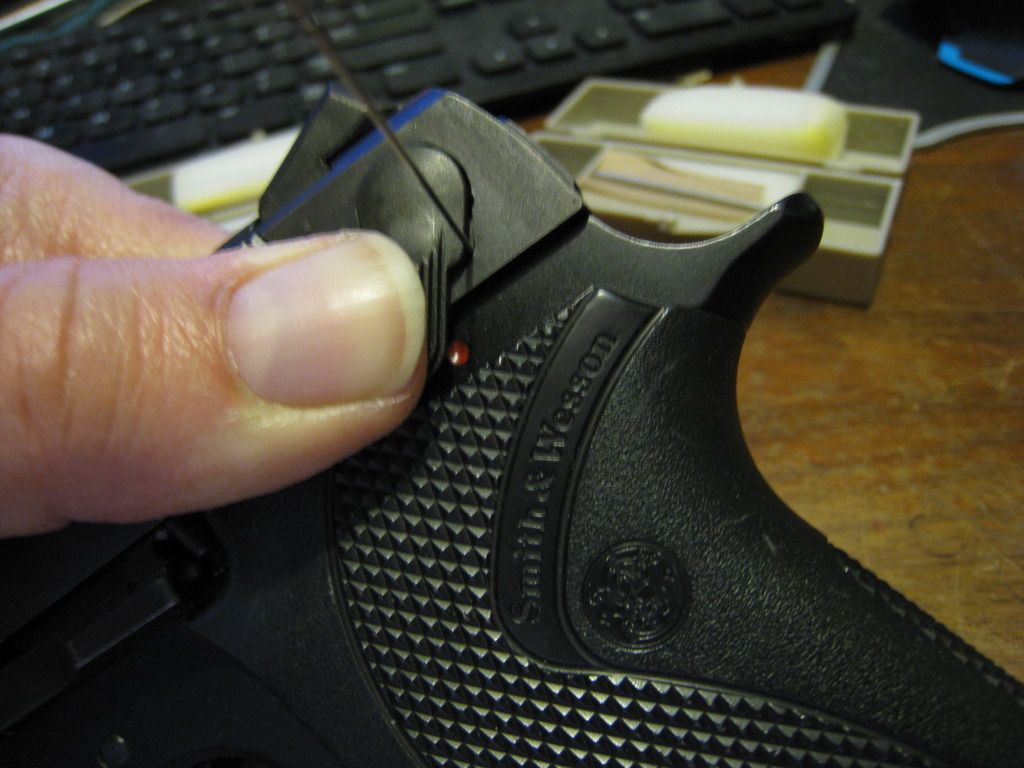
What were gonna do is stick a pin gauge in the shallow recess below the decocker right where I'm pointing with the punch then with the hammer cocked, attempt the decock the pistol.
I'll start with the twenty five thousandths pin. We should see the hammer fall here. If it does
NOT drop, that tells me the sear release lever is flat worn out and must be replaced.
Hammer fell here so far so good.
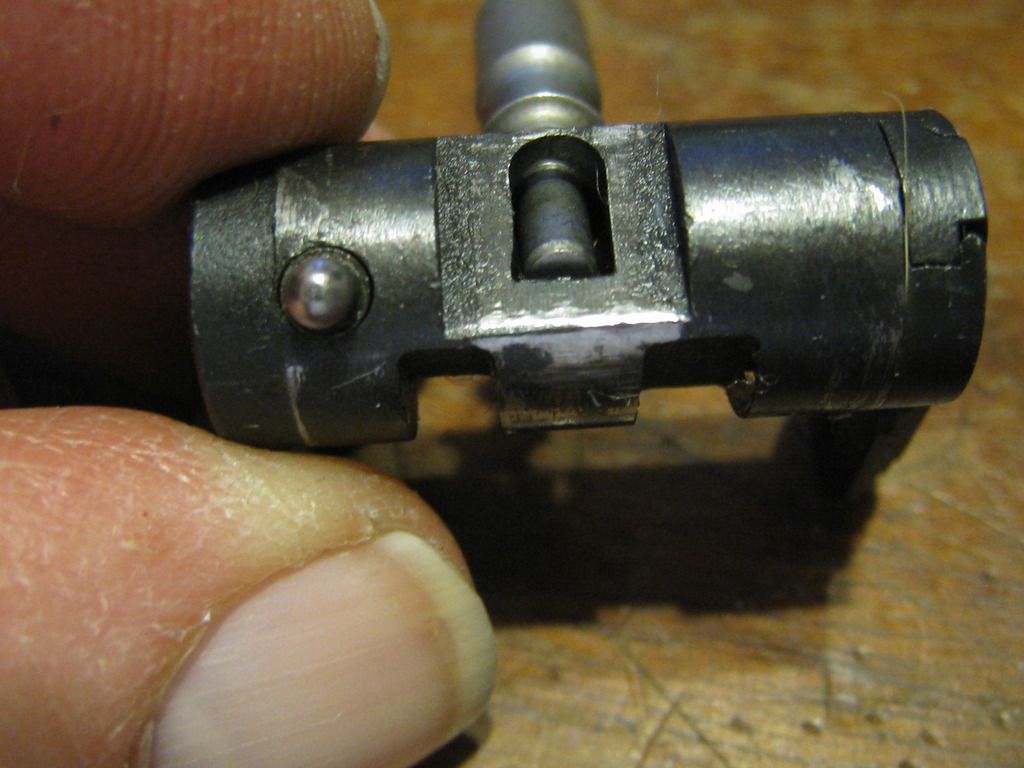
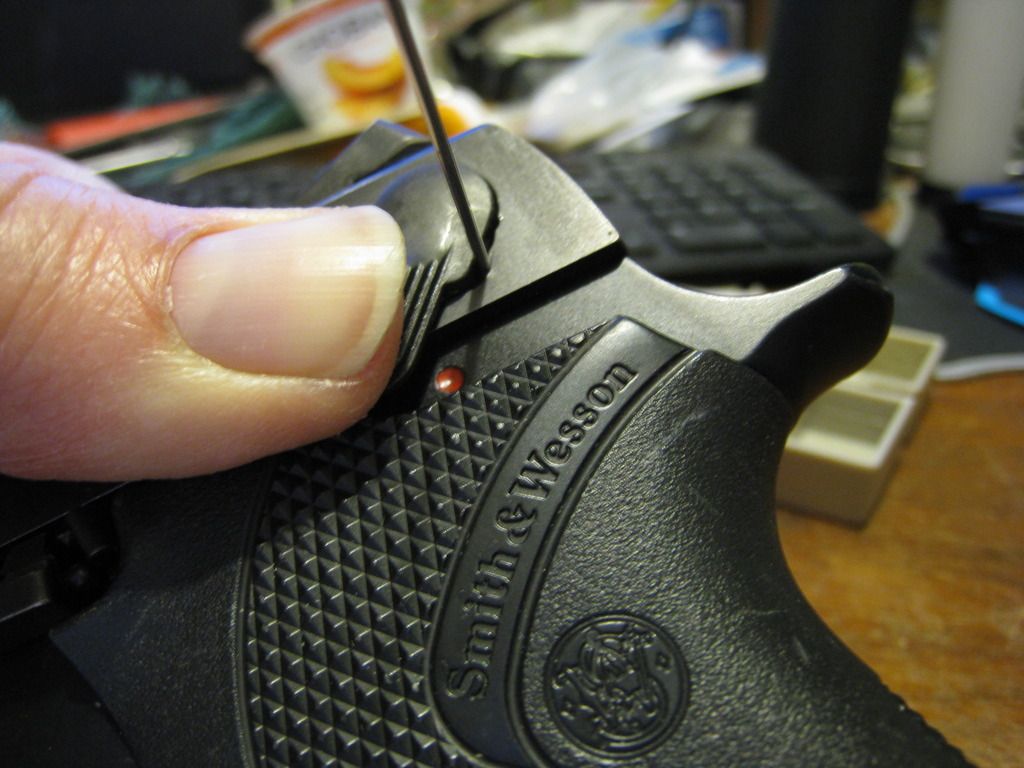
Next I'll check with the forty five thousandths pin. hammer should fall here too. If it does not, a new sear release lever needs to be fitted. Our hammer decocked properly with this gauge too so we're still good.
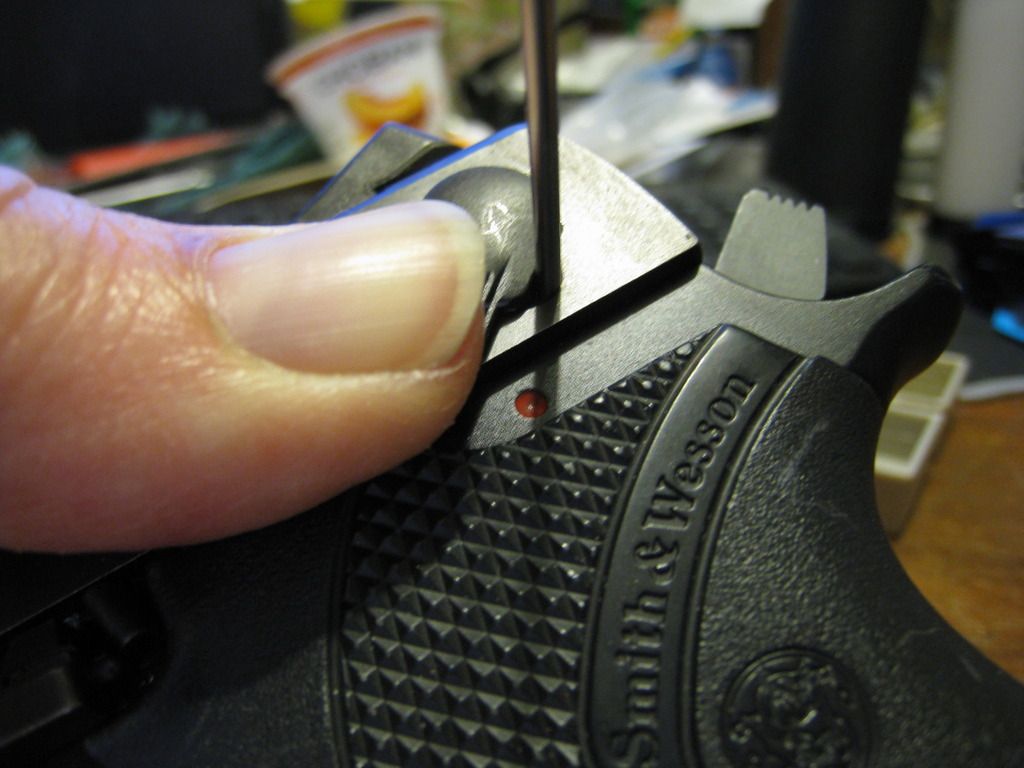
Lastly I'll check it with the seventy eight thousandths pin. Here the hammer should
NOT drop. In this case the hammer remained cocked so all is well.
If the hammer did fall, that tells me the sear release lever is too long and needs to be filed.
I would have to pull the sear release lever and carefully file this edge I'm pointing at.

I would file a minute amount at a time bit then re-install & check, repeating this just until the hammer remains cocked on the 0.078" pin.
Anyway the "1014' passed the checks. All that remains is the magazine mods and we can go for a spin.
I also repeated all the checks with the completed "1013" upper on this frame since I would like to test it before it gets shipped off to its new home. It also passed the checks. But will need to be checked again on it's new frame when it gets home.
Cheers
Bill