We have seen checkering damage repaired by inletting a piece of wood and checkering it to blend with the original. To do a good job that way is beyond my skill and patience. I had a nice 1911 with a couple patches of checkering damaged or gouged out. Instead of inletting wood, I filled the areas with a batch of glue/sawdust mix, leveled it off and extended the checkering to cover the added area. Since then I have used this method on several revolvers, 1911s, a Colt 1905 and two Savage .45ACPs.
Here is what works for me, the glue fill and a little tool I made. I use clear Devcon 2 Ton epoxy glue, not the 5 minute kind, mixed with sawdust to make a paste thick enough to almost peak up when you pull out the toothpick you mix it with. You don't want it to run after you apply it. You can mix light wood sawdust with dark to get different final color. It is a good idea to do a couple of test batches to learn how it looks when it is set up and cut into. For a patch quarter inch square a couple of drops of the epoxy mixed with about twice as much sawdust is a good working amount. Mix glue then add sawdust.
Clean the area on the grip with alcohol or acetone and apply the mix. After it sets up, either overnite or warmed under a light bulb for couple hours, carefully file it level with the surrounding checker area. Maybe protect around it with scotch tape while filing.
With the tool you make described below, you use the part without teeth as a guide, while you carefully hold it in line with the cut you are making. Little by little draw the cutting area of the tool over and into your now-hard patch material. Don't go too deep till you have established your overall recheckered area - then do all your cuts to match the depth of the original part.
The same tool & procedure is used to restore or "freshen" worn checkering.
I made the tool from a strip of 1/16x3/8" spring steel because I have a huge amount of it. That might be a little thicker than it need be, but don't use too thin. One edge I filed a sort of knife edge of about 60 degrees to fit, more or less, the valleys between the checker diamonds. The first 3/4" is left smooth, polished a little, and about 1/2" or a bit more has the teeth filed in about 1/16" apart, the far end is wrapped with tape for a handle. The working end I rounded to protect from damaging the original grip. When your job is almost complete you can grind the end off square to work into cuts that end abruptly as against the screw hole diamonds on a 1911. The tool is so simple you will probably experiment with other configurations & make several tools for different applications or experiment.
The epoxy paste filler cuts much like hard wood. As with anything for the first time, it is good to check it all out on scrap to get a little experience -in-progressattacking a serious job. This applies as much about the final color match as it does to the checkering workmanship.
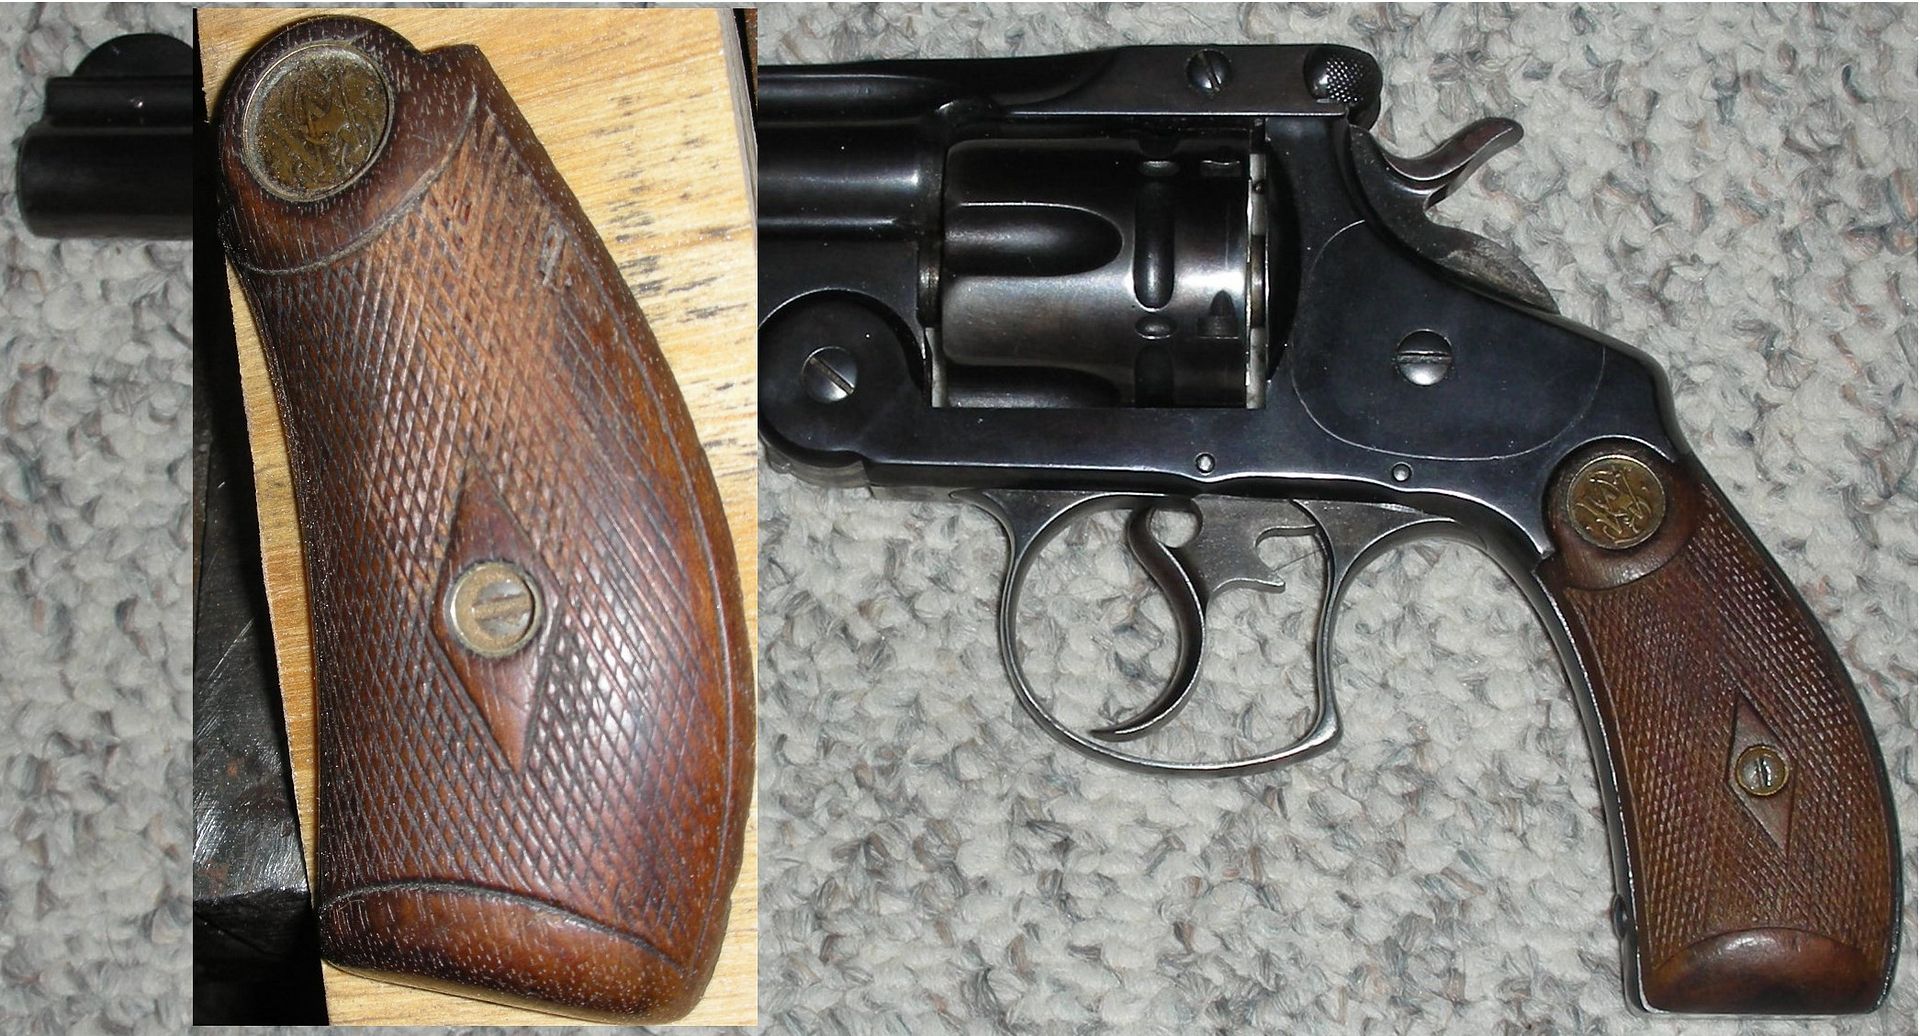
Work-in-progress & grip on the gun --
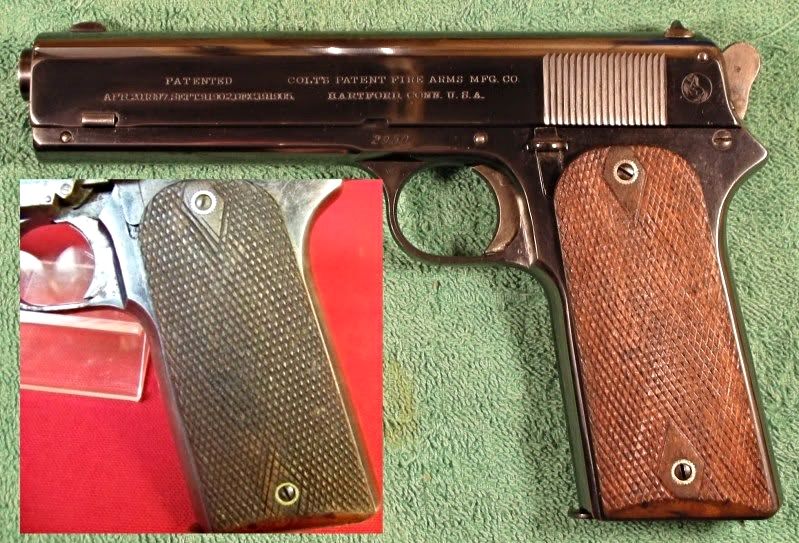
Before & after, same grip restoration --
This is about how I did it, I wrote up for future reference and/or my Son & G-Sons -- not as the only or best way. Comments & alternatives are solicited ----->


 Linear Mode


