Smith & Wesson Forum

Advertise With Us Search
Go Back   Smith & Wesson Forum > Smith & Wesson Revolvers > S&W Hand Ejectors: 1896 to 1961

Notices

S&W Hand Ejectors: 1896 to 1961 All 5-Screw & Vintage 4-Screw SWING-OUT Cylinder REVOLVERS, and the 35 Autos and 32 Autos


Reply
 
Thread Tools Display Modes
  #1  
Old 07-31-2010, 08:40 AM
twaits's Avatar
twaits twaits is offline
Member
 
Join Date: May 2009
Location: Windham, Maine
Posts: 1,392
Likes: 47
Liked 621 Times in 142 Posts
Default 1896 Disassembly/reassembly

Hi all. I got no response from anyone in the 'smithing section so I'm going to post here. I'm hoping someone (Dferriswheel?) can give me some pointers:

Can anyone here walk me through the disassembly/reassembly of an 1896 first model HE? Or if there is already a thread on this link me to it?

I have two that are together and one that is in pieces. I would like to take apart one that is together to see exactly what the one that is in parts needs to get it running again.


Okay, after pulling the sideplate off one of my other 1896s I think I see how it's supposed to go together. It looks like a lot of little things have to be lined up just right. I think by the looks of it the gun that is in pieces needs a DA sear spring and pin, and a hand. Correct me if I'm wrong but it looks like the tension on the hand is powered by the trigger return spring.
Here's the thing I'm not understanding: Normally when you push on the ejector rod the extractor and ratchet will not rotate independently of the cylinder. This one does. There is a little groove that runs down the post the extractor is attached to. I thought this was what kept the thing from rotating but I'm thinking now that I was wrong. Anyway, I'm a bit confused by it. The ejector rod has been cut down shorter along with the barrel and a knurled knob was attached to the end. Maybe this has something to do with it? I'll add pictures later.
Reply With Quote
  #2  
Old 07-31-2010, 08:48 AM
twaits's Avatar
twaits twaits is offline
Member
 
Join Date: May 2009
Location: Windham, Maine
Posts: 1,392
Likes: 47
Liked 621 Times in 142 Posts
Default pictures

Here's the action of one of my good 1896s:


Below is the project gun I am working on (thanks to New Kidz ):


Last edited by twaits; 07-31-2010 at 09:01 AM.
Reply With Quote
  #3  
Old 07-31-2010, 11:56 AM
MKT's Avatar
MKT MKT is offline
SWCA Member
1896 Disassembly/reassembly 1896 Disassembly/reassembly 1896 Disassembly/reassembly 1896 Disassembly/reassembly 1896 Disassembly/reassembly  
Join Date: Sep 2005
Location: Temecula, CA
Posts: 1,243
Likes: 11
Liked 88 Times in 56 Posts
Default

twaits,

First, I don't know jack about the innerds of an 1896. With that being said, I have been into almost everything post 1905 and would suggest that you look in the milled recess in the back of the trigger for the hand torsion spring.

In your last picture, notice the small pin at the 9 o'clock position of the trigger pivot hole? My money is on that pin being the torsion spring pin. It appears that the hand has a pivot pin and tension pin as evidenced by the pivot hole and dog legged slot. The torsion spring might be gunked up in its recess or may have broken some time ago.

Thanks to the previous postings by Mike Kelley (or was is Mike Priwer???...I don't recall...it was Mike someone!), I know that the trigger return is powered by the second leaf spring pinned to the front grip strap.

That is about all I can give you.
__________________
Non illegitimae carborundum

Last edited by MKT; 07-31-2010 at 12:53 PM. Reason: more typos
Reply With Quote
  #4  
Old 07-31-2010, 01:05 PM
twaits's Avatar
twaits twaits is offline
Member
 
Join Date: May 2009
Location: Windham, Maine
Posts: 1,392
Likes: 47
Liked 621 Times in 142 Posts
Default

Thanks! There is indeed a little spring inside the trigger for the hand.
Now I know what that is for
Reply With Quote
  #5  
Old 08-01-2010, 11:52 AM
H Richard's Avatar
H Richard H Richard is offline
US Veteran
1896 Disassembly/reassembly 1896 Disassembly/reassembly 1896 Disassembly/reassembly 1896 Disassembly/reassembly 1896 Disassembly/reassembly  
Join Date: Aug 2006
Location: West Central IL
Posts: 22,803
Likes: 18,552
Liked 22,421 Times in 8,276 Posts
Default

Twaits: you need a copy of David Chicoine's book, "Antique Firearms, Assembly & Disassembly". It's a gun Digest book, can be obtained from kp books, Krause Publications Bookstore. There is a complete parts breakdown along with individual description of ea. part and narrative instructions on disassembly and assembly. Chicoine could also be the source for some parts. If I had a scanner I could send you those pages, but unfortunately I don't.
__________________
H Richard
SWCA1967 SWHF244
Reply With Quote
  #6  
Old 08-01-2010, 01:20 PM
DCWilson's Avatar
DCWilson DCWilson is offline
SWCA Member
1896 Disassembly/reassembly 1896 Disassembly/reassembly 1896 Disassembly/reassembly 1896 Disassembly/reassembly 1896 Disassembly/reassembly  
Join Date: Dec 2007
Location: Orange County, CA
Posts: 13,996
Likes: 5,005
Liked 7,702 Times in 2,624 Posts
Default

Passing on a tip from Mike Priwer: when it comes time to reassemble the trigger package, you will need a short piece of dowel to hold the trigger return spring down against the frame while you begin insertion of the trigger and its parts. Otherwise you won't have enough hands to insert all the pieces at the same time. I took apart and cleaned a 1902 .38 M&P that looked a lot like this inside.

Isn't it the case that some of these early guns have no hand spring? I thought the hand position was controlled by running it (or an extension pin) in the groove in the back of the sideplate. Or is that what MKT was alluding to and I just didn't interpret it correctly?

Wonderful project. I love the smooth inner surfaces on these older revolvers -- no milling chatter marks or ridges.
__________________
David Wilson
Reply With Quote
  #7  
Old 08-04-2010, 10:28 PM
Dr.-d Dr.-d is offline
Member
1896 Disassembly/reassembly 1896 Disassembly/reassembly 1896 Disassembly/reassembly 1896 Disassembly/reassembly 1896 Disassembly/reassembly  
Join Date: Mar 2009
Posts: 271
Likes: 21
Liked 15 Times in 14 Posts
Default

As a fellow 1896 owner I just wanted to say good luck with your project. I never have removed the side plate for a look inside mine. Thanks for the peek, pretty intricate in there.
Reply With Quote
  #8  
Old 08-06-2010, 07:45 AM
Ballarat Ballarat is offline
Member
 
Join Date: Jun 2009
Location: Qld. Australia
Posts: 211
Likes: 1
Liked 13 Times in 7 Posts
Default

Gday, I go with H Richards. I have a copy of this book, it is invaluable. All the early Smiths are dealt with there with pics and instructions. Its one of my gun bibles.
Reply With Quote
  #9  
Old 08-06-2010, 11:54 AM
mikepriwer mikepriwer is offline
SWCA Member
1896 Disassembly/reassembly 1896 Disassembly/reassembly 1896 Disassembly/reassembly 1896 Disassembly/reassembly 1896 Disassembly/reassembly  
Join Date: Dec 2005
Location: Portland, OR
Posts: 5,524
Likes: 940
Liked 6,467 Times in 1,328 Posts
Default

Twaits

You can email me if you are still having problems. [email protected]

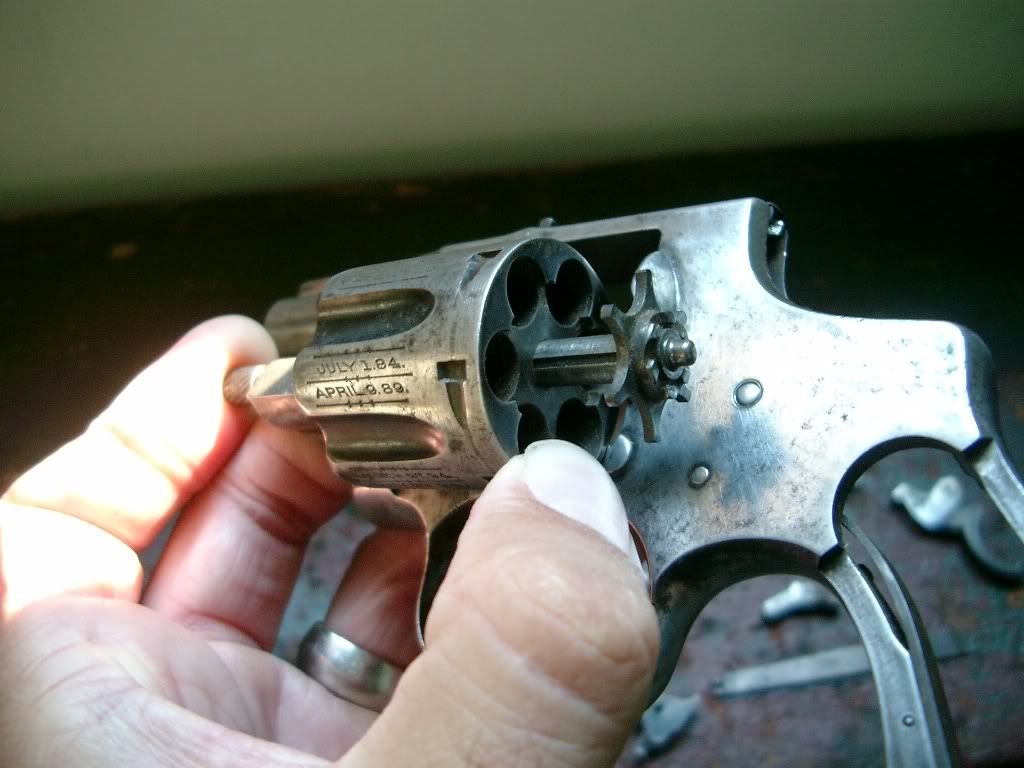
If the extractor rod is turning in the cylinder, something has
apparently happened to its guide. There is suppossed to be a
projection, or piece of metal, as a part of the cylinder, that is the
guide for the extractor rod. When the rod is inserted into the cylinder,
the slot in the rod engages the tab, or piece of metal, and that is what
keeps the extractor from twisting or rotating.

Typically that tab is part of the cylinder, on the 1899's and later.
On the 1896, maybe its made as part of a separate disk, that is
somehow pressed into the end of the cylinder. I don't know how
your cylinder could be missing this important tab, to guide the
extractor rod.

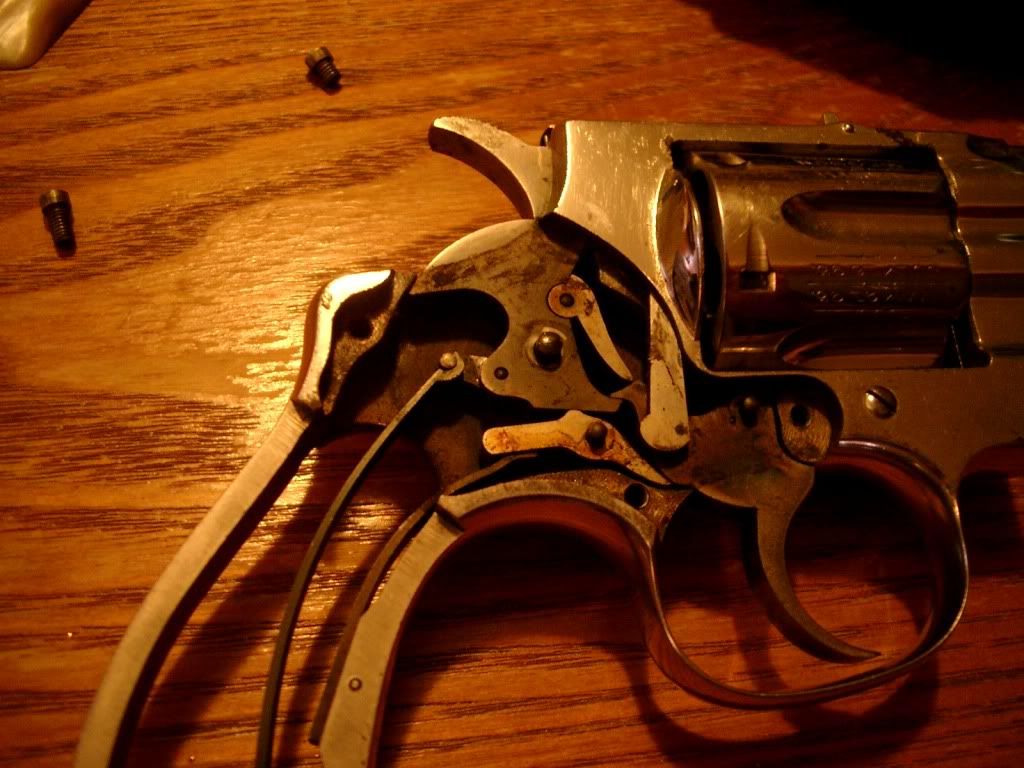
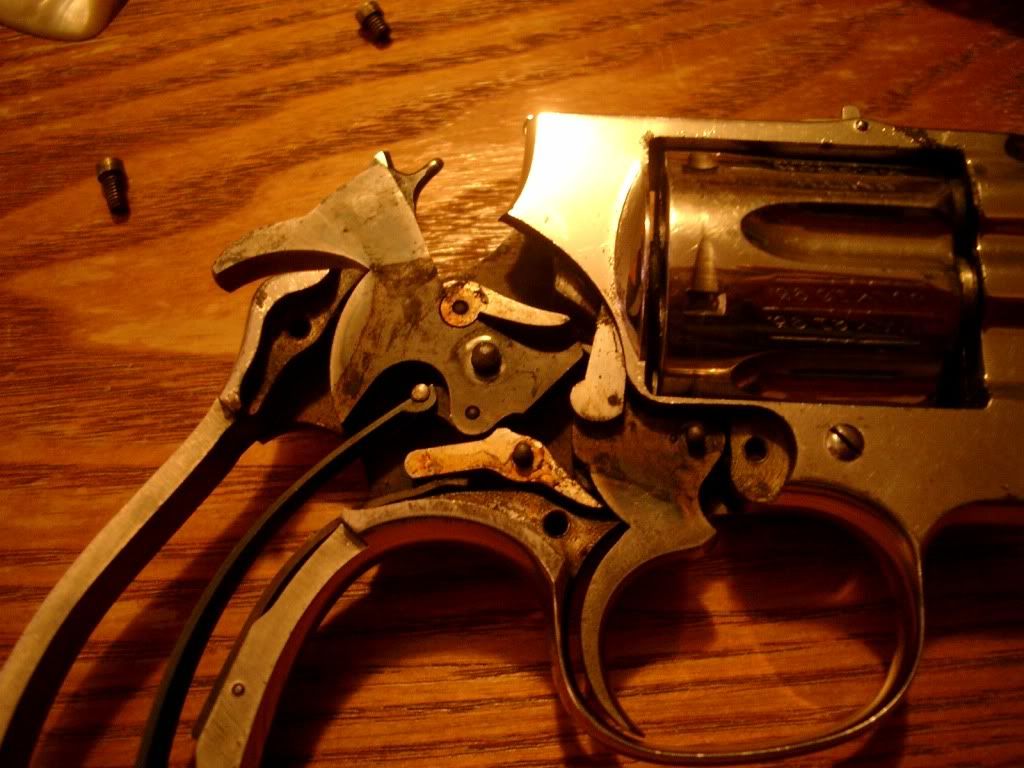
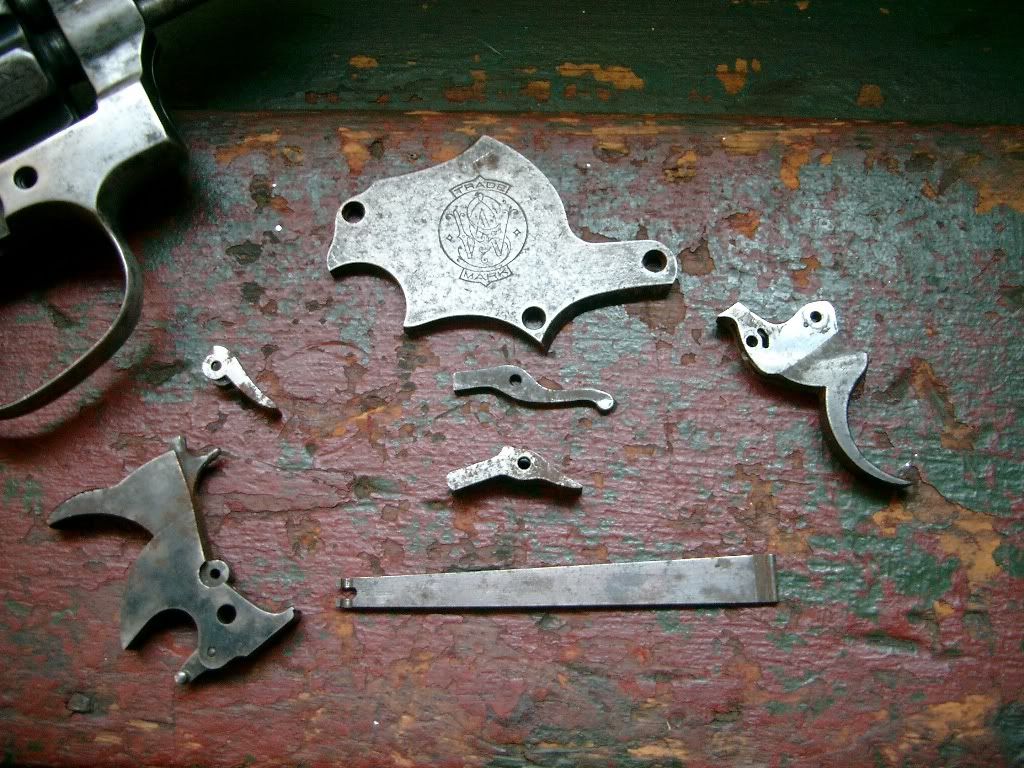
This 1896, like the 1899's and 1902's, has the early levering
trigger rebound mechanism. It was replaced in 1906 with the
rebound slide. That second flat spring, pinned into the front grip
strap, is the driving spring for the levering trigger rebound.

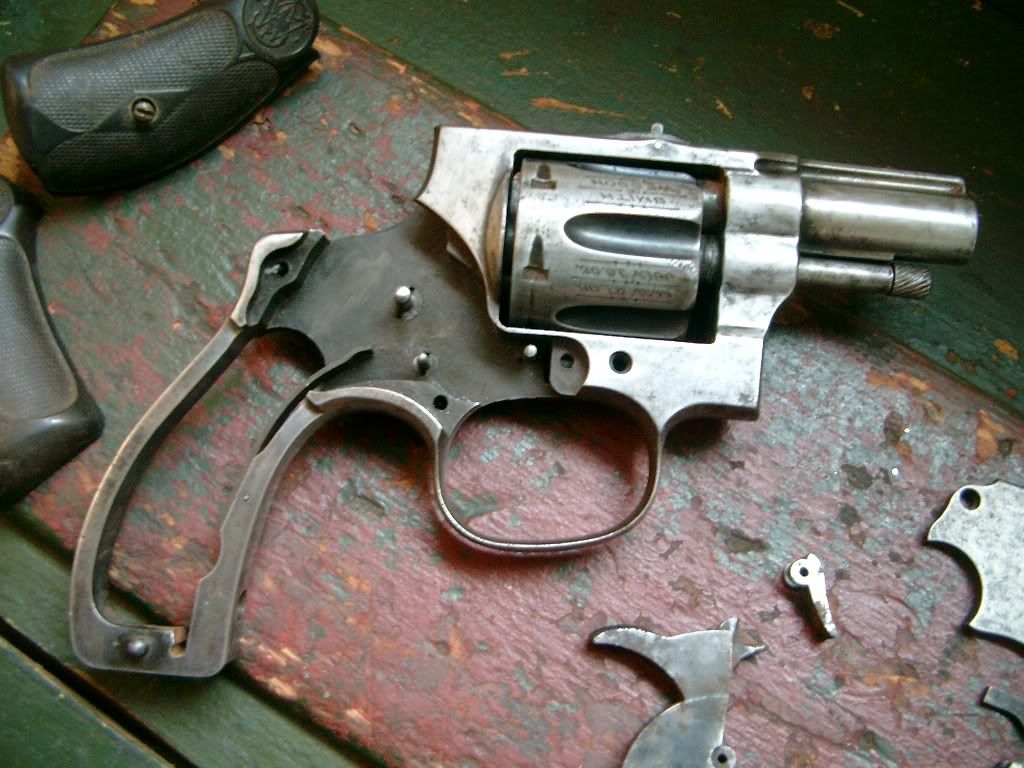
With your 'good' gun, you can remove the hammer mainspring, then
remove the hammer, and then double-action the trigger, and watch
carefully what happens. Do this, of course, with the cylinder open.

Let me know if you need any guidance.

Mike Priwer
Reply With Quote
Reply

Tags
ejector, extractor, sideplate


Posting Rules
Forum Jump

Similar Threads
Thread Thread Starter Forum Replies Last Post
Winchester 61 disassembly and reassembly rchall Firearms & Knives: Other Brands & General Gun Topics 14 10-10-2016 12:42 PM
M41 COMPLETE disassembly & reassembly MINI SSS Smith & Wesson Semi-Auto Pistols 6 12-28-2010 04:56 PM
Question re: 908 disassembly/reassembly CyBlackerson Smith & Wesson Semi-Auto Pistols 5 11-27-2010 06:58 PM
908 disassembly/reassembly manual CyBlackerson Smith & Wesson Semi-Auto Pistols 3 11-27-2010 06:28 PM
1896 First model HE .32 disassembly/reassembly twaits S&W-Smithing 1 07-29-2010 07:05 AM

Powered by vBadvanced CMPS v3.2.3
smith-wessonforum.com tested by Norton Internet Security smith-wessonforum.com tested by McAfee Internet Security

All times are GMT -4. The time now is 01:02 AM.


Smith-WessonForum.com is not affiliated with Smith & Wesson Holding Corporation (NASDAQ Global Select: SWHC)