|
|
 |

03-21-2009, 09:57 PM
|
|
Member
|


|
|
Join Date: Mar 2009
Location: Central AZ
Posts: 434
Likes: 8
Liked 355 Times in 163 Posts
|
|
Ladies & Gentlemen: I'm considering the purchase of a 696-0, which has two minor scratches & one deeper scratch. The latter looks as if it came from an errant screwdriver. Is it possible to remove the minor and MAJOR scratches? How? Thanks, Hang-Fire Hank
|
03-21-2009, 09:57 PM
|
|
Member
|
|
|
Join Date: Mar 2009
Location: Central AZ
Posts: 434
Likes: 8
Liked 355 Times in 163 Posts
|
|
Ladies & Gentlemen: I'm considering the purchase of a 696-0, which has two minor scratches & one deeper scratch. The latter looks as if it came from an errant screwdriver. Is it possible to remove the minor and MAJOR scratches? How? Thanks, Hang-Fire Hank
|
03-21-2009, 10:17 PM
|
|
Member
|
|
|
Join Date: Nov 2007
Location: west coast
Posts: 1,486
Likes: 0
Liked 55 Times in 34 Posts
|
|
It's relatively easy to remove scratches on an ALL stainless steel handgun.
Get some wooden popsicle sticks and a sheet of 600 or 1200 grit wet-or-dry abrasive paper from the local hardware store or auto supply store. Tear the abrasive paper into 1" wide strips, and wrap around the flat stick, or use a 1/2" flat file. Polish the scratched area using fore-and-aft strokes, keeping the stick flat on the surface. Avoid rounding off corners and edges. After abrasive paper polishing, follow up using green Scotchbrite pad. The final finish will be uniform, and look like the factory polish with the scratch gone.
|
03-22-2009, 01:36 AM
|
|
Member
|


|
|
Join Date: Feb 2005
Location: Sonoran Desert~Arizona
Posts: 219
Likes: 75
Liked 453 Times in 72 Posts
|
|
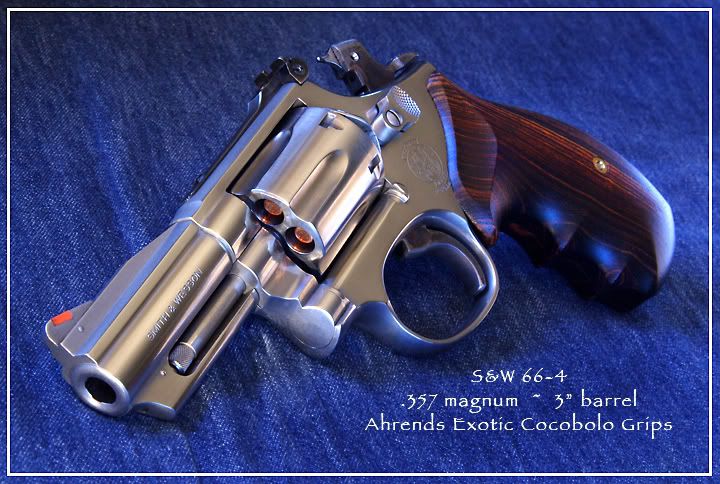
Hank... you can do this. I did the same with a pawnshop-found not-cared-for 3" 66 with beautiful results. This gun was filthy and had numerous scuffs & scratches (including two fairly deep ones). Started with fine sandpaper, then ScotchBrite pads, finishing off with Flitz.
I say go for it and you'll be glad ya did!

|
03-22-2009, 06:28 AM
|
|
Member
|
|
|
Join Date: Mar 2009
Location: Central AZ
Posts: 434
Likes: 8
Liked 355 Times in 163 Posts
|
|
John &Dhart: Thank you both, fellas. Now if I can talk the guy down from $800, I'll do it. H-F Hank
|
03-23-2009, 04:35 AM
|
 |
US Veteran
|

|
|
Join Date: Sep 2008
Location: NW NJ
Posts: 1,187
Likes: 3,164
Liked 1,098 Times in 332 Posts
|
|
I can't help but notice that the pictured revolver is loaded and COCKED in the photos.
LTC
|
03-23-2009, 08:31 AM
|
 |
US Veteran
|


|
|
Join Date: Feb 2009
Location: DFW
Posts: 176
Likes: 3
Liked 103 Times in 36 Posts
|
|
Also try using some automotive buffing compound on the scotchbrite pad. Then finish up with mag wheel polish sold at WalMart.
|
03-23-2009, 08:41 AM
|
|
Member
|
|
|
Join Date: Mar 2009
Location: Central AZ
Posts: 434
Likes: 8
Liked 355 Times in 163 Posts
|
|
Gents: Thank you for both for your suggestions. I printed out your instructions to keep for future use. I didn't "come to terms" with the seller & thought the condition didn't warrant the price (& no box), I elected to pass. DHart, I neglected to comment...that is a BEE-U-TEE-FULL 66 you have there!! H-F Hank
|
03-23-2009, 09:05 AM
|
 |
Member
|
|
|
Join Date: Jan 2003
Location: Portsmouth NH USA
Posts: 2,454
Likes: 1,723
Liked 1,576 Times in 626 Posts
|
|
Quote:
Originally posted by LTC:
I can't help but notice that the pictured revolver is loaded and COCKED in the photos.
LTC
|
I'm just guessing, but I suspect Dhart may have some chargeless, primerless cartridges lying around in different calibers for just such excellent photographs as we've come to expect from him over the years.
__________________
Bob
|
03-23-2009, 09:08 AM
|
|
Member
|
|
|
Join Date: Nov 2007
Location: west coast
Posts: 1,486
Likes: 0
Liked 55 Times in 34 Posts
|
|
Naw, his photography studio is named "Take Risks Photography".
|
03-23-2009, 11:25 AM
|
|
Member
|
|
|
Join Date: Feb 2005
Location: Sonoran Desert~Arizona
Posts: 219
Likes: 75
Liked 453 Times in 72 Posts
|
|
Quote:
Originally posted by LTC:
I can't help but notice that the pictured revolver is loaded and COCKED in the photos.
LTC
|
My intent was to make a dramatic impression of seriousness and potency along with beauty. Of course measures were taken to be safe. And by no means do I wish to suggest that people photograph cocked and loaded guns!
|
03-23-2009, 12:10 PM
|
|
US Veteran
|
|
|
Join Date: Sep 2008
Location: NW NJ
Posts: 1,187
Likes: 3,164
Liked 1,098 Times in 332 Posts
|
|
DHart,
Thanks for the explanation. It was just a comment on what I saw. Nice photo and piece by the way.
LTC
|
03-23-2009, 12:36 PM
|
|
Member
|
|
|
Join Date: Feb 2005
Location: Sonoran Desert~Arizona
Posts: 219
Likes: 75
Liked 453 Times in 72 Posts
|
|
LTC... your impressions are understandable for sure!
Hank... just a couple of other things, as you might already have thought, before refinishing remove the cylinder, cylinder latch, grips, and screws. Use the proper screwdriver for the screws to be sure they remain un-buggered. Keep your refinishing strokes running along the original lines of the grain (from bore to butt in straight lines). Just work slowly and carefully and in just one evening, you can totally transform a stainless gun into one that looks like new.
|
|
 Posting Rules
|
|
|
|
|


 Linear Mode

