|
|
 |

10-22-2019, 10:39 PM
|
|
Member
|


|
|
Join Date: Feb 2004
Location: Central SD USA
Posts: 1,841
Likes: 1,884
Liked 1,504 Times in 608 Posts
|
|
 Red ramp sight insert, where to get?
I just squired a S&W Model 66 no dash. The plastic insert is missing on the front sight. Where can I get a replacement? Do they come in different colors, like neon green?
__________________
otis
|
10-22-2019, 10:48 PM
|
|
Member
|


|
|
Join Date: Nov 2014
Location: Oklahoma
Posts: 595
Likes: 4,510
Liked 2,074 Times in 336 Posts
|
|
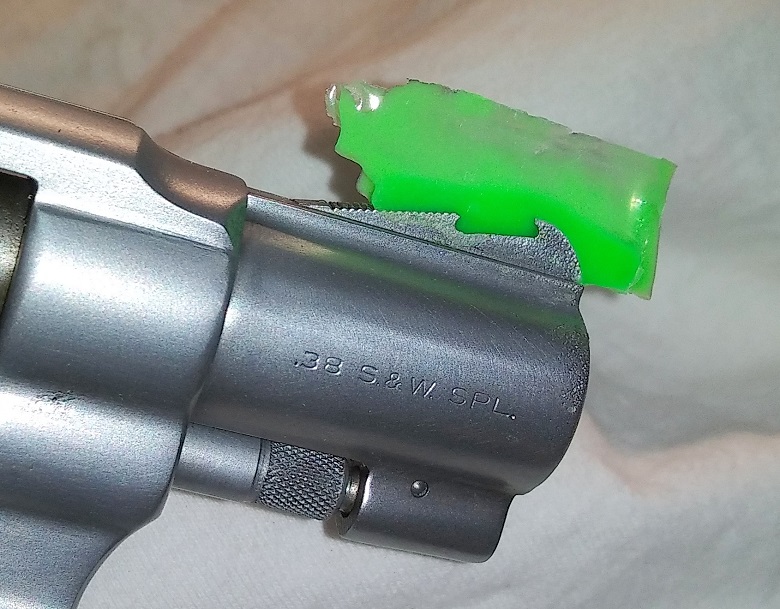
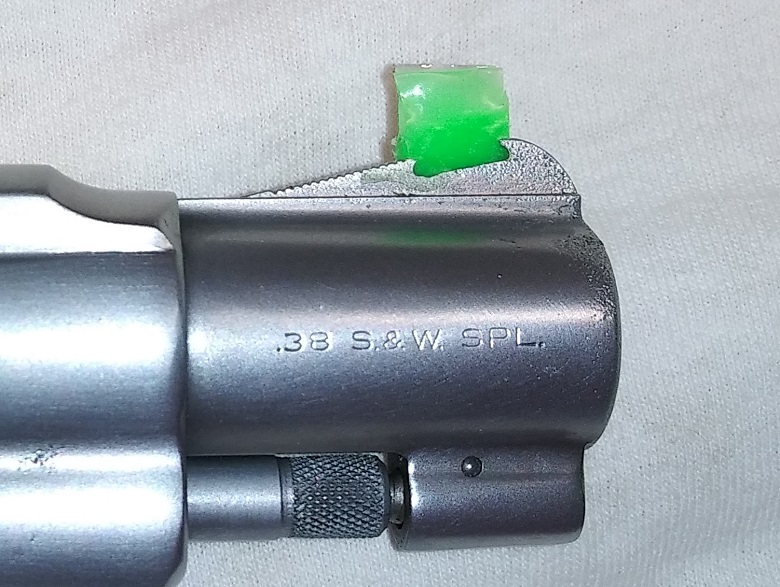
It's a pretty simple DIY and the materials are cheap. You can buy a kit from Midway, but you don't have to. This is what I used for a model 10 earlier this month.
Two part epoxy adhesive.
This time I used the $3.50 item from horrible freight.
Testors enamel model paint.
I'm partial to Fluorescent Green - 1174
Loosely follow these instructions from Smiling Larry:
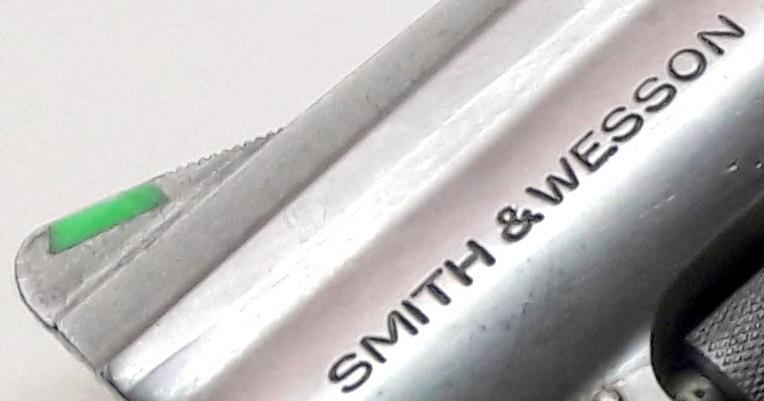
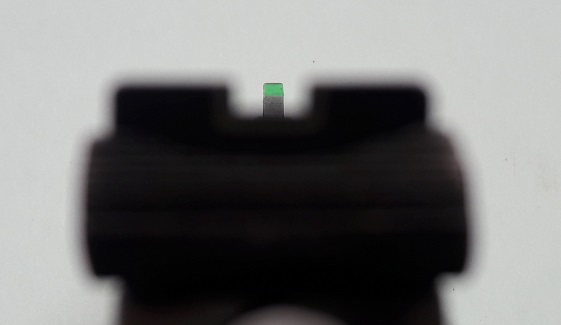
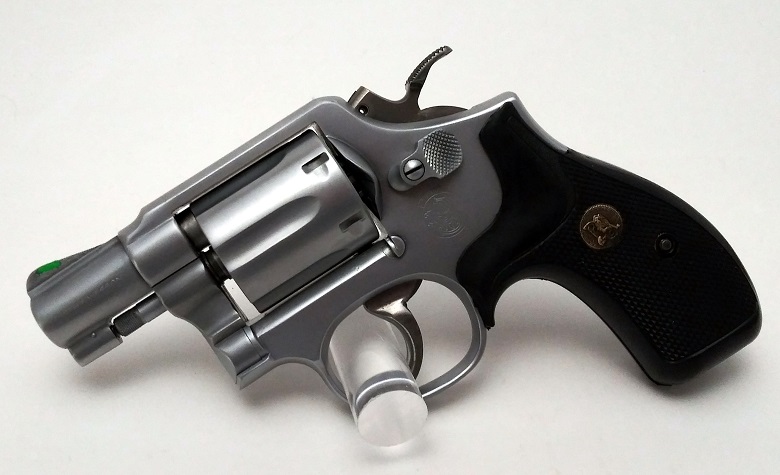
Model 66-1 that I did using this method last year:
Model 10 that I did earlier this month:
|
|
The Following 9 Users Like Post:
|
|
10-22-2019, 10:50 PM
|
 |
Moderator
|


|
|
Join Date: Jun 2007
Posts: 26,897
Likes: 987
Liked 19,018 Times in 9,306 Posts
|
|
There are kits available to make your own:
BROWNELLS FRONT SIGHT INSERT KIT | Brownells
I have also seen them made from pieces of toothbrush handle.
__________________
Alan
SWCA LM 2023, SWHF 220
|
10-22-2019, 11:12 PM
|
|
Member
|

|
|
Join Date: Jan 2001
Location: In The Woods Of S.C.
Posts: 8,918
Likes: 14,058
Liked 13,766 Times in 4,990 Posts
|
|
OR you can whittle one out of a red/yellow/orange/green tooth brush handle and glue it in....I did several that way.
__________________
S&W Accumulator
|
10-23-2019, 10:55 AM
|
|
Member
|
|
|
Join Date: Feb 2004
Location: Central SD USA
Posts: 1,841
Likes: 1,884
Liked 1,504 Times in 608 Posts
|
|
I had seen something about mixing baking soda and super glue to make a resin. Wonder if that would work?
__________________
otis
|
10-23-2019, 01:47 PM
|
 |
Member
|
|
|
Join Date: May 2019
Location: Clarks Summit ,PA
Posts: 593
Likes: 81
Liked 589 Times in 253 Posts
|
|
Quote:
Originally Posted by otis24

I had seen something about mixing baking soda and super glue to make a resin. Wonder if that would work?
|
When you mix baking soda with super glue it hardens immediately , and I mean immediately, instantly.
__________________
2 Cor 5:17
John3:16
|
10-23-2019, 02:04 PM
|
 |
Member
|
|
|
Join Date: Apr 2011
Location: Where this month?
Posts: 3,604
Likes: 264
Liked 4,215 Times in 1,714 Posts
|
|
My 29-2 with a repaired front sight..
Casting resin.

|
|
The Following 3 Users Like Post:
|
|
10-23-2019, 04:43 PM
|
|
Member
|
|
|
Join Date: Oct 2014
Location: Monroe cnty. Ohio
Posts: 6,950
Likes: 4,430
Liked 10,068 Times in 3,689 Posts
|
|
I have used kids pencil boxes, rulers, ect made of Flo plastic. Same as tooth brush method but little less work on shaping. I use little drill bit in my fingers to clean out the holes in bottom of sight slot. Put a little clear epoxy in holes and slide in insert. Clean off any epoxy that may squeeze out and your done. Felt wheel on dremil with tooth pate paste will polish
.plastic. Guard blue with tape.
|
|
The Following User Likes This Post:
|
|
10-23-2019, 08:36 PM
|
|
SWCA Member
|

|
|
Join Date: Aug 2013
Location: Foothills of the Ozarks
Posts: 3,596
Likes: 10,669
Liked 5,588 Times in 2,179 Posts
|
|
Yup!
The last insert I made came from the pocket clip of a promotional ball-point pen I got at a Honda Motorcycle "Ride Red" technical service update seminar.
Looked like the right color.
I think I used J-B Weld to secure it.
John
|
10-23-2019, 08:57 PM
|
|
Member
|
|
|
Join Date: Jul 2010
Location: Central VA
Posts: 8,657
Likes: 1,569
Liked 9,427 Times in 4,225 Posts
|
|
Zipty6, do you mix the Testors paint into the epoxy or paint it on? If the former, what proportions do you use?
TIA~Froggie
|
10-23-2019, 09:09 PM
|
|
Member
|
|
|
Join Date: Nov 2014
Location: Oklahoma
Posts: 595
Likes: 4,510
Liked 2,074 Times in 336 Posts
|
|
Quote:
Originally Posted by Green Frog
Zipty6, do you mix the Testor’s paint into the epoxy or paint it on? If the former, what proportions do you use?
TIA~Froggie
|
I mix the epoxy then add just enough paint to get the desired color. It takes very little paint. I usually use one toothpick to mix the epoxy and another to add the paint.
I've found that pieces cut from plastic milk jugs make great partitions. They peel off of the epoxy clean after it has cured. I don't worry about using too much. Excess can be trimmed with a razor blade after it has cured. The important points are to make sure that the epoxy gets all of the way to the bottom of the notch and that you give it plenty of time to cure before trimming.

Last edited by zipty6; 10-23-2019 at 09:11 PM.
|
|
The Following 5 Users Like Post:
|
|
10-23-2019, 09:23 PM
|
|
Member
|
|
|
Join Date: Sep 2005
Location: SW Ohio
Posts: 2,127
Likes: 1,916
Liked 2,384 Times in 1,066 Posts
|
|
zipty6, I don't want to hijack the thread but can you tell us a little about your model 10? Nice looking revolver! Is it hard chromed?
|
10-23-2019, 09:26 PM
|
|
Member
|
|
|
Join Date: Nov 2014
Location: Oklahoma
Posts: 595
Likes: 4,510
Liked 2,074 Times in 336 Posts
|
|
Quote:
Originally Posted by Bob L
zipty6, I don't want to hijack the thread but can you tell us a little about your model 10? Nice looking revolver! Is it hard chromed?
|
Thanks for asking.
I call it the Frankensnub. I'll start a separate post on it this evening or tomorrow morning.
Sent from my LM-Q720 using Tapatalk
|
10-23-2019, 09:55 PM
|
|
Member
|


|
|
Join Date: Oct 2010
Location: Delaware County, Pa
Posts: 567
Likes: 60
Liked 462 Times in 225 Posts
|
|
Front sight insert kit.
I have used Brownells from sight kit and it works great. Easy to use, holds up well and I put a lot of them on friends and co workers guns, over the years.
|
10-23-2019, 10:08 PM
|
|
Member
|
|
|
Join Date: Sep 2005
Location: SW Ohio
Posts: 2,127
Likes: 1,916
Liked 2,384 Times in 1,066 Posts
|
|
By the way ziper6, very nice DIY write-up on replacing the inserts.
|
|
The Following 2 Users Like Post:
|
|
10-23-2019, 10:20 PM
|
|
Member
|
|
|
Join Date: Jul 2010
Location: Central VA
Posts: 8,657
Likes: 1,569
Liked 9,427 Times in 4,225 Posts
|
|
Thanks, zipty6. That’s exactly what I needed. I’ve got a 29-2 that has totally lost its insert. I’ll try to make a replacement as close to the original as possible.
Froggie
|
|
The Following User Likes This Post:
|
|
11-02-2019, 10:06 AM
|
 |
US Veteran
|

|
|
Join Date: Jun 2014
Location: Copenhagen, Denmark
Posts: 1,171
Likes: 2,972
Liked 3,764 Times in 684 Posts
|
|
I wrote this a few years back, hopefully it helps someone.
Installing/Replacing a Front Sight Insert - Tips...
__________________
USAF AMMO
Last edited by GunarSailors; 11-02-2019 at 06:00 PM.
|
|
The Following User Likes This Post:
|
|
11-03-2019, 08:55 AM
|
|
Member
|
|
|
Join Date: May 2019
Location: Clarks Summit ,PA
Posts: 593
Likes: 81
Liked 589 Times in 253 Posts
|
|
Quote:
Originally Posted by zipty6
I mix the epoxy then add just enough paint to get the desired color. It takes very little paint. I usually use one toothpick to mix the epoxy and another to add the paint.
I've found that pieces cut from plastic milk jugs make great partitions. They peel off of the epoxy clean after it has cured. I don't worry about using too much. Excess can be trimmed with a razor blade after it has cured. The important points are to make sure that the epoxy gets all of the way to the bottom of the notch and that you give it plenty of time to cure before trimming.
|
Zipity6 , what a great DIY example, very effective very simple. 
__________________
2 Cor 5:17
John3:16
|
|
The Following 2 Users Like Post:
|
|
11-03-2019, 07:52 PM
|
 |
Member
|
|
|
Join Date: Apr 2012
Location: South Western,PA.
Posts: 540
Likes: 1,564
Liked 540 Times in 220 Posts
|
|
zipy6 the first picture green filler, finally a front sight I can see.
__________________
"I'm feeling MUCH better now"
|
|
The Following User Likes This Post:
|
|
12-05-2020, 09:10 PM
|
|
SWCA Member
|
|
|
Join Date: Jan 2002
Location: Sunny Florida, USA
Posts: 1,831
Likes: 126
Liked 4,148 Times in 818 Posts
|
|
Quote:
Originally Posted by murphydog
|
The Brownell's kit is presently shown as Out of Stock on the website. Argh. I may end up having to go with the old whittled down toothbrush method.
__________________
Charlie Flick
SWCA 729 HF 215
|
|
The Following User Likes This Post:
|
|
04-02-2021, 10:05 PM
|
|
Member
|
|
|
Join Date: Sep 2001
Location: houston texas
Posts: 60
Likes: 3
Liked 72 Times in 12 Posts
|
|
Changing colors
SW Mod 10 from dark red to yellow
|
04-03-2021, 11:25 AM
|
 |
Member
|
|
|
Join Date: Apr 2006
Posts: 17,817
Likes: 7,852
Liked 25,733 Times in 8,694 Posts
|
|
As a person that years ago always preferred to cut the front sight to install a Red Ramp Insert, I have changed my ways to a much better method (at least to me).
I no longer dovetail the front sight - I simply use Testor's Model Paint sold in the 1 ounce bottles in any craft store. Let me explain my reasoning......
First of all and most important to me is there is no alteration (cutting) of the front sight. That allows me to restore the original Plain Jane front sight in minutes if so desired. While at the moment you might not think you would ever want to go back to the Factory sight - someday you just mIght and this gIves you the option. While colored ramps seem like a great idea for indoor shooting (and they are), they don't appear the same outdoors. Years ago I shot almost exclusively indoors and the colored inserts were helpful. Now days I shoot outdoors 90% of the time and to me the Red Ramp insert gets washed out and turns gray in the sunlight - the plain factory sights work better (for me).
Secondly the Testor's paint comes in a plethora of colors, glossy, flat, iridescent, etc. so there is a much much larger color choice and it also allows changing colors rapidly and easily. If and when you want the factory sights restored, simply take a new razor blade and carefully remove the paint following up with some paint thinner and viola - the paint is gone with no damage!
Believe it or not in the 30+ years I have been using the Testor's paint I know for a fact it stands up to every solvent and chemical I use on my guns just fine - it is one tough paint! Allow to dry 24 hours between coats.
Instead of using a brush and applying one thick coat, I apply the Testor's with a wooden toothpick making sure the guns sight is perfectly horizontal while drying. I apply it (exactly where an insert would be, not to the entire front sight) in 3 lighter coats and don't worry about any paint that gets where you don't want it - it can be cleaned up later after drying with a new razor blade. This method is super affordable, idiot proof, allows any color change you want any time you want it, it's durable, looks terrific and works as good or better than the actual Dovetailed Insert.
I would strongly suggest trying this method before cutting a dovetail into your front sight. Once the cut us there, it's there forever! Plus, you might want to experiment with different colors and guess what - you might not like the colored sight at all! What have you got to loose except $2 bucks for a bottle of Testor's!
PS: Before applying paint - clean surface with Alcohol to insure there is no oil on it.
Last edited by chief38; 04-03-2021 at 11:30 AM.
|
|
The Following User Likes This Post:
|
|
|
 Posting Rules
|
|
|
|
|


 Linear Mode

