|
|
 |

12-31-2010, 08:34 AM
|
 |
Moderator
|


|
|
Join Date: Jan 2004
Location: Columbus Ohio
Posts: 4,552
Likes: 931
Liked 3,590 Times in 816 Posts
|
|
 586 project
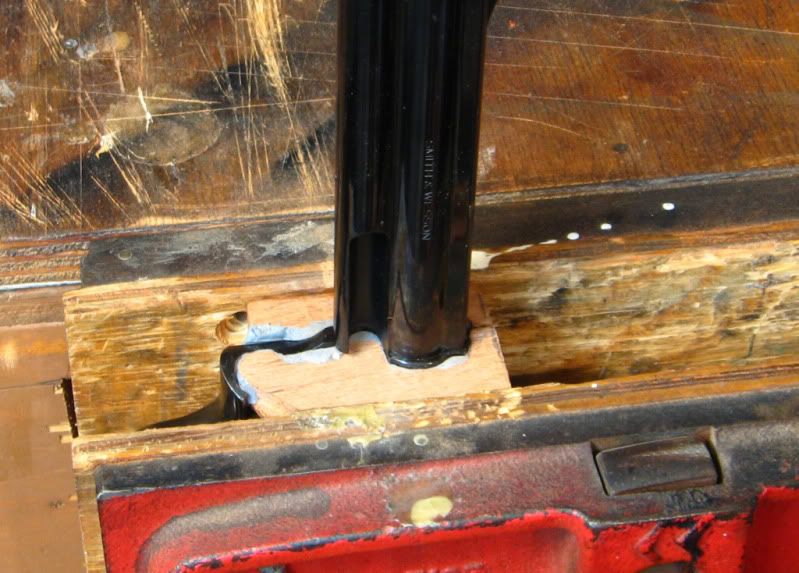
For a long time I have wanted a project gun, something not very collectible that I could learn on. I found a pretty good 586 at the right price that had some minor issues. I'm about ready to begin building my very own custom combat magnum. The gun had some pretty bad push off which I have fixed. My next mission is to change out the 6" tube with a 4" tube. I made some hardwood blocks for frame support and bedded them as one would bed a rifle action to remove any gaps.
My question is for those who have done this before, will these blocks and carpenters vise setup give the frame enough support? I plan on doing the same thing when I make up a barrel wrench. Right now the epoxy needs to cure for 24 hours, and the 4" tube has yet to arrive, though I'm expecting it sometime this afternoon.
Also how much torque does it take to remove the barrel, I don't want to over do it, nor do I want to chicken out.
Right now I'm just making tools and jigs that i may need, and will want to throughly inspect my new barrel before I attempt disassembly. Any tools beyond my abilities to make will have to be purchased.
As for redoing the forcing cone which angle is best for general use, I see a couple of different angles for sale on Brownell's site, 11 or 18 degree?
__________________
Regards,
Guy-Harold Smith II
Last edited by Smith357; 11-08-2011 at 06:50 PM.
|
|
The Following 4 Users Like Post:
|
|
12-31-2010, 08:19 PM
|
|
Moderator
|
|
|
Join Date: Jan 2004
Location: Columbus Ohio
Posts: 4,552
Likes: 931
Liked 3,590 Times in 816 Posts
|
|
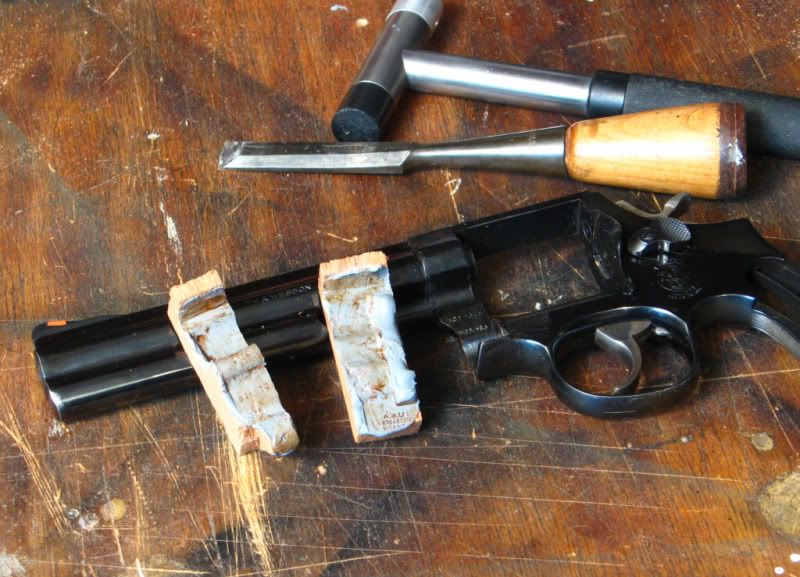
I decided, with the convincing of 45wheelgun to leave well enough alone for now. The new barrel came in and looks nice, I have not slugged it yet to check for minor buldging, but will do that at some point to get some sort of readings. While discussing cost options I figured it probably worth it to have a pro do the barrel swap and rather than me spending a ton of money on tools for a job I'm not sure about. No reason to take a chance of buggering up a perfectly good revolver. Why not just send it to S&W. This 586 is a no dash that has not had the recall work done yet. I'll just ship it to S&W and have them do the big "M" modification, while they have the gun apart I will see what it costs to have the barrel swap done to factory spec.
Doh!! 
I can still make the grips and some other minor things. So I put the 586 back together and will hold off on any work until after I give S&W a call. While I'm talking to them I might as well price out any and all custom work that I can think of like porting, night sights, matte finish or adding a lock. :P I wonder if they will cover shipping both ways?? :
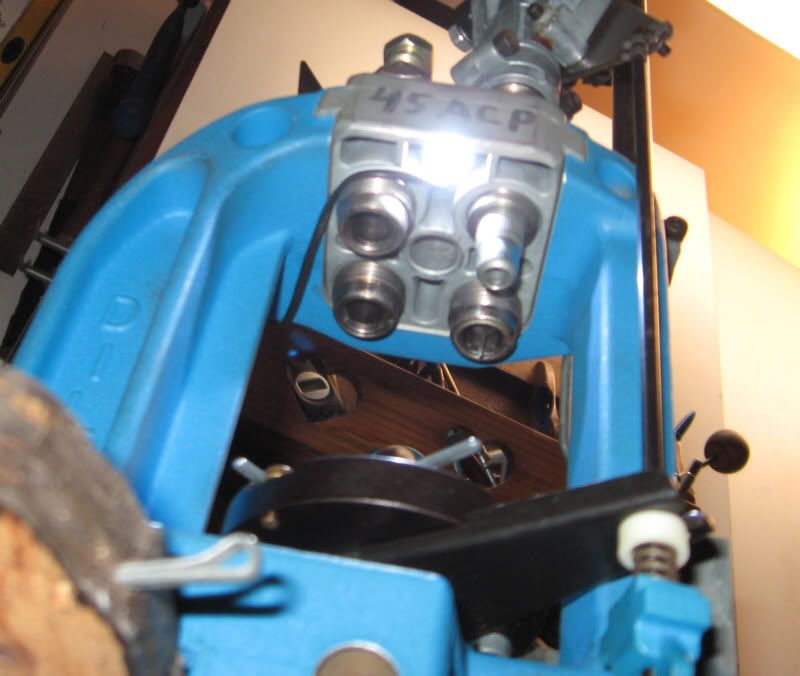
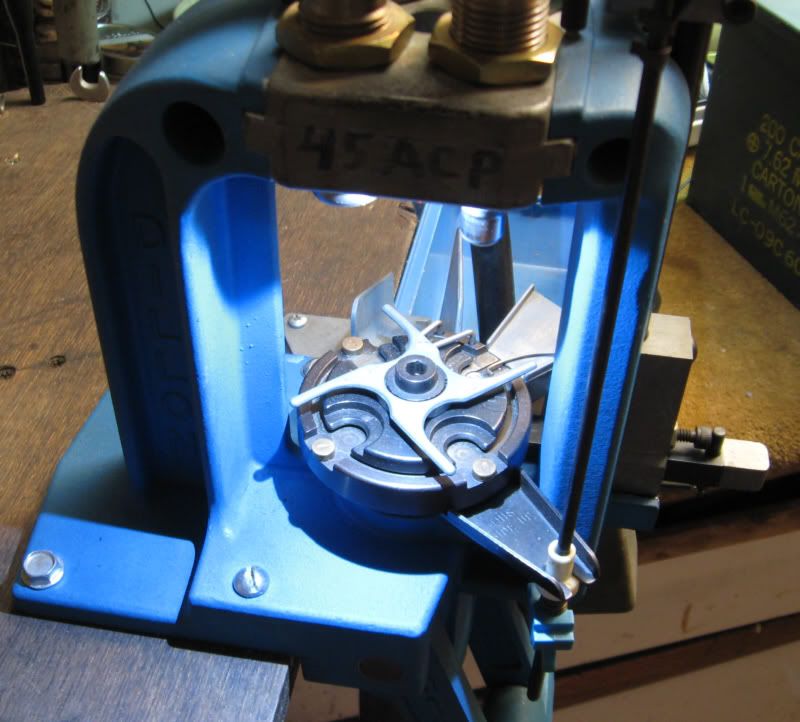
Besides, I have other projects going, I needed to electrify my press so I can see down into the cases. Fix some furniture around the house and catchup on the "honey-do" list.
__________________
Regards,
Guy-Harold Smith II
Last edited by Smith357; 12-31-2010 at 08:31 PM.
|
|
The Following 4 Users Like Post:
|
|
01-01-2011, 10:40 AM
|
|
Member
|


|
|
Join Date: Feb 2010
Location: Rocky Mtns, CO
Posts: 986
Likes: 19
Liked 214 Times in 141 Posts
|
|
I just got a couple of no dash L frames modified at S&W for the M stamp conversion. They paid shipping both ways for me.
Please provide details on the light you added to your RL550B, it looks NICE!
|
01-05-2011, 06:51 PM
|
|
Moderator
|
|
|
Join Date: Jan 2004
Location: Columbus Ohio
Posts: 4,552
Likes: 931
Liked 3,590 Times in 816 Posts
|
|
I just got off the phone with S&W. They are sending a call tag to pick up my 586 for the recall work. I will be sending along the 4" tube and for $75 they will do the barrel swap. Then I'll sell the 6" tube to help offset the cost. Sounds good to me.
__________________
Regards,
Guy-Harold Smith II
Last edited by Smith357; 01-05-2011 at 06:55 PM.
|
|
The Following 2 Users Like Post:
|
|
02-15-2011, 10:03 PM
|
|
Moderator
|
|
|
Join Date: Jan 2004
Location: Columbus Ohio
Posts: 4,552
Likes: 931
Liked 3,590 Times in 816 Posts
|
|
Update
I talked to S&W today and authorized the work on my 586. I'm having the 4" barrel installed and having them give it the bead blast blue finish. All for $200... yup thats $60 for the barrel swap and $140 for the refinish. They are going to replace all the buggered screws at no charge.
I have finished the shaping the grips to fit my hand, bedded them to fit tight on a K frame and the final coat of tung oil should be nice and hard buy the time the revolver returns home in about two weeks.
When it returns it will be good to go as is, but I have plans to eventually add night sights, and possibly fit a 686 cylinder that I will get modified for moon clips.

__________________
Regards,
Guy-Harold Smith II
Last edited by Smith357; 02-15-2011 at 10:06 PM.
|
|
The Following 2 Users Like Post:
|
|
02-15-2011, 10:53 PM
|
 |
Member
|
|
|
Join Date: Mar 2003
Location: SoCal - SGV
Posts: 469
Likes: 280
Liked 130 Times in 49 Posts
|
|
Quote:
Originally Posted by Smith357

I have finished the shaping the grips to fit my hand, bedded them to fit tight on a K frame
|
I'd love to see some pics of the bedding job, and maybe a brief tutorial.
Thanks!
|
02-16-2011, 02:10 AM
|
 |
Member
|
|
|
Join Date: Nov 2004
Location: Mountain State
Posts: 3,568
Likes: 56
Liked 379 Times in 149 Posts
|
|
Hey 357, your blocks would have worked - but what were you going to use on the barrel???????????????? Your stocks look great so far. The use of a 686 cylinder is smart, easy to clean and moons will make you ready for a match or two.
|
02-16-2011, 02:12 AM
|
|
Member
|


|
|
Join Date: Feb 2011
Location: SC Missouri
Posts: 1,254
Likes: 281
Liked 331 Times in 221 Posts
|
|
On the Moon Clip Cylinder Conversion. No need to get another cylinder, unless you just want a stainless one. Also make sure it is for the correct Model. After TK or Clark, or who ever does it. It will still work fine with Loose Rounds, Speed Loaders, Speed Strips, as well as Moon Clips.
Possible complication. On a 686 No Dash and a 686-1 the cylinder diameter is a little smaller than newer models. What I did was use a dremel tool to cut the clips a little deeper to the inside. No big deal. I did around 50 of them in a couple settings. After the first few you can pretty well tell how much to buzz off by looking at them.
It makes for a much faster reload for us mortals, and keeps our brass at home, and not wondering aimlessly lost on the range. I hate loosing brass that I have to buy to replace.
__________________
ICORE MO2908
Last edited by BobR1; 02-16-2011 at 02:18 AM.
|
02-16-2011, 08:31 AM
|
|
Moderator
|
|
|
Join Date: Jan 2004
Location: Columbus Ohio
Posts: 4,552
Likes: 931
Liked 3,590 Times in 816 Posts
|
|
Quote:
Originally Posted by Black_Talon
I'd love to see some pics of the bedding job, and maybe a brief tutorial.
Thanks!
|
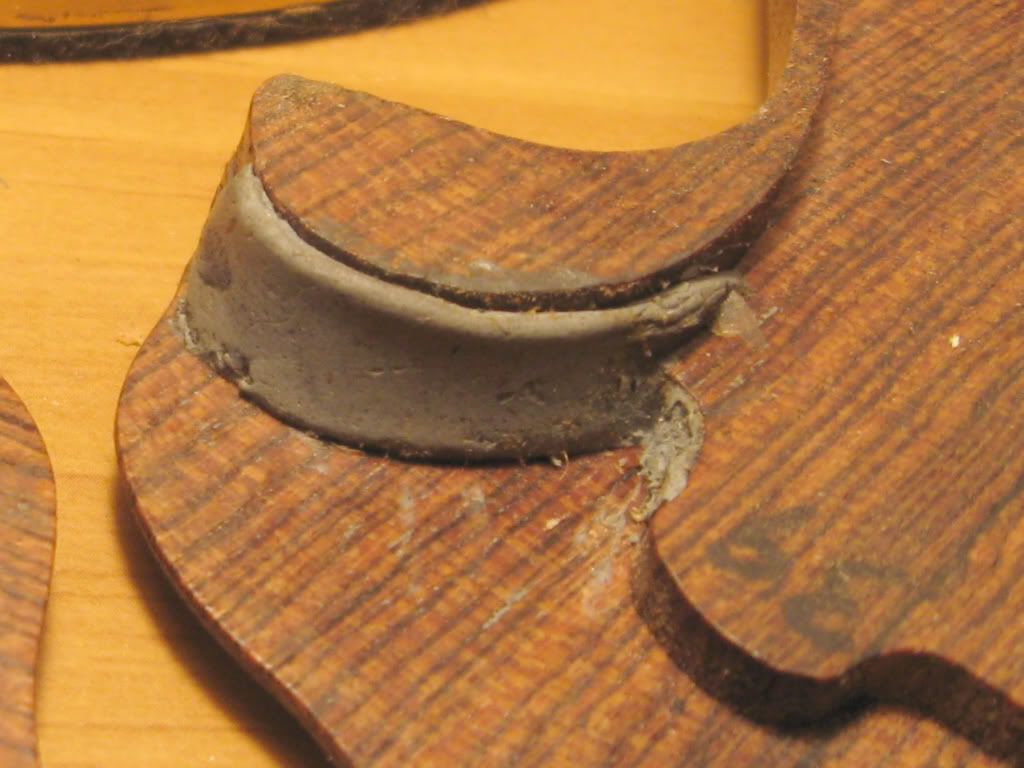
The grips are Jay Scott's that came from VM with a forum donation. They were way oversize for my hands and like many after market grips they were loose and ill fitting on the gun. To bed them so they were tight, I mixed up some epoxy waited for it to firm up a bit and rolled out a small piece to put between the grip and front of the frame. I used shoe polish as a release agent. When the epoxy was almost set I removed the grips, trimmed the excess with a knife, greased up the surface of the epoxy and replaced them to harden completely.
Quote:
Originally Posted by Bullseye Smith
Hey 357, your blocks would have worked - but what were you going to use on the barrel???????????????? Your stocks look great so far. The use of a 686 cylinder is smart, easy to clean and moons will make you ready for a match or two.
|
I had started making a set of blocks for the barrel too, I had not gotten as far as devising a handle.
I figure 686 cylinders are pretty common and I can refinish SS. I just like the idea of having the 686 cylinder moon clipped and the 586 cylinder that matches the gun left alone. So it can be a nice black or a dull pinto. 
__________________
Regards,
Guy-Harold Smith II
Last edited by Smith357; 02-16-2011 at 08:30 PM.
|
03-01-2011, 07:15 PM
|
|
Moderator
|
|
|
Join Date: Jan 2004
Location: Columbus Ohio
Posts: 4,552
Likes: 931
Liked 3,590 Times in 816 Posts
|
|
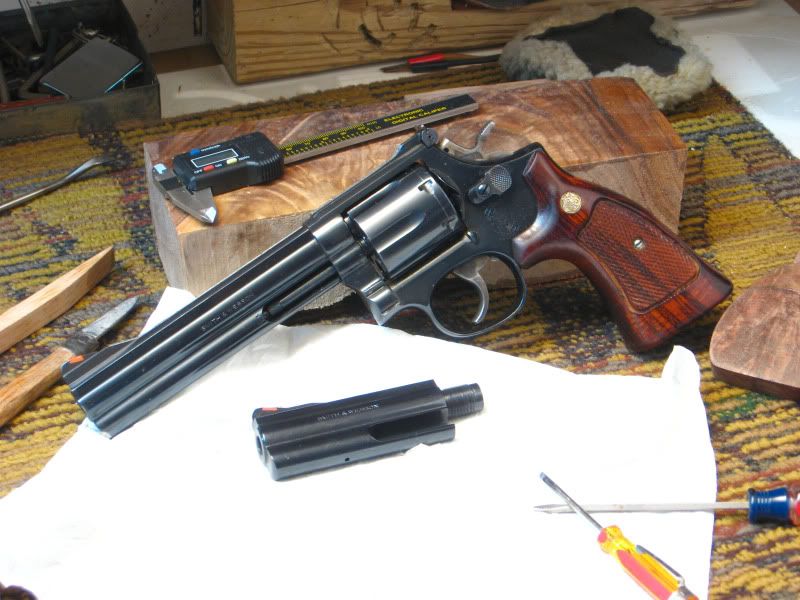
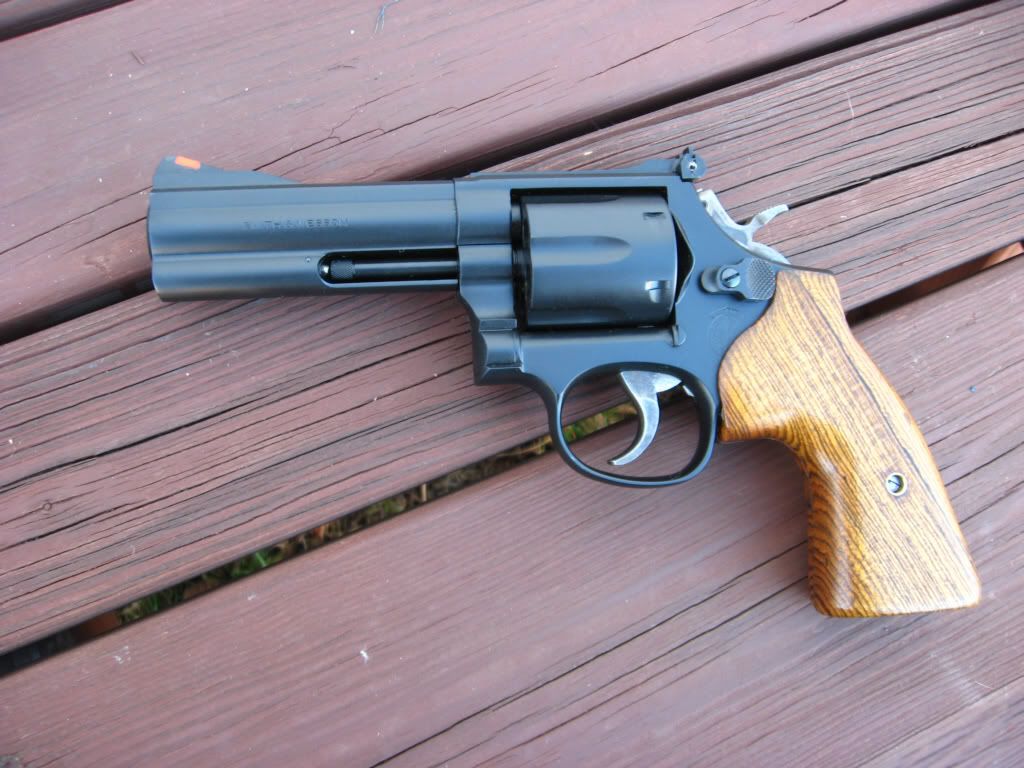
When I got home from work today I had a package waiting for me. Inside was my 586 with the new barrel and finish, I put on the grips I have been working on and they fit perfectly. Stage one is now complete and the 586 is good to go as is. But being as I got this to play with I will now keep an eye out for a suitable 686 cylinder to move on to stage two, though I'm really not in any hurry, I also want to get Tritium night sights. The one thing I will want before any of the other stuff is some good gun leather.
Look Ma, no turn line!!
__________________
Regards,
Guy-Harold Smith II
|
|
The Following 7 Users Like Post:
|
|
03-01-2011, 10:13 PM
|
 |
Member
|
|
|
Join Date: Feb 2009
Location: Rowan CO., N C
Posts: 235
Likes: 5
Liked 10 Times in 6 Posts
|
|
it came out great. very nice job
|
03-01-2011, 11:33 PM
|
|
SWCA Member
|


|
|
Join Date: Oct 2007
Location: California
Posts: 19,248
Likes: 11,901
Liked 20,594 Times in 8,582 Posts
|
|
I have a 586 project gun as well. I'm turning it into a 596 (44 spl) with 4" Mtn Gun barrel. What is the M recall you spoke about?
__________________
Jim
S&WCA #819
|
03-02-2011, 12:18 AM
|
|
US Veteran
|
|
|
Join Date: Apr 2008
Location: Wautoma, WI 54982
Posts: 4,118
Likes: 6,564
Liked 799 Times in 499 Posts
|
|
Great project! Not much point in learning to do barrel swaps unless
you plan on doing a lot of them.
Since you're posting project process, could you mention group size
with the current sights, and again wih the night sights? Just
wondering if there's any difference in width etc. to affect groups.
Thanks for posting, pretty interesting. TACC1
|
03-02-2011, 12:38 AM
|
|
US Veteran
|

|
|
Join Date: Jul 2006
Location: OR
Posts: 3,516
Likes: 5,499
Liked 1,026 Times in 350 Posts
|
|
That's a pretty serious-looking piece of hardware you have there. VERY nice!
I'll look forward to a range report when the time come 'round - 'cause I know you'll be shootin' that gun!
Regards,
Jerry
|
03-02-2011, 01:56 AM
|
|
Member
|
|
|
Join Date: Nov 2004
Location: Mountain State
Posts: 3,568
Likes: 56
Liked 379 Times in 149 Posts
|
|
It looks so nice it is almost a shame to shoot and get the turn line and dirt on it. That was money well spent and a good project. Now all you need is the custom 686 cylinder and you can go to Pickaway and try her out.
|
03-02-2011, 08:23 AM
|
|
Moderator
|
|
|
Join Date: Jan 2004
Location: Columbus Ohio
Posts: 4,552
Likes: 931
Liked 3,590 Times in 816 Posts
|
|
Quote:
Originally Posted by Hondo44
I have a 586 project gun as well. I'm turning it into a 596 (44 spl) with 4" Mtn Gun barrel. What is the M recall you spoke about?
|
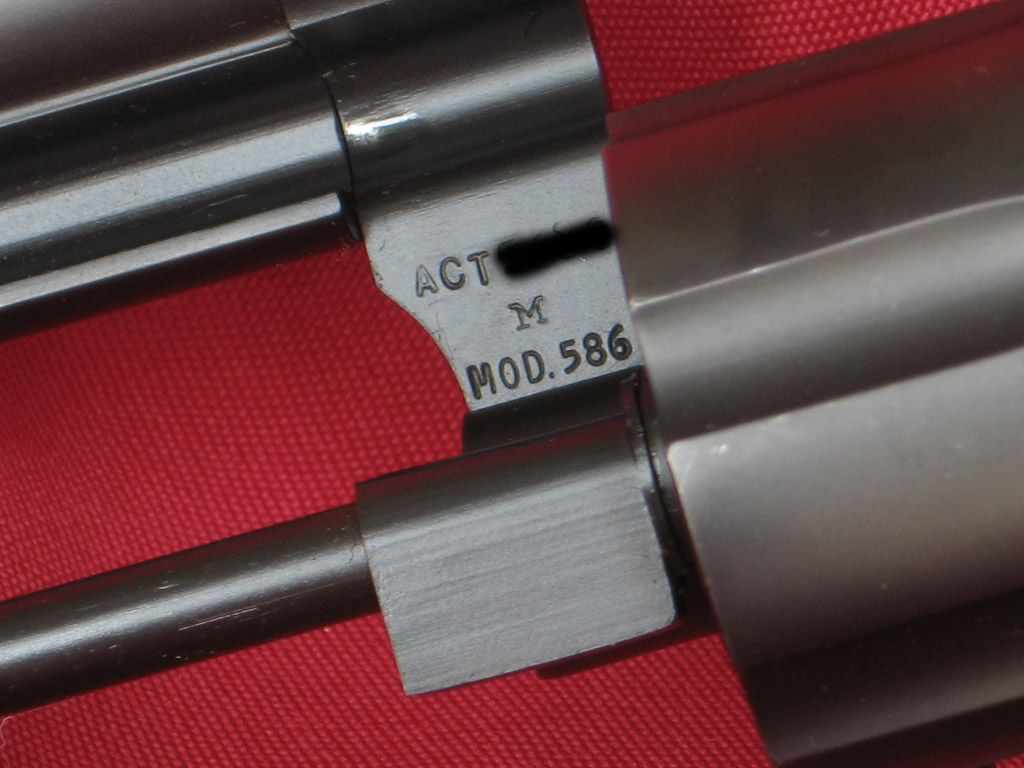
It has to do with the early no dash and dash one models. They have been recalled to fix primer back flow issues. S&W changes out the firing pin and the....I'm drawing a blank....the dohicky with the hole. They then stamp an "M" in the crane above the model number. Since mine is a nodash taht did not have the "M" stamp the shipping both ways was covered by S&W.
Quote:
Originally Posted by TACC1
Since you're posting project process, could you mention group size
with the current sights, and again wih the night sights? Just
wondering if there's any difference in width etc. to affect groups.
Thanks for posting, pretty interesting. TACC1
|
That I can do, I'm dying to get to the range this weekend and give it a test drive.
Quote:
Originally Posted by j38
That's a pretty serious-looking piece of hardware you have there. VERY nice!
I'll look forward to a range report when the time come 'round - 'cause I know you'll be shootin' that gun!
|
Yup, it was built to be a shooter. Since its been reworked it has no collectors value and will always be a redone 586.
Quote:
Originally Posted by Bullseye Smith
It looks so nice it is almost a shame to shoot and get the turn line and dirt on it. That was money well spent and a good project. Now all you need is the custom 686 cylinder and you can go to Pickaway and try her out.
|
When the bill is tallied up to this point I have right around 6 bills in it, I figure the night sights will run another 90 and the extra cylinder milled for moon clips will be another $150ish and then the leather will run around $150-200 for a carved Tom Threepersons.
I know I'll never recoup the money I put into it, but then I don't ever plan on even trying.
__________________
Regards,
Guy-Harold Smith II
|
03-02-2011, 09:41 PM
|
|
Moderator
|
|
|
Join Date: Jan 2004
Location: Columbus Ohio
Posts: 4,552
Likes: 931
Liked 3,590 Times in 816 Posts
|
|
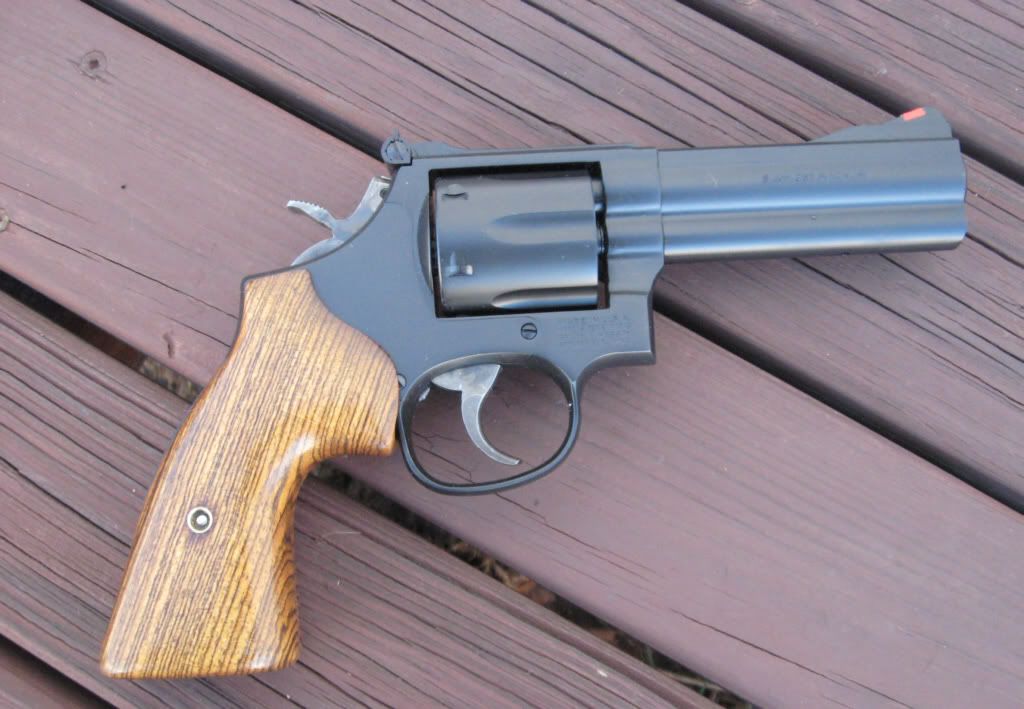
Stock Change
from this, they look good but still need wood removed in the web area
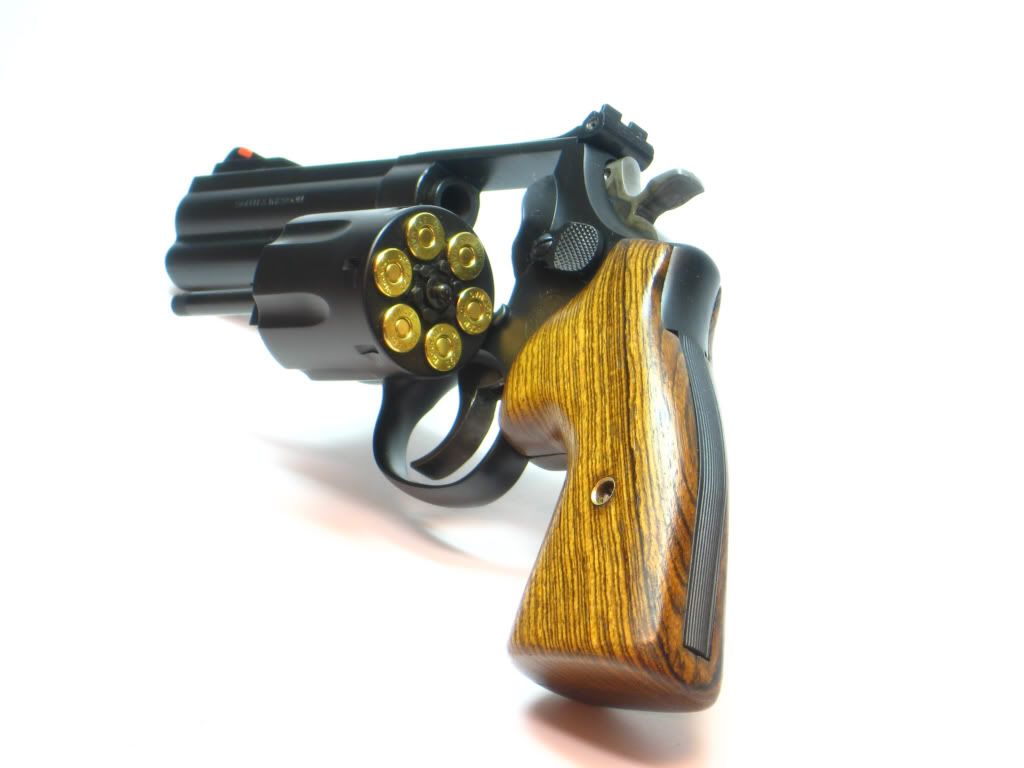
to these dark targets
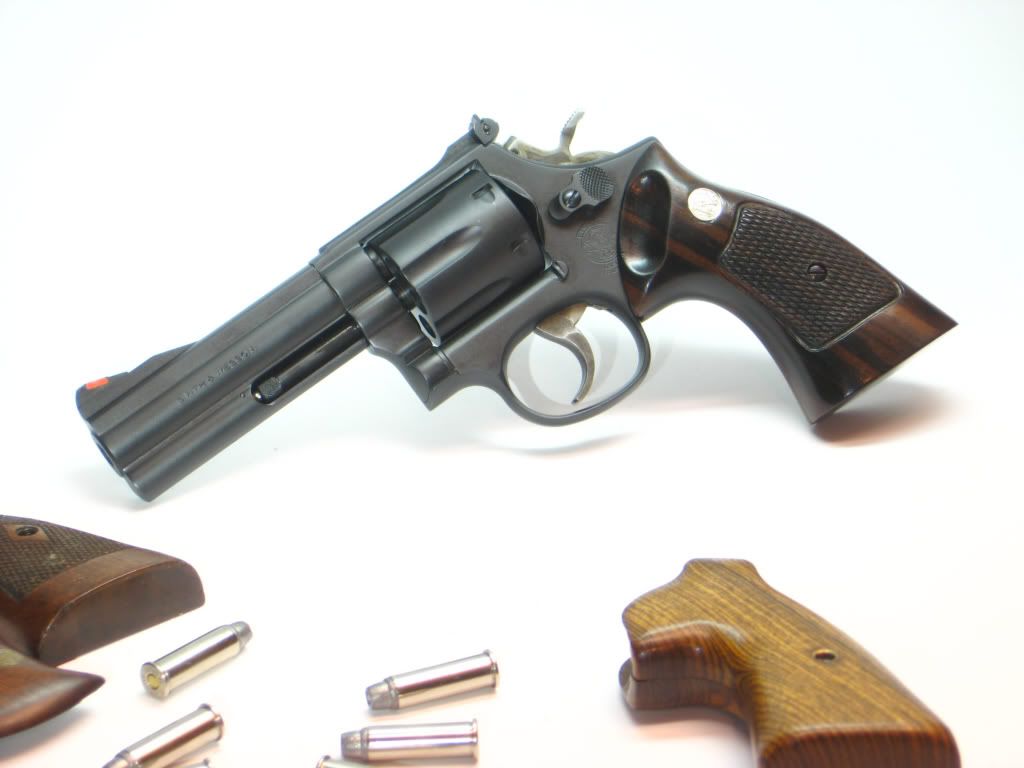
or maybe.........
something else
__________________
Regards,
Guy-Harold Smith II
|
|
The Following 2 Users Like Post:
|
|
03-02-2011, 10:45 PM
|
|
Member
|
|
|
Join Date: Feb 2011
Posts: 550
Likes: 5
Liked 75 Times in 50 Posts
|
|
Quote:
Originally Posted by Smith357
Stock Change
from this, they look good but still need wood removed in the web area
to these dark targets
or maybe.........
something else |
Man, that's a no-nonsense looking revolver you have there!!
I like it...
|
03-27-2011, 11:28 AM
|
|
Moderator
|
|
|
Join Date: Jan 2004
Location: Columbus Ohio
Posts: 4,552
Likes: 931
Liked 3,590 Times in 816 Posts
|
|
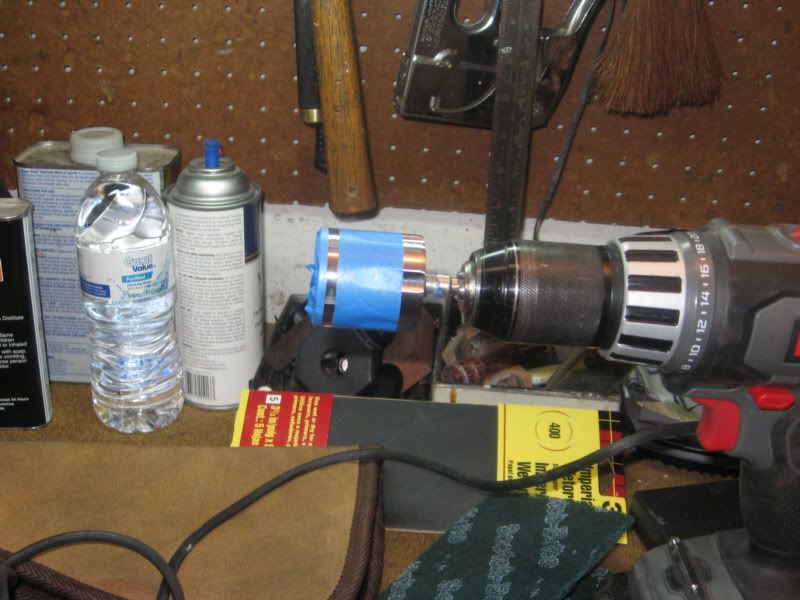
Stage Two Started
I just got started on the cylinder segment. Big thanks to Bullseye Smith
who took the 6" barrel in trade for this 686 cylinder.
I started buy finding a rod that fit into the cylinder then wrapped in a bit
of tape on the rod for a firm press fit to the the cylinder. Chucked it up in
the drill and spun the cylinder on a Scotchbrite pad for an even brushed look.
Then taped off an area to polish to hide a drag line, and then polished out
the flutes with a Dremel buffing wheel.
I'm not sure if I like it yet, but I have some time, before I even attempt to install
it I should shoot the gun first. that's right I have not yet had a chance to get out
and shoot the darn thing yet.
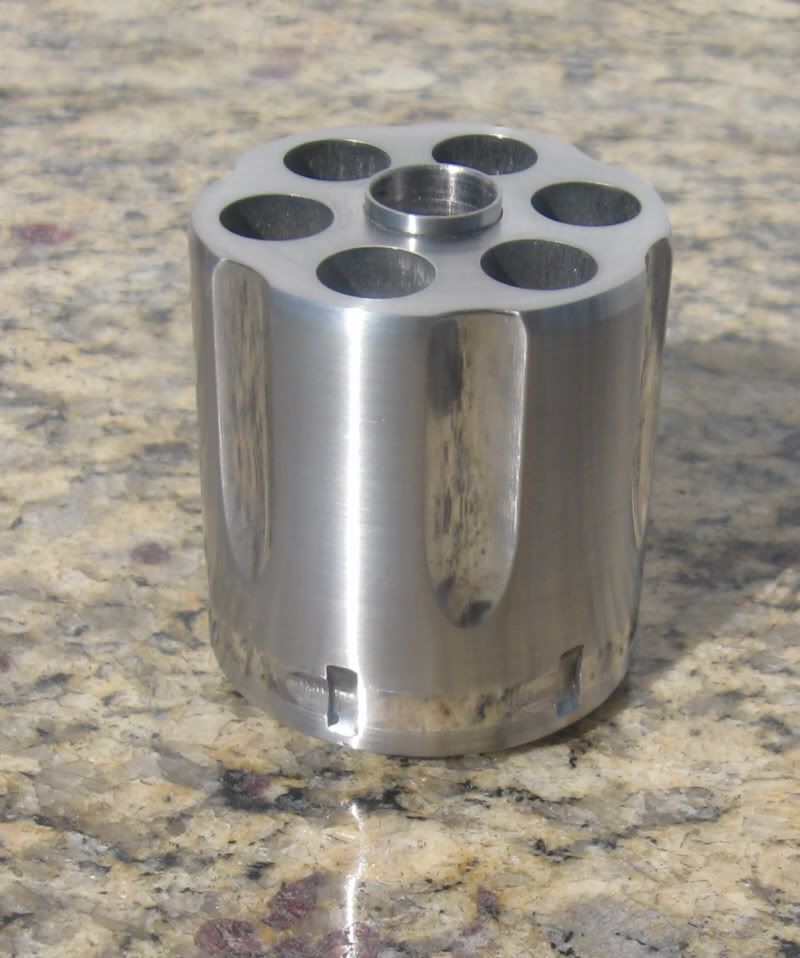
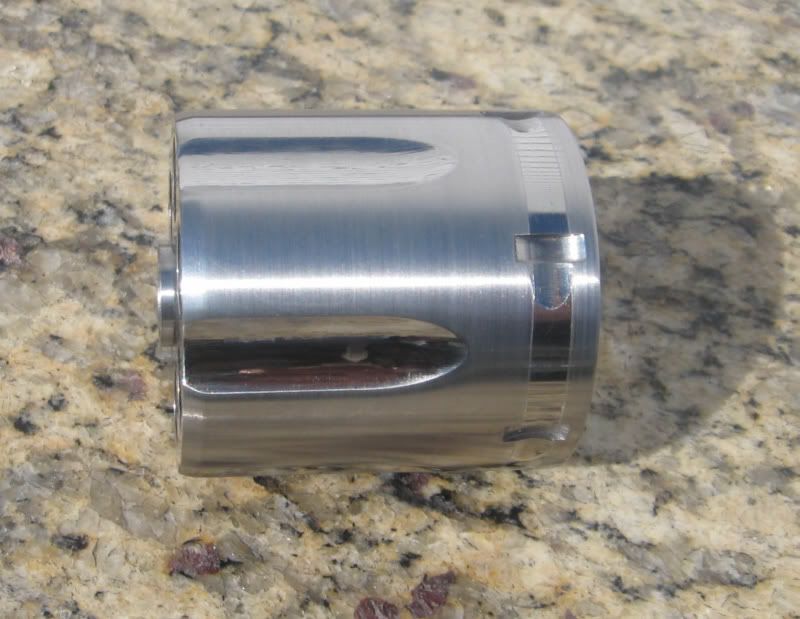
This finish is easy enough to convert back to a plain brushed look, or even a bead blast,
I just need to make up my mind which way I want to go. Then I can fit it to the gun
and send it out for a moon clip conversion.
__________________
Regards,
Guy-Harold Smith II
Last edited by Smith357; 03-27-2011 at 11:31 AM.
|
03-27-2011, 11:52 AM
|
|
Member
|
|
|
Join Date: Nov 2004
Location: Mountain State
Posts: 3,568
Likes: 56
Liked 379 Times in 149 Posts
|
|
Very nice 357, very nice indeed. That will give a very personnal look, the area's that you taped off would look great with a bead blast in those area's. Leave the front of the cylinder shinny for easy cleaning. That for sure will end as a great project, and one of a kind. Very good job  .
|
04-24-2011, 10:24 PM
|
|
Moderator
|
|
|
Join Date: Jan 2004
Location: Columbus Ohio
Posts: 4,552
Likes: 931
Liked 3,590 Times in 816 Posts
|
|
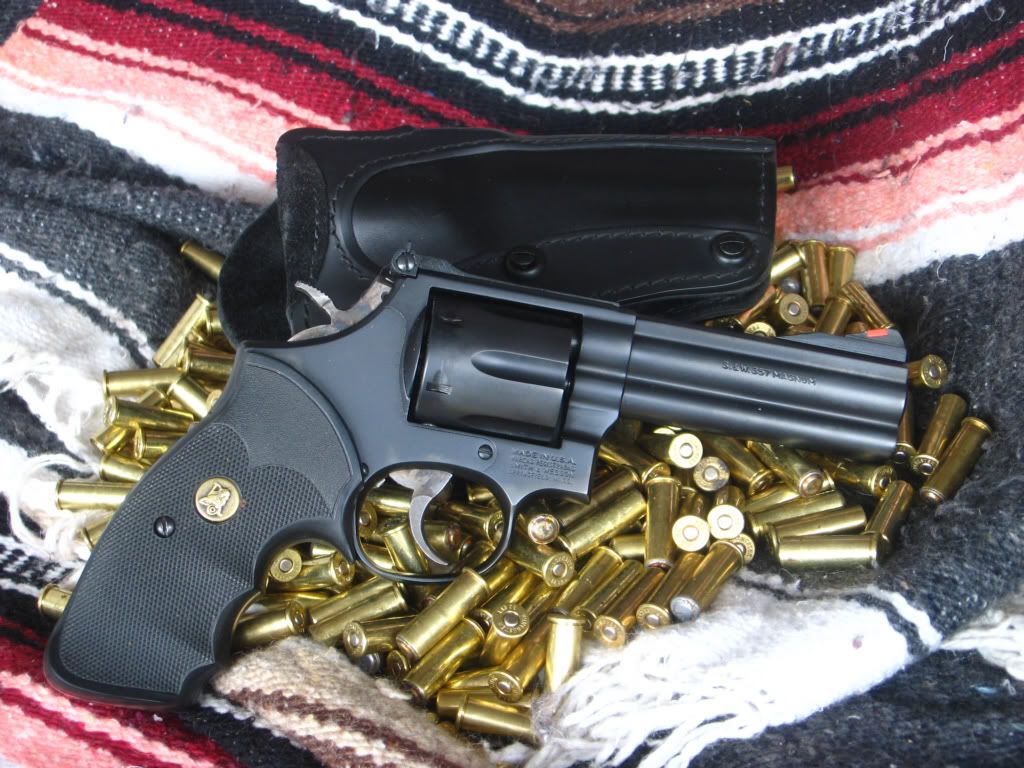
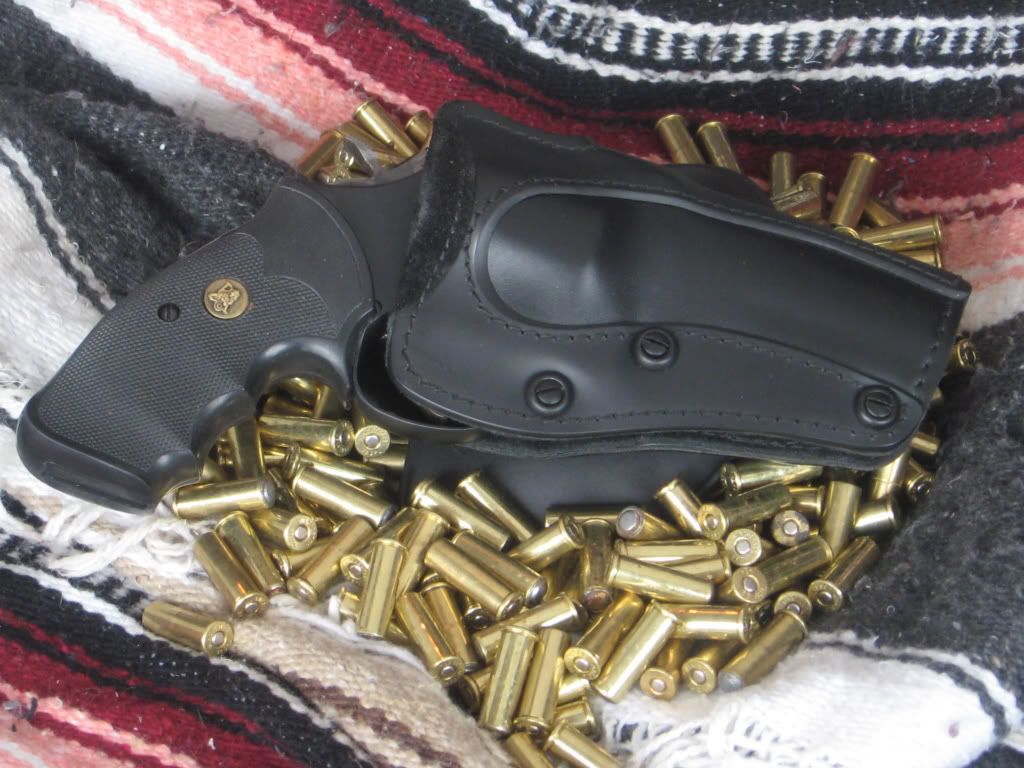
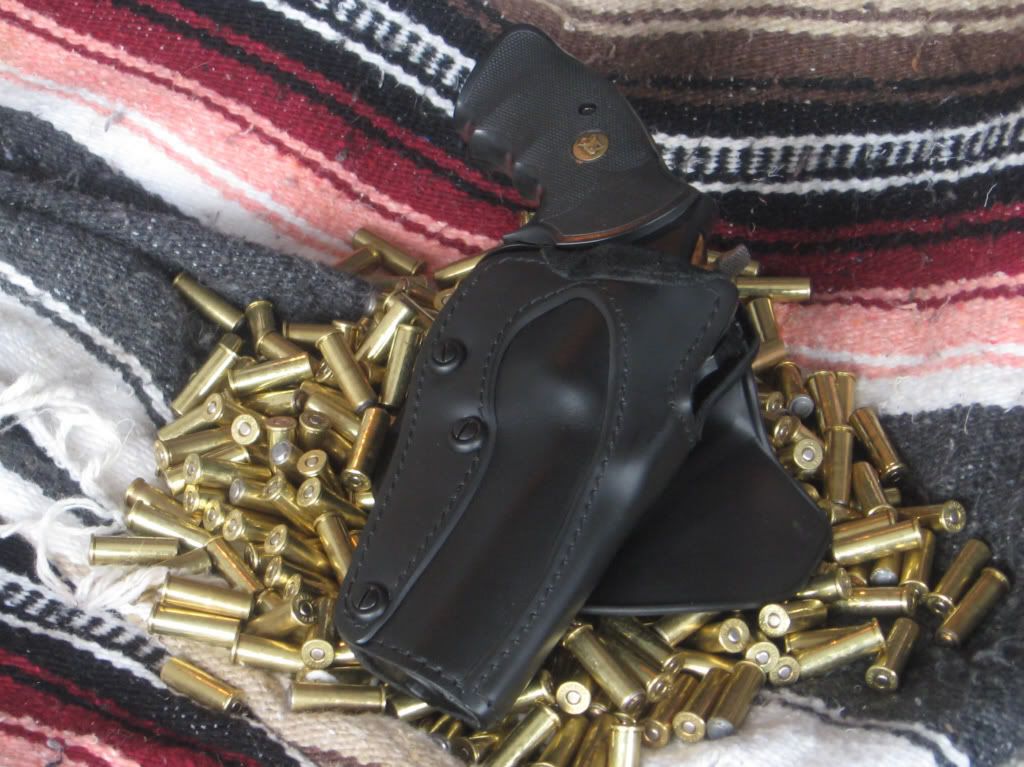
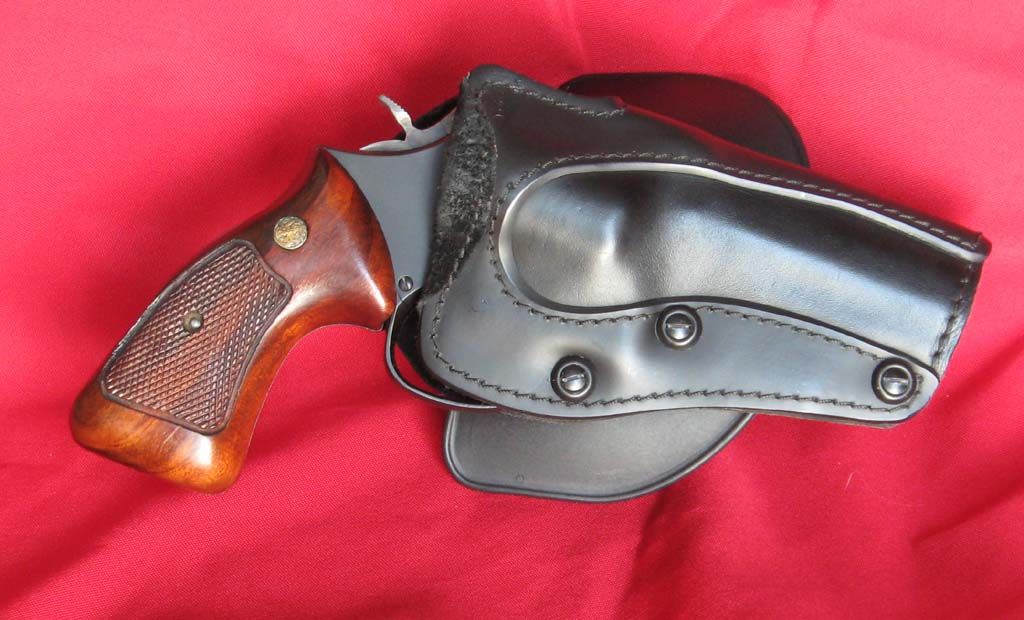
I think I found the holster, after going through every holster box at a few gun shows to try different styles. It's not even close to what I was originally looking for, but it really seems to match the combat concept of the build. It's a Safariland 568, even the model number is close, it's a kydex and leather hybrid. A big plus is it's easy on easy off high ride paddle design that is very comfortable, it does not pull down my pants and seems to spread the weight evenly, I actually forget I'm wearing it. Retention is fully adjustable and it does concealed fairly well under a sport coat or heavy un-tucked shirt.
I did finally get the gun to the range and it grouped its shot about 3 inches low, I did not attempt to adjust the sights because I hated the grips, they had a pretty good bite, so I'm going with rubbers. I figure rubbers also match up with the concept of a combat wheelgun. I will do the sight in adjustments with grips that feel good.
as for the 686 cylinder I'm going to bead blast it, I don't care for the brushed/polished thing I tried.
__________________
Regards,
Guy-Harold Smith II
Last edited by Smith357; 04-24-2011 at 10:43 PM.
|
|
The Following User Likes This Post:
|
|
04-25-2011, 11:06 AM
|
|
Member
|
|
|
Join Date: Apr 2007
Location: never never land, USA
Posts: 3,013
Likes: 120
Liked 824 Times in 530 Posts
|
|
Quote:
Originally Posted by Smith357
it grouped its shot about 3 inches low,
|
If you've got a .146 rear blade in it you might consider going to a .160 to bring up your POI. The .160 has a deeper notch giving a better sight picture.
|
04-25-2011, 12:00 PM
|
|
Member
|
|
|
Join Date: Sep 2010
Location: Home Pa
Posts: 208
Likes: 26
Liked 24 Times in 16 Posts
|
|
Quote:
Originally Posted by tomcatt51
If you've got a .146 rear blade in it you might consider going to a .160 to bring up your POI. The .160 has a deeper notch giving a better sight picture.
|
I need figure that out myself yanking 8in barrels and swapping for 4in or 3in may screw up the rear sight.
|
04-25-2011, 06:24 PM
|
|
SWCA Member
|
|
|
Join Date: Oct 2007
Location: California
Posts: 19,248
Likes: 11,901
Liked 20,594 Times in 8,582 Posts
|
|
Quote:
Originally Posted by Bugs Bunny
I need figure that out myself yanking 8in barrels and swapping for 4in or 3in may screw up the rear sight.
|
The rule of thumb is that shortening a barrel requires a slightly taller front sight (or shorter rear sight). However, your point of impact is low and tomcatt51 is correct about using a taller rear sight blade. But 3" low should be well within your rear sight elevation adjustment without elevating to an unsightly height.
But I think you're right, wait 'till you install your final preference of grips.
__________________
Jim
S&WCA #819
|
04-25-2011, 07:49 PM
|
 |
US Veteran
|
|
|
Join Date: Apr 2003
Location: Texas, USA
Posts: 1,113
Likes: 1,826
Liked 1,170 Times in 310 Posts
|
|
And +1 on the holster choice. I have one for my Model 19 4 inches, and it is one of my favorite holsters. Comfortable, secure, and stylish.
|
11-17-2012, 07:00 AM
|
|
Member
|
|
|
Join Date: Oct 2012
Location: Michigan
Posts: 183
Likes: 267
Liked 71 Times in 44 Posts
|
|
Smith 357,
Great post. Do you have any updates to it? Have you shot the gun much and how did it do?
Jay
|
11-17-2012, 07:51 AM
|
|
Moderator
|
|
|
Join Date: Jan 2004
Location: Columbus Ohio
Posts: 4,552
Likes: 931
Liked 3,590 Times in 816 Posts
|
|
Quote:
Originally Posted by 33jayman
Smith 357,
Great post. Do you have any updates to it? Have you shot the gun much and how did it do?
Jay
|
I carry the gun on a regular basis, and I shoot it whenever I can. It's a good shooter. The finish is not as durable as I had hoped and is starting to show wear in all the normal holster wear spots. Since S&W already bead blasted the gun I can now do just about any of the home gunsmith finishes like Parkerize or Duracoat I want if later on down the line if the mood strikes. Right now I'm fine with the honest wear it is getting.
__________________
Regards,
Guy-Harold Smith II
|
11-17-2012, 02:20 PM
|
|
Member
|
|
|
Join Date: Oct 2012
Location: Michigan
Posts: 183
Likes: 267
Liked 71 Times in 44 Posts
|
|
How would black T look?
Jay
|
12-16-2012, 07:38 PM
|
 |
US Veteran
Absent Comrade
|

|
|
Join Date: Sep 2011
Location: Wisconsin Central State
Posts: 971
Likes: 3,197
Liked 800 Times in 351 Posts
|
|
I noticed you were going with night sights. Who has them. I have a 686 four inch in need of a rear blade and if it needs work why not skip to new night sights? If there are any out there. All Midway had were factory blades.
|
08-27-2014, 08:27 AM
|
|
Member
|
|
|
Join Date: Jan 2014
Location: Texas
Posts: 126
Likes: 4
Liked 64 Times in 31 Posts
|
|
Any update on this gun? More mods or performance notes?
I'm particularly interested in how your finish is wearing.
Last edited by Hfrog355; 08-27-2014 at 08:39 AM.
|
08-27-2014, 04:41 PM
|
|
Moderator
|
|
|
Join Date: Jan 2004
Location: Columbus Ohio
Posts: 4,552
Likes: 931
Liked 3,590 Times in 816 Posts
|
|
Quote:
Originally Posted by Hfrog355
Any update on this gun? More mods or performance notes?
I'm particularly interested in how your finish is wearing.
|
I really have not done anything but shoot it, I had all these plans but decided I really like it just the way it is. I carry it often in the cooler months and the finish seems to be holding up OK. It is starting to show holster wear on all normal surfaces, and I have even managed to put a few minor scratches on it, overall I would say the finish is about 90%.
__________________
Regards,
Guy-Harold Smith II
|
|
The Following User Likes This Post:
|
|
08-27-2014, 09:29 PM
|
 |
Member
|
|
|
Join Date: Jun 2004
Location: Independence, OH, USA
Posts: 6,944
Likes: 28,943
Liked 7,232 Times in 2,601 Posts
|
|
Nice blast from the past, good lookin gun. Larry
|
08-28-2014, 12:23 AM
|
|
Member
|
|
|
Join Date: Jan 2014
Location: Texas
Posts: 126
Likes: 4
Liked 64 Times in 31 Posts
|
|
Yeah, I really love that blasted blue finish. I haven't seen that around much, so it looks unique IMO.
|
08-31-2014, 06:21 PM
|
 |
Member
|
|
|
Join Date: May 2006
Location: south Florida
Posts: 317
Likes: 9
Liked 229 Times in 83 Posts
|
|
I have a 586 that I bought NIB in 1985. While I don't want a 4" barrel, it could stand a refinish. Here is a pic of mine as it sits right now.
It has many 1000's of rounds down the barrel, and while the pic does not show it, the muzzle has a lot of blue missing.

__________________
handlebar-proud to be American
Last edited by handlebar; 08-31-2014 at 06:23 PM.
|
08-31-2014, 06:51 PM
|
 |
US Veteran
|
|
|
Join Date: Jan 2010
Location: The wet side of Oregon
Posts: 6,292
Likes: 8,814
Liked 7,785 Times in 2,377 Posts
|
|
Seeing that SS cylinder is making me think......586 pinto!
__________________
-jwk-
US Army '72-'95
|
08-31-2014, 10:05 PM
|
|
Moderator
|
|
|
Join Date: Jan 2004
Location: Columbus Ohio
Posts: 4,552
Likes: 931
Liked 3,590 Times in 816 Posts
|
|
These are the last pictures I took of it.
Jan 2012 I guess it's time for more current shots. But the layout has not changed, I like it the way it is.

__________________
Regards,
Guy-Harold Smith II
Last edited by Smith357; 08-31-2014 at 11:11 PM.
|
|
The Following User Likes This Post:
|
|
09-01-2014, 09:37 PM
|
 |
US Veteran
|
|
|
Join Date: Sep 2011
Location: houston,texas
Posts: 7,198
Likes: 124,841
Liked 23,177 Times in 5,749 Posts
|
|
Thanks for brining back a good post. Nice to see well done projects.
__________________
Hue 68 noli me tangere
|
09-02-2014, 09:24 AM
|
|
Member
|
|
|
Join Date: Jan 2014
Location: Texas
Posts: 126
Likes: 4
Liked 64 Times in 31 Posts
|
|
Would love some new shots if you get time.
|
10-05-2014, 11:05 AM
|
|
Member
|
|
|
Join Date: Jun 2003
Location: SouthWest Virginia
Posts: 88
Likes: 10
Liked 47 Times in 18 Posts
|
|
Nice project with great results. Does anyone make a replacement rear blade with tritium? It would be a very easy way to get night sights.
|
10-05-2014, 12:13 PM
|
|
Member
|
|
|
Join Date: Mar 2012
Posts: 6,183
Likes: 11,067
Liked 18,499 Times in 4,231 Posts
|
|
Quote:
Originally Posted by Mtwoodson
Nice project with great results. Does anyone make a replacement rear blade with tritium? It would be a very easy way to get night sights.
|
Yes. Meprolight makes them for K, L, and N Frames.
They come two ways - either a full front blade or a red-ramp replacement insert.


I have them on my 586 and I like them. 
|
|
|
Tags
|
586, 686, bullseye, concealed, flutes, k frame, kydex, leather, lock, model 19, pinto, primer, safariland, scotchbrite, tritium  |
| Thread Tools |
|
|
| Display Modes |
 Linear Mode Linear Mode
|
 Posting Rules
|
|
|
|
 Similar Threads
|
| Thread |
Thread Starter |
Forum |
Replies |
Last Post |
|
S&W K32 Project...
|
Boge Quinn |
S&W Hand Ejectors: 1896 to 1961 |
28 |
02-26-2019 07:25 PM |
|
Project 616
|
Green Frog |
S&W Revolvers: 1980 to the Present |
113 |
03-15-2017 03:12 AM |
|
WTB Project Gun
|
Vfeldman |
WANTED to Buy |
0 |
08-22-2014 09:53 AM |
|
Project 65-3
|
Dragon88 |
S&W Revolvers: 1980 to the Present |
14 |
10-27-2011 03:51 PM |
|
Project 32
|
lilmag |
S&W Antiques |
10 |
10-23-2010 11:38 AM |
|


