|
|
 |

01-10-2016, 03:38 PM
|
 |
US Veteran
|


|
|
Join Date: Jun 2014
Location: Copenhagen, Denmark
Posts: 1,171
Likes: 2,972
Liked 3,764 Times in 684 Posts
|
|
 Installing/Replacing a Front Sight Insert - Tips...
Red Ramp Insert Replacement & Installation
This thread is supposed to be a guide on how to replace a factory insert that has fallen out, is faded, damaged, or loose. Or if you would just like to install one in your plain Baughman or ramp style front sight that is too hard to see. I hope its okay that I share my experiences in this thread, and my apologies to anyone else who may have another thread already covering this topic.
You should probably watch this video first...
If your front sight doesn't have an insert...
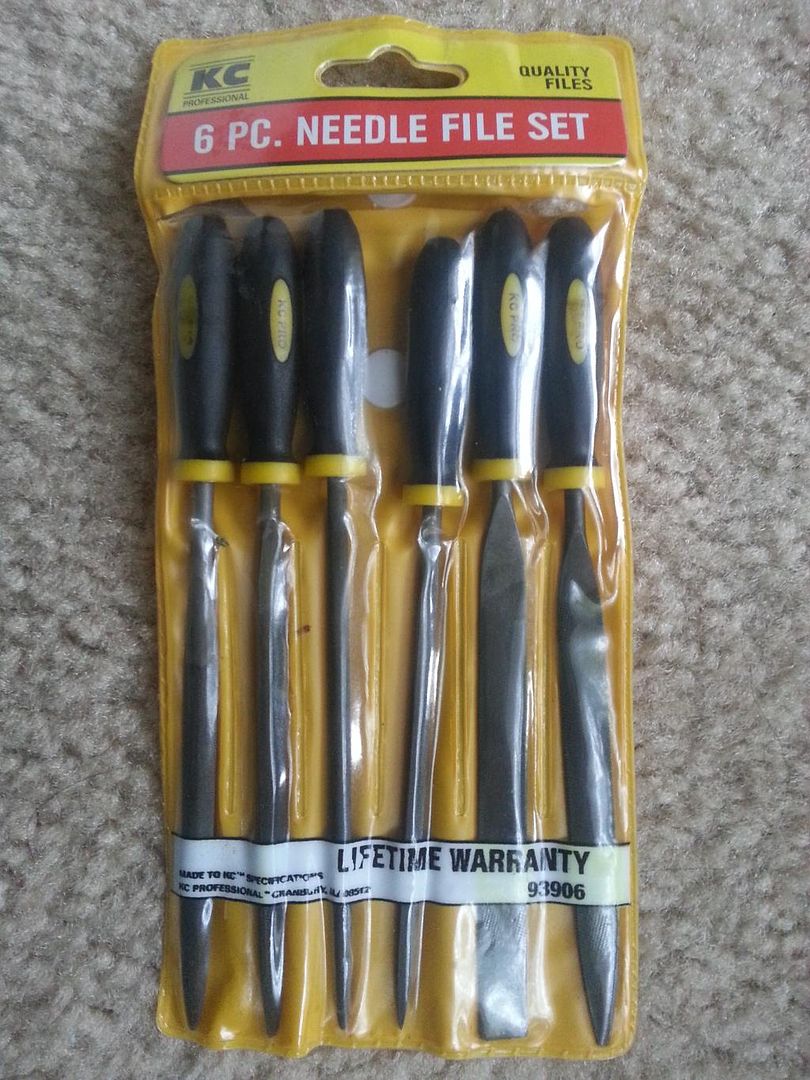
Buy a small set of jewelers files, make sure one of them is triangular shaped. The smaller, the better. I got a set at ACE Hardware for less than $10. Actually starting this process will make you feel like God himself might strike you down with a bolt of lightning, and if you are doing this to anything other than a shooter, God might really be considering it. I would only take a file to a shooter that I have no intention of getting rid of. Go slowly, go evenly and check both sides often. It is very important you only file a dovetail that fills up the rear sight. No more (in my opinion). I have seen some home made inserts that are way too long and it doesn't even look close to being factory. Not to mention how much easier it is to tell that your sights are lined up with a insert that only fills up the rear sight. Don't make your dovetail so deep that the bottom of the dovetail touches the barrel rib but deep enough to have a decent piece of acrylic to work with. That is how I would do it...
Here is some great advice.
Quote:
Originally Posted by armorer951

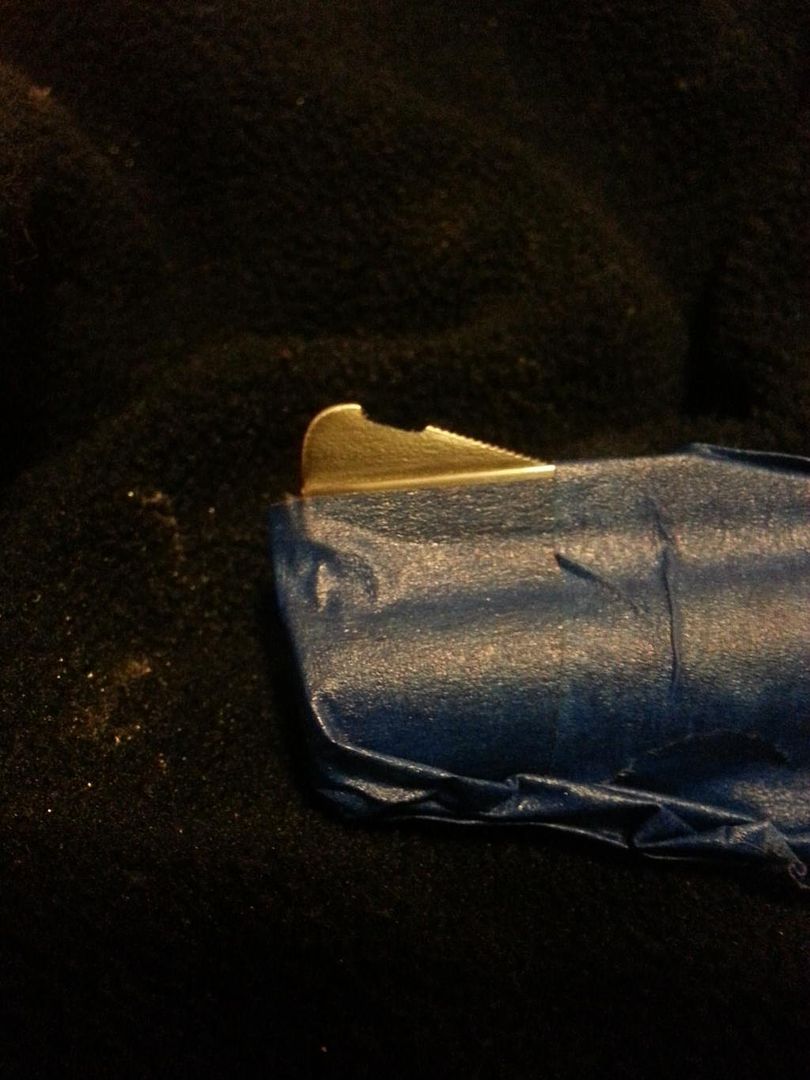
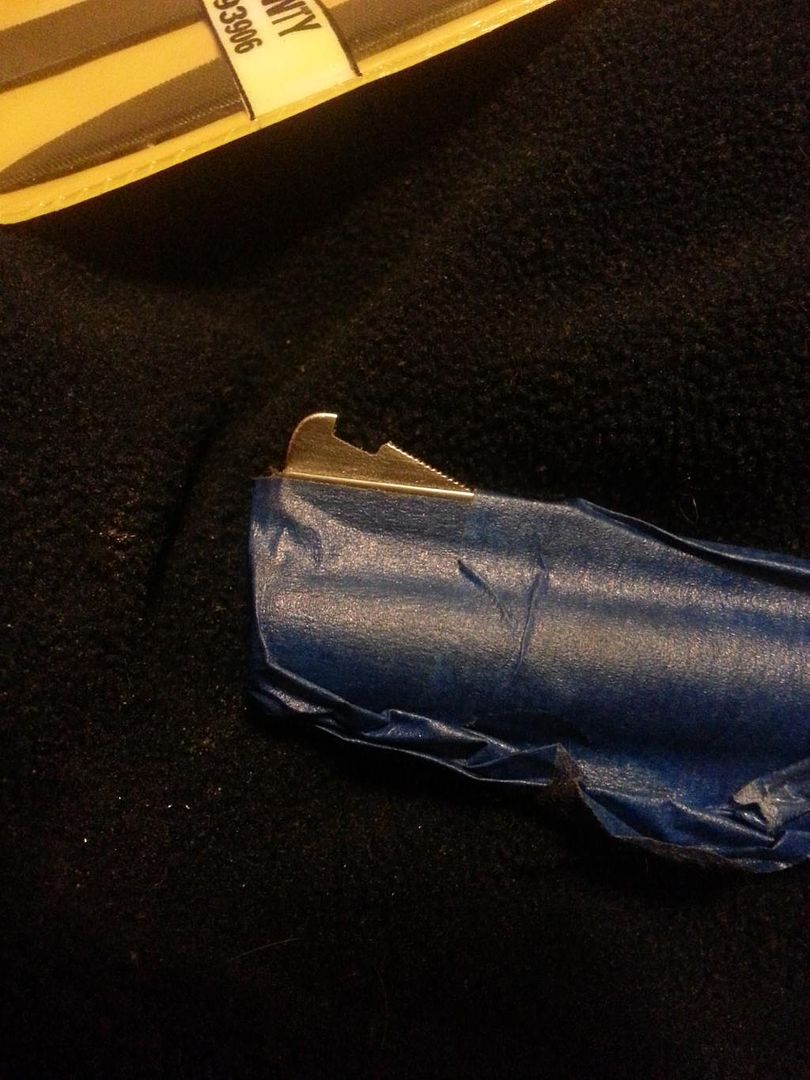
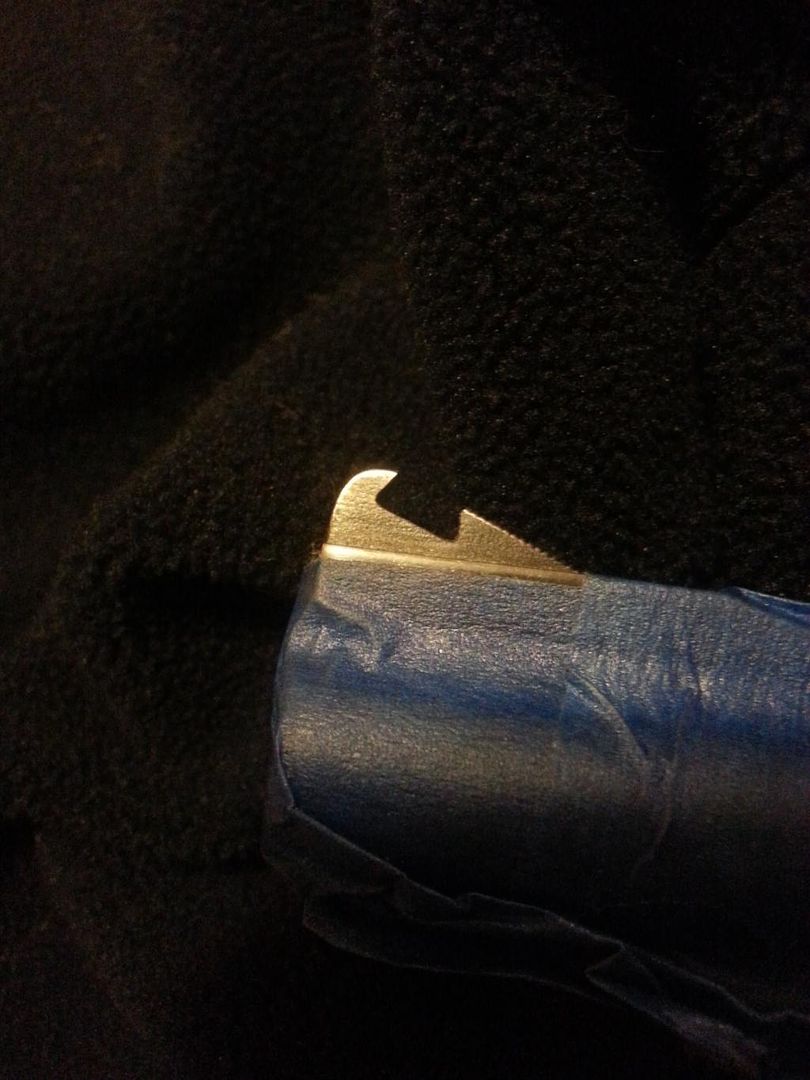
Another useful tool for doing these inserts is an additional small triangle file with one "safe" side. (cutting teeth removed) This safe sided file allows you to have more control, and open the angle cuts at each end without removing material from the bottom of the dovetail....or work on the bottom cut without cutting the end angle.
The file also makes it much easier to cut the corners/angles at each end to a very sharp point.
|
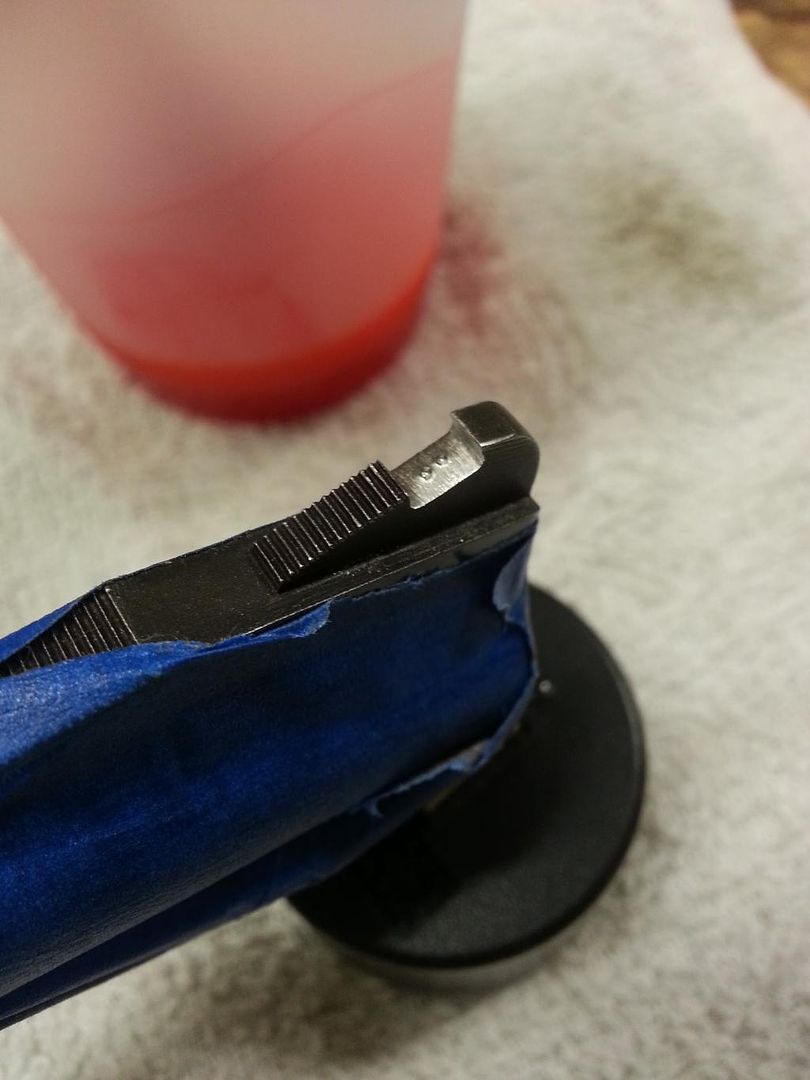
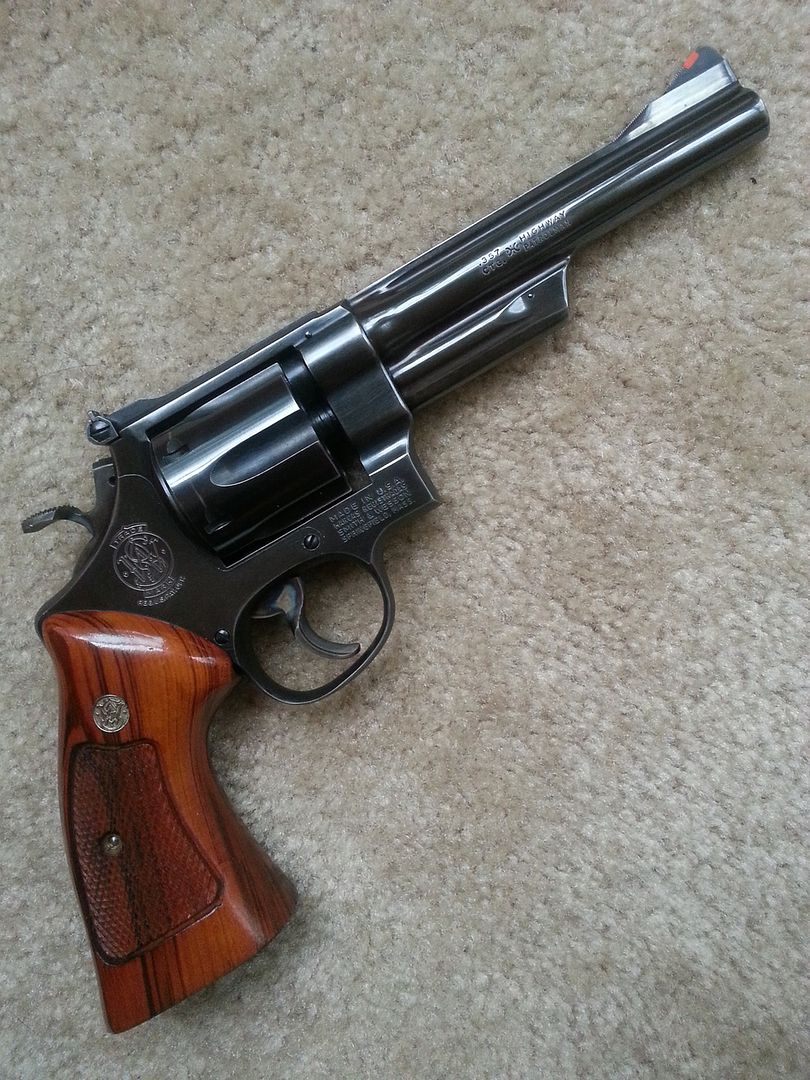
Me not using a triangular shaped file with a safe side is why the model 15 below has a dovetail that is really cut a little too deep.
 Dimpling with a punch or drilling 2 small holes...
Once you have cut the dovetail in your front ramp like Larry Potterfield illustrates in the video, don't forget to dimple inside the dovetail with a centerpunch. I prefer a centerpunch because it causes a little metal to "roll" up into the space where the largest part of the insert is. It really helps keep the insert secure and in place. The factory however drills two very small holes down.
 The Fences...
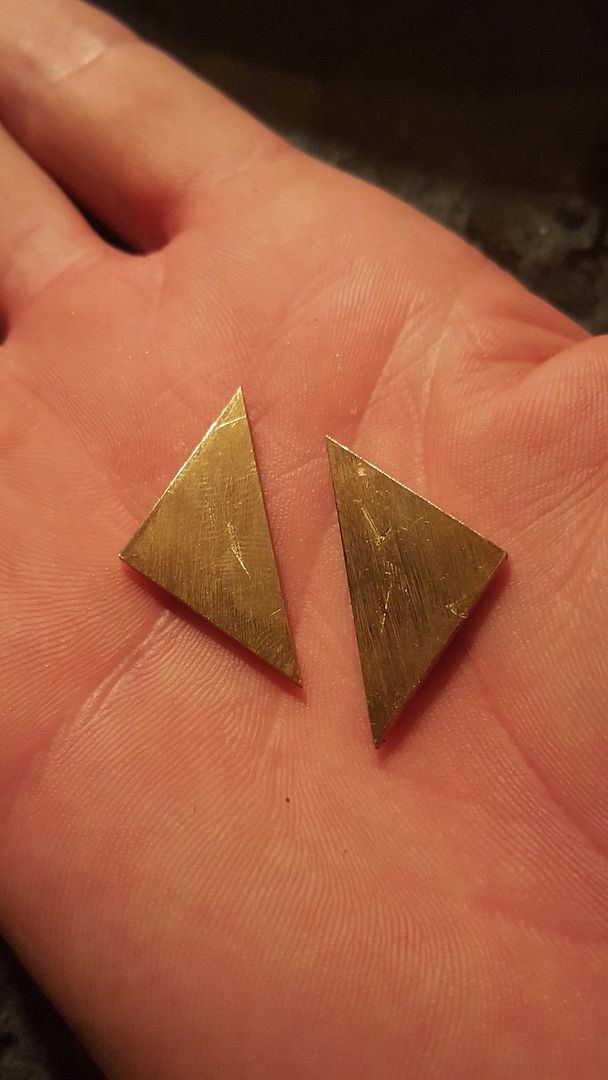
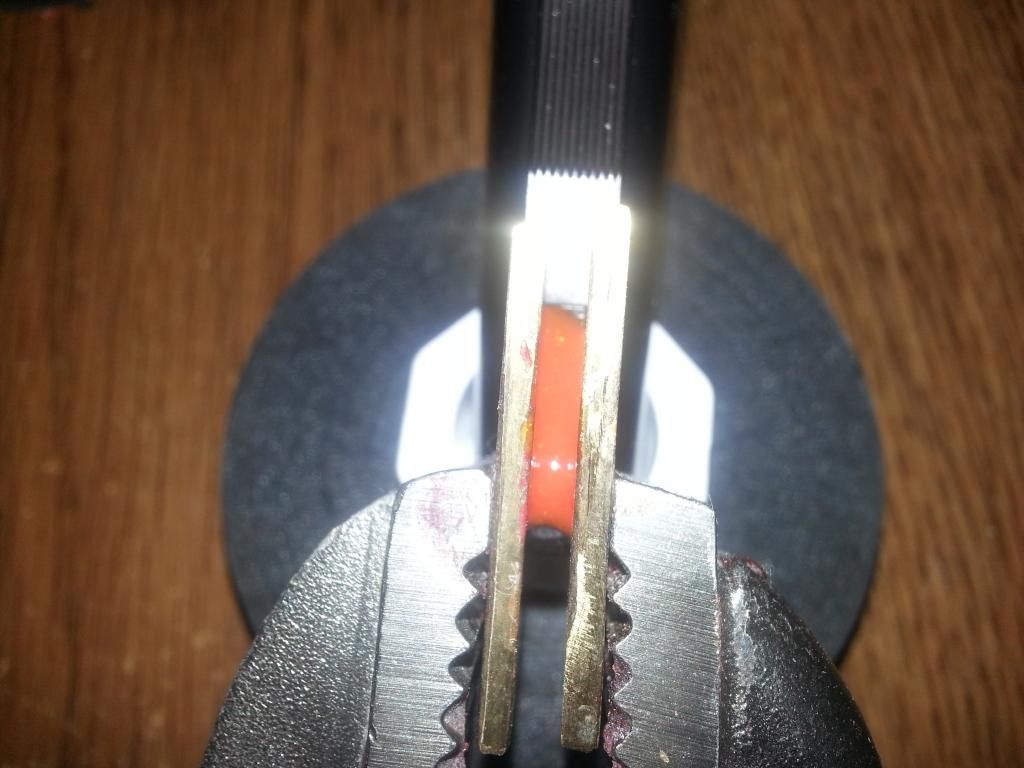
You will need two brass fences that will squeeze each side of your front ramp. I used pieces from a thick brass hinge. I like the fences to be thick enough so that when I pinch down on them with the vice grips, and the front ramp in between, the teeth of the vice grips only touch the brass fences. You do still have to watch out for the barrel, but find fences that stick out on each side past the width of the rib. Make sure they are flat and clean. I laid the fences on a file and flattened the sides of the fences that would be facing the resin. Clean them off and spray the Castin Craft Releasing Agent (don't forget to shake the bottle). Let the fences dry and clamp them on your front sight.
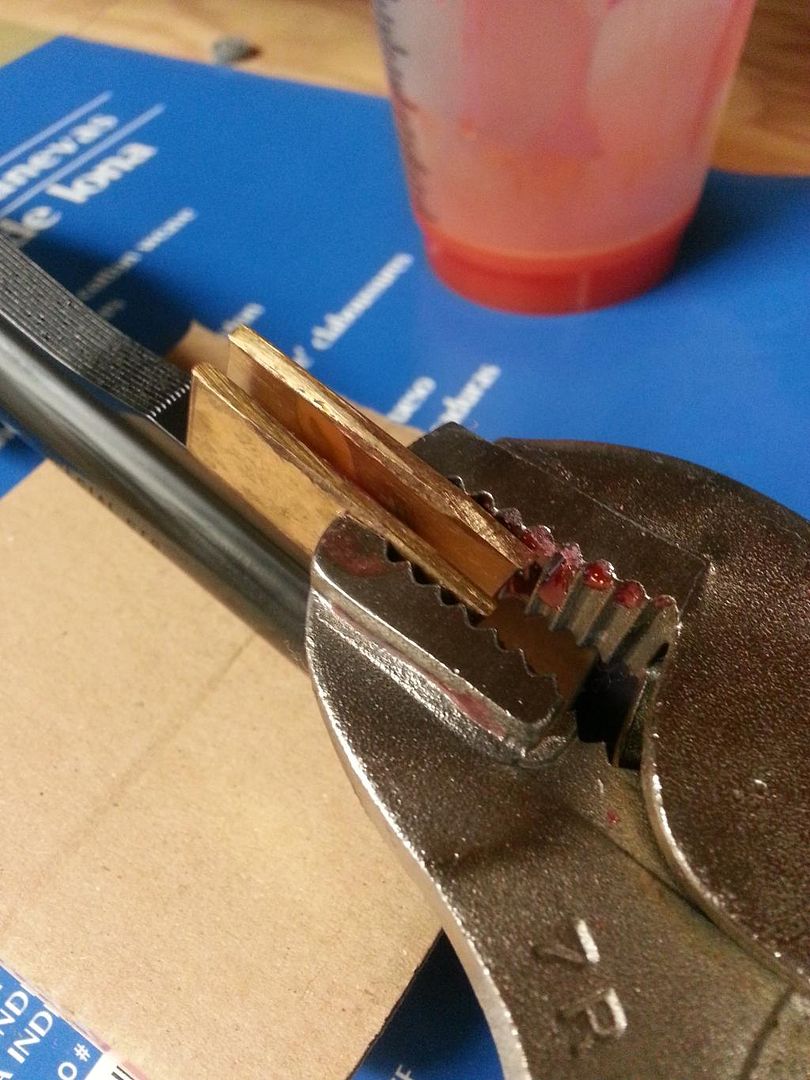 My most recent brass fences that I made, the shape helps to make sure the liquid gets inside the dovetail and not all over the fences.
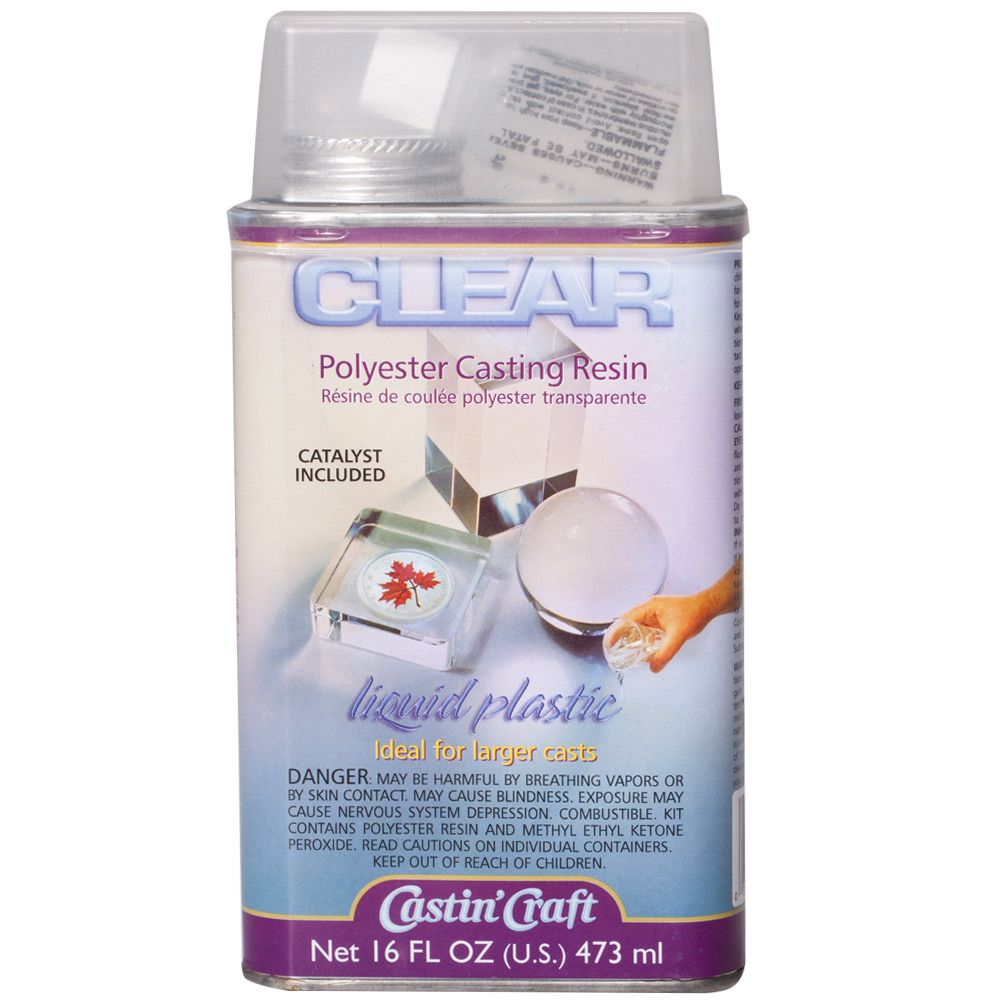
 Method #1 Castin' Craft (polyester casting resin)
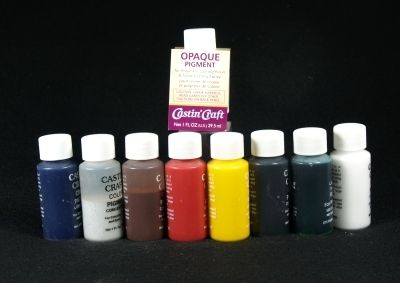
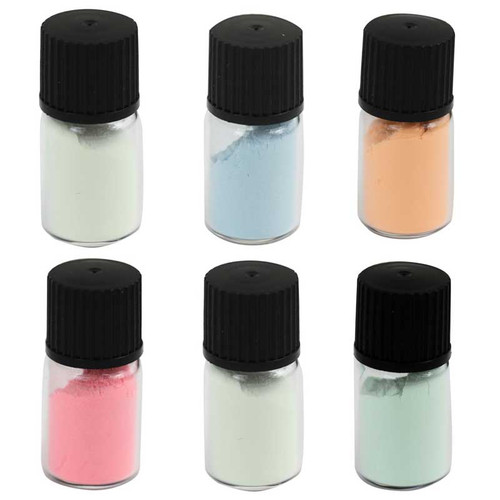
You will need some Castin Craft Resin, hardener, opaque red and yellow pigments, some mold releasing agent, some plastic cups, stir sticks for mixing. You will also need some brass fences, some vice grips, a small centerpunch, a hammer and some blue painters tape to protect the area around the front sight. I got all the material for the Castin' Craft insert at Hobby Lobby (except the files, the brass fences, the hammer, centerpunch and vice grips).
 This picture is of an insert that is too orange to be from my first attempt, but you get the idea.
 Cure Times and trimming...
You have plenty of time to work, so you don't have to hurry. Using this method takes an extremely long time to cure compared to the Brownells kit, even in a warm environment. But I would make sure you have everything ready to go before you put your drops of hardener in the resin. Make sure the dovetail is level when you drip the resin in between the fences, so it doesn't pour out the front of the sight. Make sure you stick around and watch it for a couple of hours so that if it starts to dip in the middle of the insert from leakage or air bubbles escaping, you can apply another drop or two. Once you have a good insert in there, leave it be for 3 or 4 days. It needs to be at room temp for it to harden properly so don't do it outside (fair warning - it stinks pretty bad). After 4 or 5 days remove the vice grips, remove the fences, clean the insert off with rubbing alcohol. The insert might still seem somewhat soft on the top, even after 4 or 5 days, just wipe it down with alcohol and it will be much easier to work with. Carefully start to trim the excess with a small jewelers file or razor blade. Larry Potterfield shows trimming it initially with a razor blade. I feel that when the casting resin is fully cured it is too hard to evenly cut with a razor blade, and you are pushing on the insert with quite a bit of pressure causing it to possibly have some movement in it when you're done. I use a small file with nice gentle swipes across the top pf the insert with minimal pressure, lets the file slide off the insert taking material with it evenly every time without causing extra movement. I think its okay to use a razor blade in the beginning as long as the insert is fully hard. I usually finish the top of the plastic insert with a very narrow piece of 800 grit sandpaper (a little more narrow than the insert itself. I put the sandpaper in between the insert and a narrow sanding block (I used one of the files). Think of playing a violin... the gun is the violin the insert is the strings of the violin, the file is the bow, and the thin piece of sandpaper is the horsehairs on the bow. Be extremely careful to only sand on the insert. Removing all of the excess with a file is okay too but it can leave deeper grooves than fine sandpaper. The last thing you should do is square everything up, so don't remove too much with your razor blade. If your fences sealed up good enough, and were squeezed tight enough, you shouldn't have to trim anything off the sides, just the top.
1st attempt with Polyester Casting Resin... Didn't bother finish making it look pretty, I knew it was too dark.
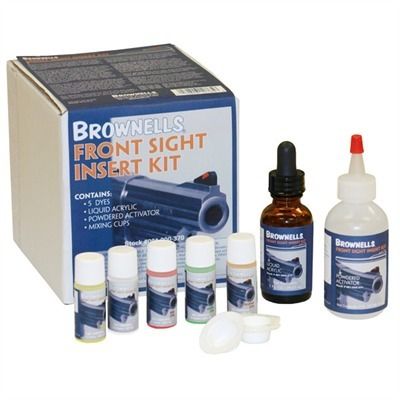
 Method #2 - Brownells Front Sight Insert Kit (liquid acrylic)
Last year I scored a Brownells front sight insert kit from a forum member here (thanks JR). It works different than casting resin, first off it sets up VERY quickly but fencing the sides and shaping it are the same. The best part is that it takes about an hour to an hour and a half from start to finish with the Brownells acrylic. I PREFER THE BROWNELLS FRONT SIGHT INSERT KIT!!! Getting the mix perfect is not very critical with this kit, super easy to use. I put about half of the eye dropper of liquid acrylic in the little white cups they sell. Then I put the yellow powdered pigment in the acrylic and mix it really well. it takes the powder a little longer to fully mix in with the acrylic. Then I just put as little red into the mix as possible. This will probably take several times of trying to get enough red in without making it too red. Have patience and make sure you mix it well before you add more red in it. Don't be afraid to load it up with plenty of yellow powdered pigment. Did I mention mixing it well?
I put about 3 -5 times the amount of the powdered hardener compared to the amount of acrylic. in other words if you looked at the puddle of acrylic, vs the pile of powdered hardener... the Powdered hardner pile would be 3 - 5 times bigger. As soon as you put the powdered hardener in with the liquid acrylic, it turns to liquid. So its going to seem like you are putting a wole lot of hardener in there compared to the few drops when using the casting resin. Even if you put 10 times too much hardner in there, it will still mix fine, you will just need to work fast. I put enough in there and then mix it really good and when it starts to get thick, then is when I put the acrylic down in between the fences. Poke it to make sure the air bubble get out and that the acrylic goes down in the factory holes.
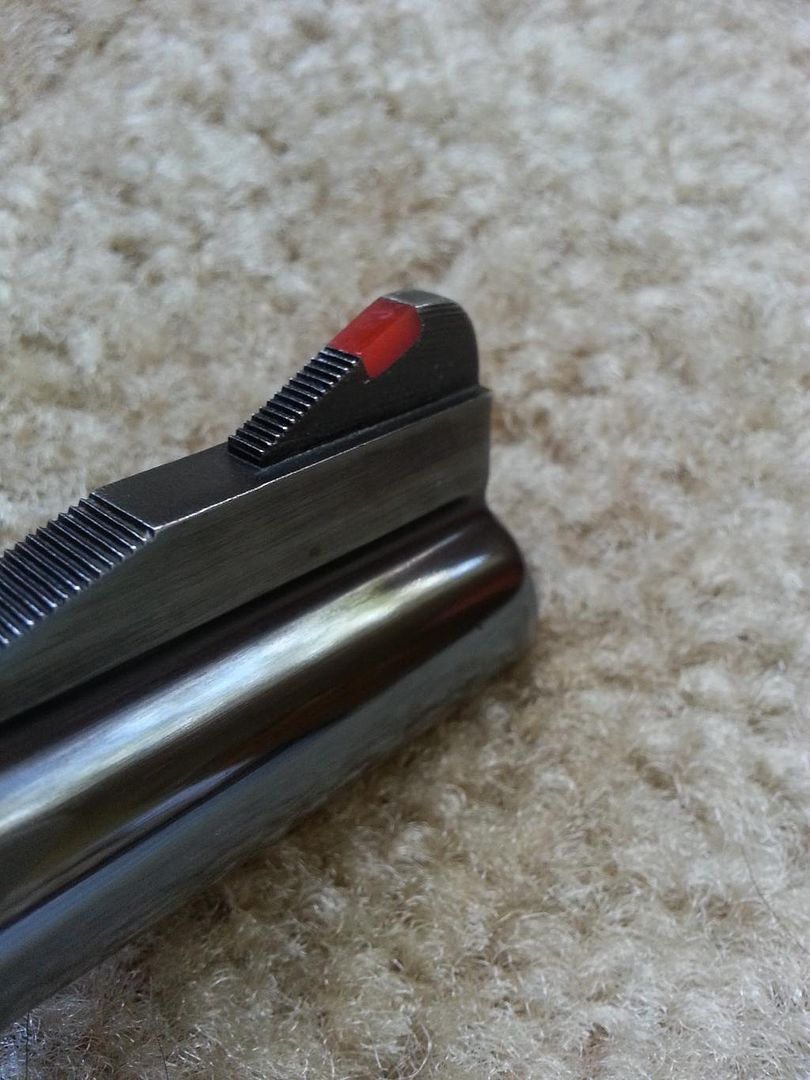
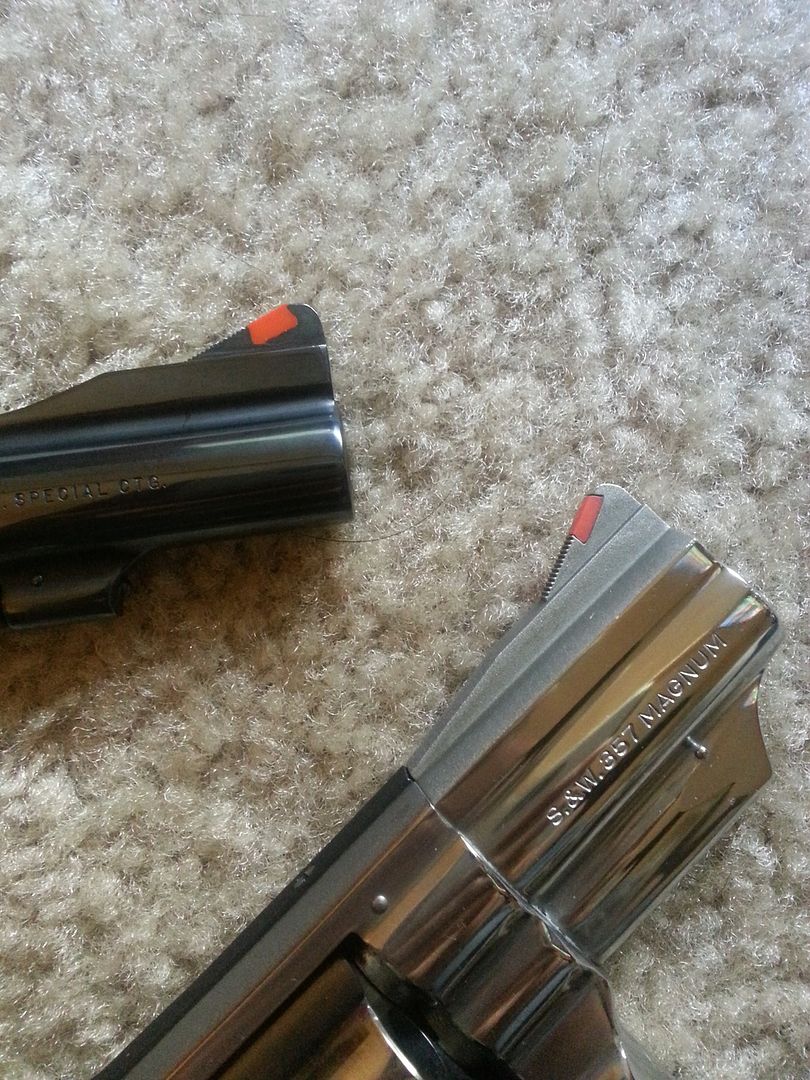
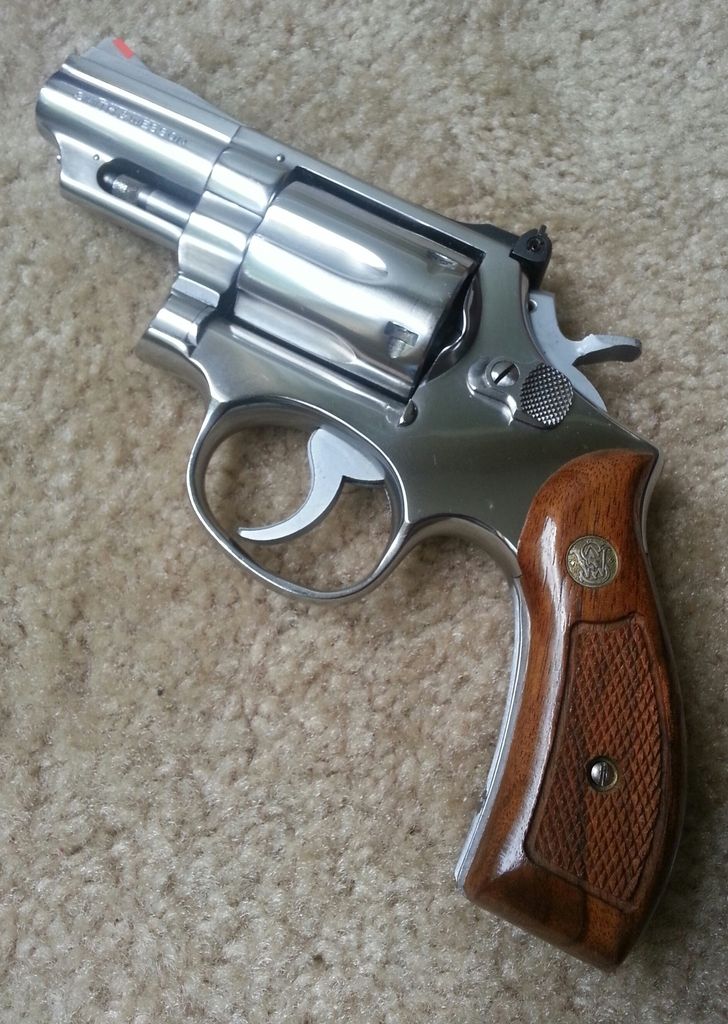
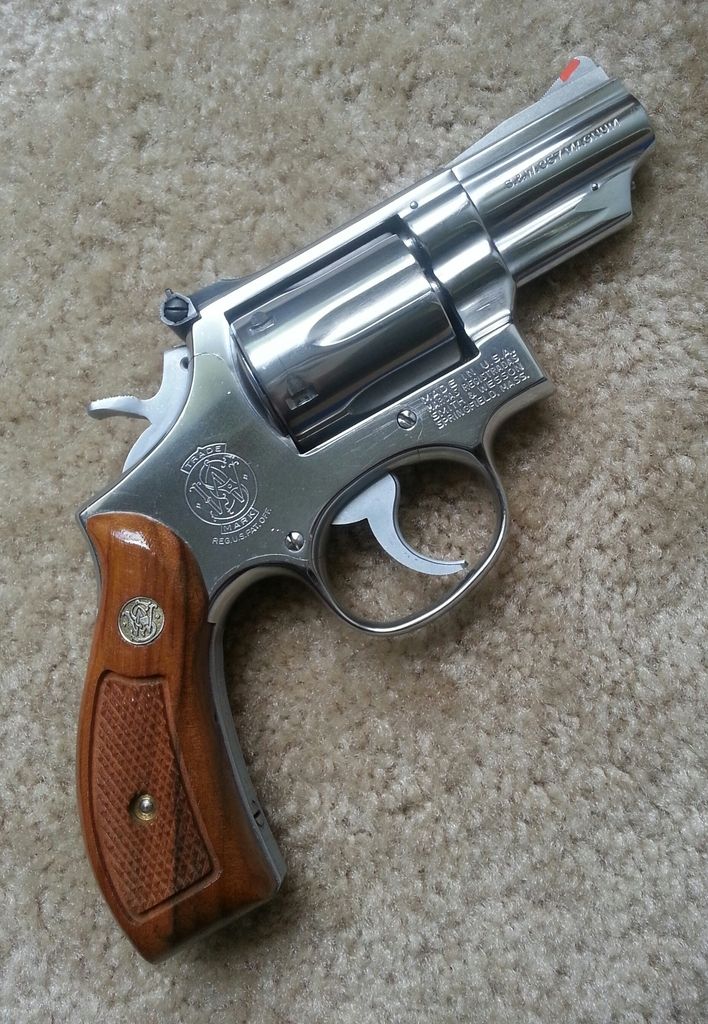
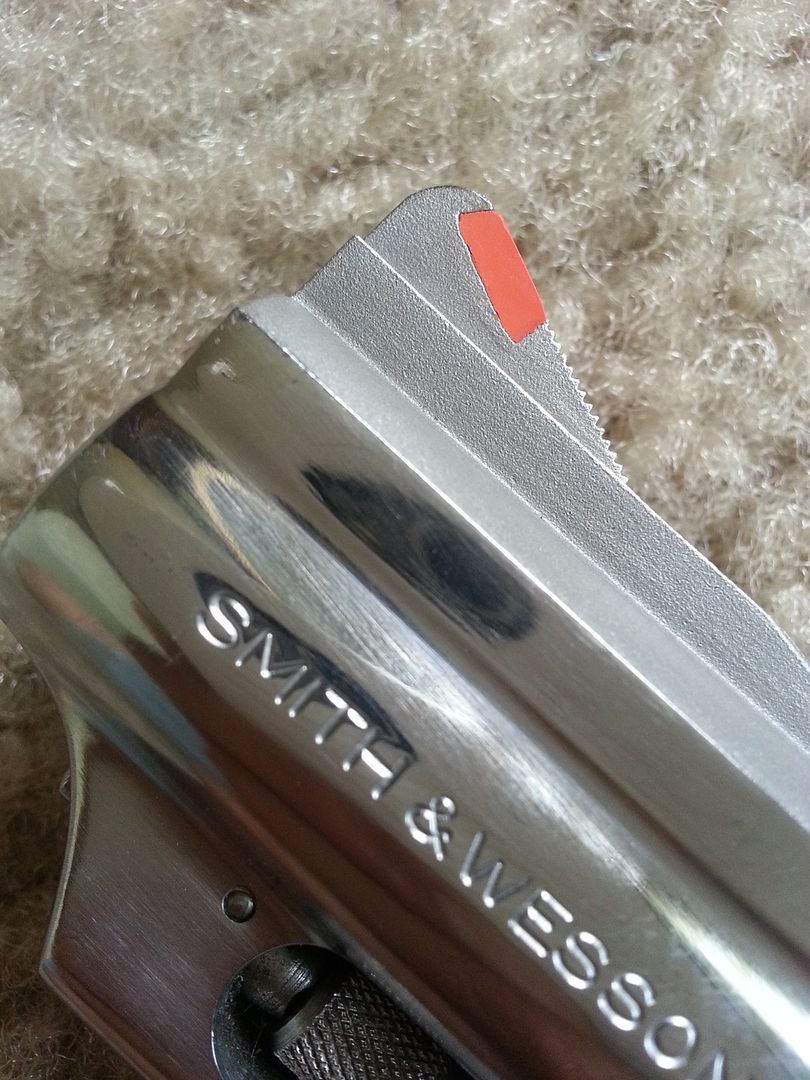
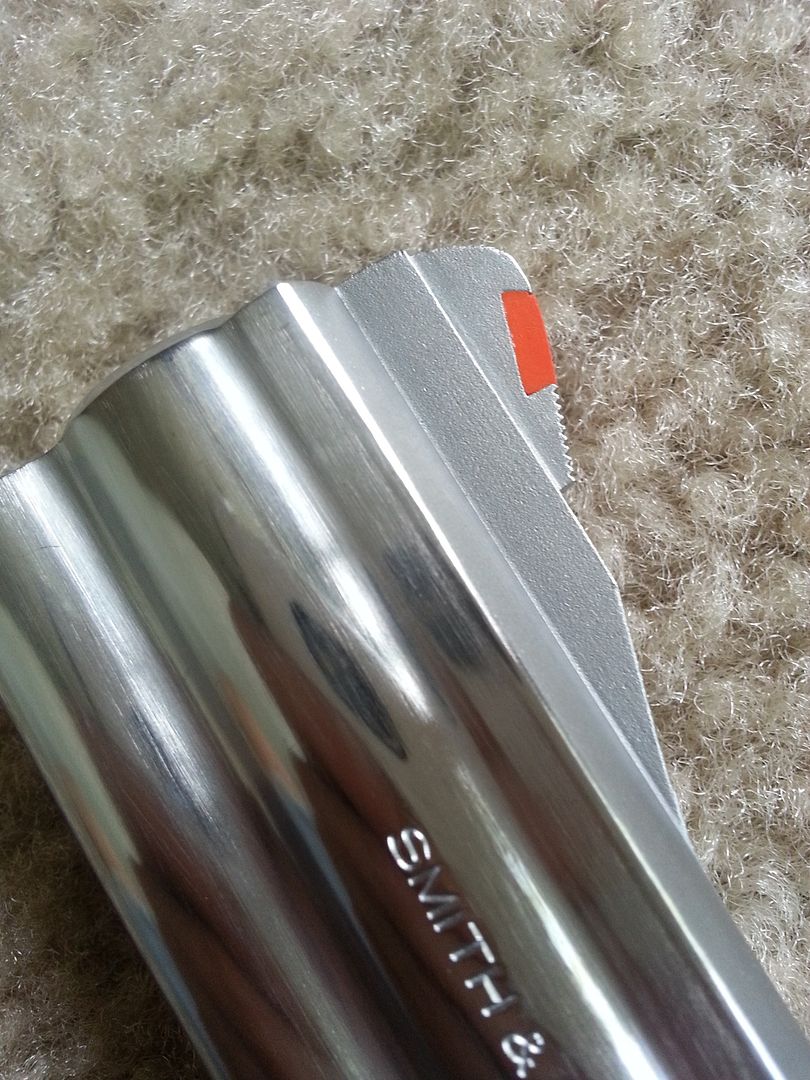
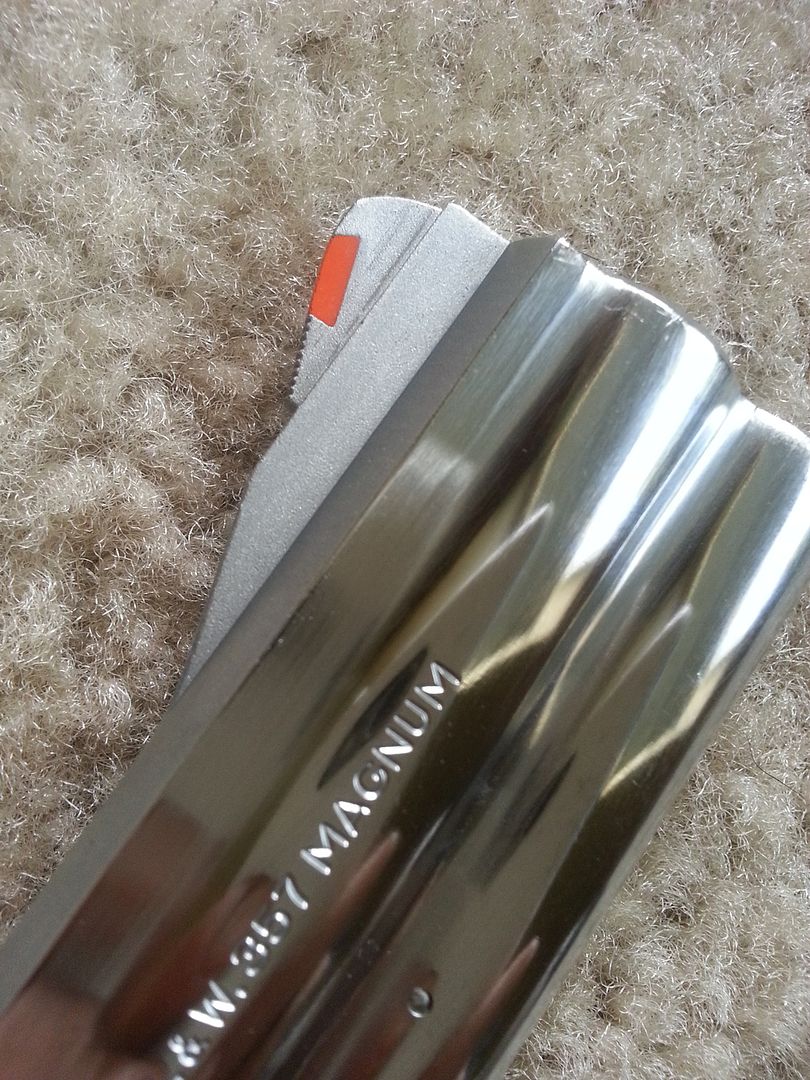
 This compares the Brownells insert color of my model 15-2 with the factory insert in my model 66 before I replaced it. This picture was taken before I finished trimming the top. It was only to show the color comparison.
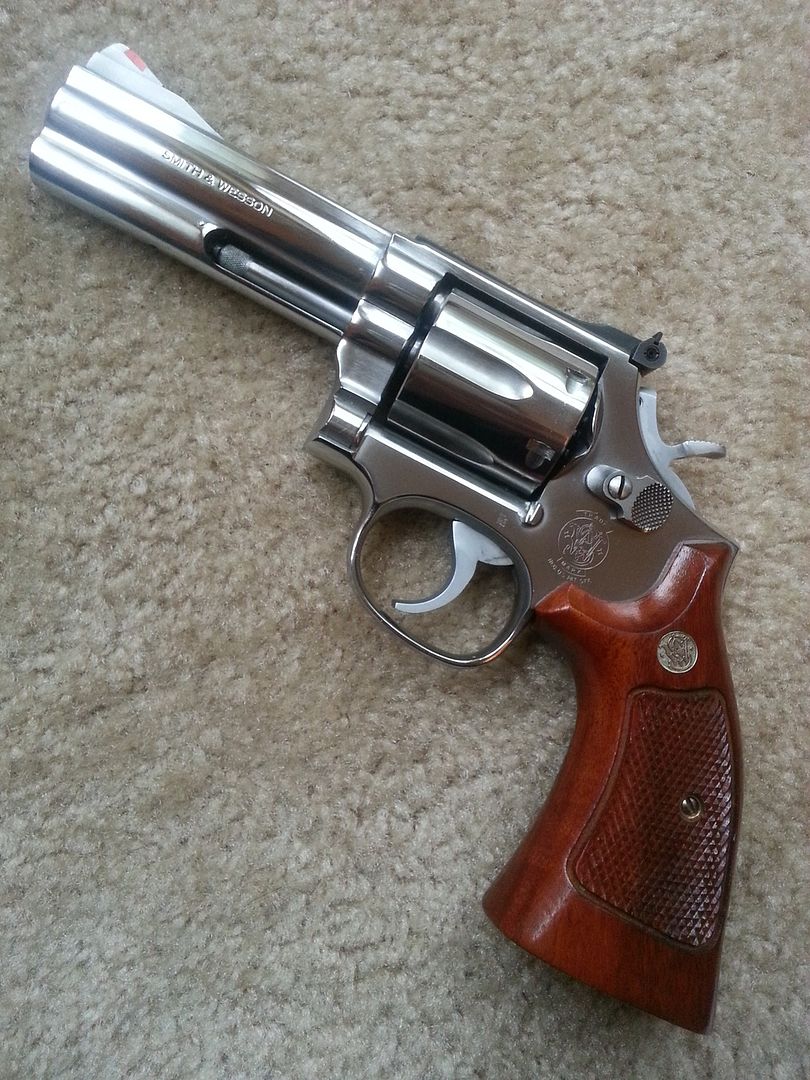
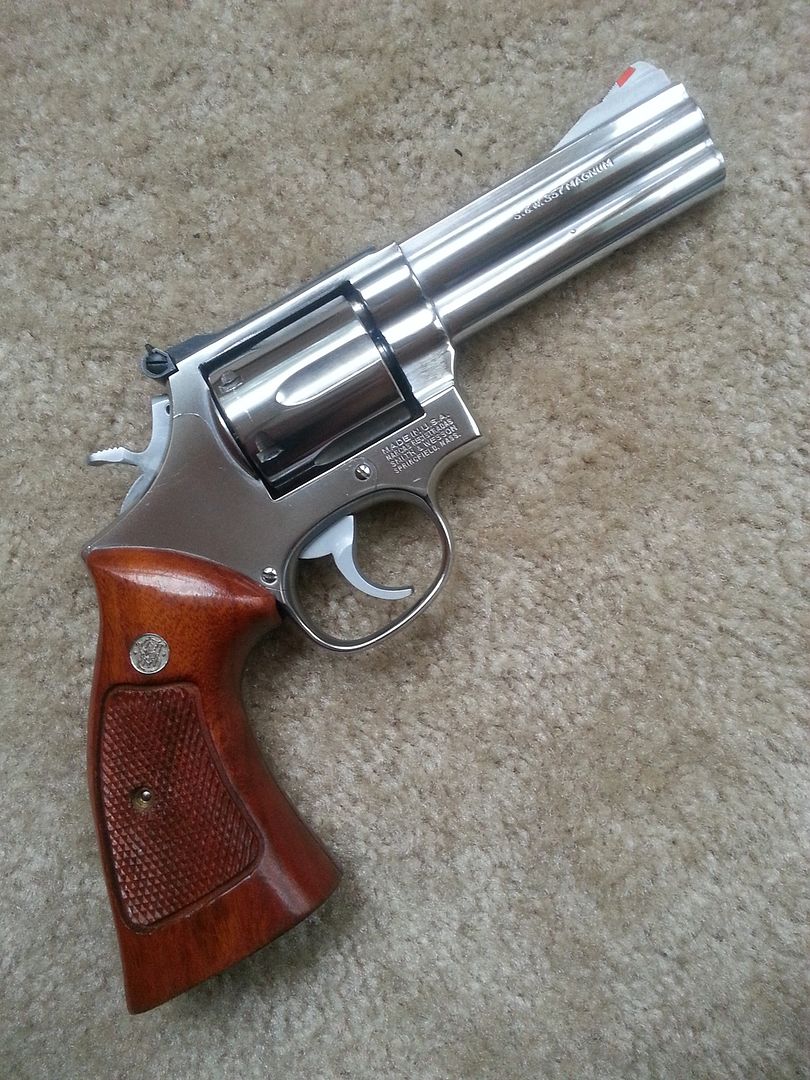
 The model 15-2 and the model 28-2 below did not come with inserts, I cut a
dovetail in both front sights and used the Brownells kit to make the new ones.
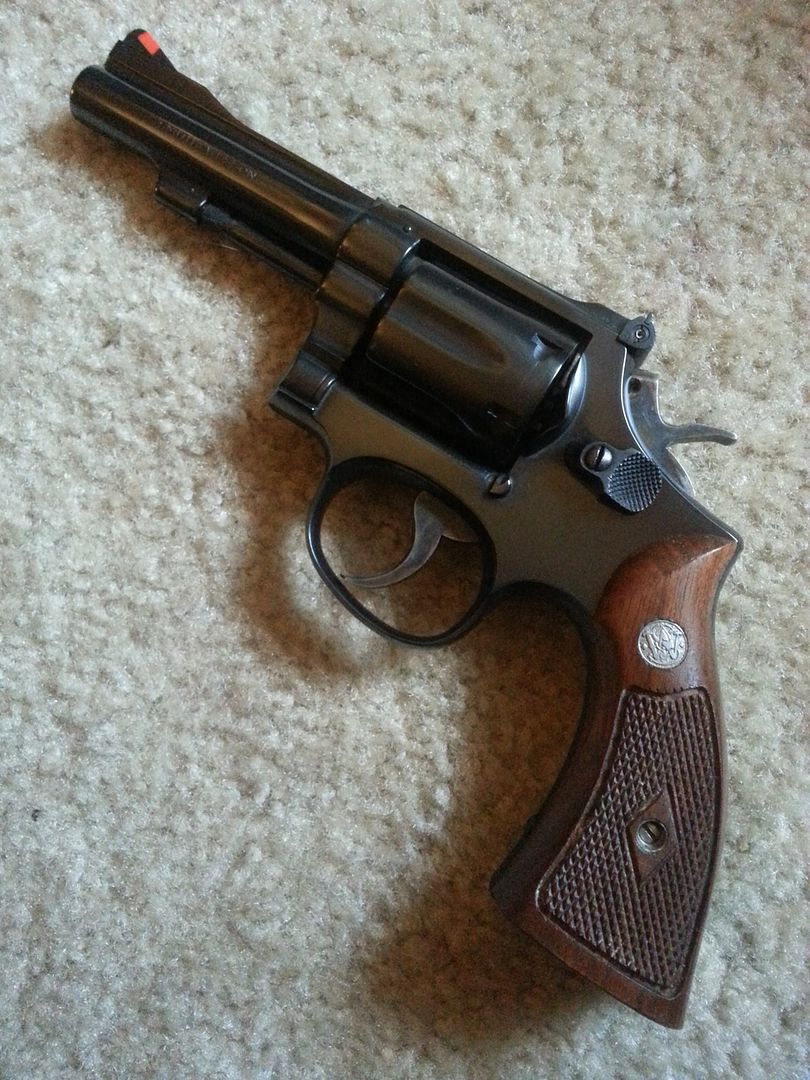
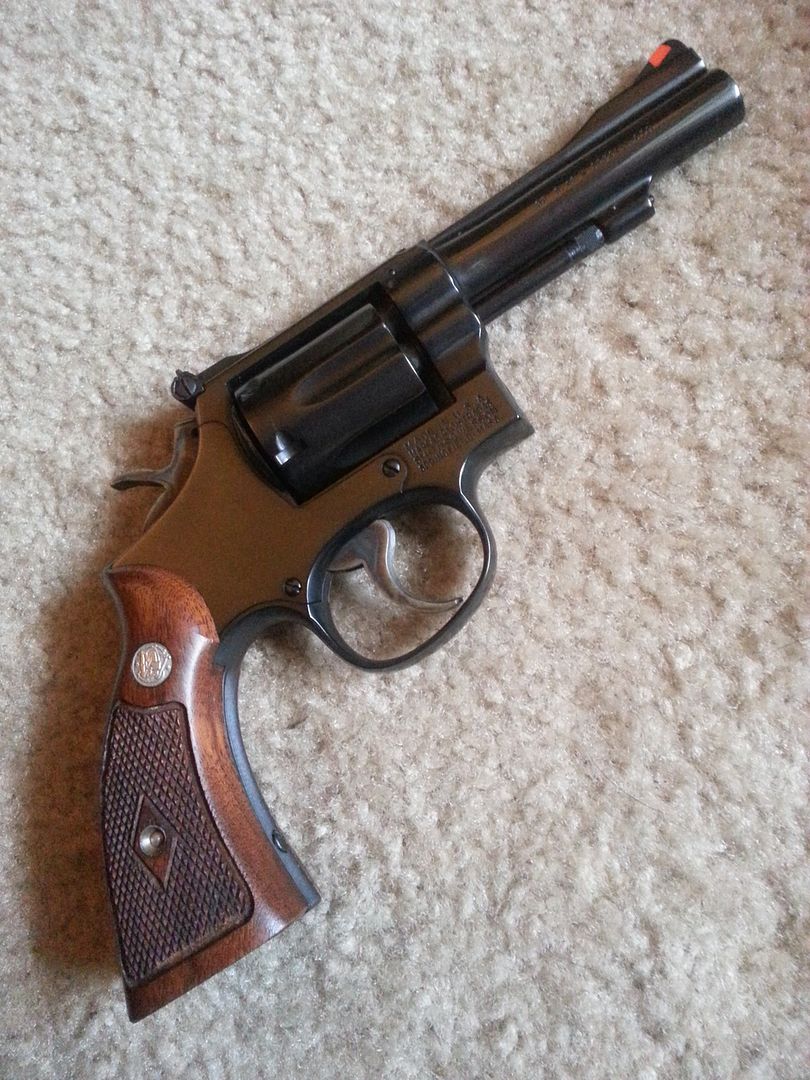
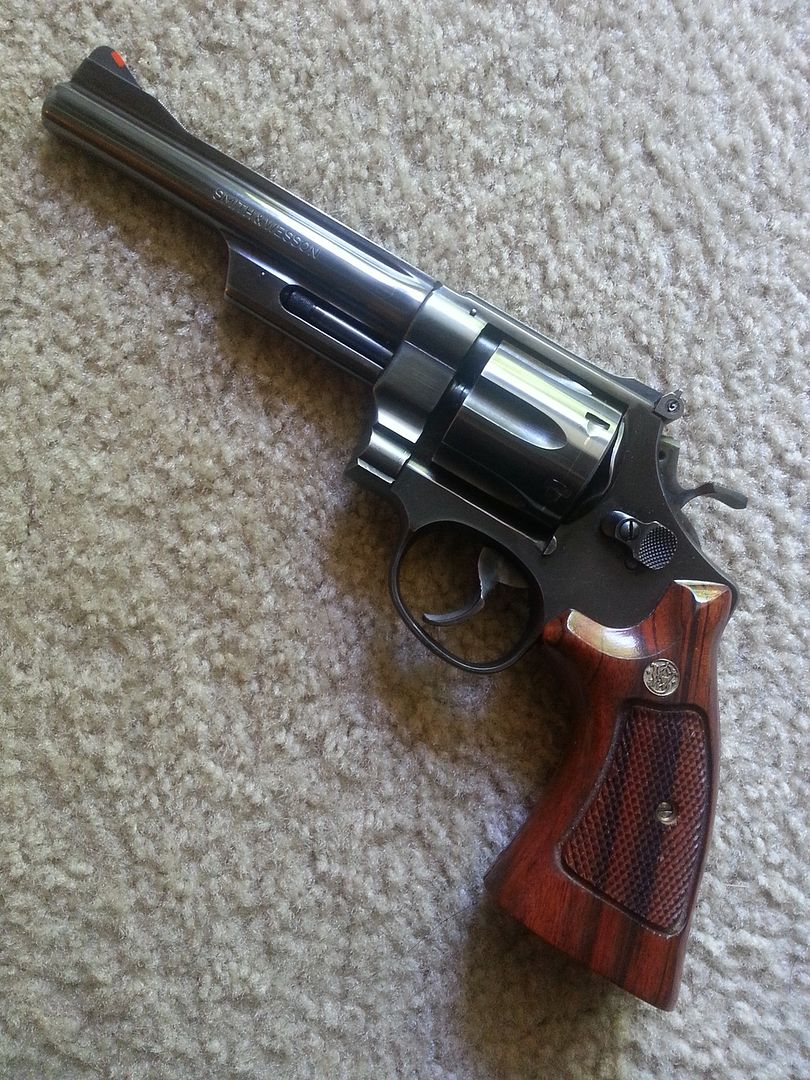
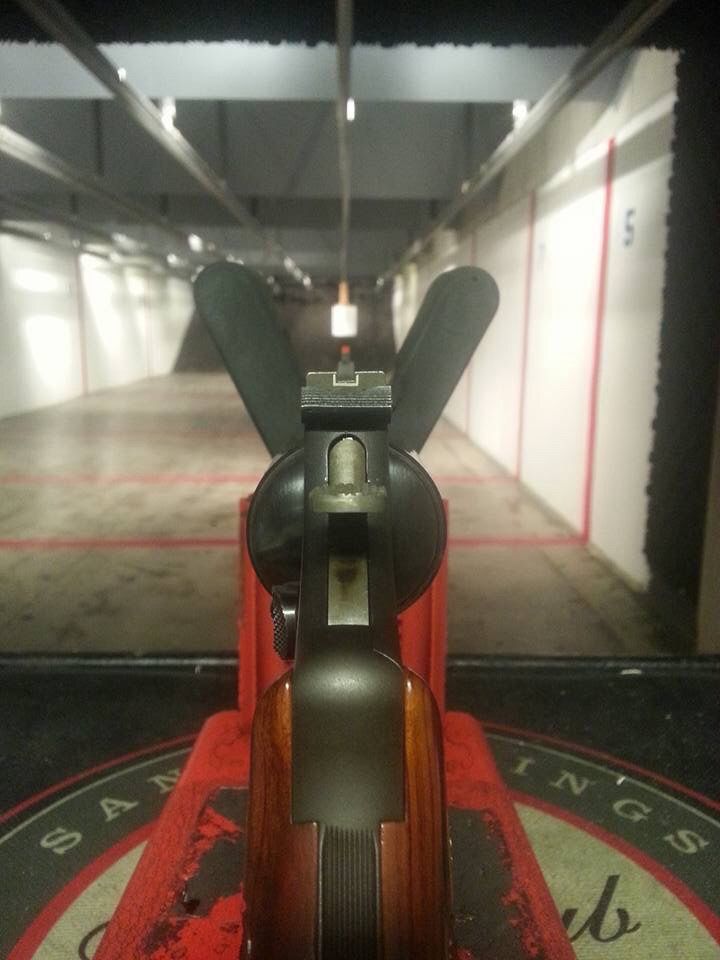 These are factory dovetails with inserts done from the Brownells kit.

__________________
USAF AMMO
Last edited by GunarSailors; 05-18-2017 at 05:10 AM.
|
|
The Following 30 Users Like Post:
|
10mmauto, 2ndshift, 5-Shot, 755, armorer951, bgrafsr, clang444, cndrdk, Collects, Dutchguy, Fishinfool, Hapworth, Jimmyjones, JohnHL, jringo8769, kraynky, kthom, lrrifleman, lscocoa, markeb, mike campbell, mscook, Muley Gil, Protocall_Design, Rick Pentecost, RKmesa, sdb321, torizus, Vildmand, weatherby |
01-10-2016, 04:31 PM
|
 |
Member
|


|
|
Join Date: Oct 2015
Location: Southern NJ
Posts: 4,681
Likes: 18,973
Liked 4,189 Times in 1,864 Posts
|
|
Thank you for this thread. I have been toying with the idea of installing a "red ramp" on my 439, but was at a loss how to do it, but I didn't want to send the pistol out!
__________________
Judge control not gun control!
|
|
The Following 2 Users Like Post:
|
|
01-10-2016, 10:21 PM
|
|
Member
|
|
|
Join Date: May 2001
Posts: 1,421
Likes: 0
Liked 947 Times in 413 Posts
|
|
All I'd add is that the insert doesn't need to be nearly as deep as some of the pictures show.
Look at pictures of S&W factory guns for good examples.
|
01-11-2016, 01:07 AM
|
|
US Veteran
SWCA Member
Absent Comrade
|


|
|
Join Date: Nov 2009
Location: upstate SC / Mtns SW Va
Posts: 4,789
Likes: 3,064
Liked 9,875 Times in 1,986 Posts
|
|
I purchased a 2 1/2" 629 that had gone to Magna port for customization. A red ramp insert was installed and it went flying the first time I shot it. I used Gunar's method with casting resin, but couldn't get the color right. My trim job was not up to snuff, so I on my second try decided to go with just the yellow. It turned out great and it shows up in bright as well as low light conditions. Try it, you'll like it.
Agree, the first time takes a lot of nerve, but subsequent inserts go much easier. Once the dovetail slot is cut, you can redo any mess ups until you get what you're looking for.
I bought my first NEW gun a couple months ago, a 44spl charter arms backpacker. I can't see the stainless steel front sight and so I'm going to put in a yellow insert ... as soon as I get up enough nerve to file that dovetail.
Charlie
|
|
The Following 2 Users Like Post:
|
|
01-11-2016, 05:39 AM
|
|
US Veteran
|
|
|
Join Date: Jun 2014
Location: Copenhagen, Denmark
Posts: 1,171
Likes: 2,972
Liked 3,764 Times in 684 Posts
|
|
Quote:
Originally Posted by crsides
I used Gunar's method with casting resin, but couldn't get the color right. My trim job was not up to snuff, so I on my second try decided to go with just the yellow. It turned out great and it shows up in bright as well as low light conditions. Try it, you'll like it.
Agree, the first time takes a lot of nerve, but subsequent inserts go much easier. Once the dovetail slot is cut, you can redo any mess ups until you get what you're looking for. Charlie
|
I struggled with the brightness when using the Castin Craft resin especially trying to get that factory orange. The trimming is pretty tough too, especially if the insert hasn't fully cured. If its still somewhat soft when you're shaping it, and you get to rocking it back and forth or from from side to side, once it does cure it will have more movement in it than if you were to have let it fully cure (for like 5 days) and then started shaping it.
It takes such a long time to even be able to take the fences off when using the casting resin, just to see if you have a good insert. That's why I prefer the Brownells kit. From start to finish I can do one in about an hour. And best of all, the colors are brighter. The orange powdered pigment that comes with the Brownells kit wasn't bright enough and I found that I could match the factory orange closest when mixing the yellow powdered pigment with just a touch of the red powdered pigment.
__________________
USAF AMMO
Last edited by GunarSailors; 04-05-2016 at 03:46 AM.
|
01-11-2016, 06:07 AM
|
|
US Veteran
|


|
|
Join Date: Feb 2005
Location: The SW Va Blue Ridge
Posts: 17,524
Likes: 89,687
Liked 24,881 Times in 8,519 Posts
|
|
Looks Good!
I have done the inserts by using a piece of toothbrush handle or any other type of colored plastic. A little more file and sandpaper time perhaps, but the results are the same.
As above, getting the dovetail just right is always the hardest part.
__________________
John 3:16
WAR EAGLE!
|
|
The Following 3 Users Like Post:
|
|
01-11-2016, 10:42 AM
|
 |
Member
|


|
|
Join Date: May 2012
Location: Evansville, Indiana USA
Posts: 6,220
Likes: 483
Liked 11,381 Times in 3,519 Posts
|
|
Great photos and tips on this procedure.
Another useful tool for doing these inserts is an additional small triangle file with one "safe" side. (cutting teeth removed) This safe sided file allows you to have more control, and open the angle cuts at each end without removing material from the bottom of the dovetail....or work on the bottom cut without cutting the end angle.
The file also makes it much easier to cut the corners/angles at each end to a very sharp point.
__________________
Ret. LE, FA Instr, S&W Armorer
|
|
The Following 3 Users Like Post:
|
|
01-11-2016, 02:14 PM
|
|
Member
|

|
|
Join Date: Mar 2013
Posts: 3,913
Likes: 7,348
Liked 8,864 Times in 3,168 Posts
|
|
Nice work - thanks!
|
|
The Following User Likes This Post:
|
|
01-11-2016, 06:04 PM
|
|
Member
|
|
|
Join Date: Mar 2012
Posts: 5,831
Likes: 3,902
Liked 5,902 Times in 2,543 Posts
|
|
You need a little more practice -- I'll be sending a few of mine so you can perfect your technique. 
|
|
The Following User Likes This Post:
|
|
01-11-2016, 06:11 PM
|
|
US Veteran
|
|
|
Join Date: Jun 2014
Location: Copenhagen, Denmark
Posts: 1,171
Likes: 2,972
Liked 3,764 Times in 684 Posts
|
|
Quote:
Originally Posted by Hapworth
You need a little more practice -- I'll be sending a few of mine so you can perfect your technique. |
Shipping might cost you an arm and a leg. Wait time on US State Department export and Danish import documentation may take a while too 
__________________
USAF AMMO
|
|
The Following User Likes This Post:
|
|
01-11-2016, 07:03 PM
|
 |
SWCA Member
|

|
|
Join Date: Oct 2002
Location: SF East Bay - "the delta"
Posts: 3,501
Likes: 1,587
Liked 4,495 Times in 1,516 Posts
|
|
Before any of the insert kits came out I was doing inserts using Devcon 2-ton Epoxy glue and Testor's Fluorescent red (1175TT) and orange (1173TT) enamel paint mixed in the glue to get the factory insert red/orange color. Can't claim it as an original idea, it was in one of the older Gun Digest Gunsmithing books (I no longer remember which one).
I first let the paint pigment separate and settle to the bottom of the bottles, then drain off all of solvent except what's needed to keep the separated pigment covered, then I dip a tooth pick in to "harvest" the pigment to mix with the epoxy.
This is a 659 stainless slide I did a long time ago, using Testor's black enamel paint... still going strong.
__________________
Conrad
SWCA #1830 SWHF #222
Last edited by Gunhacker; 06-05-2016 at 05:14 PM.
Reason: corrected spelling
|
|
The Following 3 Users Like Post:
|
|
01-11-2016, 07:12 PM
|
|
US Veteran
|
|
|
Join Date: Jun 2014
Location: Copenhagen, Denmark
Posts: 1,171
Likes: 2,972
Liked 3,764 Times in 684 Posts
|
|
Quote:
Originally Posted by Gunhacker
I first let the paint pigment separate and settle to the bottom of the bottles, then drain off all of solvent except what's needed to keep the separated pigment covered, then I dip a tooth pick in to "harvest" the pigment to mix with the epoxy.
|
Maybe that explains the oily residue left on some of the early inserts I did using the 2 part epoxy before I tried Castin Craft casting resin. I didn't separate the solvents from the pigments... The Brownells kit is so much easier and smells a whole lot better too.
__________________
USAF AMMO
Last edited by GunarSailors; 04-02-2016 at 06:11 AM.
|
01-11-2016, 09:25 PM
|
|
Member
|
|
|
Join Date: Nov 2010
Location: WINCHESTER, VIRGINIA
Posts: 3,356
Likes: 4,437
Liked 4,433 Times in 1,463 Posts
|
|
Great thread! CONGRATS!! I would add-- proper file is a 'safe' file from Brownells, the 'dimple' I found out years ago as from the factory is actually two small HOLES -- when done properly the material will flow into those, thus helping securing the insert in. You will also find that 'parchment paper' will assist in removing of the form. A checkering file will put the small grooves in the top of the insert and cut down on some glare. JMHO from doing hundereds of these in the day.
|
|
The Following 2 Users Like Post:
|
|
01-11-2016, 09:44 PM
|
|
US Veteran
|
|
|
Join Date: Feb 2005
Location: The SW Va Blue Ridge
Posts: 17,524
Likes: 89,687
Liked 24,881 Times in 8,519 Posts
|
|
Quote:
Originally Posted by GunarSailors
Thank you. How would you keep the insert secured in the front sight? Seems like a good tap in the right direction might cause the insert to pop out. The Brownells kit makes an insert that is solid as a rock if the inside on the dovetail is dimpled or drilled properly. But pouring the liquid acrylic in the dovetail and around the dimple or in the holes is the reason it's so secure.
|
You can either put a drop of Super Glue in the dovetail or you can just use a pure friction fit. I've done a bunch of them over the last 40 years and have never had anyone bring one back because the insert came out.
__________________
John 3:16
WAR EAGLE!
|
|
The Following 2 Users Like Post:
|
|
03-31-2016, 10:01 PM
|
 |
Member
|
|
|
Join Date: Mar 2014
Location: North Central Oklahoma.
Posts: 509
Likes: 13
Liked 710 Times in 202 Posts
|
|
Question- Couldn't you cut the dovetail with a mill and dovetail cutter instead of the file?
|
03-31-2016, 11:11 PM
|
|
Member
|
|
|
Join Date: Nov 2010
Location: WINCHESTER, VIRGINIA
Posts: 3,356
Likes: 4,437
Liked 4,433 Times in 1,463 Posts
|
|
Gunar-- mighty fine work-- I might add this-- a bit late, but here it is. You might consider to make your fence out of a piece of Nylon cutting board. I discovered this stuff when tying flies years ago--- I have yet found anything that would stick to it-- you can also face your fences with a small piece of parchment paper-- the bakers friend- nothing sticks to it as well and it will give the edges a nice smooth look. A checkering file is your friend for duplicating the small grooves, thus cutting down glare. JMHO-
|
|
The Following User Likes This Post:
|
|
04-01-2016, 01:39 AM
|
|
US Veteran
|
|
|
Join Date: Jun 2014
Location: Copenhagen, Denmark
Posts: 1,171
Likes: 2,972
Liked 3,764 Times in 684 Posts
|
|
Quote:
Originally Posted by spdguns
Question- Couldn't you cut the dovetail with a mill and dovetail cutter instead of the file?
|
Sure, I guess if you have one. I kind of like the idea of doing it the "old school" way (by hand, with a file). It doesnt take long to cut it, even by hand.
__________________
USAF AMMO
Last edited by GunarSailors; 04-05-2016 at 03:41 AM.
|
|
The Following User Likes This Post:
|
|
05-27-2016, 02:04 PM
|
 |
Member
|
|
|
Join Date: Mar 2013
Location: Central Kentucky
Posts: 3,090
Likes: 11,426
Liked 5,133 Times in 1,952 Posts
|
|
Great thread! I've got a couple of Blackhawks that could use that method. The simple paint on method doesn't hold up well in and out of the holster, and with cleaning solvents. Might have to put that on my list for next Winter.
|
|
The Following User Likes This Post:
|
|
05-27-2016, 11:07 PM
|
|
Member
|

|
|
Join Date: Nov 2015
Location: Montana
Posts: 595
Likes: 454
Liked 331 Times in 169 Posts
|
|
Nearly two generations ago I did several red ramp replacements with a technique remarkably like this one, with a few differences. The police-friends (uniformed, no detectives) all carried S&W M-28s, mostly 6-inch, a few with 4-inch barrels. Upon their request for a self-luminescent front sight, my solution was to visit a friend of my parents who was a watchmaker. He furnished a small can of wax that contained a white substance that is used on watch dials to cause them to glow in the dark for several hours. He recommend white rather than green because it retained luminescence longer.
I placed the open can of wax on my electric stove's burner. The wax flamed and burned away, leaving a white powder. From that point our procedures are similar. I used clear epoxy as the binder. I experimented to identify the ratio of powder to binder and have a durable insert. I also used a tiny drill to use as a combination anchor plus receptacle for yet more powder-binder.
My durability test was to whack my insert testing junker barrel randomly with a rawhide mallet 6 times. I figured if the insert stayed in place and didn't shatter, it would handle the job. The insert retained its self-luminescence longer than the shifts they worked.
In terms of how well it worked, two shooting incidents were concluded successfully, although one was precipitated by one friend being shot in the thigh. Interestingly, he was unaware that had been shot until the "duel" was over. He happened to look at his leg while holstering his revolver, saw the wound, and his leg collapsed.
Hope this helps.

|
05-28-2016, 04:41 AM
|
|
US Veteran
|
|
|
Join Date: Jun 2014
Location: Copenhagen, Denmark
Posts: 1,171
Likes: 2,972
Liked 3,764 Times in 684 Posts
|
|
Quote:
Originally Posted by Naphtali
Nearly two generations ago I did several red ramp replacements with a technique remarkably like this one, with a few differences. The police-friends (uniformed, no detectives) all carried S&W M-28s, mostly 6-inch, a few with 4-inch barrels. Upon their request for a self-luminescent front sight, my solution was to visit a friend of my parents who was a watchmaker. He furnished a small can of wax that contained a white substance that is used on watch dials to cause them to glow in the dark for several hours. He recommend white rather than green because it retained luminescence longer.
|
I did buy some glow in the dark fluorescent yellow powdered pigment off of Amazon and experimented with it in the epoxy and casting resins. Maybe it was the type of powdered pigment, but it didnt glow in the dark quite as well as I had hoped, and it seemed to affect the color brightness in the daylight. Maybe I didnt use enough.
Once I got the Brownells kit, I was so happy with the daytime brightness of it that I never experimented with using the glow in the dark pigment. If I did my shooting at night I might reconsider. But its a great idea. Thanks for sharing.
__________________
USAF AMMO
Last edited by GunarSailors; 05-28-2016 at 04:44 AM.
|
06-02-2016, 04:18 PM
|
|
Member
|
|
|
Join Date: May 2016
Location: Dallas, TX
Posts: 7
Likes: 6
Liked 9 Times in 7 Posts
|
|
Quote:
Originally Posted by Naphtali
Upon their request for a self-luminescent front sight, my solution was to visit a friend of my parents who was a watchmaker. He furnished a small can of wax that contained a white substance that is used on watch dials to cause them to glow in the dark for several hours. He recommend white rather than green because it retained luminescence longer.
I placed the open can of wax on my electric stove's burner. The wax flamed and burned away, leaving a white powder. From that point our procedures are similar. I used clear epoxy as the binder. I experimented to identify the ratio of powder to binder and have a durable insert. I also used a tiny drill to use as a combination anchor plus receptacle for yet more powder-binder.
|
Great Idea. I decided to see if I could find something similar. I did.
It's from this site.
Luminous Watch Hand Paint - Dial Luminescent Powder | Esslinger Watchmakers Tools
Kind of pricey per gram but may be worth a shot. One thing to look out for, especially way back when you did it, is these powders may be somewhat radioactive.
And I'm not sure how well they would work with colored pigments, and type of pigment (powdered vs liquid) may make a difference as well.
|
|
The Following User Likes This Post:
|
|
04-29-2017, 06:11 PM
|
|
Member
|
|
|
Join Date: Oct 2006
Posts: 6,636
Likes: 1,816
Liked 5,389 Times in 2,714 Posts
|
|
One thing I'd like to point out. Many....decades ago, I read that the orange inserts can gray out under certain lighting conditions. I regarded this as BS. Then, much later, during a match at an indoor range I visually lost my front sight.
Yeah, the circumstances have to be just right, it only happened on one stage, but I removed the sight as soon as I got home. I'd advise against the insert on a defensive pistol.
|
|
The Following User Likes This Post:
|
|
04-29-2017, 08:14 PM
|
 |
Member
|
|
|
Join Date: Feb 2017
Posts: 62
Likes: 224
Liked 59 Times in 25 Posts
|
|
I have done similar work but with Clear Epoxy and Testors model paint, also drill 2 holes at opposite angles instead of using a punch. The inserts held up pretty well.
|
|
The Following User Likes This Post:
|
|
05-01-2017, 08:10 AM
|
 |
Member
|
|
|
Join Date: Jun 2006
Location: Frostbite Falls
Posts: 1,093
Likes: 87
Liked 784 Times in 305 Posts
|
|
Quote:
Originally Posted by armorer951
Great photos and tips on this procedure.
Another useful tool for doing these inserts is an additional small triangle file with one "safe" side. (cutting teeth removed) This safe sided file allows you to have more control, and open the angle cuts at each end without removing material from the bottom of the dovetail....or work on the bottom cut without cutting the end angle.
The file also makes it much easier to cut the corners/angles at each end to a very sharp point.
|
Armorer 951 is absolutely right as that is the best file for this job. Also I've used popcycle sticks for the fences with success on many occasions. A bit more clean up but easier to find than sheet brass. If clean up is an issue you could lacquer the sticks and let them set for a few days to have a perfectly smooth surface.
|
|
The Following User Likes This Post:
|
|
05-18-2017, 05:07 AM
|
|
US Veteran
|
|
|
Join Date: Jun 2014
Location: Copenhagen, Denmark
Posts: 1,171
Likes: 2,972
Liked 3,764 Times in 684 Posts
|
|
I think I cut the brass from an old door hinge.
__________________
USAF AMMO
|
05-27-2023, 04:35 AM
|
|
US Veteran
|
|
|
Join Date: Jun 2014
Location: Copenhagen, Denmark
Posts: 1,171
Likes: 2,972
Liked 3,764 Times in 684 Posts
|
|
I hope its okay to give this one a bump..
__________________
USAF AMMO
|
|
 Posting Rules
|
|
|
|
|


 Linear Mode

