|
|
 |

02-24-2021, 09:00 PM
|
 |
Member
|


|
|
Join Date: Feb 2011
Location: PRNJ
Posts: 6,744
Likes: 477
Liked 16,748 Times in 3,308 Posts
|
|
 How tough to loosen "tamper resistant" safety screw on Mossberg 500
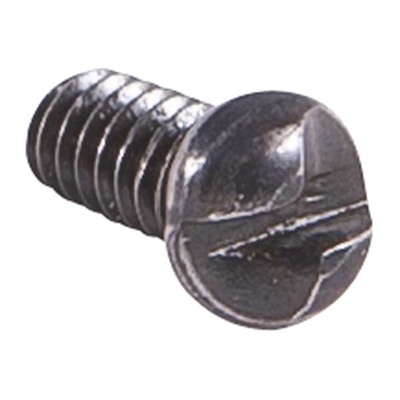
The safety button on a Mossberg 500 is made of plastic, known to be sticky, and is often replaced with one made from aluminum. But the factory button is held on with a one-way "tamper resistant" screw:
How hard to get this off?
What tool?
__________________
Buy American
Vote Responsibly
Last edited by bushmaster1313; 02-24-2021 at 09:05 PM.
|
02-24-2021, 09:29 PM
|
|
Member
|
|
|
Join Date: Nov 2007
Location: Atlanta, GA
Posts: 7,878
Likes: 3,791
Liked 11,733 Times in 3,661 Posts
|
|
Try a thick rubber band over your screwdriver blade then insert the blade into the slot in the screw head.
|
|
The Following User Likes This Post:
|
|
02-24-2021, 09:31 PM
|
 |
Member
|

|
|
Join Date: Feb 2017
Posts: 705
Likes: 533
Liked 1,016 Times in 389 Posts
|
|
It's easier than you think. I put a bit of painters tape on the head of the screw and chose a sharp screwdriver bit that fit well. Thus prepared for battle it came right out, easily.
YMMV
|
02-24-2021, 09:36 PM
|
 |
Member
|

|
|
Join Date: Feb 2005
Location: On da Bayou Teche
Posts: 18,456
Likes: 18,543
Liked 58,863 Times in 9,668 Posts
|
|
Remember it's tamper resistant NOT tamper proof 
__________________
Forum consigliere
|
|
The Following 2 Users Like Post:
|
|
02-24-2021, 09:53 PM
|
 |
Member
|
|
|
Join Date: Apr 2006
Posts: 17,800
Likes: 7,843
Liked 25,707 Times in 8,687 Posts
|
|
If you use a hacksaw blade to cut a groove into the screw head you can then use a regular screwdriver to remove it. Then replace with a regular screw afterwards.
|
|
The Following User Likes This Post:
|
|
02-25-2021, 12:28 AM
|
 |
Member
|

|
|
Join Date: Jul 2009
Location: Knoxville, TN
Posts: 98
Likes: 34
Liked 59 Times in 26 Posts
|
|
I ran into this a few years ago hanging security storm doors. I took a flat wood bit the fit the length of the slot in the head (in this case probably 3/16-1/4) and ground the point off, making the complete bit flat. Chuck it up in your screw gun and screw or unscrew away, at low speed of course.
|
02-25-2021, 08:38 AM
|
|
Member
|
|
|
Join Date: Dec 2020
Posts: 130
Likes: 3
Liked 255 Times in 97 Posts
|
|
I have more issue with the ball bearing they use to index the safety plate below the safety; mine kept slipping out of alignment and jamming the safety solid. I finally replaced it with the guide rod from a Garand extractor assembly- worked like a charm.
|
02-25-2021, 12:44 PM
|
|
Member
|
|
|
Join Date: Sep 2005
Posts: 7,748
Likes: 1,642
Liked 9,151 Times in 3,380 Posts
|
|
Grind a screwdriver blade to a decent sharp blade edge like a wood chisel.
Look at the screw head as the one way tamper proof 'ramps' as your new slot.
Place the blade of the screw driver on those ramped edges and tap it down into the metal. The chisel edge will dig into the screw head.
Then turn the screw out as normal.
|
|
The Following 2 Users Like Post:
|
|
02-25-2021, 01:03 PM
|
|
Member
|
|
|
Join Date: May 2013
Location: Denver area
Posts: 6,241
Likes: 20,269
Liked 13,093 Times in 4,169 Posts
|
|
The plastic bits and pieces are one reason I have no use for Mossberg shotguns.
The screw isnt a problem: after the plastic safety breaks, the screw is accessible with pliers and can be easily removed.
|
|
The Following 2 Users Like Post:
|
|
02-25-2021, 01:36 PM
|
 |
Member
|
|
|
Join Date: Dec 2020
Location: WA
Posts: 485
Likes: 270
Liked 642 Times in 275 Posts
|
|
Drill a small hole and use an ez out extractor
or
sell it and get a 590A1
__________________
aka "Mooncat"
Last edited by GaryHK; 02-25-2021 at 01:41 PM.
|
02-25-2021, 02:10 PM
|
|
Member
|
|
|
Join Date: Feb 2011
Location: PRNJ
Posts: 6,744
Likes: 477
Liked 16,748 Times in 3,308 Posts
|
|
Update
Found the best fitting screwdriver, pushed hard while turning slow, and the screw turned.
Thanks to all above
__________________
Buy American
Vote Responsibly
|
|
The Following 3 Users Like Post:
|
|
02-25-2021, 02:26 PM
|
|
Member
|
|
|
Join Date: Dec 2020
Location: WA
Posts: 485
Likes: 270
Liked 642 Times in 275 Posts
|
|
Quote:
Originally Posted by bushmaster1313

Update
Found the best fitting screwdriver, pushed hard while turning slow, and the screw turned.
Thanks to all above
|
Nice job. A big sigh of relief that they didn't use red loctite
__________________
aka "Mooncat"
|
02-25-2021, 07:09 PM
|
 |
US Veteran
|


|
|
Join Date: Dec 2003
Location: "Land of Disenchantment"
Posts: 3,406
Likes: 3,967
Liked 9,165 Times in 2,519 Posts
|
|
Quote:
Originally Posted by GaryHK
Drill a small hole and use an ez out extractor
or
sell it and get a 590A1
|
You answered my question!
I replaced the safety on my Shockwave (590), and didn't have to deal with that silliness. Wondered if this was just a 500 thing. Thanks.
__________________
Only a cold warrior
|
02-25-2021, 07:13 PM
|
|
Member
|
|
|
Join Date: Dec 2020
Location: WA
Posts: 485
Likes: 270
Liked 642 Times in 275 Posts
|
|
Quote:
Originally Posted by Sistema1927
You answered my question!
I replaced the safety on my Shockwave (590), and didn't have to deal with that silliness. Wondered if this was just a 500 thing. Thanks.
|
I know that the 590A1 has a metal trigger assembly and safety. I did not know that the regular 590 receiver did away with the one way screw, good thing for you. Both the 500 and 590 have plastic safeties.
Also, for those who care, you can use 835 barrels on 6 shot (5+1) 590A1 and 590 so if you want a solid HD gun but also want to hunt birds or clays, you can.
__________________
aka "Mooncat"
Last edited by GaryHK; 02-25-2021 at 07:15 PM.
|
02-28-2021, 09:47 AM
|
|
Member
|
|
|
Join Date: Feb 2011
Location: PRNJ
Posts: 6,744
Likes: 477
Liked 16,748 Times in 3,308 Posts
|
|
Second update
The metal safety button came in the mail, along with a hex head screw and a poorly fitting hex wrench. Got the factory installed "tamper resistant" screw out with no problem using a tight-fitting flat end screw driver. The screw had a tiny bit of white factory installed thread lock, but the gun is not new and the thread lock was old and brittle. I knew from a video to have the action fully open, to keep my finger on the safety button when releasing the screw and to take care not to lose the ball bearing detent. Of course, the ball bearing dutifully fell into the action  
Was able to get the ball bearing out of the action by turning the gun upside down. Of course, I then had to crawl around on the floor to find it 
Finally got the safety button installed -- but of course, it's still very stiff. I plan to keep it in the "fire" position at all times, except for periodic manipulation to make sure it does not freeze.
__________________
Buy American
Vote Responsibly
Last edited by bushmaster1313; 02-28-2021 at 09:58 AM.
|
02-28-2021, 11:43 AM
|
|
Member
|
|
|
Join Date: Oct 2006
Posts: 6,636
Likes: 1,816
Liked 5,388 Times in 2,714 Posts
|
|
Quote:
Originally Posted by bushmaster1313
Second update
Was able to get the ball bearing out of the action by turning the gun upside down. Of course, I then had to crawl around on the floor to find it |
One of the best tool investments I ever made was for a 3 inch diameter magnet on a 3 foot stick. Over the years it's "found" more fasteners and small parts than I care to remember.
Last edited by WR Moore; 03-01-2021 at 08:05 PM.
|
|
The Following User Likes This Post:
|
|
02-28-2021, 12:09 PM
|
|
Member
|
|
|
Join Date: Feb 2016
Location: Huntsville AL
Posts: 2,119
Likes: 1,168
Liked 2,657 Times in 829 Posts
|
|
Installed NDZ button and a little dab of grease on the detent. Was lucky the tamper proof screw had already been replaced.
|
|
The Following User Likes This Post:
|
|
02-28-2021, 12:20 PM
|
|
Member
|
|
|
Join Date: Apr 2005
Location: sw pa
Posts: 935
Likes: 361
Liked 603 Times in 247 Posts
|
|
I see that you were able to replace it. My safety broke in half on about the 5th 3" mag I was using to sight it in. I used a needle nosed vise grip to unscrew it and replaced it with a metal one. I don't know why they used a plastic one when the Ward western Field that I bought used for my son came with a metal one ( 60's vintage)
|
|
The Following User Likes This Post:
|
|
02-28-2021, 01:59 PM
|
|
Member
|
|
|
Join Date: Jan 2009
Location: Metro Detroit, Michigan
Posts: 6,926
Likes: 179
Liked 4,301 Times in 2,112 Posts
|
|
On rare occasions the ONLY choice for assembling replaceable inserts it a forming tool is to use a hex socket flat head screw. In one particular application that screw is a #6. Flat head screws have a tendency to sieze in the seat if left in place for an extended screw and those hex sockets are tiny and strip easily. The simple solution for me is to use what I call a prick punch and hammer. Note make the prick punch by getting out an obsolete die hole punch and grinding the tip to a needle sharp point. Note, these hole punches are typpically M2 tool steel which is both very hard and very tough and resistant to chipping. Take that needle punch and out near the outer rim of the screw use a hammer to put in a nice deep prick mark (a sharper version of a center punch). Then angle your prick punch and hammer it in the loosen direction. One you have it loose you can usually spin the screw out by walking the prick punch in a circle in the dimple.
|
02-28-2021, 05:51 PM
|
|
US Veteran
|
|
|
Join Date: Dec 2003
Location: "Land of Disenchantment"
Posts: 3,406
Likes: 3,967
Liked 9,165 Times in 2,519 Posts
|
|
This is the style safety I put on the Shockwave. I have been very happy with it.

__________________
Only a cold warrior
|
|
 Posting Rules
|
|
|
|
|


 Linear Mode

