After having read tons of threads here about how to cope with my decidedly gritty-feeling trigger on my pretty-much-brand-new, 50 whole rounds through it M&P 9mmFS, having watched the referenced Youtube a half-dozen times, and after having chased down a proper piece of brass rod to use as a drift, tonight I tackled the "polish the striker safety bore to eliminate burrs" process.
I'd done the test using rearward pressure on the striker blocker, and it seemed to fail this - - I could feel less-than-smooth motion as the part retracted.
Things went fairly easily, excepting my carefully-made sight-locating pencil marks wiping right off the first time I touched the slide

. The set screw came out easily, the brass rod smoothly moved the rear sight aside, and I did not lose the spring or cover for the striker block.
Rather than using the harsh-looking dremel stone the gent in the video used, I opted for some fine rubber abrasive tools I use for smoothing engine parts, and finished with 1000-grit silicon carbide paper wrapped on a brass rod, hand-operated.
Things looked shiny-smooth in there when I was done. no perceptable burrs or drill marks left.
I cleaned everything carefully, put everything back together, and with the sear disconnect still lowered I tried the trigger pull.
Still gritty; no real change. Felt like you could count about ten little catches or snags spaced throughout the trigger pull.

This made me mad, so I started going over the FCG interior parts with a jeweler's loupe.
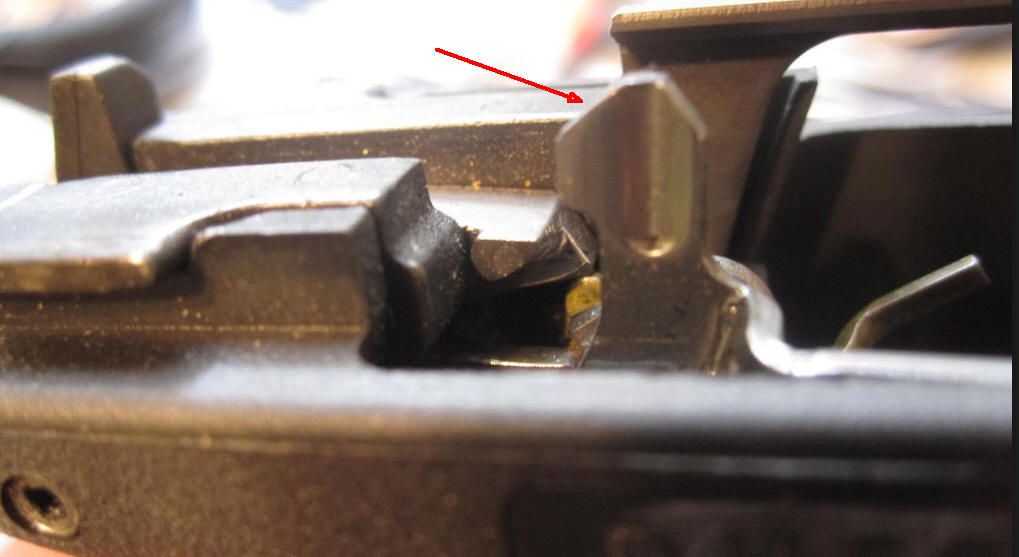
Quite quickly, I found a suspect; the raised 'cam' or actuator on the trigger bar that actually lifts the striker blocker, which is a stamped and formed piece of sheet steel, was not smooth on the cut diagonal face that actually moves across the bottom of the striker blocker; it looked as if the cutting die that made it had gotten dull, and there were about a dozen sawlike striations or grooves running across it. They were barely visible to my naked eye, but in the loupe they looked like a straight-cut file.
Aha.
I took some 1000-grit paper, wrapped it tightly around an old guage-block I have to stretch it flat, and carefully lapped out the grooves until the flat edge was mirror smooth, being sure to keep the angle unchanged & the edges unrounded. Took maybe 10 minutes work.
Put the gun back together, and tried the trigger.
Smooth
As
Butter
With a nice tactile break at the end.

I'm calling it a win, even if I did go the long way around to get there and had to spend 30 more minutes with a laser boresight getting the rear sight tapped back into hopefully the right place.
So, for the record, check the striker blocker actuator's rear diagonal face for tool-marks before you go after the blocker bore - - you just might save an hour or two.


 Linear Mode


