|
|
 |
|

01-19-2016, 07:36 PM
|
 |
US Veteran
|


|
|
Join Date: Jun 2012
Location: SW Mississippi
Posts: 1,348
Likes: 2,224
Liked 6,204 Times in 1,040 Posts
|
|
 10mm Conversion Lab - C'mon in Y'all
Well, my 4566TSW project is on the back burner until I get some parts back from Houston so, I'll proceed to mess with some other stuff.
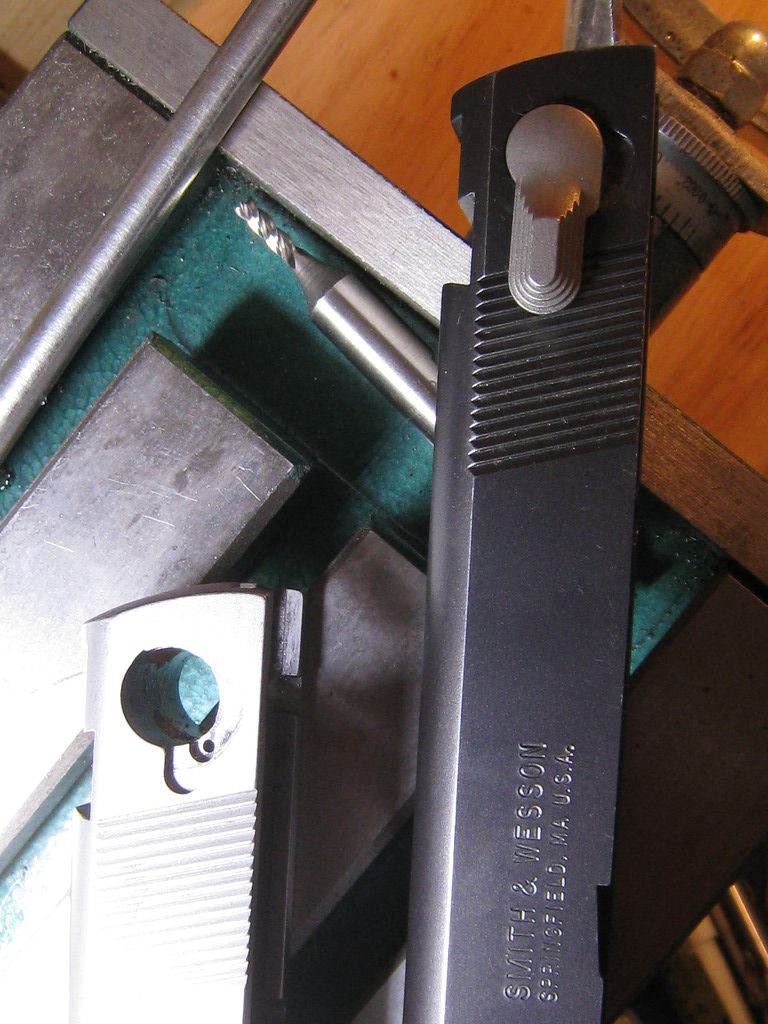
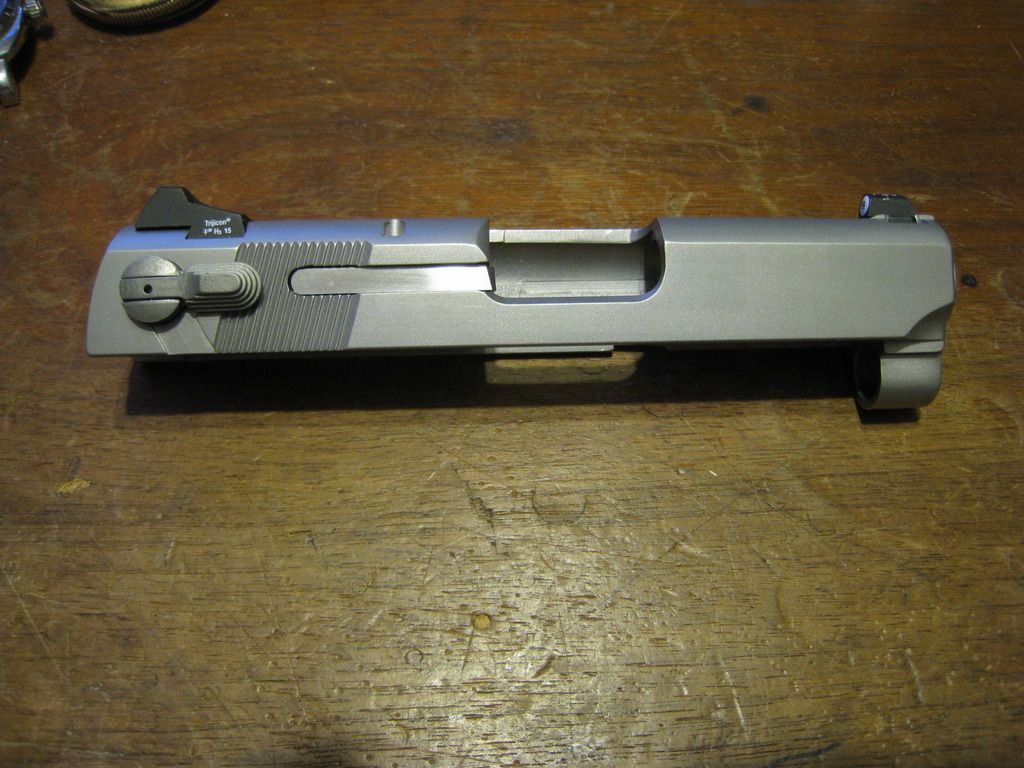
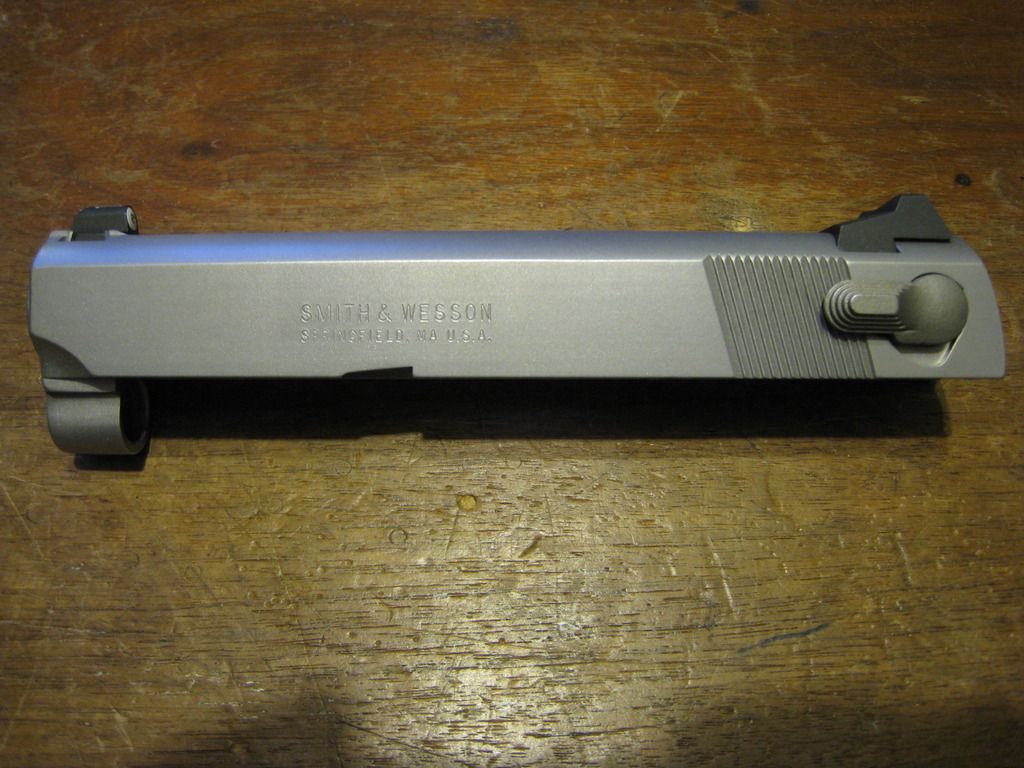
What we have here is a couple old 40xx uppers. As you can plainly see, one's a 4013 and the other a 4014.
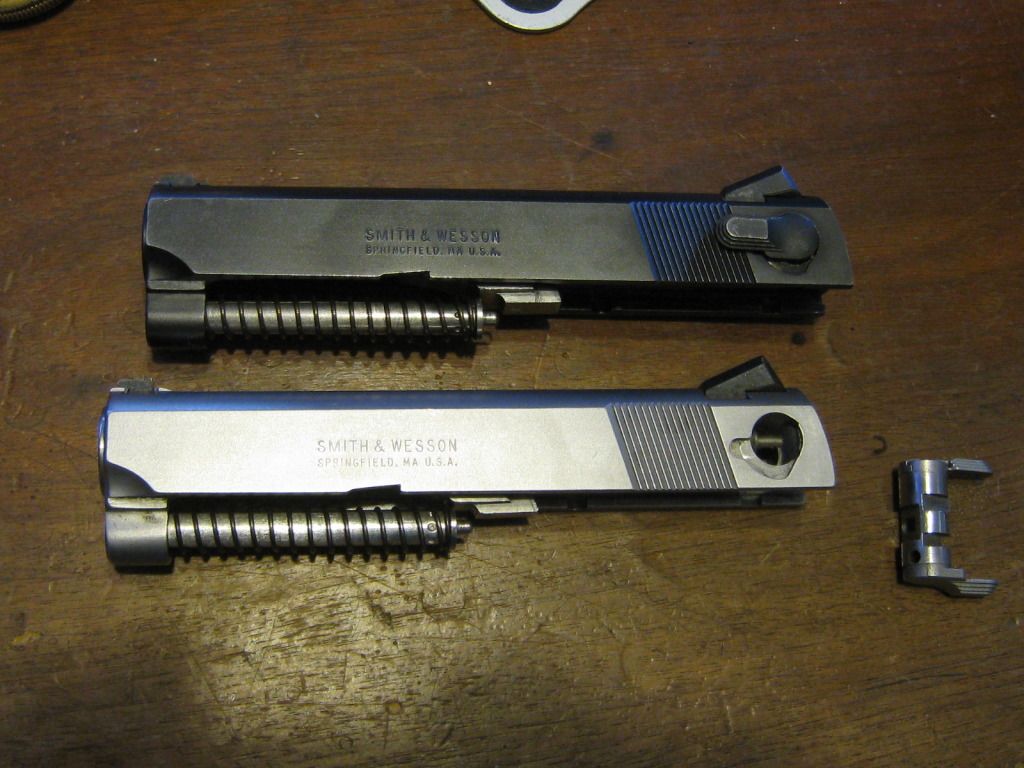
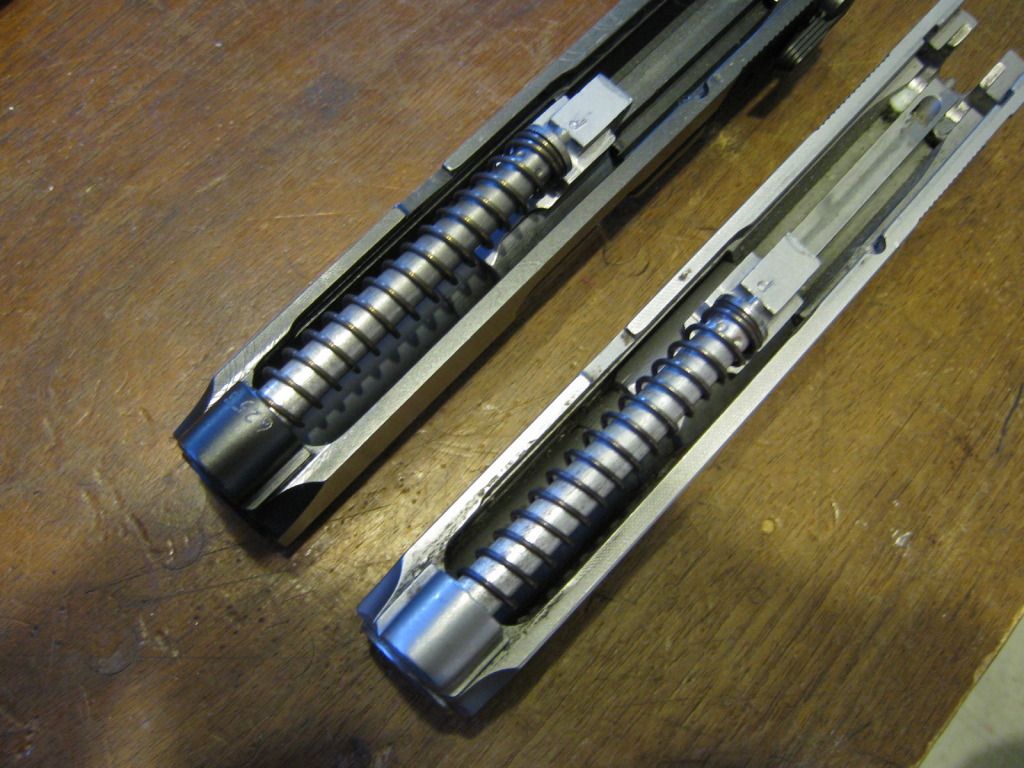
Both are early versions with the fat 0.290 staked guiderod, one being aluminum and the other stainless with a single roundwire recoil spring.
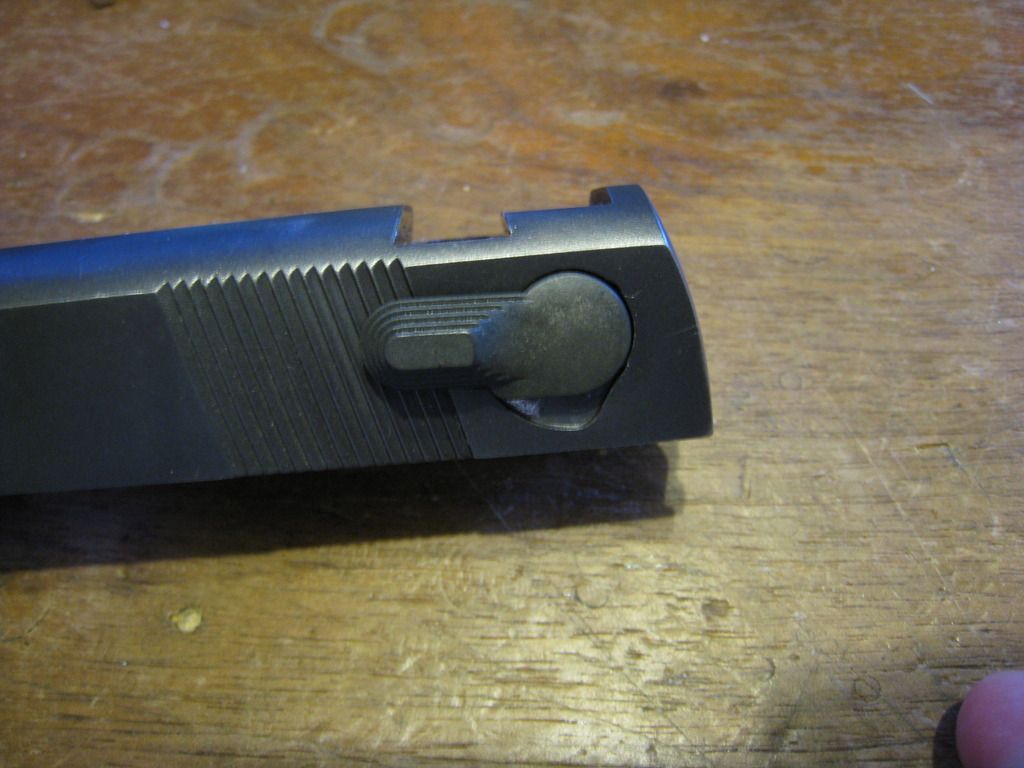
Narrow barrel hood/tab and standard three dot low-mount Novaks.
What were gonna do here is turn both of these into 10mm pocket rockets. And along the way fix up a few more things; Lots of cleanup, new sights, cut for spring loaded decocker, sort out a new recoil assembly, and a bit of polish here and there. And of course re-chamber the barrels to 10mm auto.
First order of business, I'm going to see to the recoil spring setup. Big surprise... Were gonna use a ISMI spring  I'm not going to cut up any factory parts for this so I'll be making the guiderods completely from scratch.
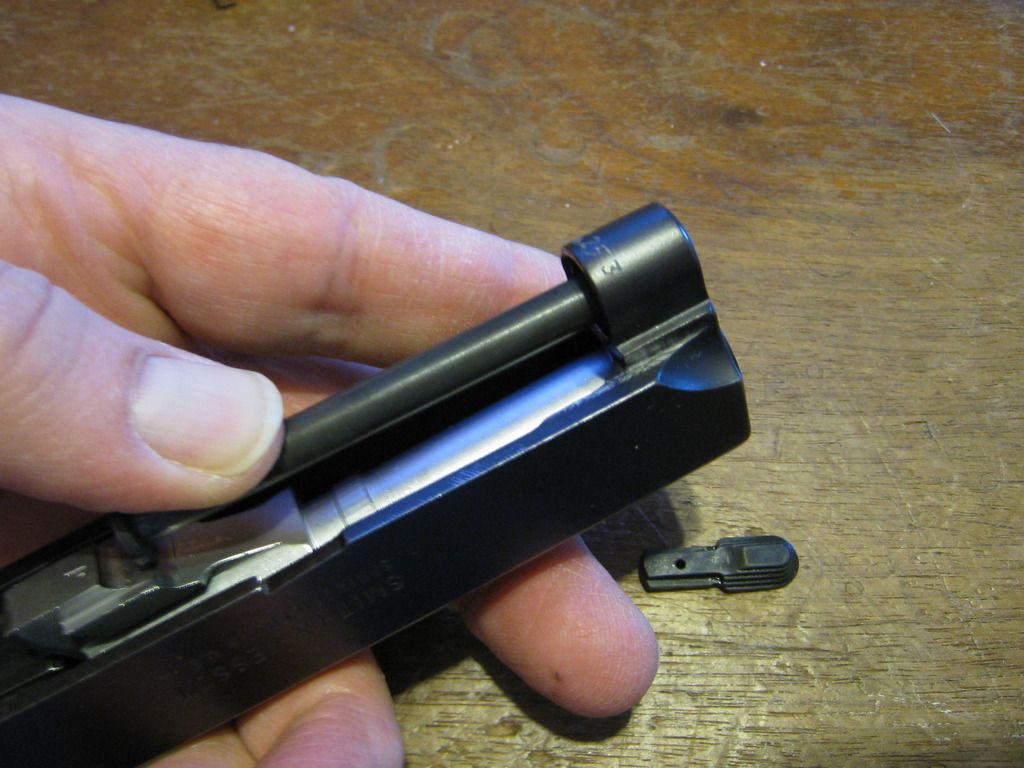
Now since the flatwire spring runs on a quarter inch diameter guiderod, I will need to do something about those huge holes in the end of the spring tunnels.
I know!... lets make some bushings. ")
I have a couple stubs of 416 stainless in the bin I think will do nicely. So lets dust off my little lathe and make some swarf. 
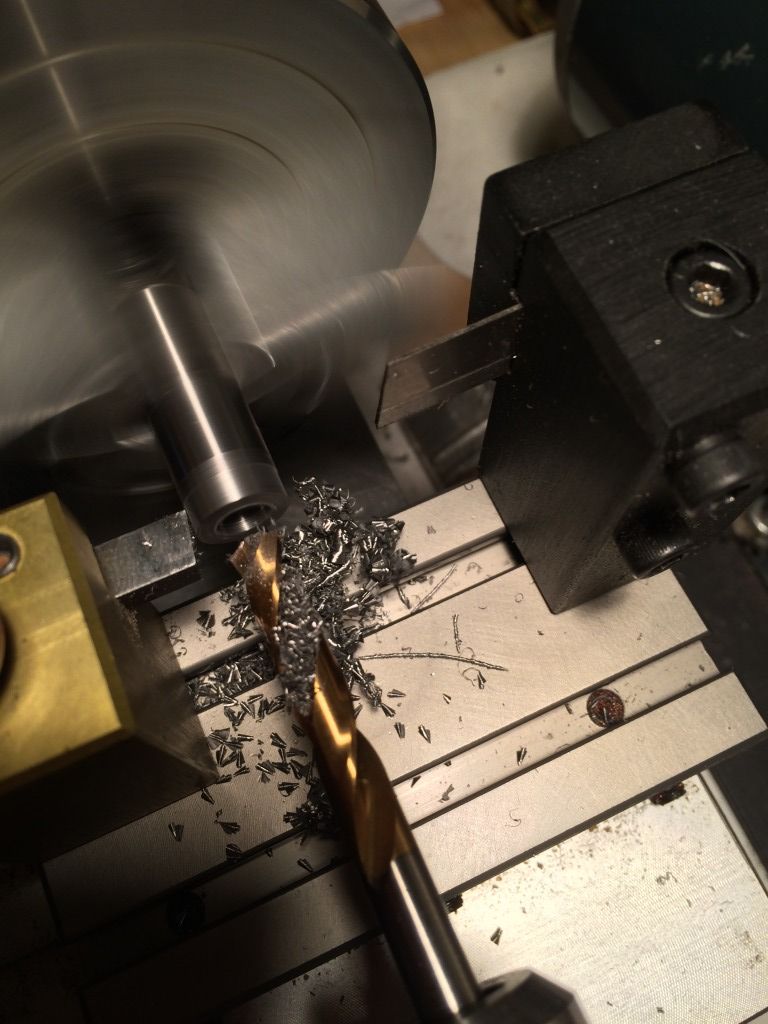
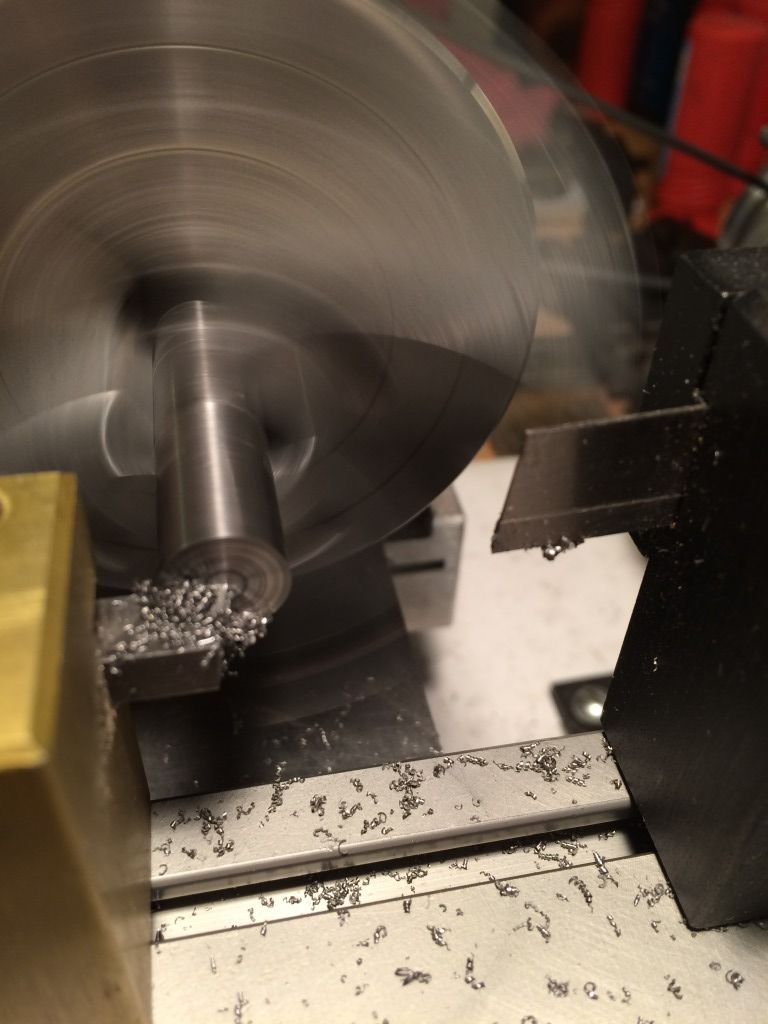
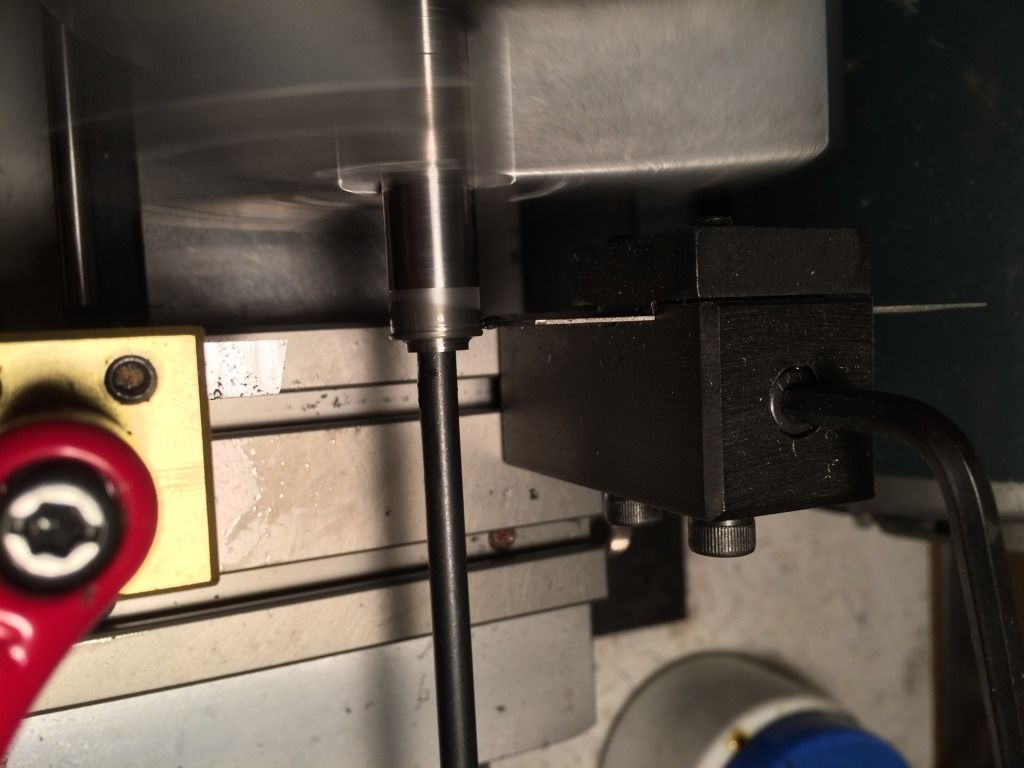
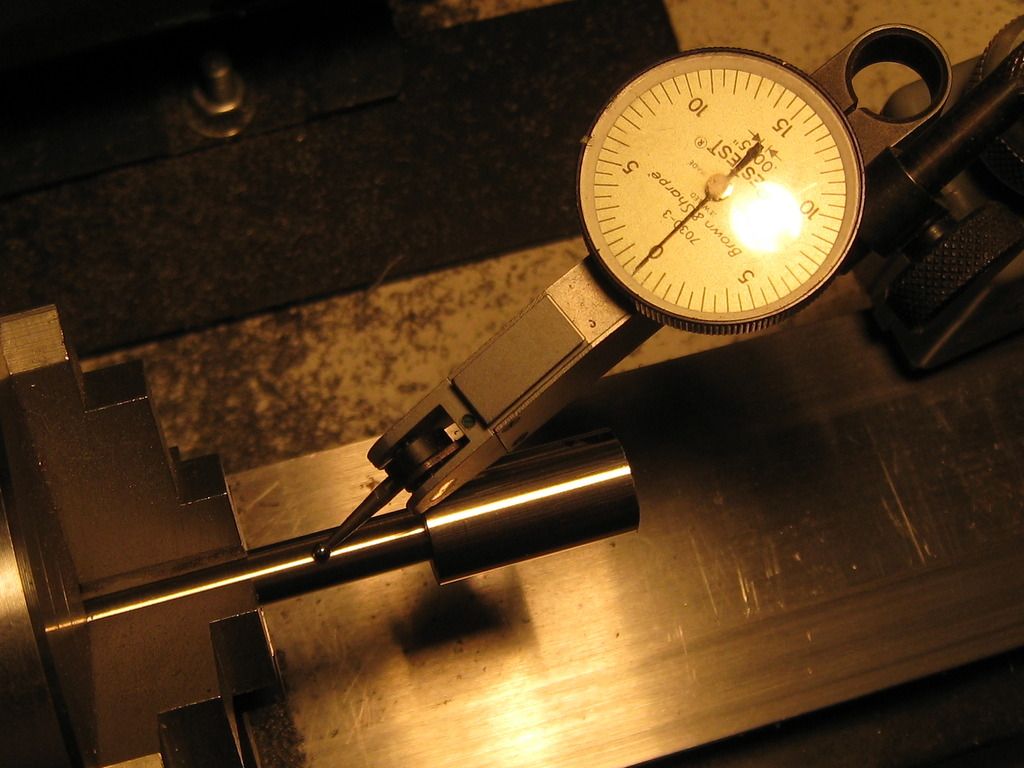
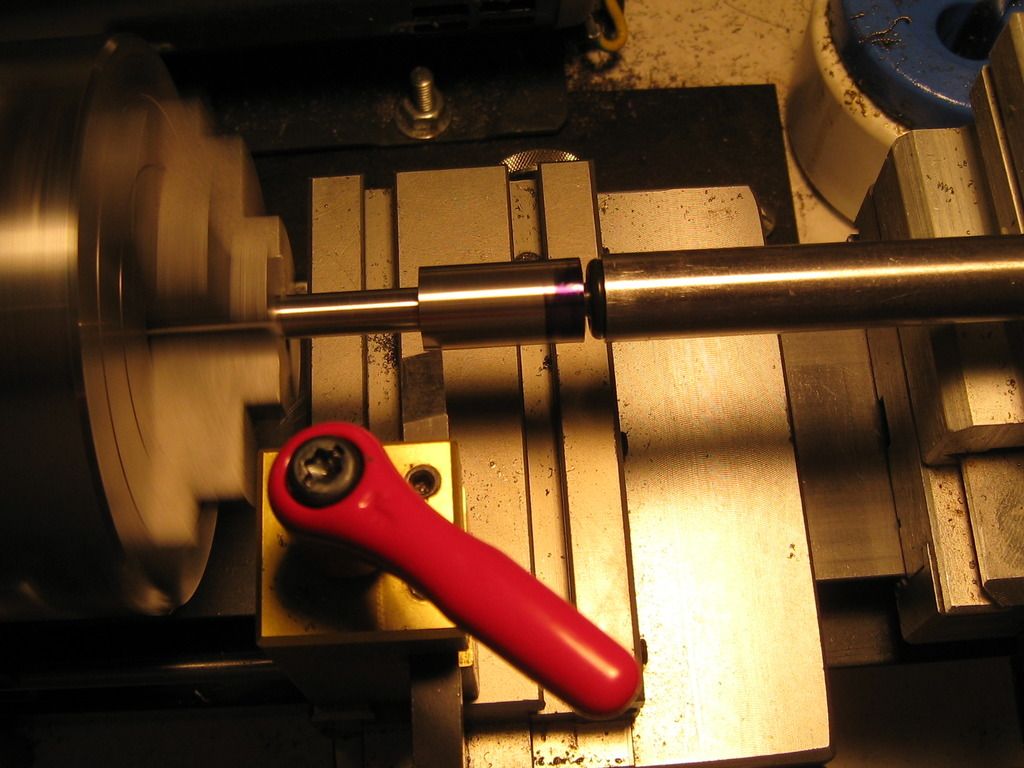
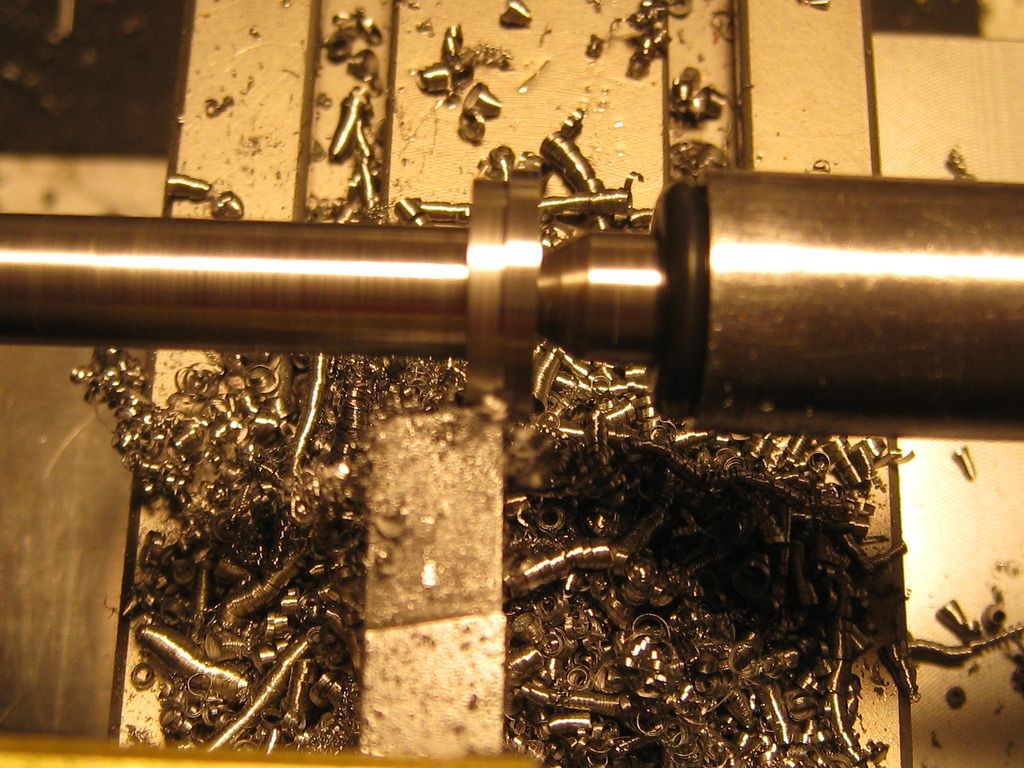
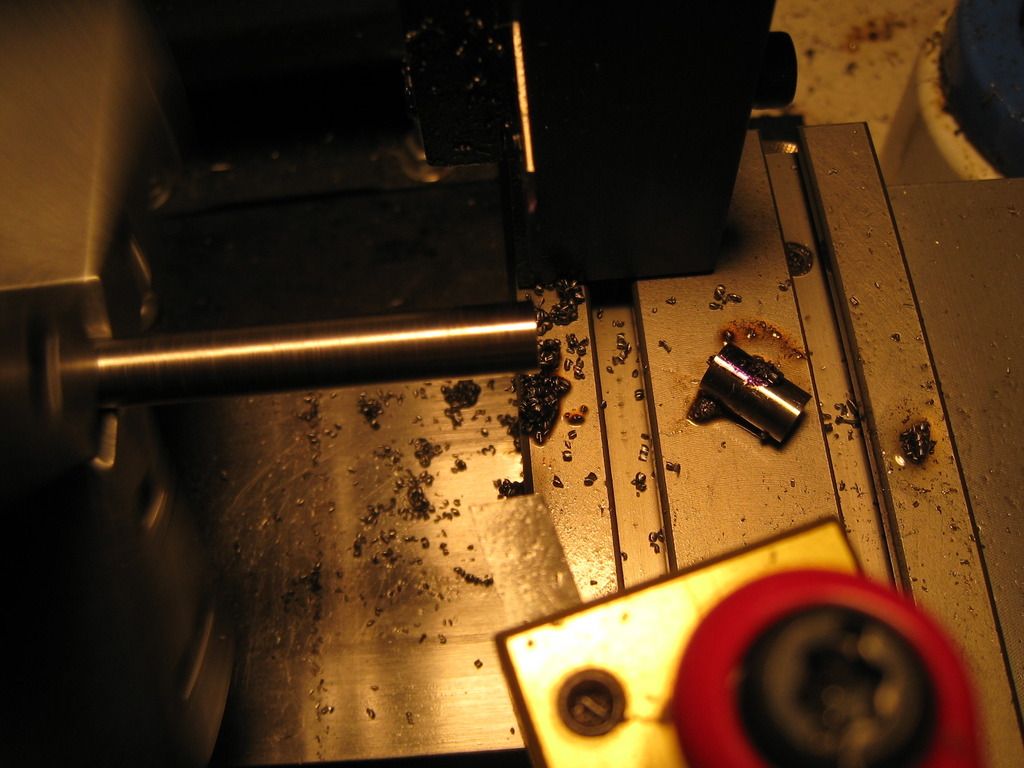
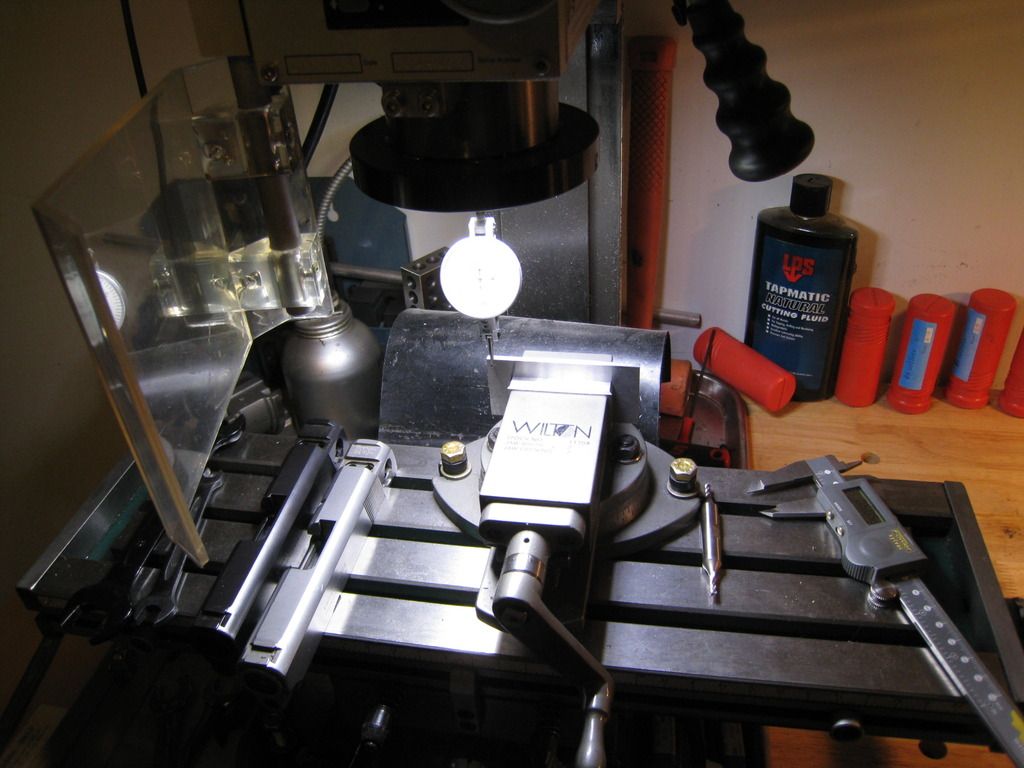
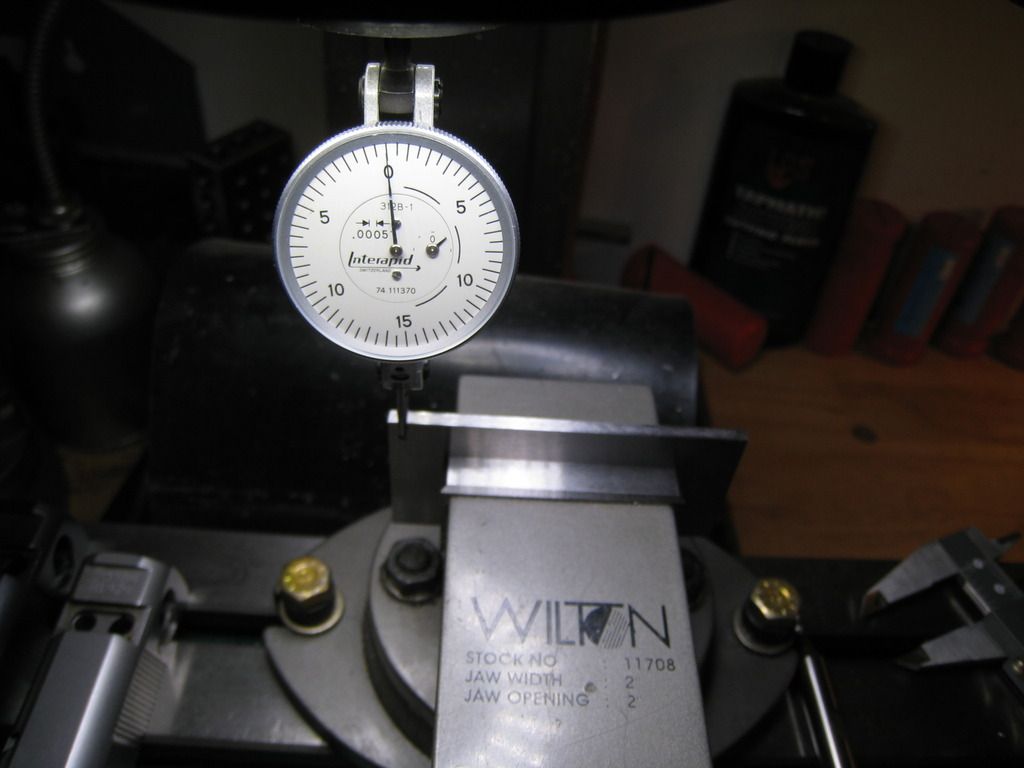
Here's a piece in the chuck indicated to withing 0.0005". This is a leftover piece from the last time I made some bushings. I think I can squeeze one more out of this. I've already faced the part and turned the OD down to 0.427 to fit the 4013 slide.
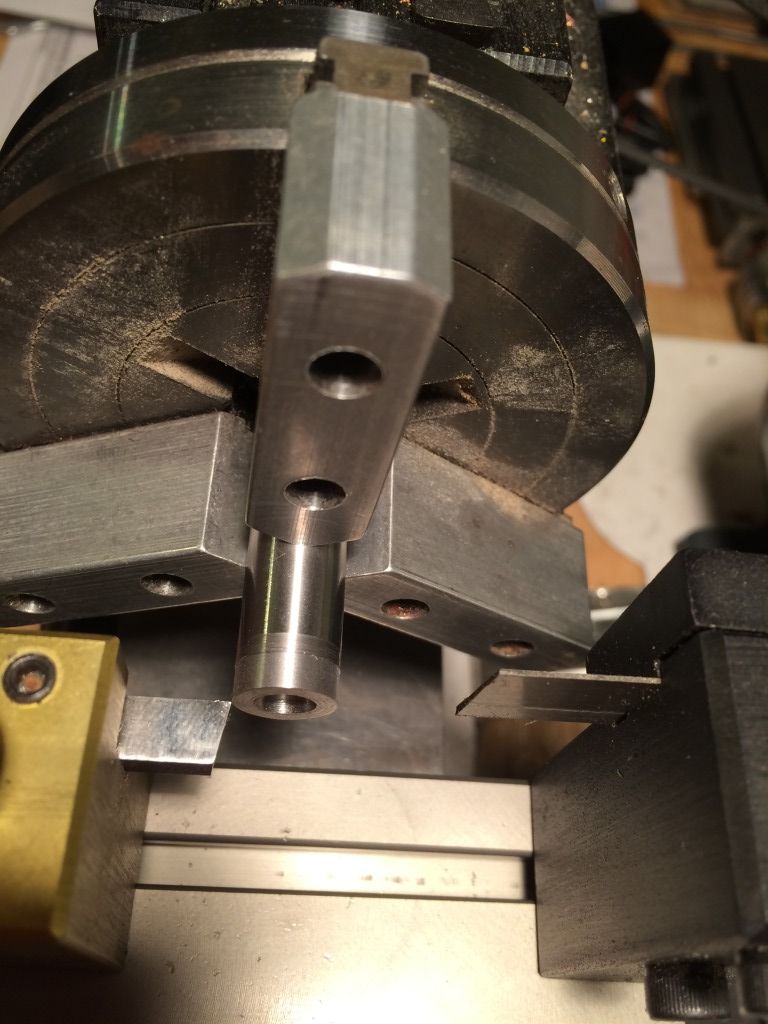
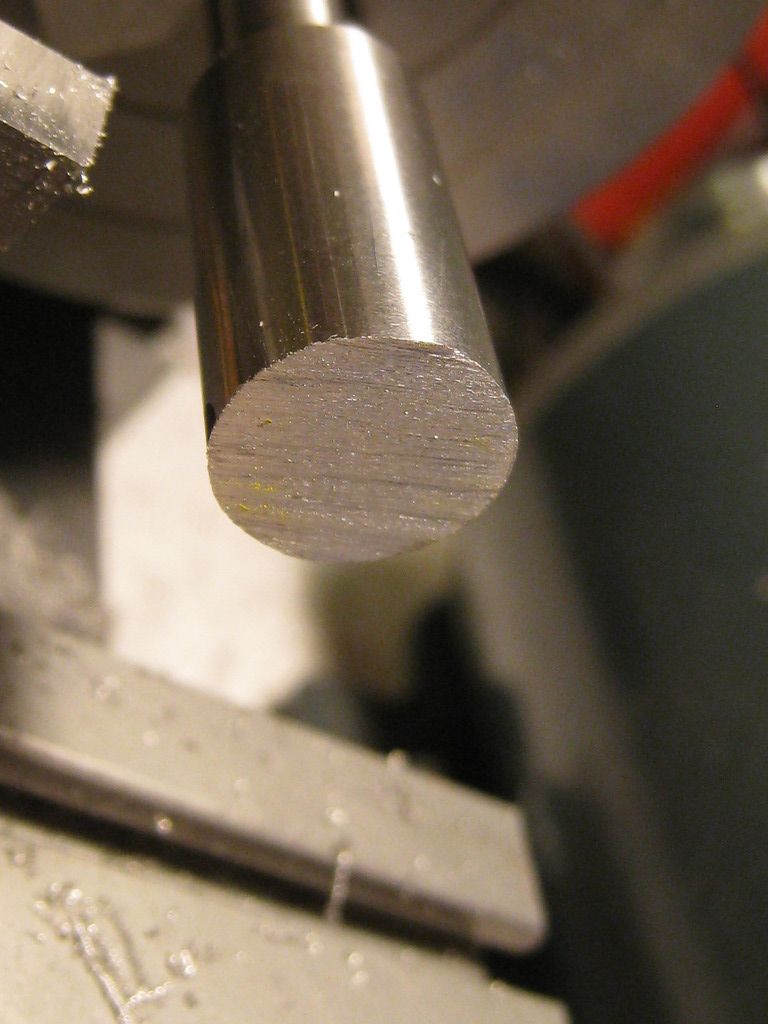
Need to deepen that hole first. Spinning the part at 500rpm and using a 1/4" cobalt bit here.
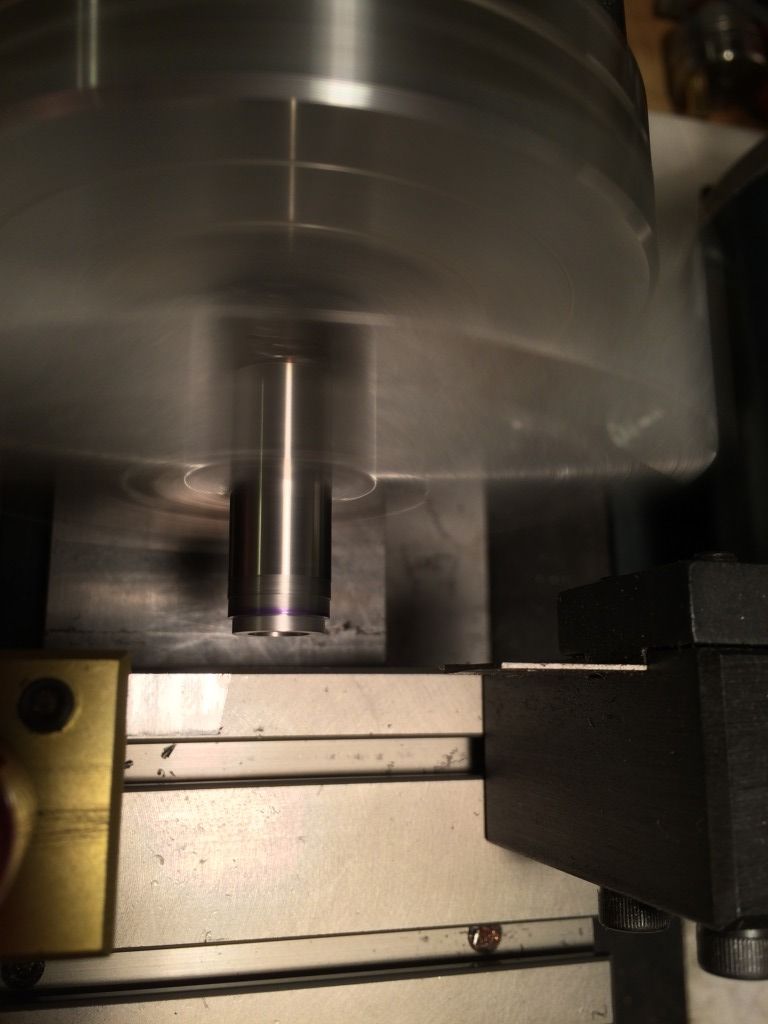
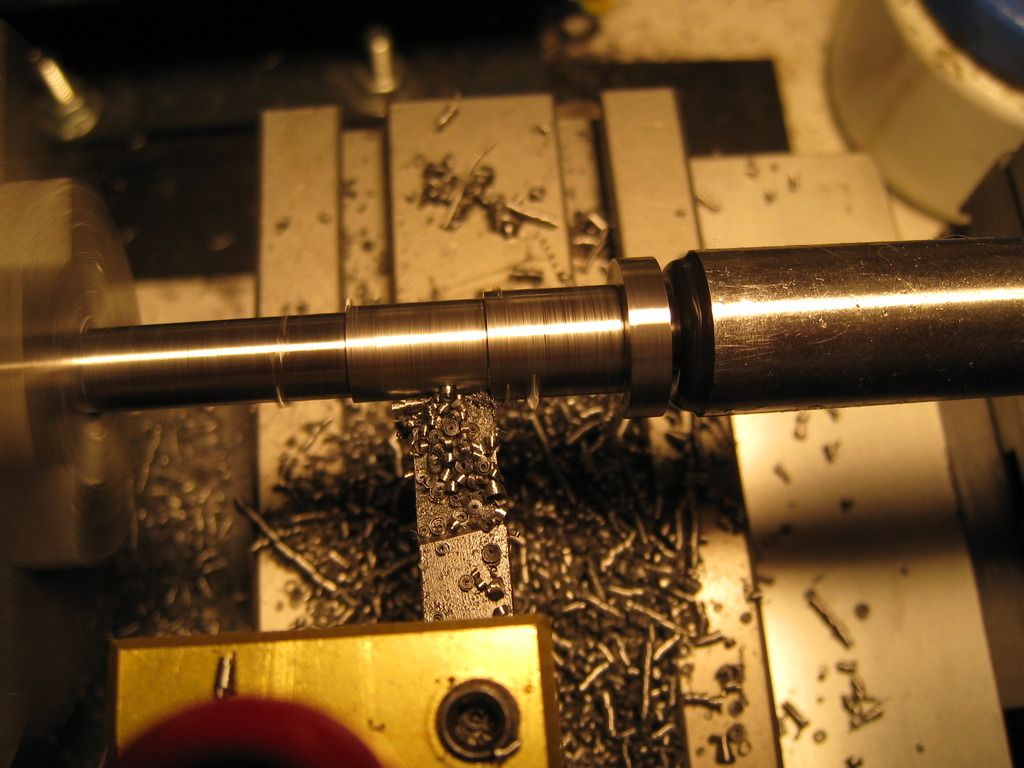
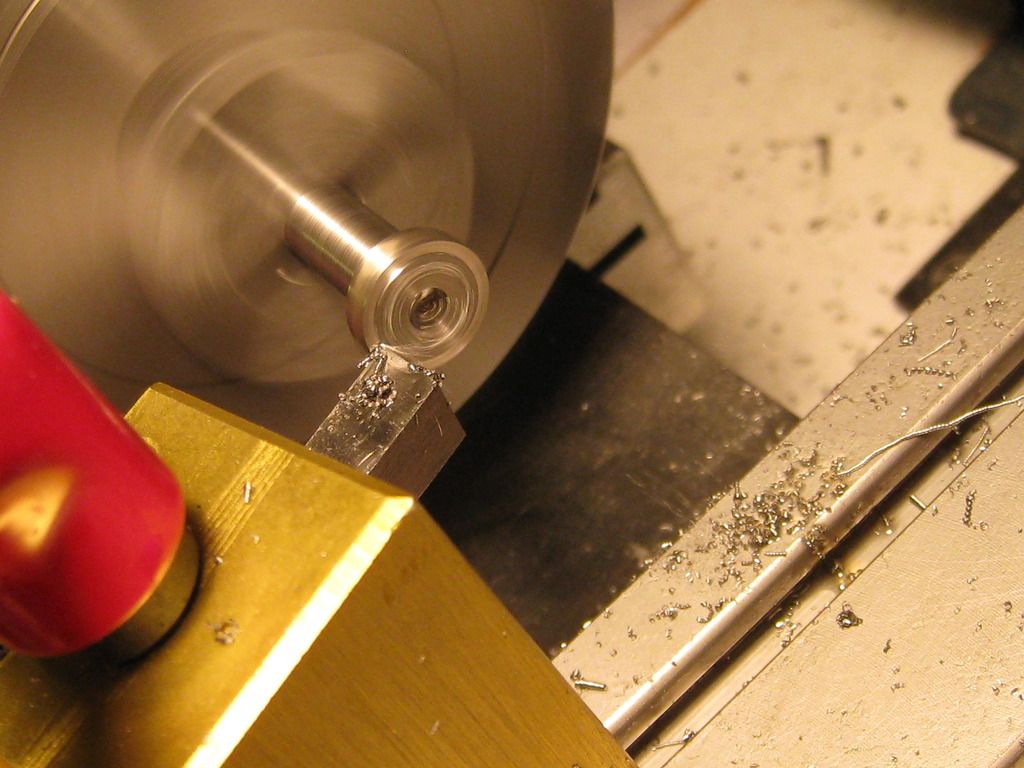
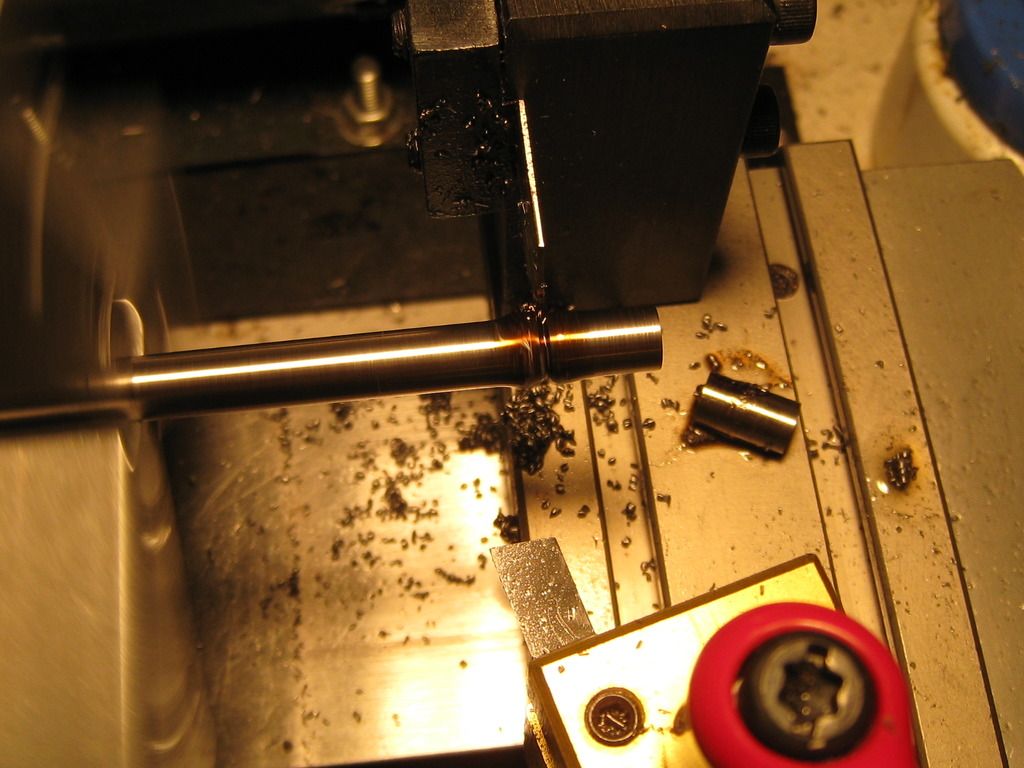
Ramp up the speed to 1375rpm and cut the shoulder back seventy thousandths and reduce the diameter down to 0.297 to fit tight in the 4013 slide.
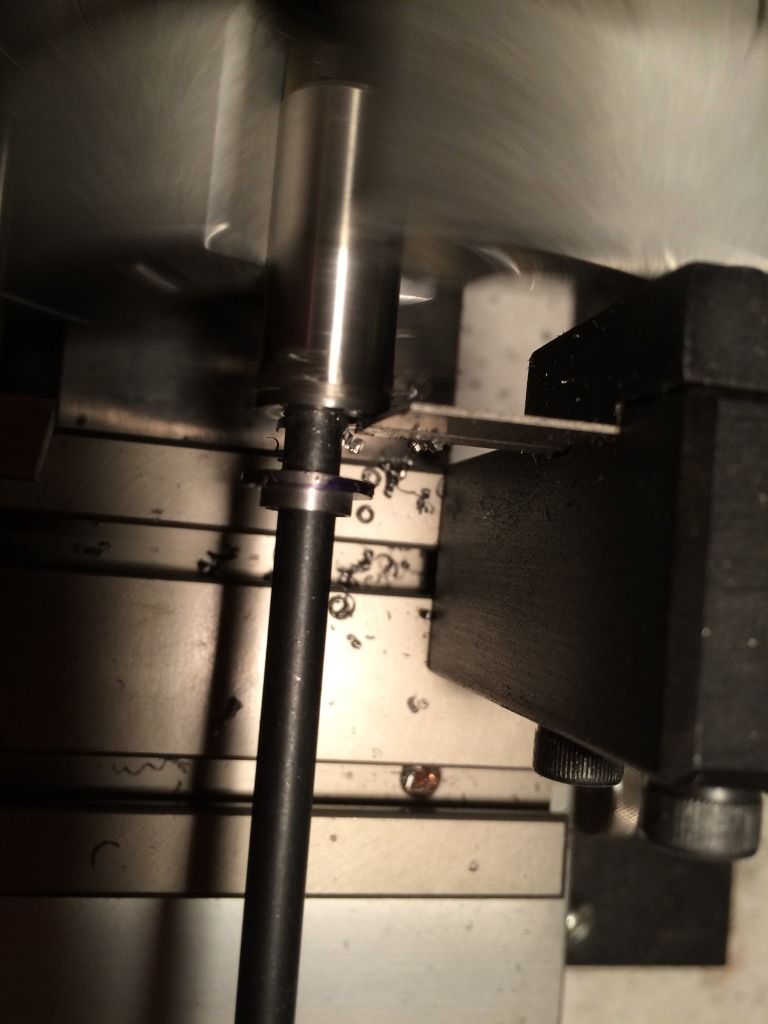
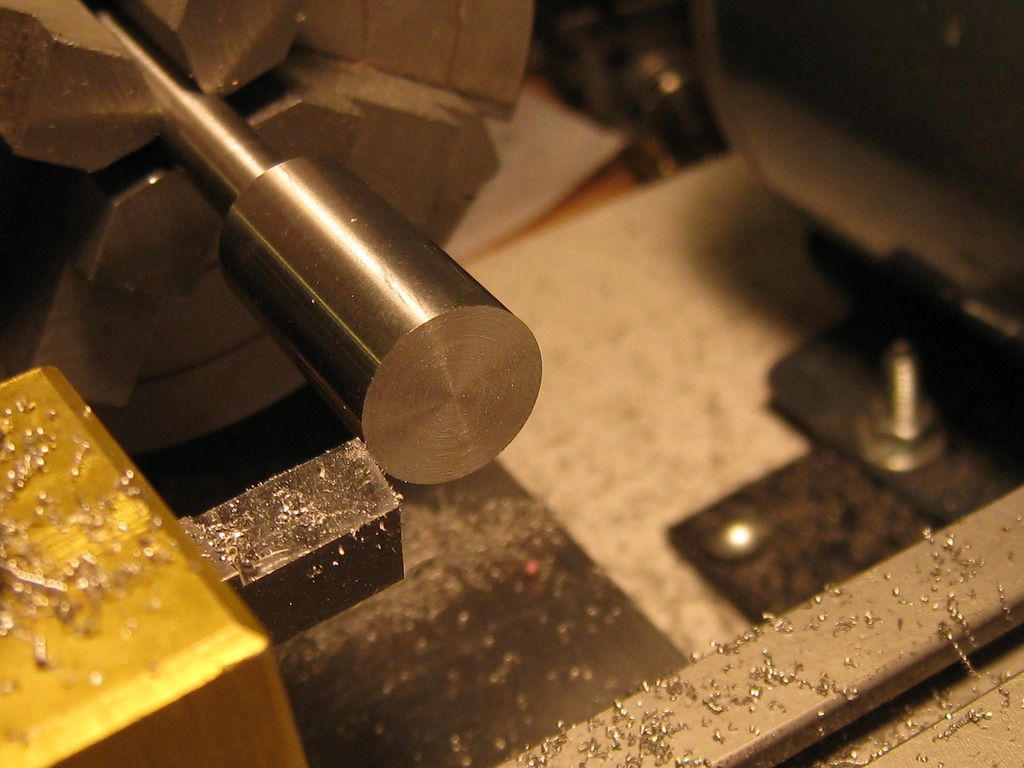
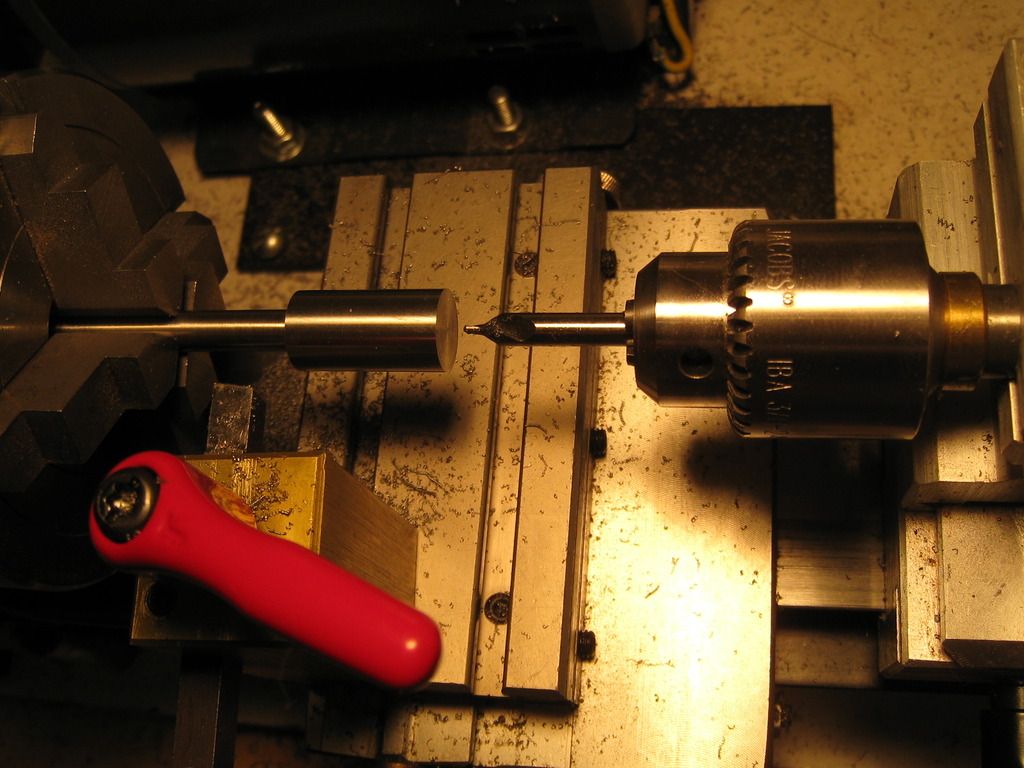
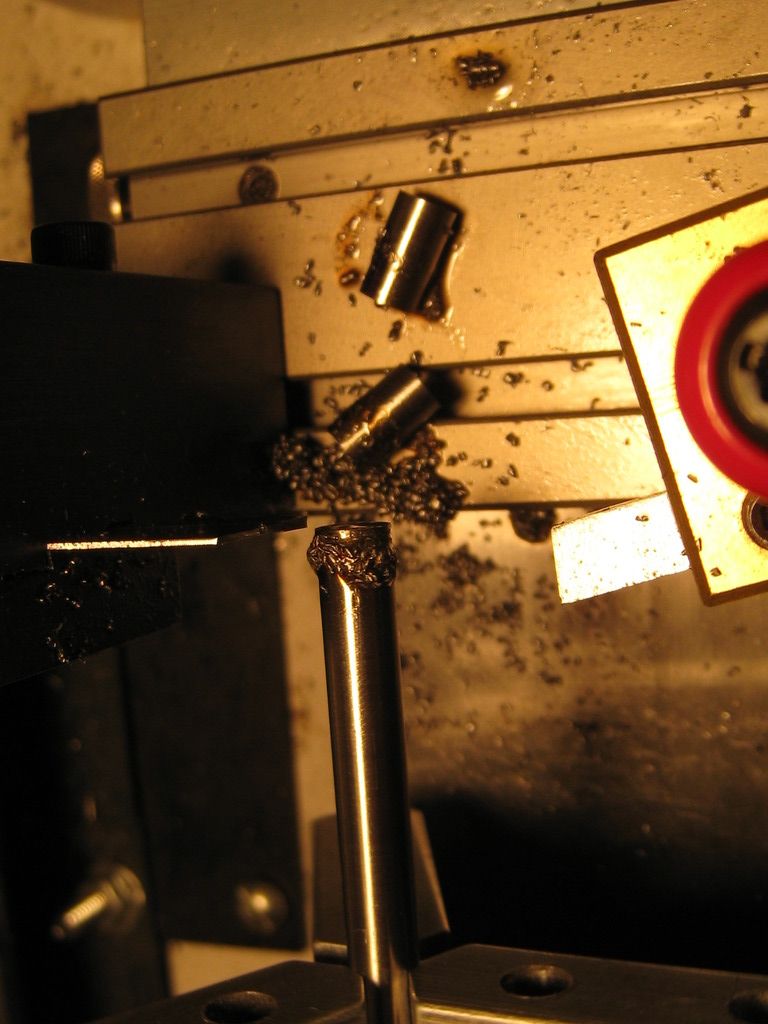
Got it cut to the right size so now we'll part if off the stub. I stuck a little piece of rod in the tailstock chuck and ran it into the stub to capture the part when it comes free. Slowed the speed back down to 500rpm and ran the parting tool in there leaving flange about .050 thick.
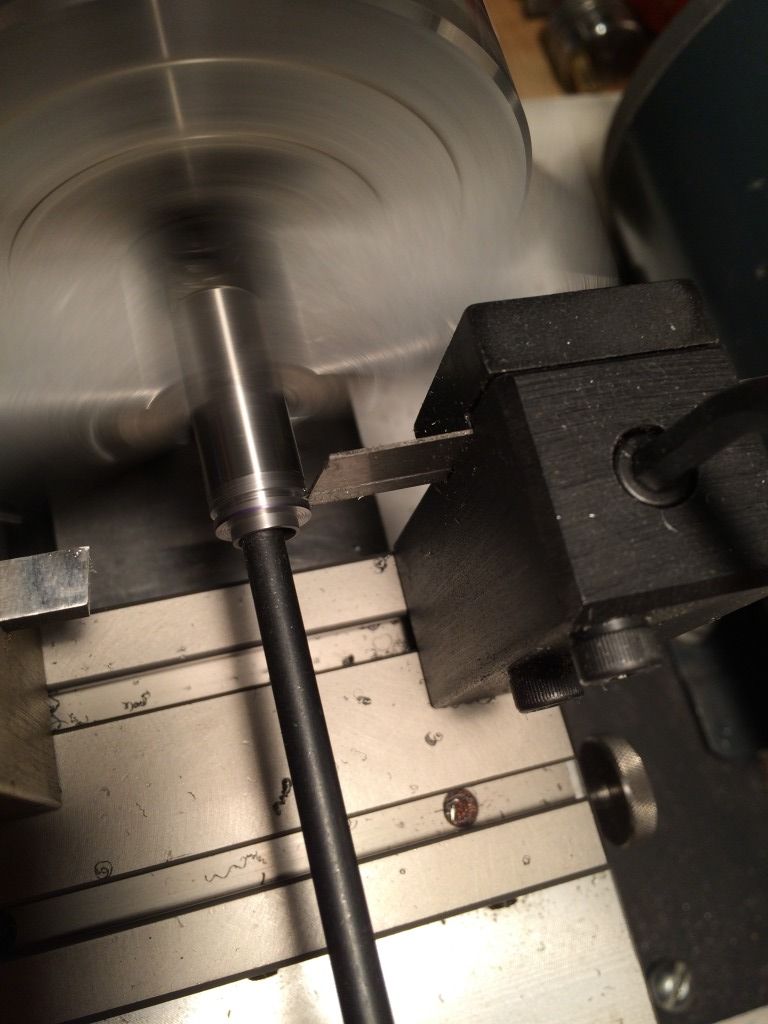
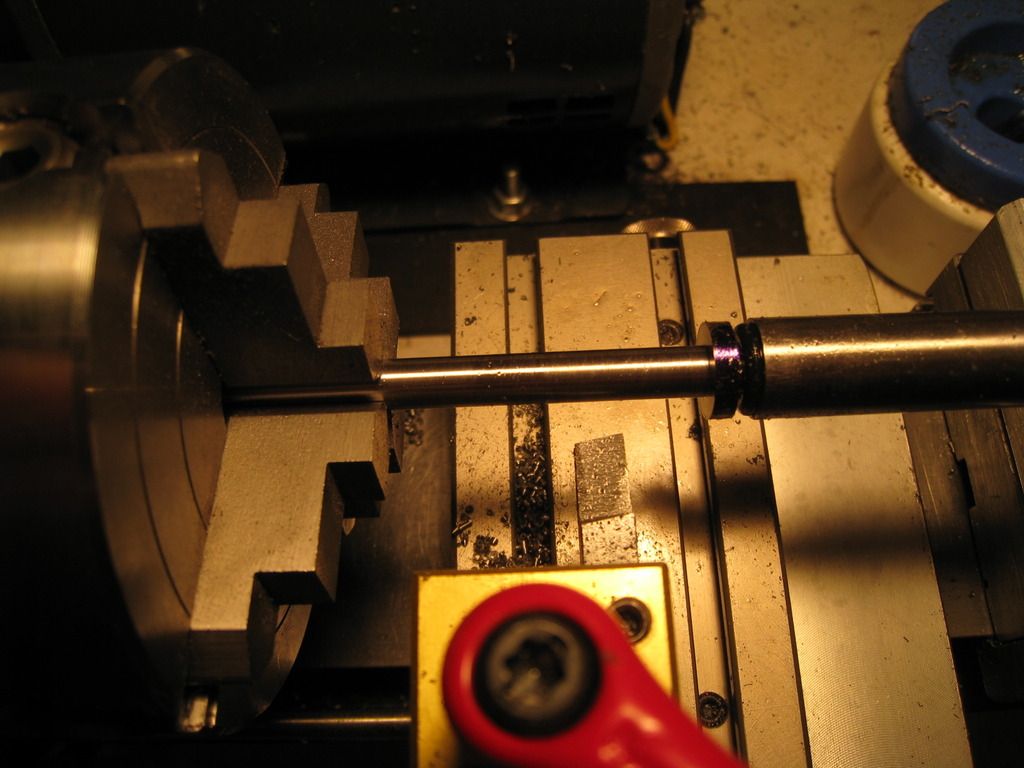
There it is.
There's not enough meat left on that stub to cut another one so I need to set up another stub to cut the bushing for the 4014. The dimensions on that 4014 are also a bit looser so I need the cut the bushing a couple thousandths larger in the diameters to get a tight fit.
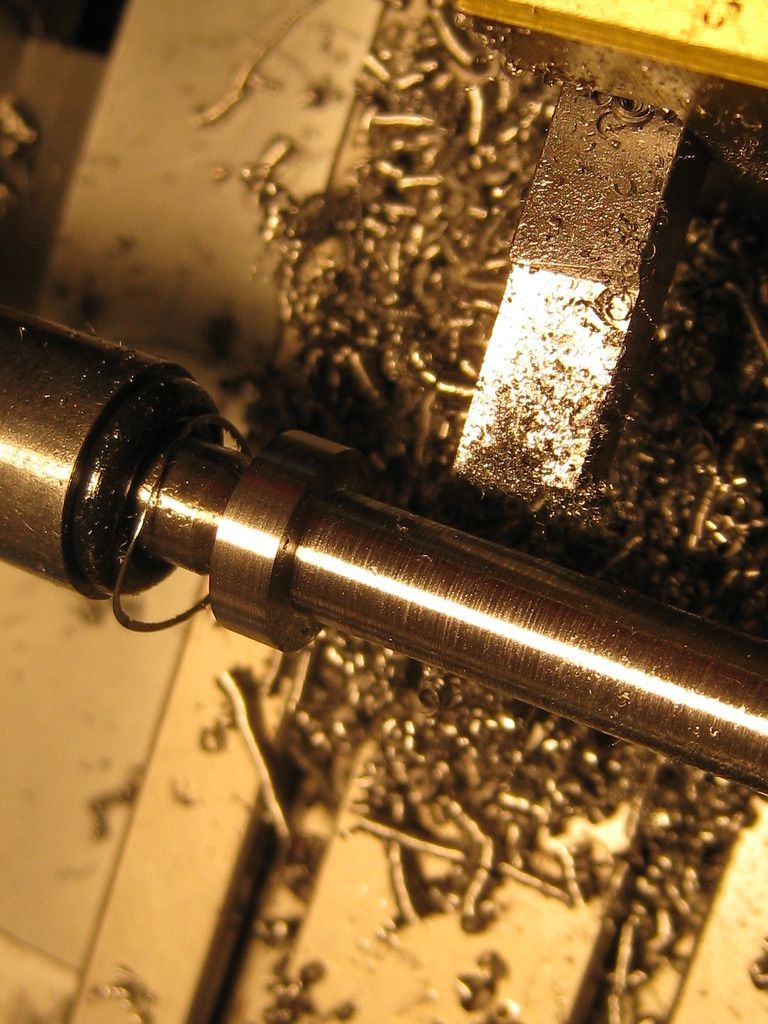
Here's the second stub already indicated in and I'm facing off the hacksaw marks at 1375rpm.
A little more drilling.
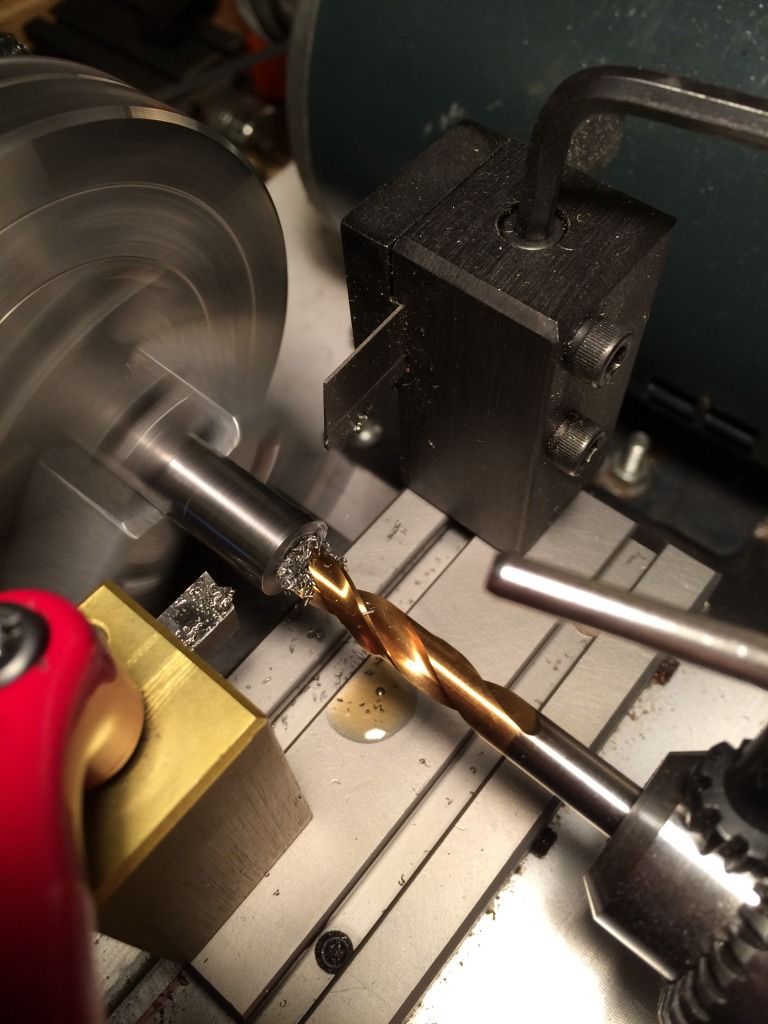
Splash on some layout dye and scribe my reference line. This time I'm only cutting back sixty thousandths since the 4014 is about 0.010 thinner than the 4013 is at the front of the spring tunnel.
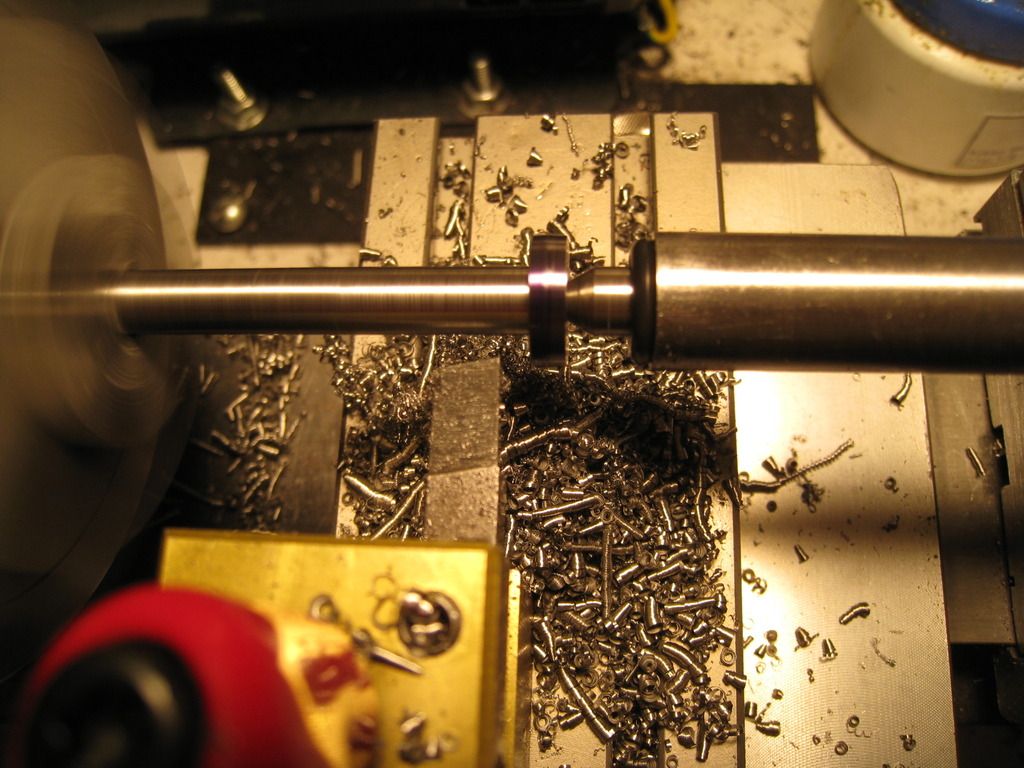
Gettin' there
Good enough, lets chop it off.
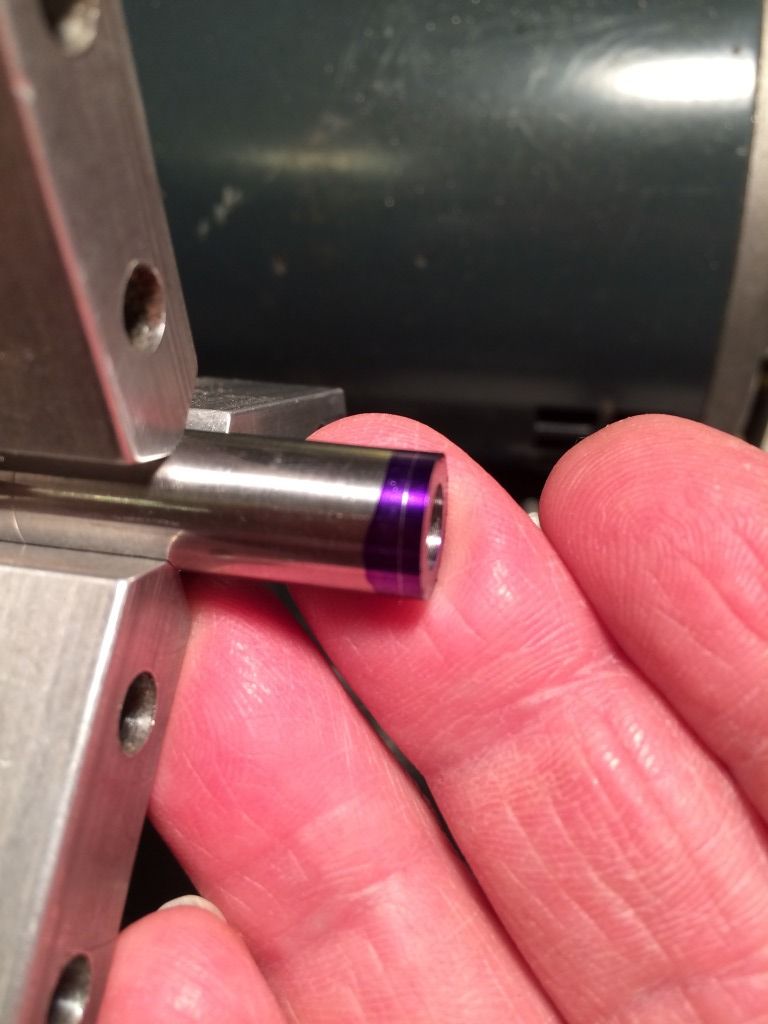
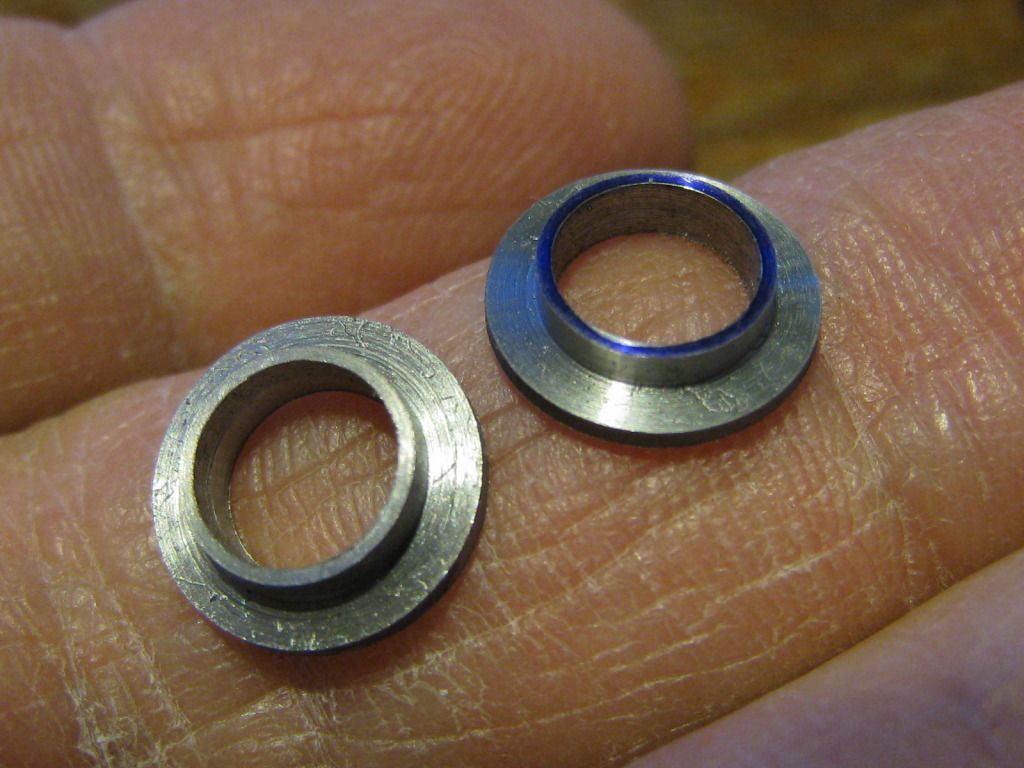
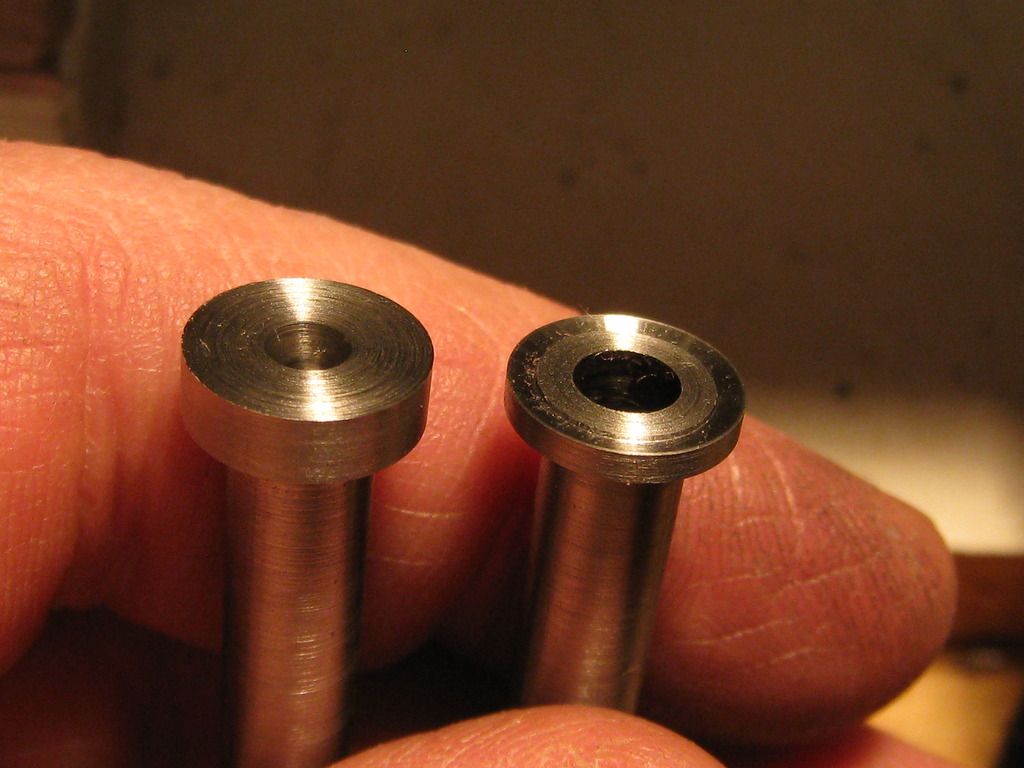
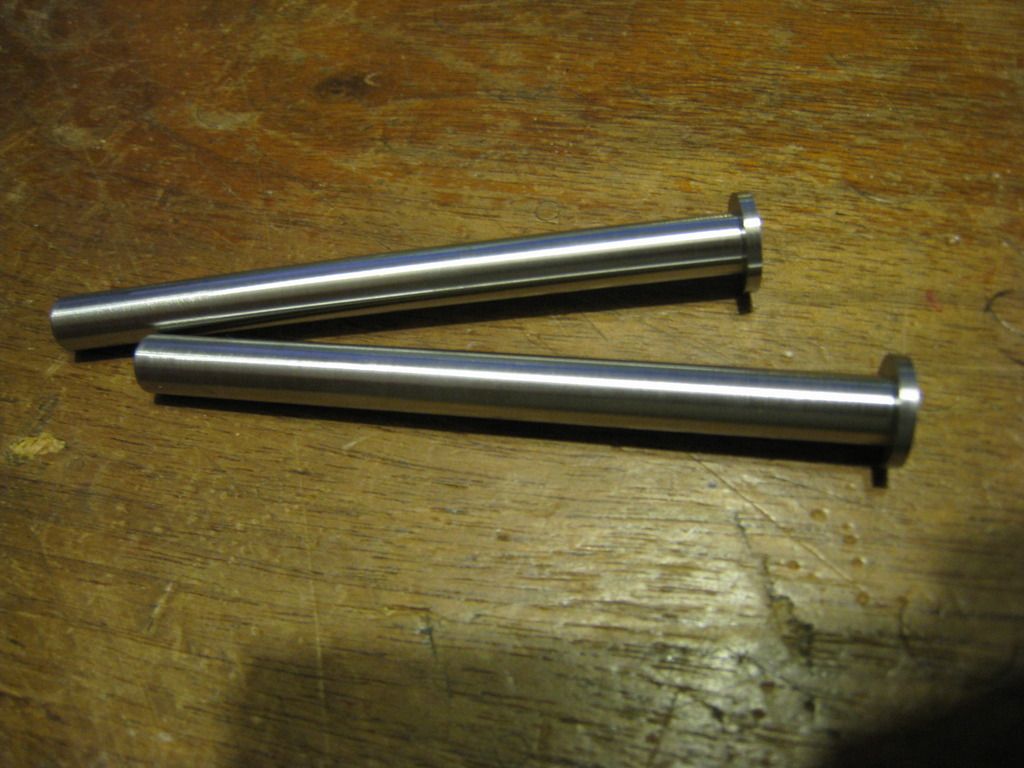
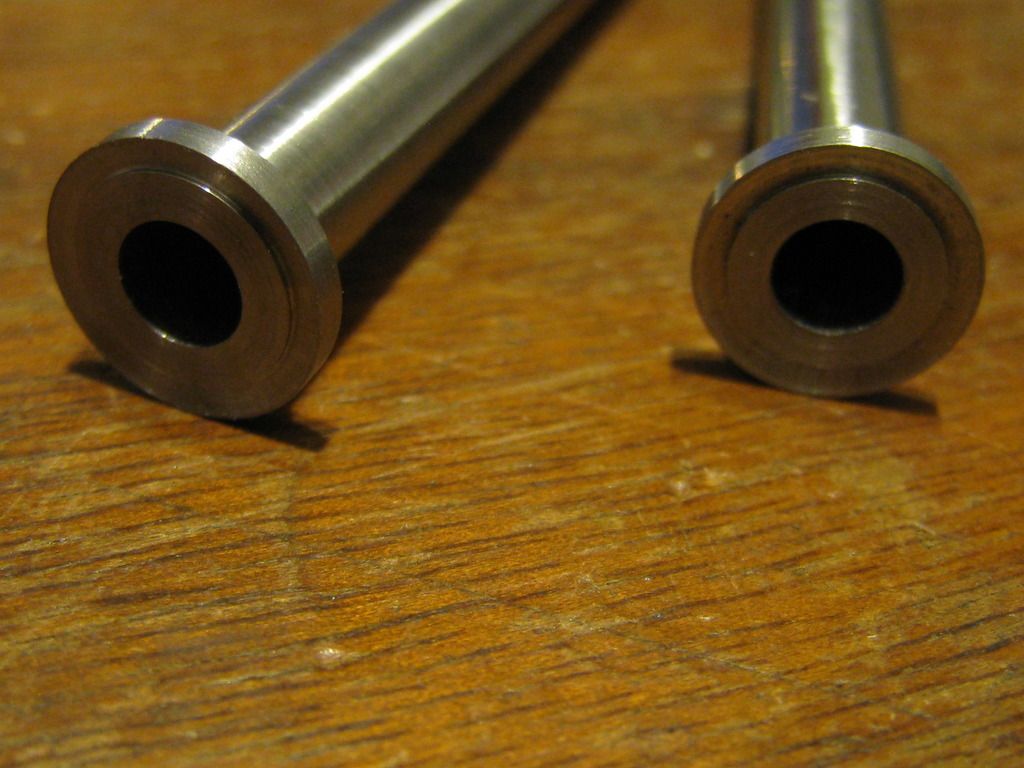
All done. While they look identical, the one on the right is a couple thousandths bigger in both outside diameters to fit the looser 4014 tunnel.
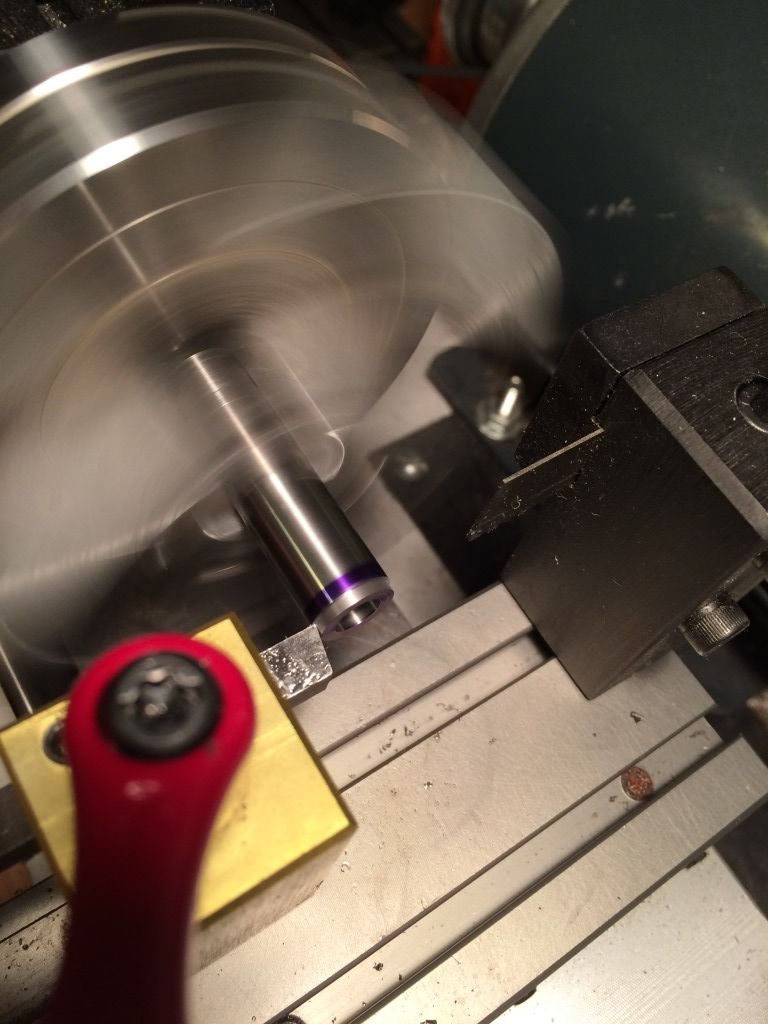
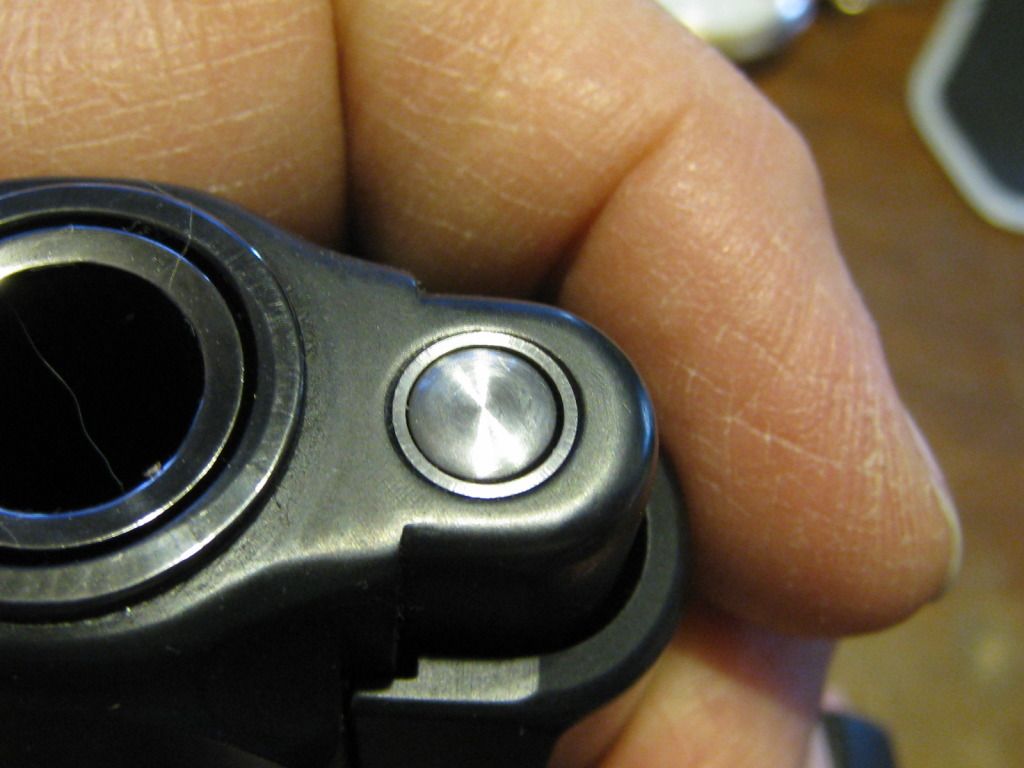
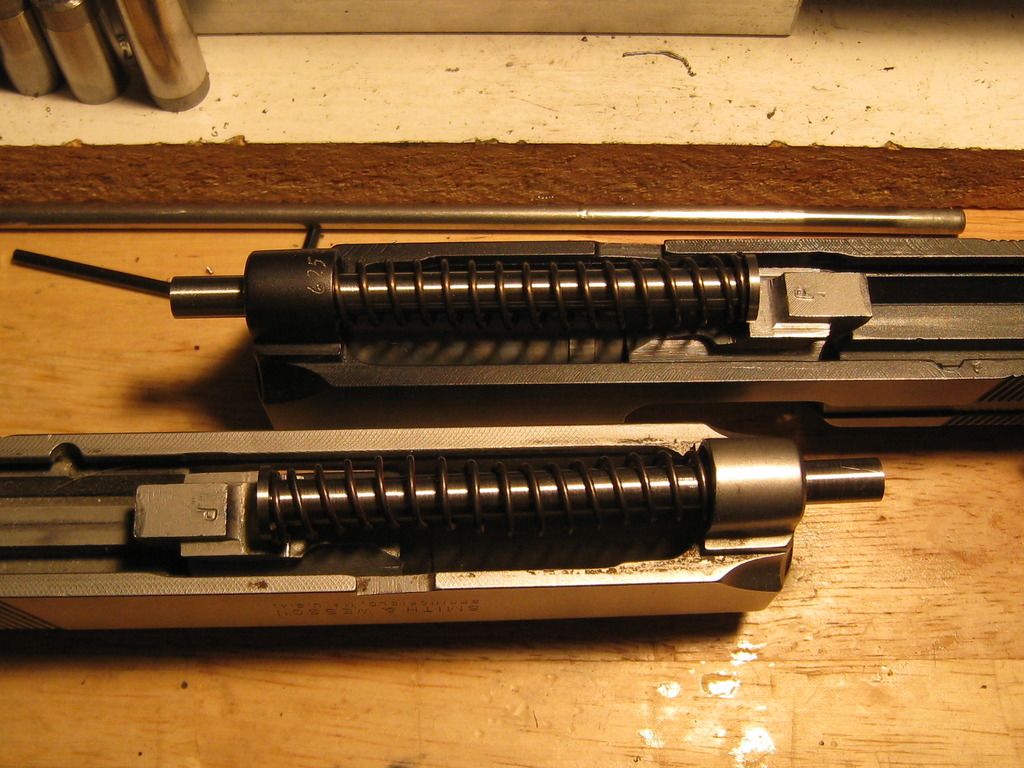
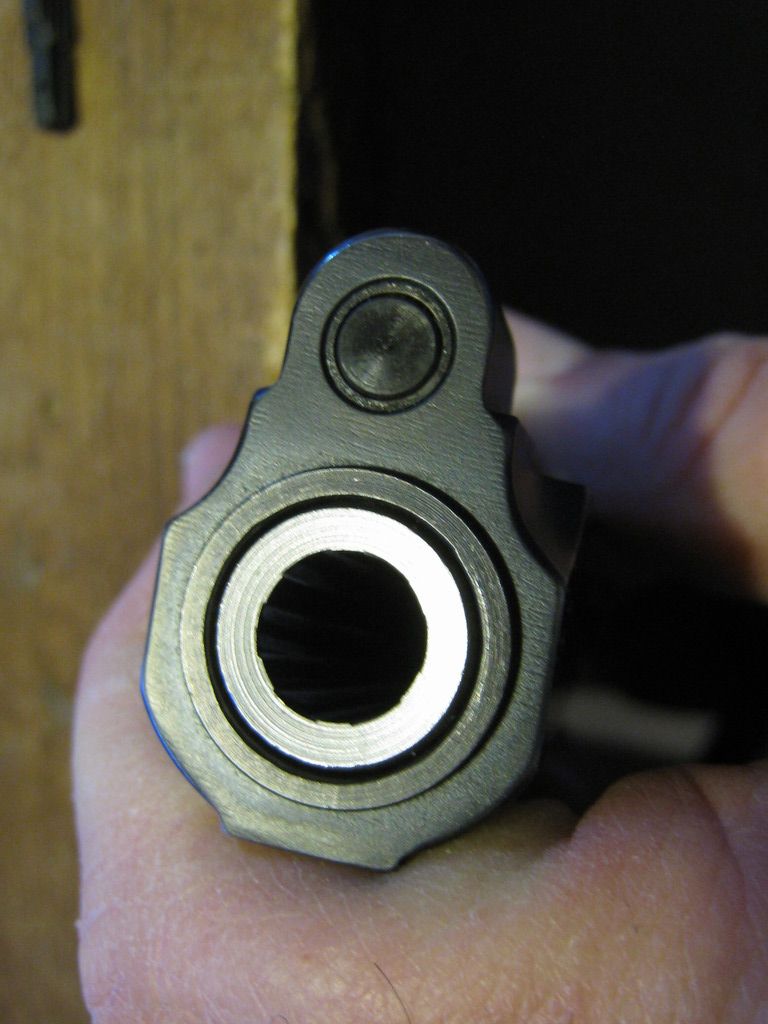
When installed it'll look something like this.
That concludes tonight's episode  For the next installment well get started making the guiderods. Assuming my order from Mcmaster-Carr gets here.
Cheers
Bill
__________________
Because they don't make a .46
Last edited by BMCM; 01-19-2016 at 09:02 PM.
|
|
The Following 43 Users Like Post:
|
03Fatboy, 2hawk, 6actual, armenius, AxeOgre, bgrone, Big Cholla, Big Shrek, BLUEDOT37, BOBBY137, Broke Hoss, bronco45, BruceB, charlie sherrill, Chromedhearts, digiroc, Elkins45, GaryS, growr, hannstv, K Frame Keith, ladder13, mjk5757, mscook, mxbob, NMPinNYC, nocents, oldman10mm, Old_Cop, opaul, Poohgyrr, Richard Simmons, Rock185, Sevens, Shorty 45 MK2, TAROMAN, TercGen, The_Truth, timn8er, Turn & Bank, URIT, vigil617, wild47 |
01-19-2016, 07:56 PM
|
 |
Member
|


|
|
Join Date: Nov 2010
Location: The Old North State
Posts: 2,221
Likes: 2,867
Liked 3,205 Times in 1,083 Posts
|
|
Yes! Yes! Yes! Yes!
Another BMCM pictorial step by step thread!!!!!!!!
<-------- runs and gets popcorn
I LOVE these threads!!!!!!!
__________________
Un-Reconstructed Southerner
|
|
The Following 8 Users Like Post:
|
|
01-19-2016, 08:28 PM
|
 |
US Veteran
|


|
|
Join Date: Nov 2011
Location: Stuart, Fla
Posts: 470
Likes: 1,071
Liked 586 Times in 217 Posts
|
|
__________________
It is the Indian not the arrow
|
|
The Following 2 Users Like Post:
|
|
01-19-2016, 08:41 PM
|
 |
Member
|
|
|
Join Date: May 2011
Location: western NY
Posts: 720
Likes: 287
Liked 999 Times in 306 Posts
|
|
10mm pocket rockets. You HAVE to like this!
|
|
The Following 5 Users Like Post:
|
|
01-19-2016, 09:58 PM
|
 |
Member
|

|
|
Join Date: Mar 2013
Location: s.w.Ohio
Posts: 1,932
Likes: 4,002
Liked 2,809 Times in 1,169 Posts
|
|
I love these swarf making threads
__________________
witty signature goes here
|
|
The Following 2 Users Like Post:
|
|
01-19-2016, 11:55 PM
|
 |
Member
|
|
|
Join Date: Oct 2009
Location: Long Beach, CA
Posts: 1,386
Likes: 875
Liked 994 Times in 442 Posts
|
|
10mm Conversion Lab - C'mon in Y'all
Way to go! I just set up my subscription to this thread, things were getting a little boring.
And, now that your geared and tooled up for the 10mm conversion; maybe that surplus 4013 slide & barrel (I want to have Melonite treated) that I have for a future 1066SSV has potential to become real.
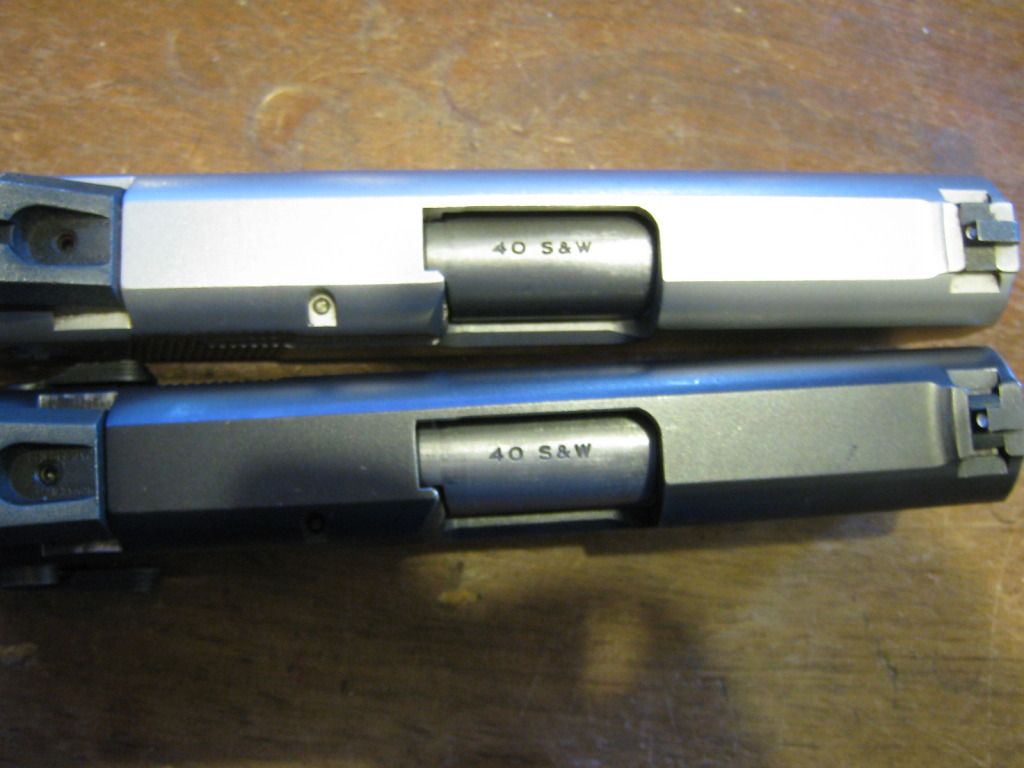
What can, or do you plan to do anything with the barrel caliber markings?
__________________
USS ZELLARS
DD-777
Last edited by 03Fatboy; 01-19-2016 at 11:57 PM.
|
|
The Following 2 Users Like Post:
|
|
01-20-2016, 01:07 AM
|
|
US Veteran
|
|
|
Join Date: Jun 2012
Location: SW Mississippi
Posts: 1,348
Likes: 2,224
Liked 6,204 Times in 1,040 Posts
|
|
Well, the barrel marking are a ways off yet but for safety sake I have been thinking how to go about taking care of that. Since this is a "NO Welding allowed" zone I believe the best option is to cross out the 40 with an "X" marking punch them move aft a bit towards the hood and stamp 10mm. In any event the barrels need to be clearly marked. Once the chamber is cut to 10mm, shooting 40S&W in there ist verboten!
So, an 1066SSV eh? Very cool  Do I need to clear another spot on the bench?
Cheers
Bill
__________________
Because they don't make a .46
|
|
The Following 4 Users Like Post:
|
|
01-20-2016, 02:11 AM
|
 |
Member
|

|
|
Join Date: Dec 2012
Location: N.E. OKLA.
Posts: 6,483
Likes: 5,881
Liked 9,324 Times in 3,494 Posts
|
|
Glad to see you take on this project & documenting it for us!
You know this means we're going to have to start a "BMCM Lottery" with one lucky drawer winning this same conversion as the grand prize ?? 
.
__________________
Waiting for the break of day
|
|
The Following 4 Users Like Post:
|
|
01-20-2016, 08:26 PM
|
 |
Member
|

|
|
Join Date: Mar 2014
Location: NW Florida
Posts: 649
Likes: 4,977
Liked 710 Times in 362 Posts
|
|
Quote:
Originally Posted by BMCM

...Once the chamber is cut to 10mm, shooting 40S&W in there ist verboten!...
Cheers
Bill
|
Um...aaaaactually...you can still shoot .40S&W out of a 10mm...
it just requires some serious brass brush cleaning of the chamber to remove
all the crud one builds up from shooting a box or three of .40S&W thru it
Until you clean it, not a good idea to try and chamber 10mm...
it just gets stuck...
__________________
Marlin & Calico Specialist
Last edited by Big Shrek; 01-20-2016 at 08:35 PM.
|
|
The Following User Likes This Post:
|
|
01-20-2016, 09:57 PM
|
|
US Veteran
|
|
|
Join Date: Jun 2012
Location: SW Mississippi
Posts: 1,348
Likes: 2,224
Liked 6,204 Times in 1,040 Posts
|
|
In the interest of safety I'm going strongly to disagree with you there.
The only place where it's remotely safe to shoot 40S&W in a 10mm chamber is in a 610 using moon clips. And even then, once the chambers get dirty 10mm may not want to chamber fully until some cleaning is performed. Not so much a problem in a revolver but in a semi it's an entirely different matter.
Both of these cartridges are intended to headspace on the case mouth. Thus the only thing holding the case head against the breechface in a correctly cut chamber is the cartridge case itself.
Now consider when you load 40S&W into a chamber cut for 10mm Auto. The 40S&W case is 0.142 inch shorter than the 10mm case. What does the 40S&W headspace against? What keeps the 40S&W from falling 0.142" further into the chamber away from the breechface? What holds the 40S&W case against the breechface where the firing pin can actually reach the primer? Performing all those functions that it was neither designed nor engineered for is your pistol's extractor. I'd expect the extractor's lifespan to be greatly reduced and that's not something I'd want to gamble with considering the availability of replacement extractors these days.
The chief reason I say this is an unsafe practice is the possiblity of the gun blowing up in my face...
Say for example we shoot a bunch of 40S&W in our shiney new 10mm chamber. Now it's good and dirty, possibly with some gilding metal or lead or copper scraped off the projectiles on the way out and some firing residue built up in the chamber. Now were all out of 40S&W and decide to switch over to some 10mm Auto without thoroughly cleaning the chamber first. Well all that debris built up in the chamber has caused a short chamber or insufficient headspace condition. Insufficient headspace is a very well known cause of slamfires and out of battery detonations in self loading arms. Not somewhere I ever want to go!
I'm not at all saying this is how you treat or care for your arms. What I am saying is if we make it known and tell folks it's ok to mix and match calibers & chambers any which way as in if it fit it shoots, then sooner or later someone's gun is gonna blow up and someone is gonna get hurt or worse. And if we told that someone that it was ok to do that then we are at fault. or at least partially so.
In my view this is no different than shooting .380 in a 9mm parabellum chamber or 7.62Nato in a 30-06 chamber or .45GAP in a .45ACP Chamber. Just Dont!
So, I stand by my statement and re-iterate;
Once the chamber is cut to 10mm Auto, shooting 40S&W in there ist verboten!
Above all else...Safety First Gentlemen!
Cheers
Bill
__________________
Because they don't make a .46
|
|
The Following 15 Users Like Post:
|
2hawk, BearBio, bgrone, Forsmithers, Richard Simmons, rosewood, RSBH44, Sevens, Shorty 45 MK2, TAROMAN, The_Truth, timn8er, Trinidad Bill, URIT, vigil617 |
01-20-2016, 10:22 PM
|
 |
Member
|

|
|
Join Date: Oct 2003
Location: Southeast Wisconsin
Posts: 1,750
Likes: 7
Liked 657 Times in 369 Posts
|
|
The Gun Zone -- 10mm v. .40 S&W FAQ
Incidentally, I disagree with the author of the above article concerning the Springfield Omaga also. Please, if you can, name ONE 10mm autoloader manufacturer who states in writing that it's OK to fire .40 S&W ammo in a 10mm chambered autoloader. Just one will do!
Bruce
Last edited by BruceM; 01-20-2016 at 10:24 PM.
|
|
The Following 4 Users Like Post:
|
|
01-20-2016, 11:02 PM
|
|
Member
|
|
|
Join Date: Mar 2014
Location: NW Florida
Posts: 649
Likes: 4,977
Liked 710 Times in 362 Posts
|
|
That's why I specifically mentioned cleaning it before switching back to 10mm...
Its the kind of thing one should only do in a serious pinch...
Kinda fits into the "just because you Can do it, doesn't mean you Should" category...
which I should have said after mentioning you could
__________________
Marlin & Calico Specialist
Last edited by Big Shrek; 01-20-2016 at 11:06 PM.
|
|
The Following 2 Users Like Post:
|
|
01-21-2016, 01:27 AM
|
 |
Member
|
|
|
Join Date: Jan 2013
Location: S.E. Wisconsin and MSP
Posts: 1,333
Likes: 713
Liked 1,574 Times in 578 Posts
|
|
I have trouble making things with Legos.
|
|
The Following 6 Users Like Post:
|
|
01-21-2016, 07:35 AM
|
 |
US Veteran
|
|
|
Join Date: May 2012
Location: Greenville, NC
Posts: 6,500
Likes: 19,952
Liked 14,217 Times in 4,509 Posts
|
|
Hot diggety you-know-what!
Thanks, Master Chief, for treating us to another conversion thread!
__________________
Ukraine -- now more than ever
|
|
The Following 3 Users Like Post:
|
|
01-21-2016, 05:44 PM
|
|
Member
|
|
|
Join Date: Apr 2014
Posts: 396
Likes: 47
Liked 525 Times in 230 Posts
|
|
Interesting thread,...I can see why the step-by-step pictorials are popular. I've often considered doing this conversion to both the 4053 and to my Mauser M2 .40 which is another .40 built on a .45 frame that can well take the 10mm. But every time I look into performing the conversion, I wonder if there's an easier way.
For the record, I shoot almost no factory loaded ammunition whatsoever. Other than .22LR and military surplus ammo, all my shooting is done with personally loaded ammo. With that thought in mind, rather than the full conversion to 10mm I wonder if it wouldn't just be easier to long throat the .40S&W chamber, rip out the magazine spacer, and then long-load .40S&W to something closer to 10mm specs. I'm sure it would require at least the 180gr slug to do it, but that's what I'd be loading anyway. Continued shooting of standard .40 in the modified chamber would no longer be an issue and the long loaded souped up .40's wouldn't pose a danger in any unmodified pistol that couldn't feed them through the magazine.

|
|
The Following 3 Users Like Post:
|
|
01-21-2016, 07:07 PM
|
|
US Veteran
|
|
|
Join Date: Jun 2012
Location: SW Mississippi
Posts: 1,348
Likes: 2,224
Liked 6,204 Times in 1,040 Posts
|
|
I think it'd be cheaper to scrounge up a second barrel to re-chamber than have PTG or Manson grind a custom reamer to push the throat forward. Most of these conversions I've seen done took a lot less work than what you're gonna see here. I'm just doing it my way Why? because
At the moment we're waiting on my "care package" from McMaster-Carr to get here then we'll get rolling on making a couple new guiderods. Ought to be here tomorrow
Cheers
Bill
__________________
Because they don't make a .46
|
|
The Following 4 Users Like Post:
|
|
01-21-2016, 10:27 PM
|
|
US Veteran
|
|
|
Join Date: Nov 2011
Location: Stuart, Fla
Posts: 470
Likes: 1,071
Liked 586 Times in 217 Posts
|
|
After personally seeing and shooting several pieces of Bills work and reading his threads, I'm convinced the Bill way is "the way" for things that go bang 
__________________
It is the Indian not the arrow
|
|
The Following 2 Users Like Post:
|
|
01-22-2016, 07:25 PM
|
|
US Veteran
|
|
|
Join Date: Jun 2012
Location: SW Mississippi
Posts: 1,348
Likes: 2,224
Liked 6,204 Times in 1,040 Posts
|
|
Well, all my goodies have been delivered. Actually the order was split into two shipments and half of it was "ninja delivered" on my porch early last night. Anyway, I have everything on hand needed to resume work.
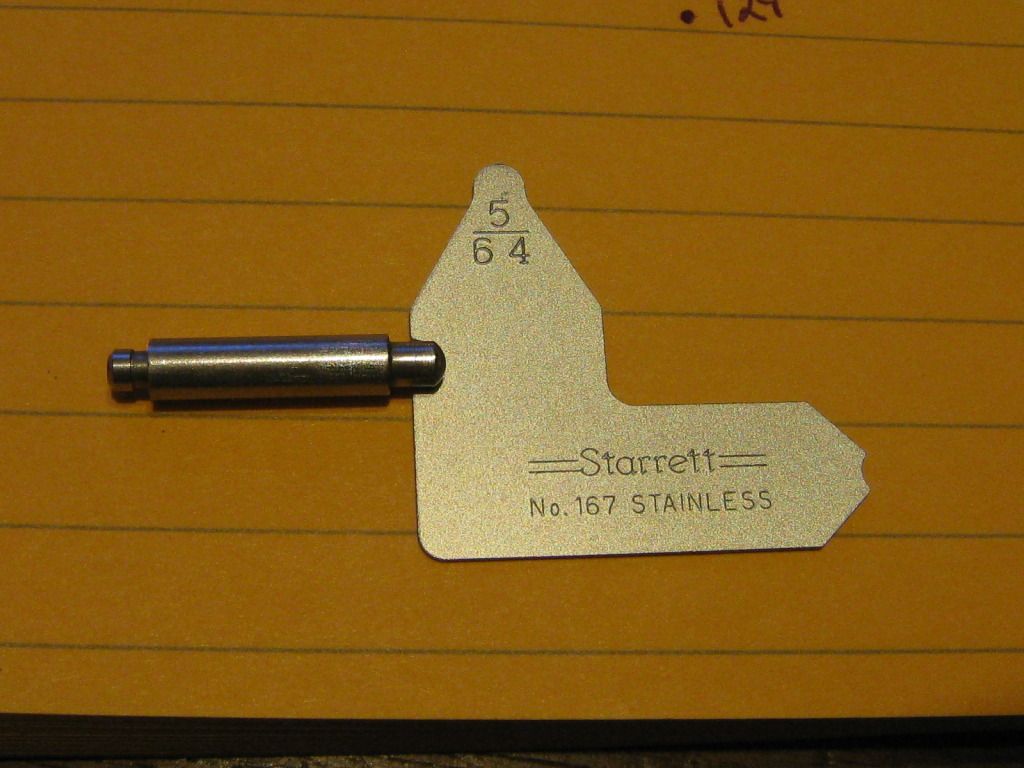
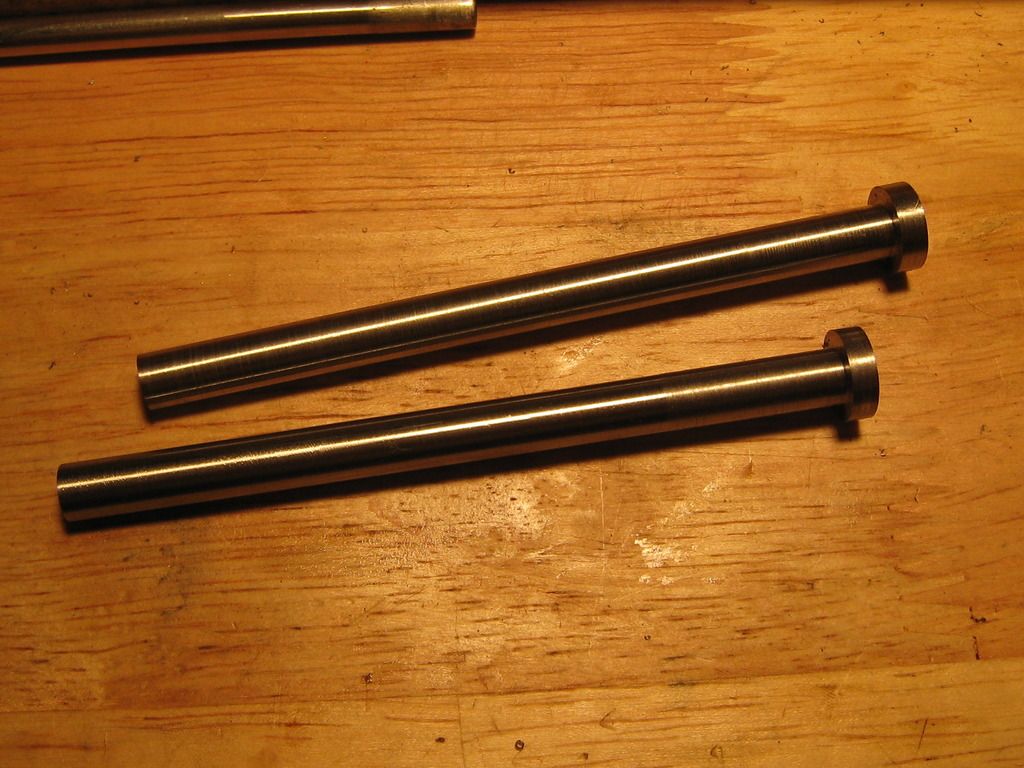
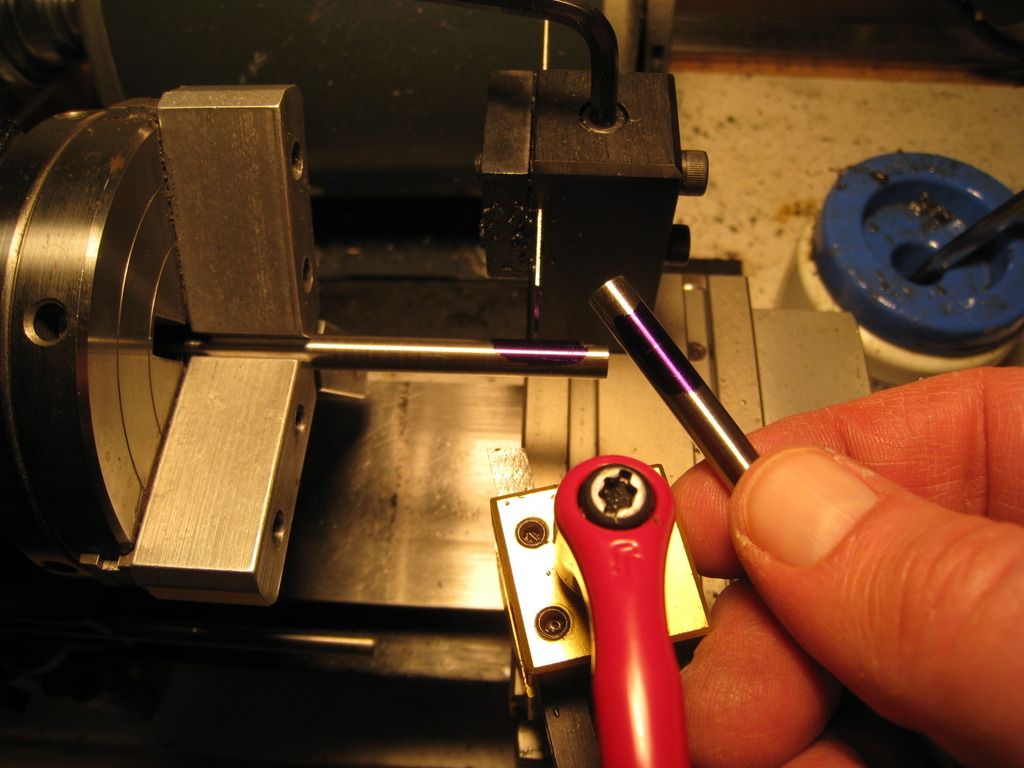
So next up we're gonna be making these parts. That guiderod measures 0.236" in diameter is the correct part for most any of the 3-3/4" barrel compact 45s ie. 4516-2, 4513TSW and several others. The guiderods I'm going to make will be a proper quarter inch in diameter.
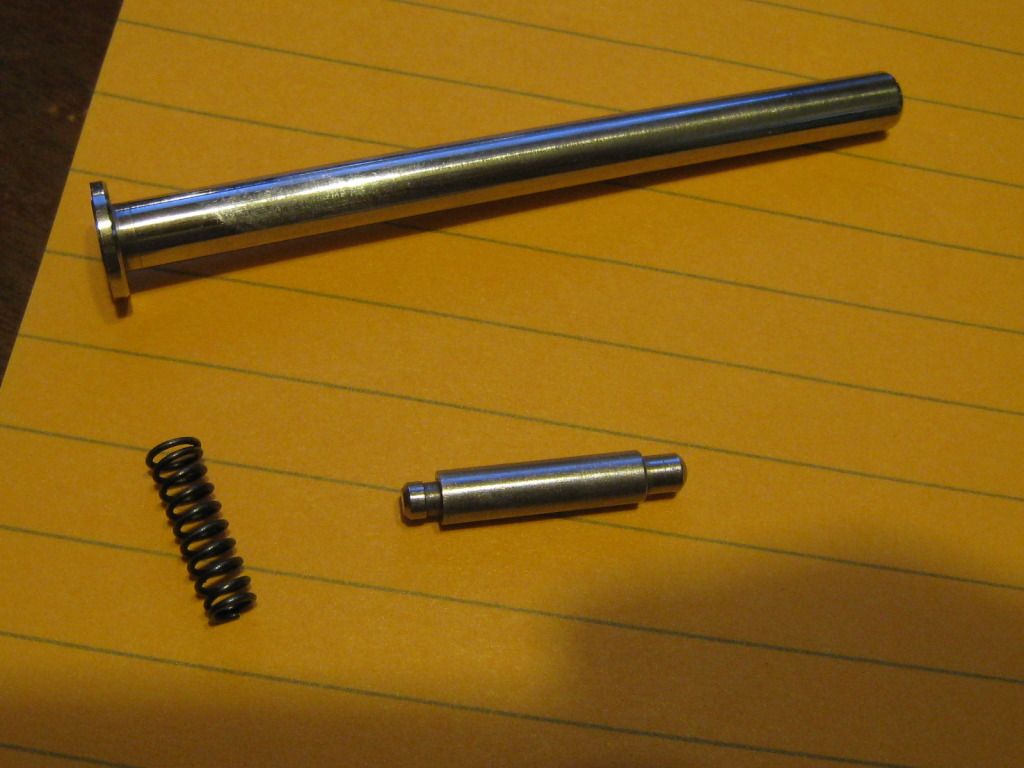
The conical spring will be fairly straightforward I think. I found a part that is nearly identical and will just need tighten the coil on one end so it'll snap onto the plunger.

I decided to start with that little plunger thingy. Loaded up the "Caveman CAD software suite" and created this precision blueprint to reference while messing about on the lathe. Bonus, I can stick it to the wall behind the machine Who doesn't love post-it notes
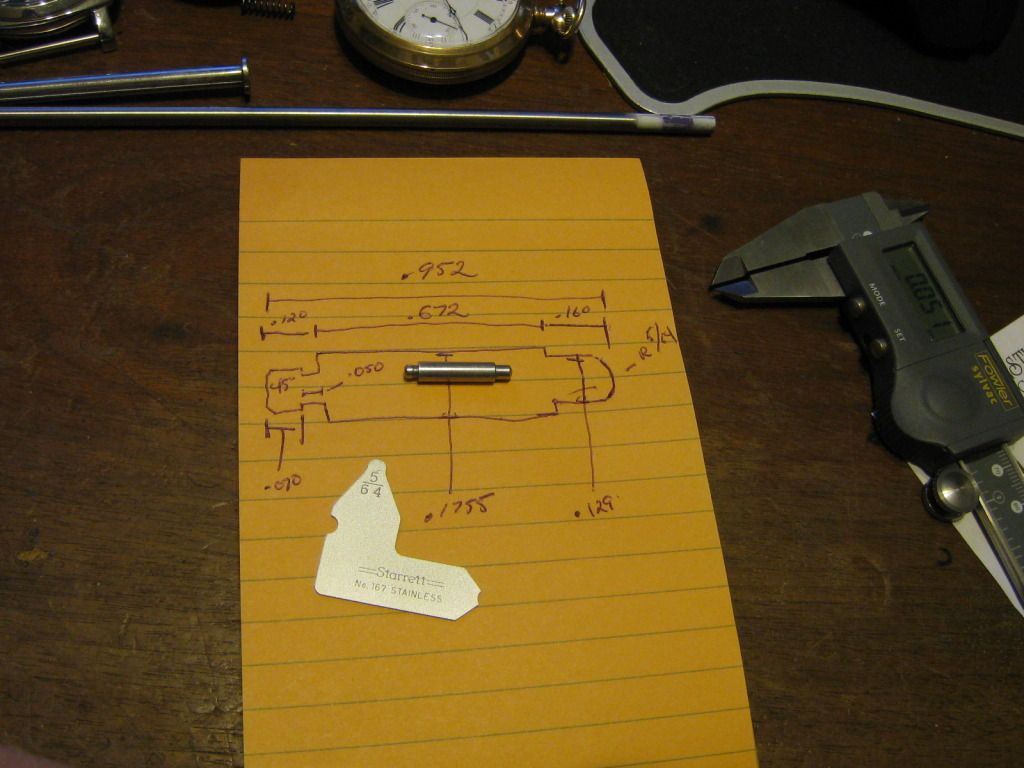
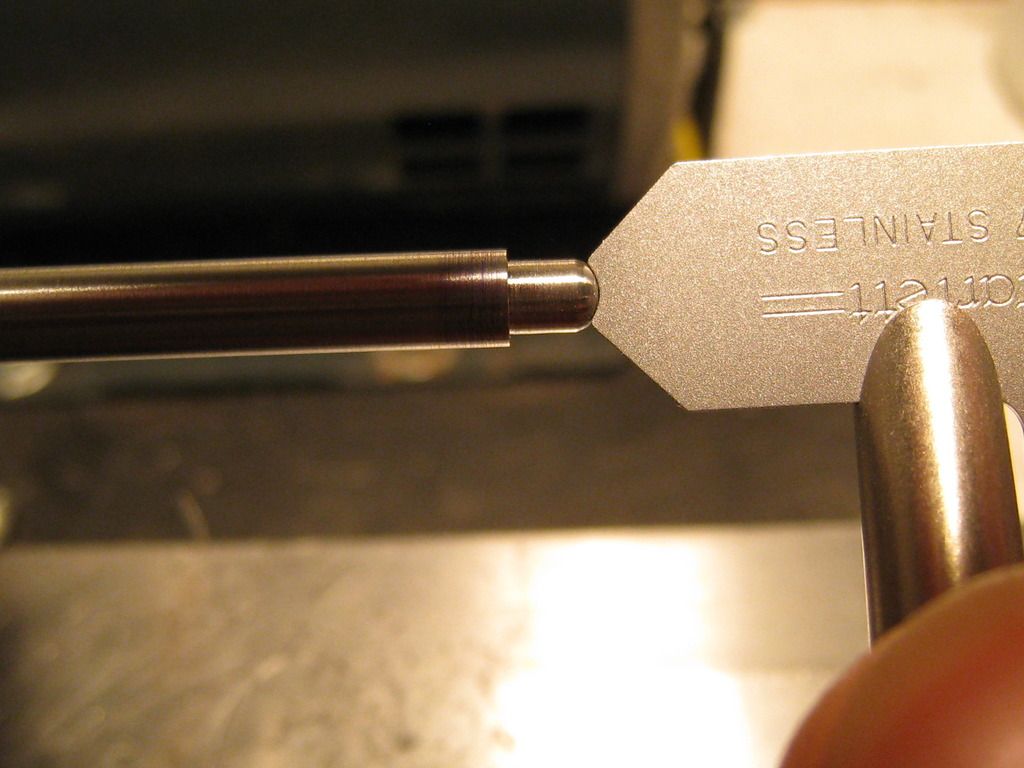
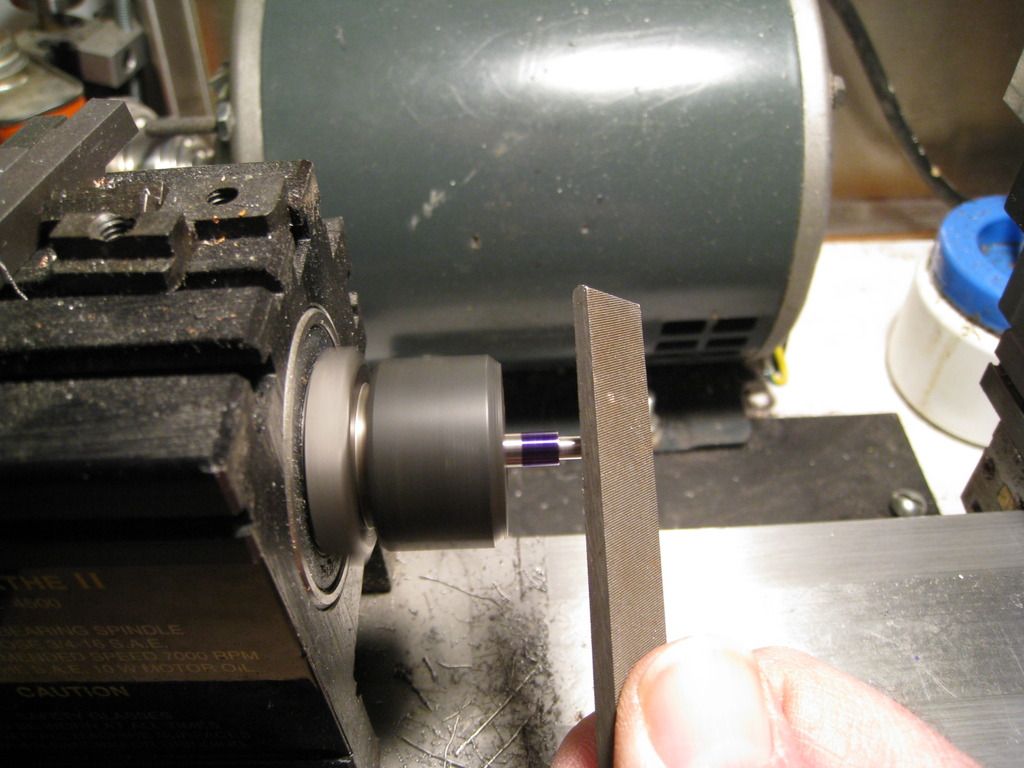
That round nose on the end of the plunger measures at 5/64" radius. I have a radius turning tool however, I think I'll just do this with a file and check it with the radius gage instead of setting up the radius turner just for this little thing.
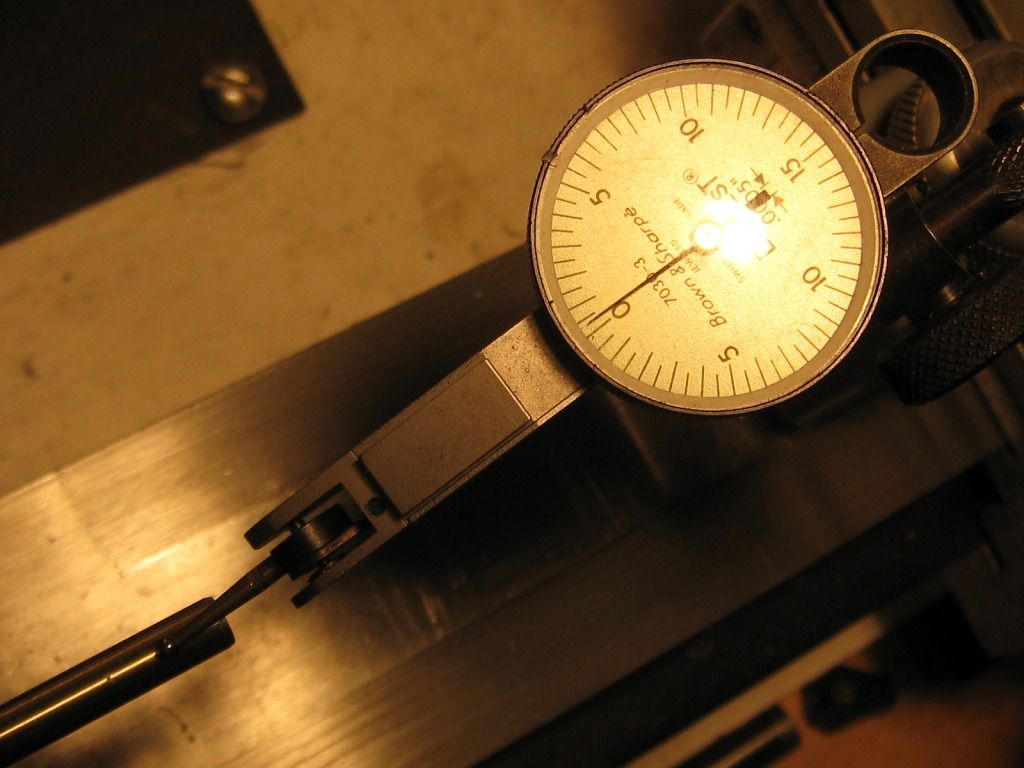
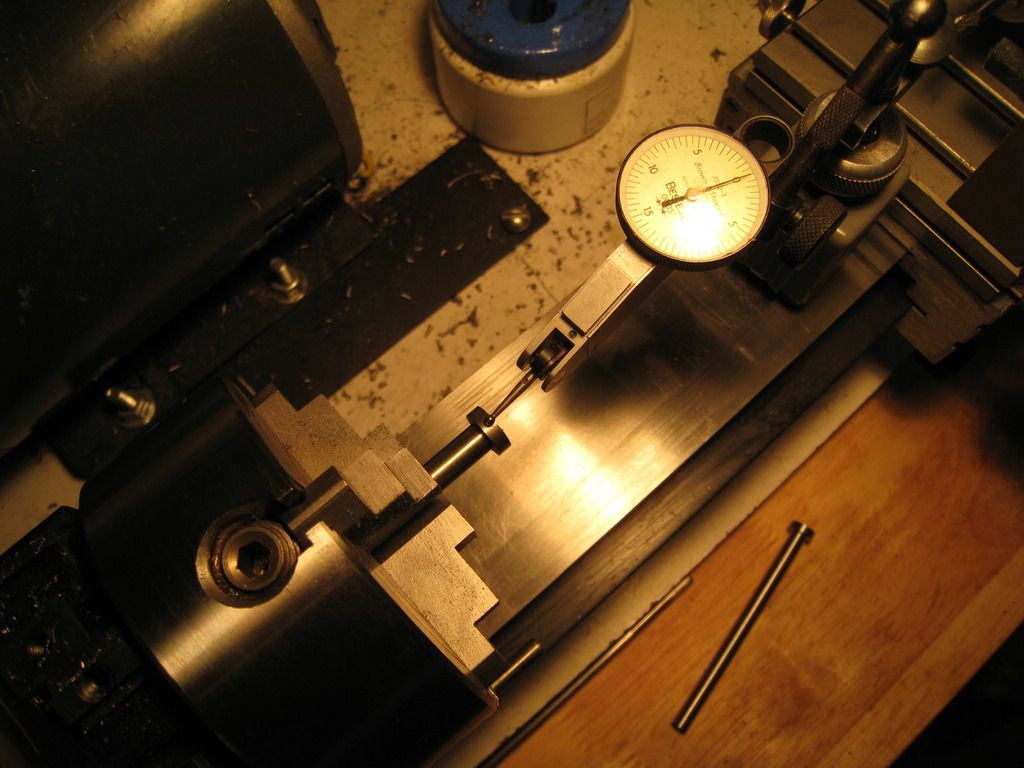
Over on the lathe I have a foot of 5mm Hardened & ground 416 stainless steel rod in the headstock. Getting that dialed in with the four jaw chuck.
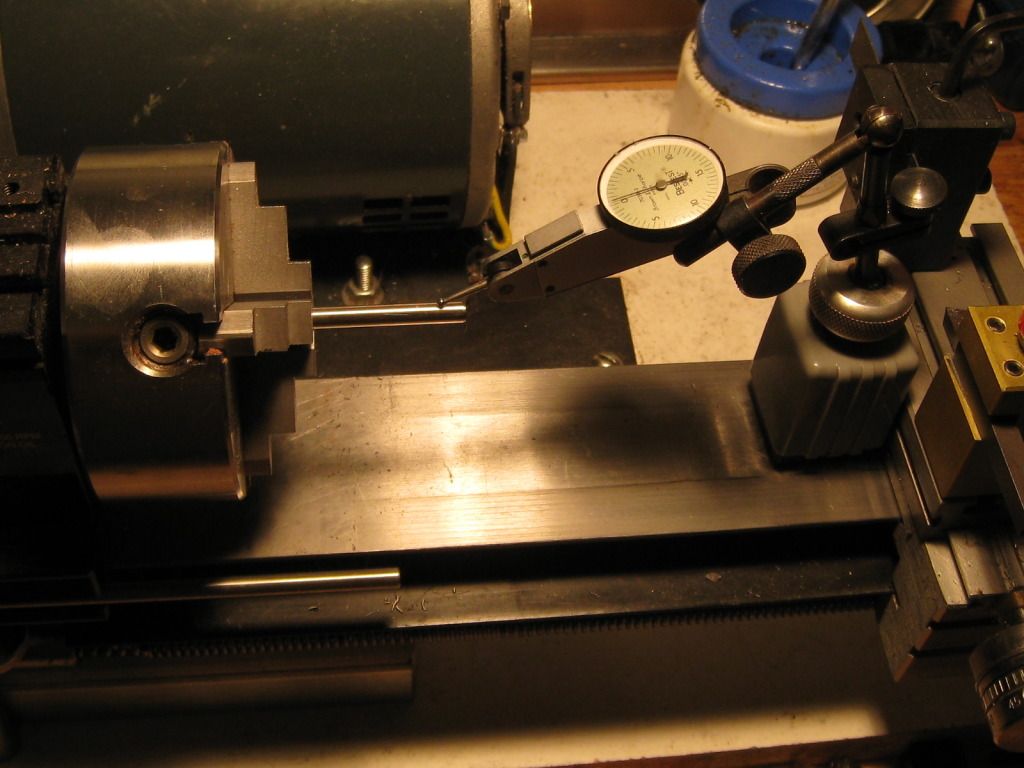
Total indicated runout about 0.0003" That's three tenthousandths of an inch. Not bad
I'll be back later...time to make some chips.
Cheers
Bill
__________________
Because they don't make a .46
|
|
The Following 8 Users Like Post:
|
|
01-23-2016, 12:22 AM
|
|
US Veteran
|
|
|
Join Date: Jun 2012
Location: SW Mississippi
Posts: 1,348
Likes: 2,224
Liked 6,204 Times in 1,040 Posts
|
|
Picking up right where we left off...
Taking a cut to bring the OD of that 5mm rod down to about 0.176"
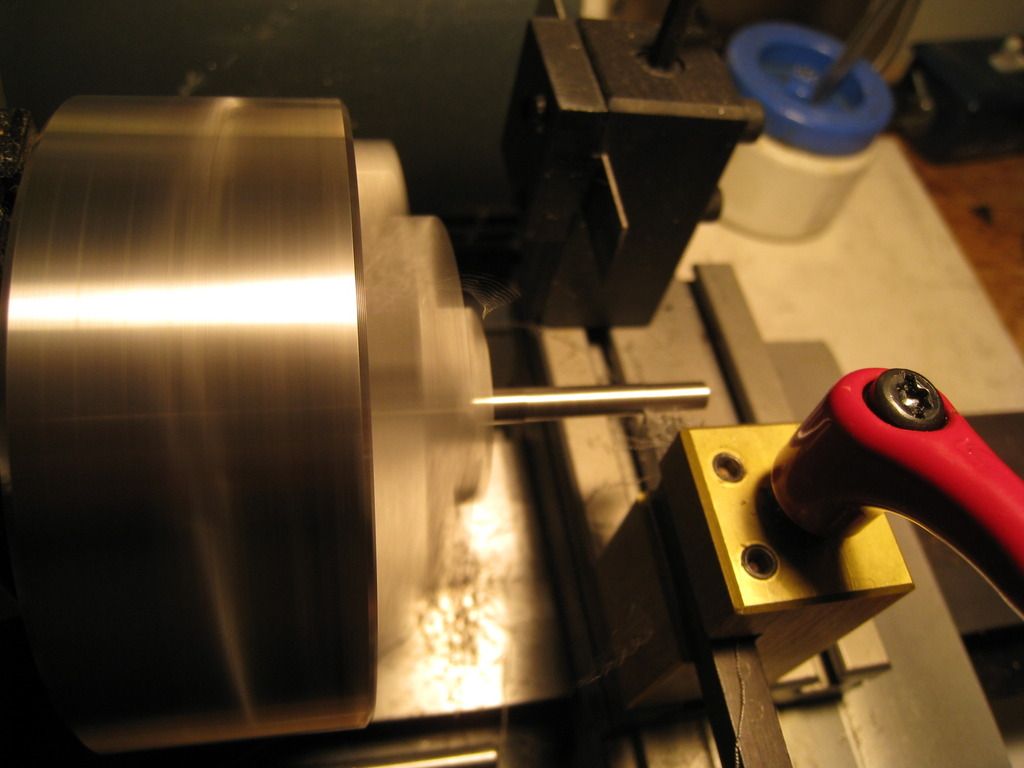
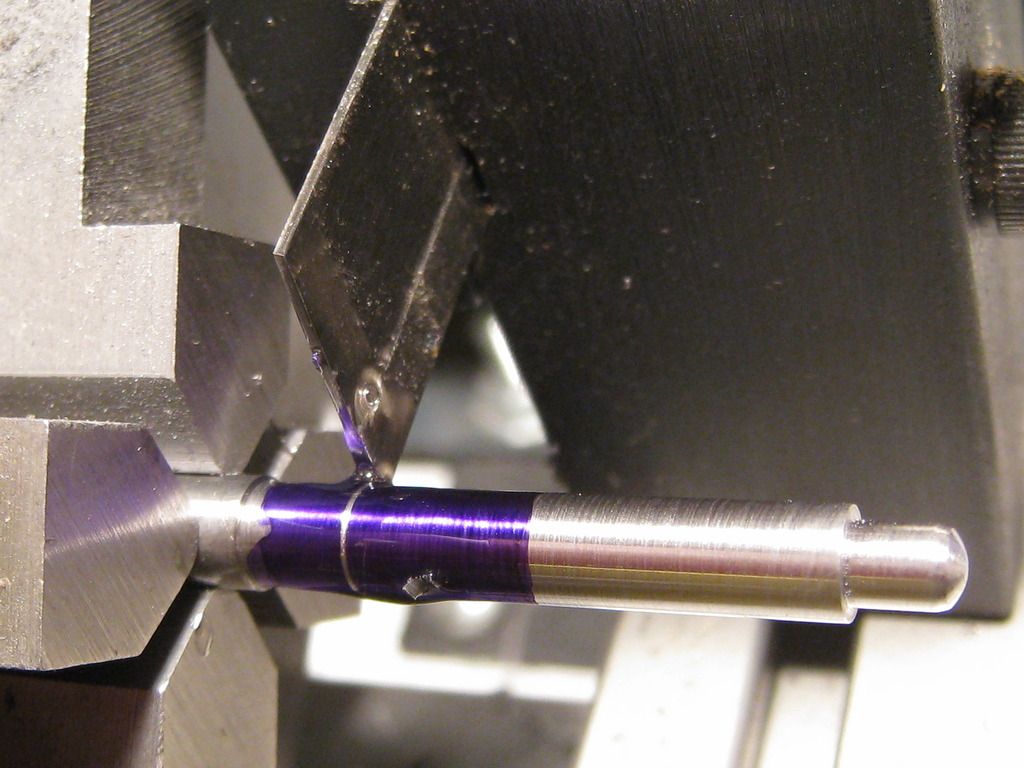
Now the that the diameter is right we'll put some layout dye on there and mark where the shoulder is to be. I line up my tool bit to that mark by eye then set the carriage stop so when turning I can simply run the carriage right into the stop with the power feed and not worry about missing my mark or overshooting.
This is the last cut here as we take off the last 0.008" to bring the diameter to 0.129"
Looks good to me
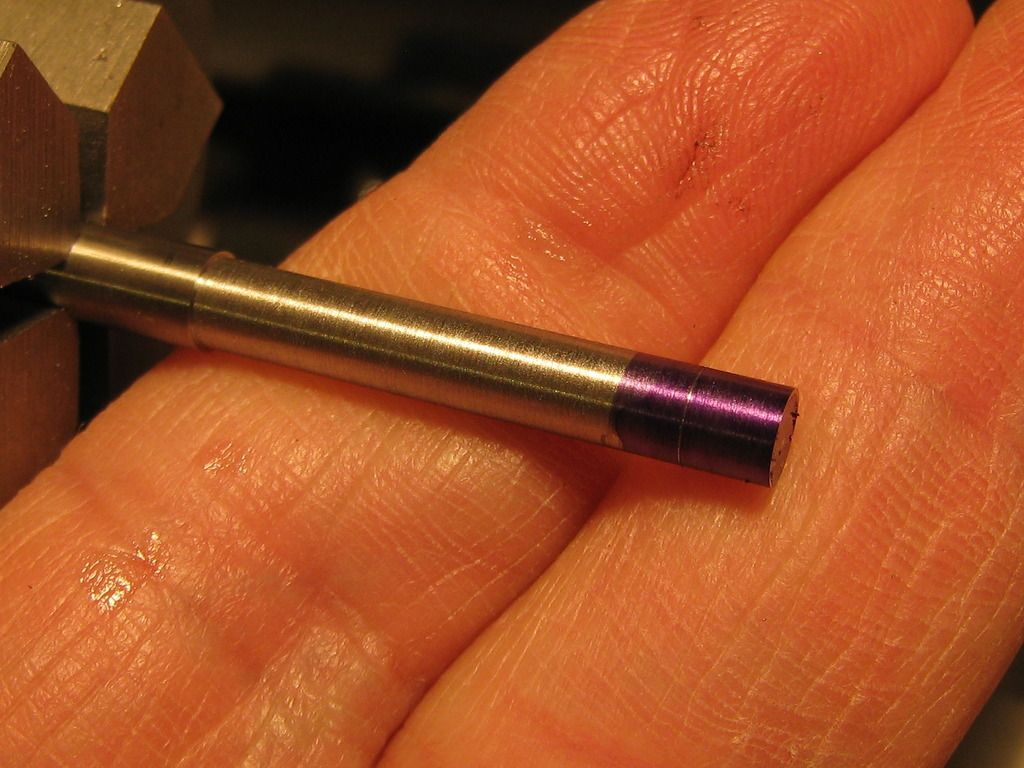
Spin the thing back up and after a little file work, we have our 5/64ths radius.
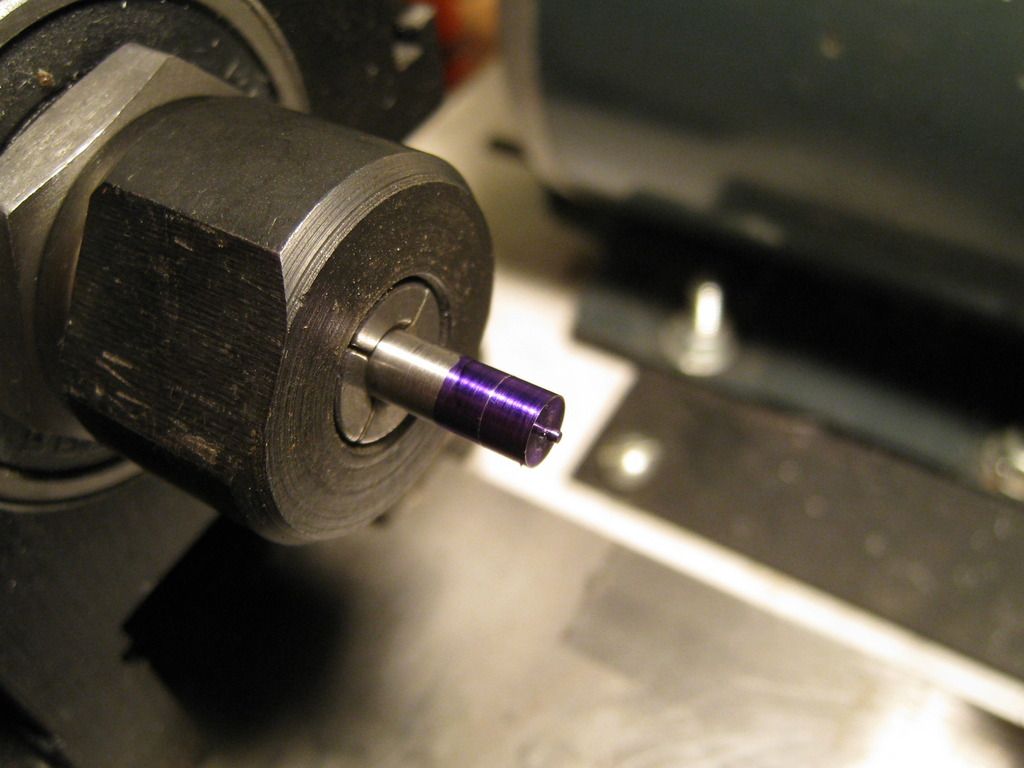
Now a little more dye and mark the rod 0.800" back from the shoulder. That's where we part off the first one.
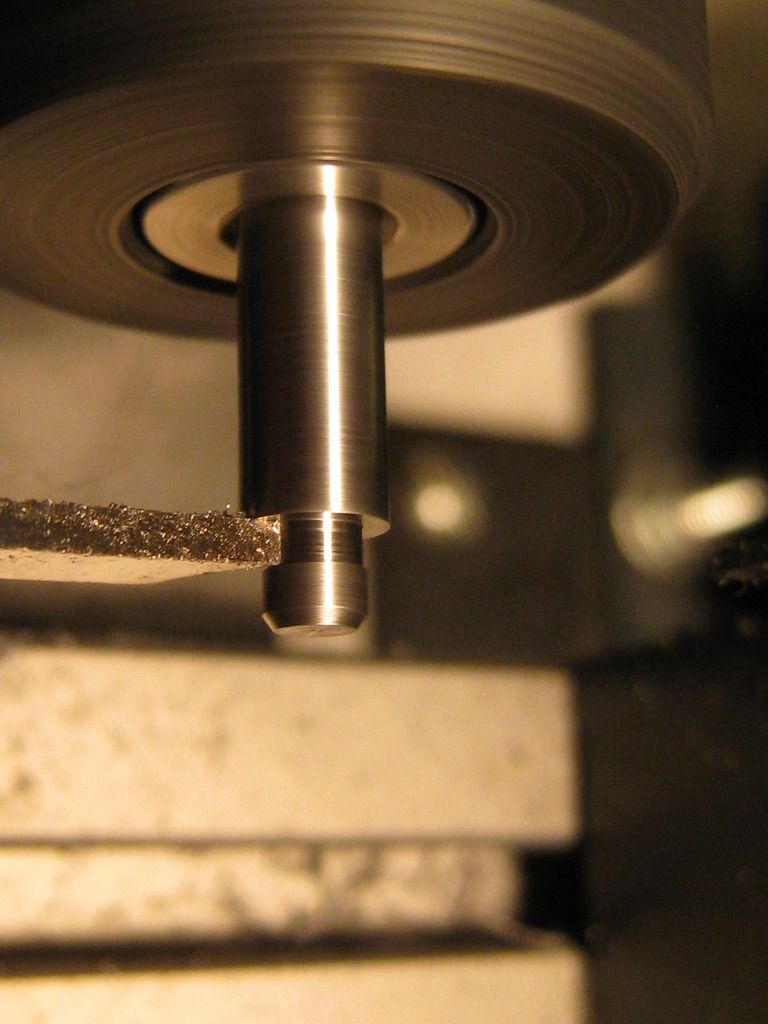
Slow the machine down to 500rpm, apply a little bit of cutting fluid and run the parting tool in there briskly.
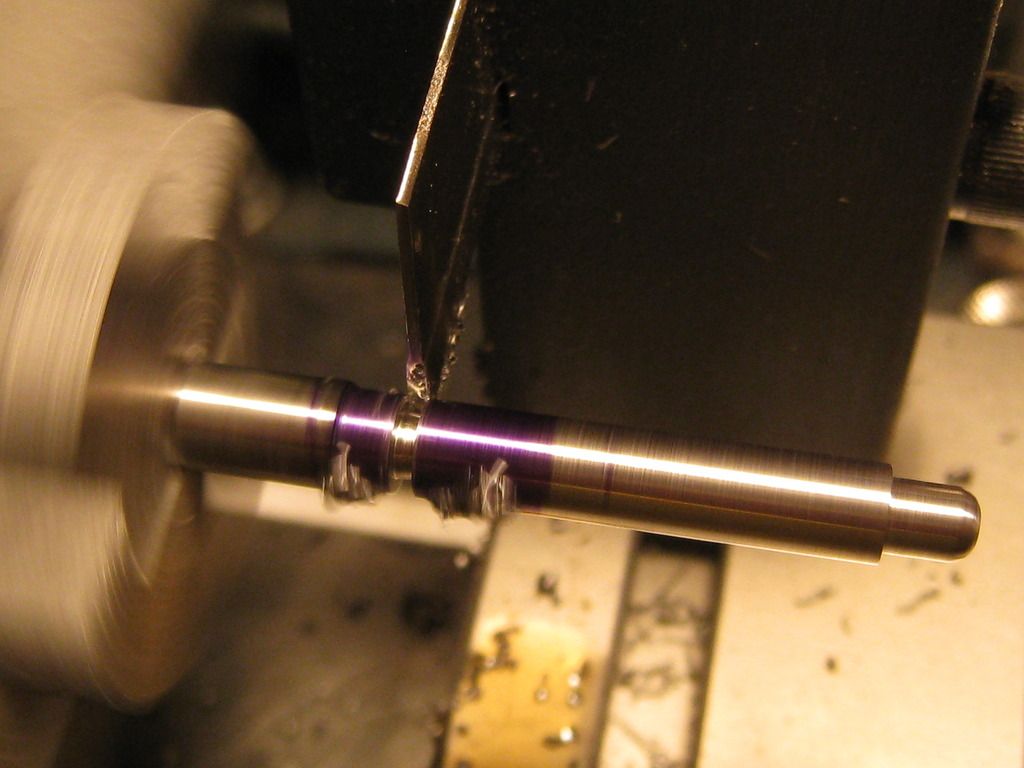
We're about one fourth complete making the plungers now.
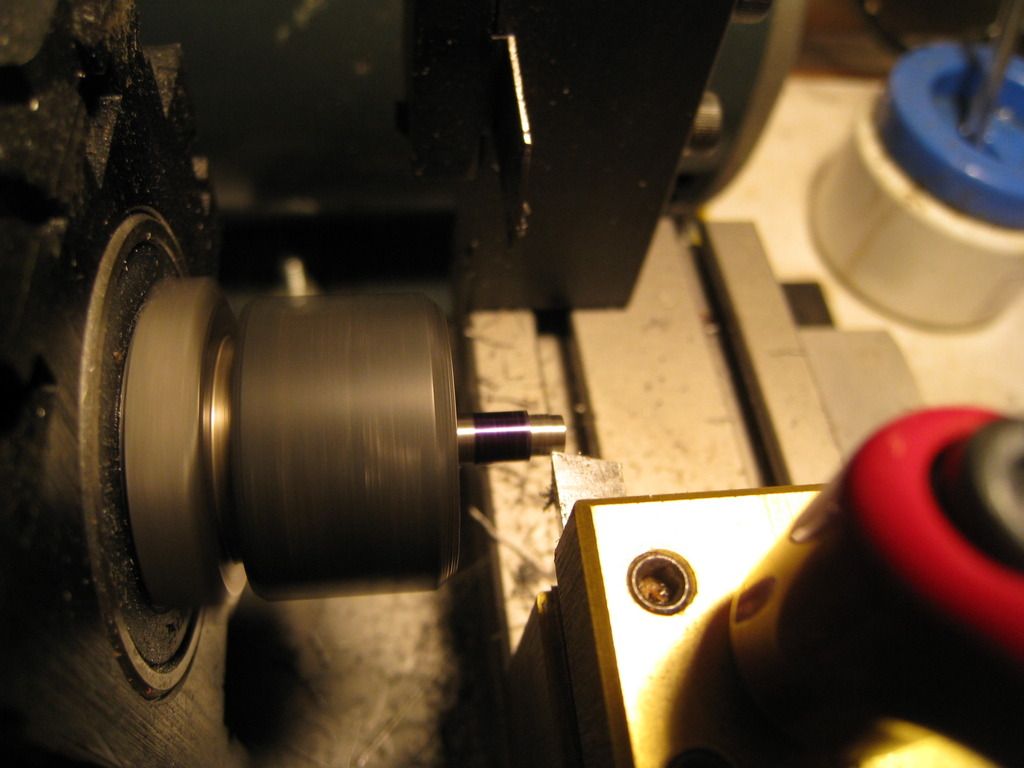
Now loosen the chuck and advance the rod to make the next one. Once it's indicated in we repeat all the above steps. Here's plunger #2 about to be parted off the stock.
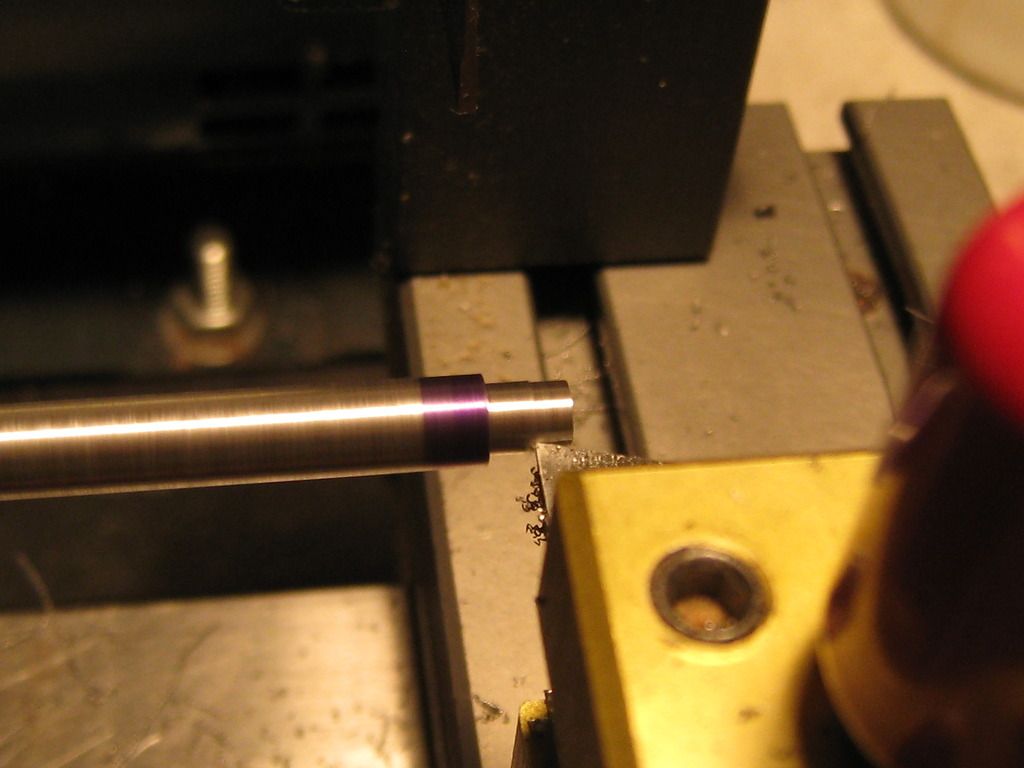
Now we un-mount the chuck and install a collet to hold the unfinished plungers. You can see there's some more dye and a new mark. What we want here is set back the shoulder 0.120" and reduce the diameter to also 0.120". But first I'll take a facing cut to clean up the end of the rod and wipe the little nub off there.
Almost there.
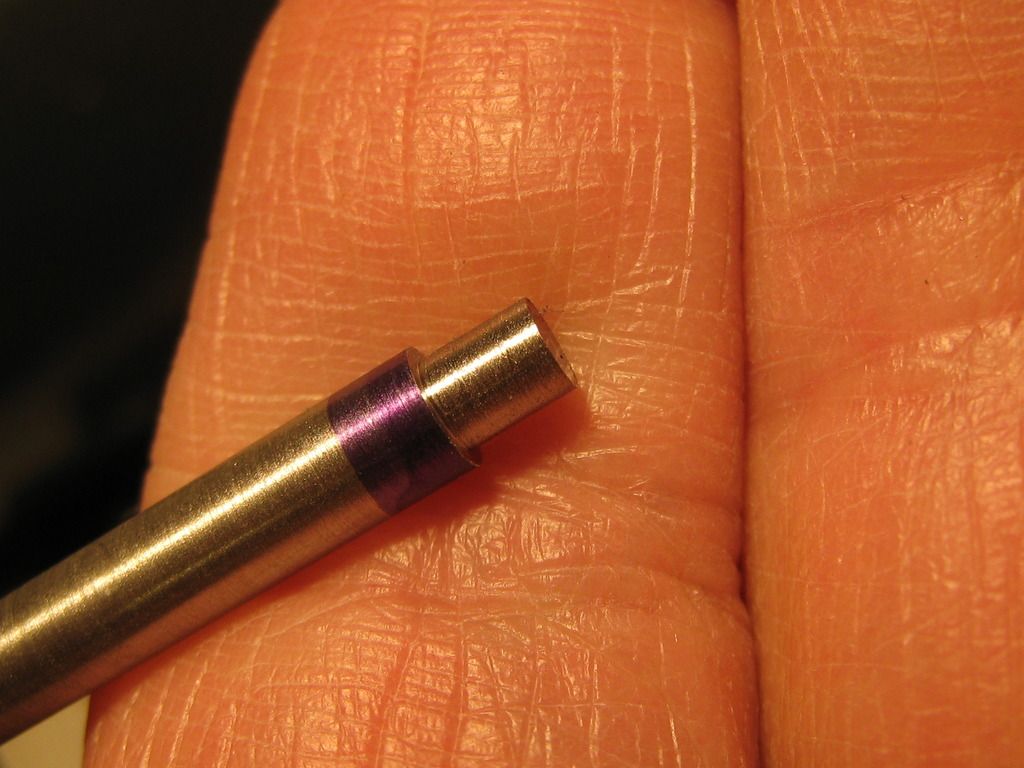
That looks good, but... it still needs a 45° chamfer out on the end.
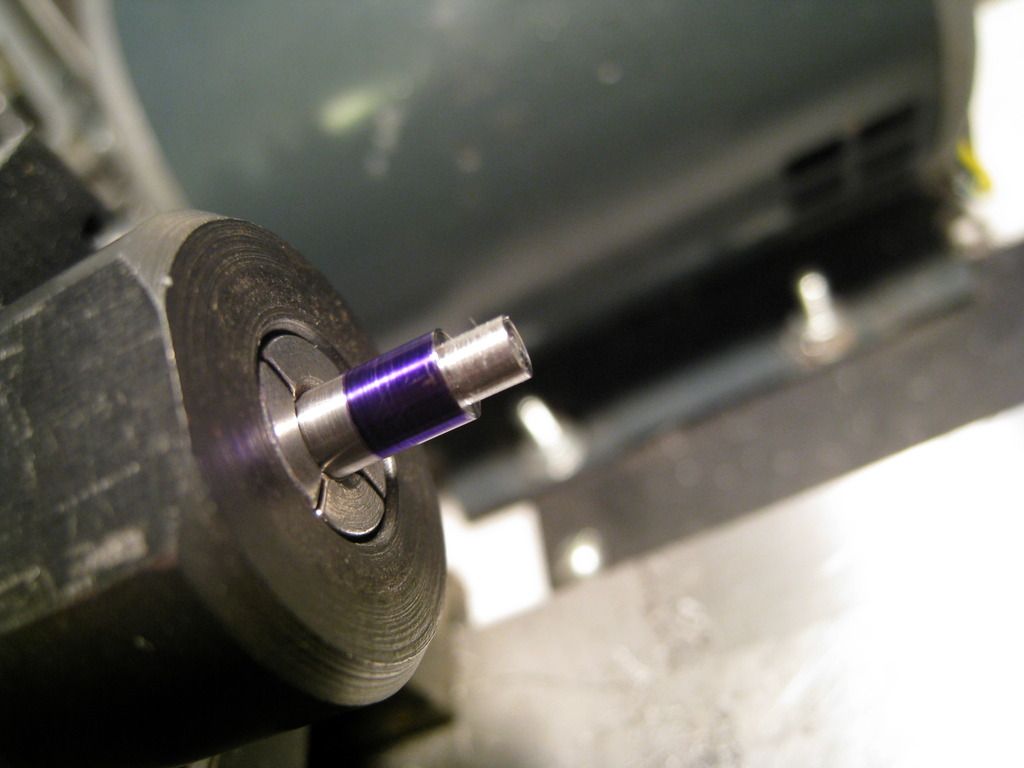
I'll do that with a file too.
Clamp the other piece in the collet, rinse & repeat and we have two plungers that are 90% complete.
That little groove on the short end which retains the plunger spring is left to do yet. I'll grind a tool to cut that tomorrow. I just re-mounted my grinding wheels with some precision drill bushings in lieu of those cheap plastic nested bushings so I need the dress & true the wheels again before I grind any tools.
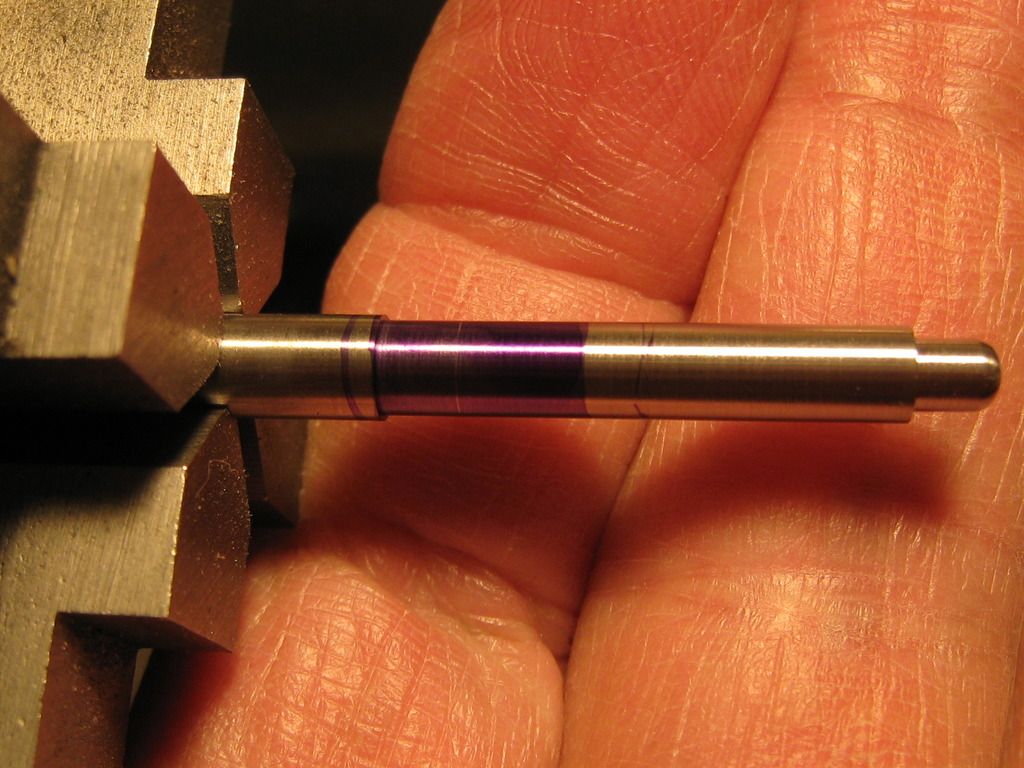
The plungers didn't come out half bad.
And...
I'll finish these up tomorrow then get going on the guiderods proper.
Cheers
Bill
__________________
Because they don't make a .46
|
|
The Following 14 Users Like Post:
|
03Fatboy, 6actual, Big Shrek, BLUEDOT37, GaryS, nocents, Richard Simmons, Shorty 45 MK2, TAROMAN, TercGen, timn8er, URIT, vigil617, wild47 |
01-23-2016, 01:48 AM
|
|
Member
|
|
|
Join Date: Mar 2013
Location: s.w.Ohio
Posts: 1,932
Likes: 4,002
Liked 2,809 Times in 1,169 Posts
|
|
wow......just blows me away
__________________
witty signature goes here
|
|
The Following 2 Users Like Post:
|
|
01-23-2016, 07:49 PM
|
|
US Veteran
|
|
|
Join Date: Jun 2012
Location: SW Mississippi
Posts: 1,348
Likes: 2,224
Liked 6,204 Times in 1,040 Posts
|
|
Lets finish up the work on the plungers, shall we?
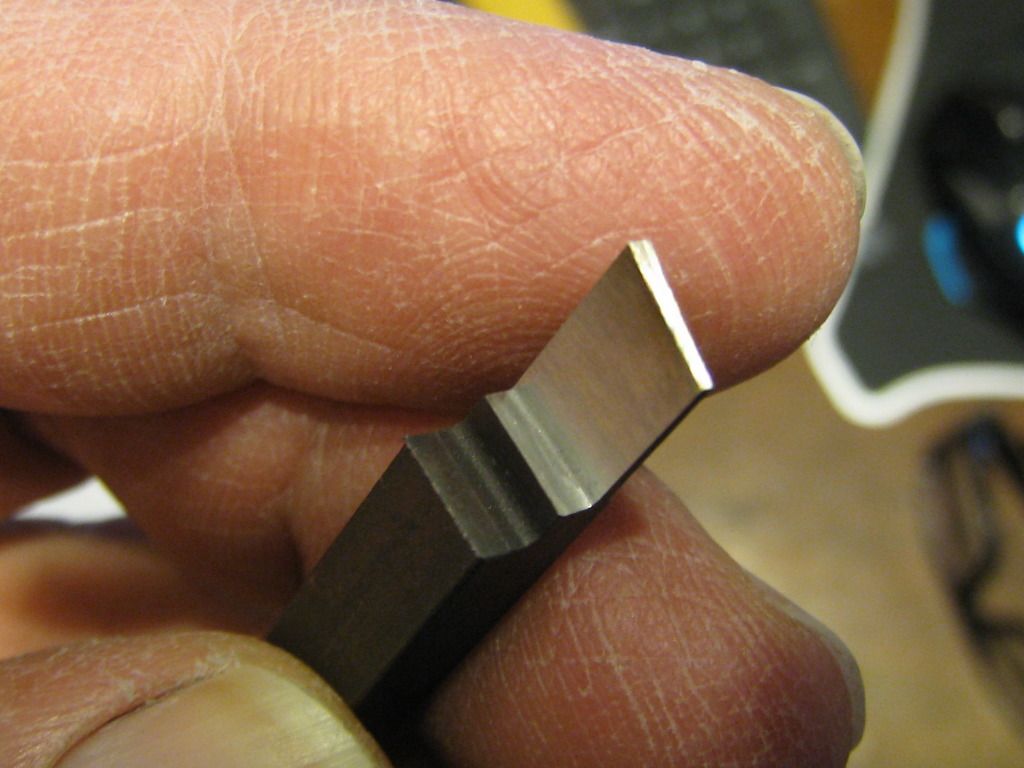
First I need to grind a toolbit to cut that 0.050" groove.
This looks to be a likely candidate.
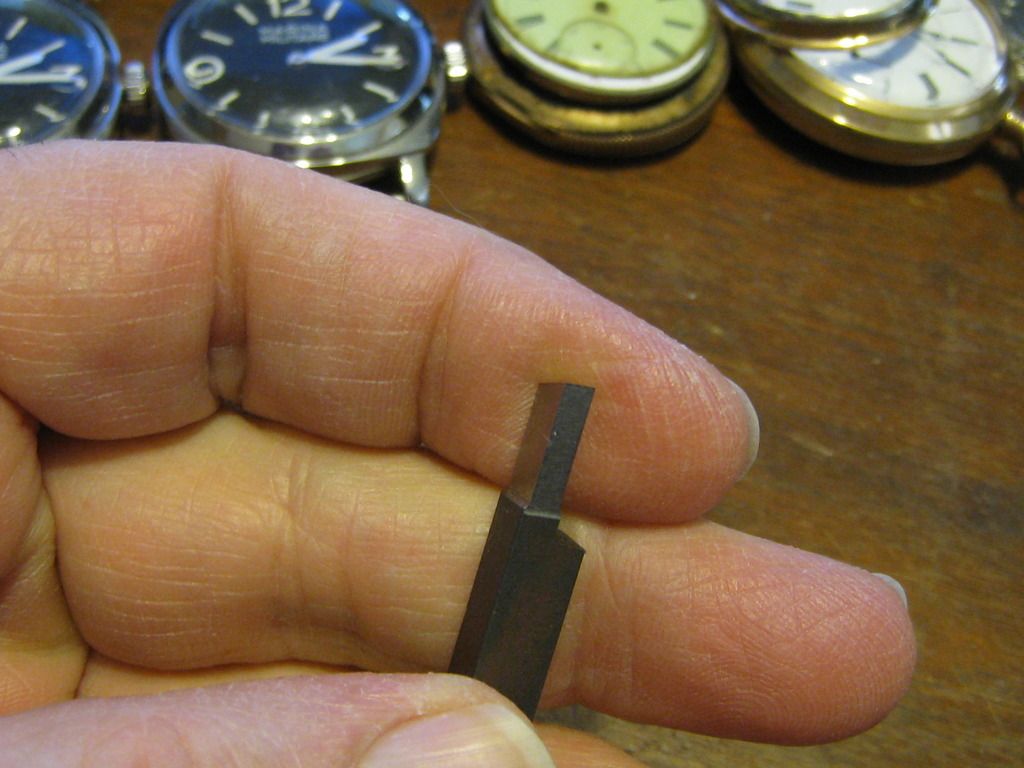
A few minute on the grinder and we have this.
Meaasures 0.051 at the cutting edge... Close enough
Back in the collet getting everything lined up.
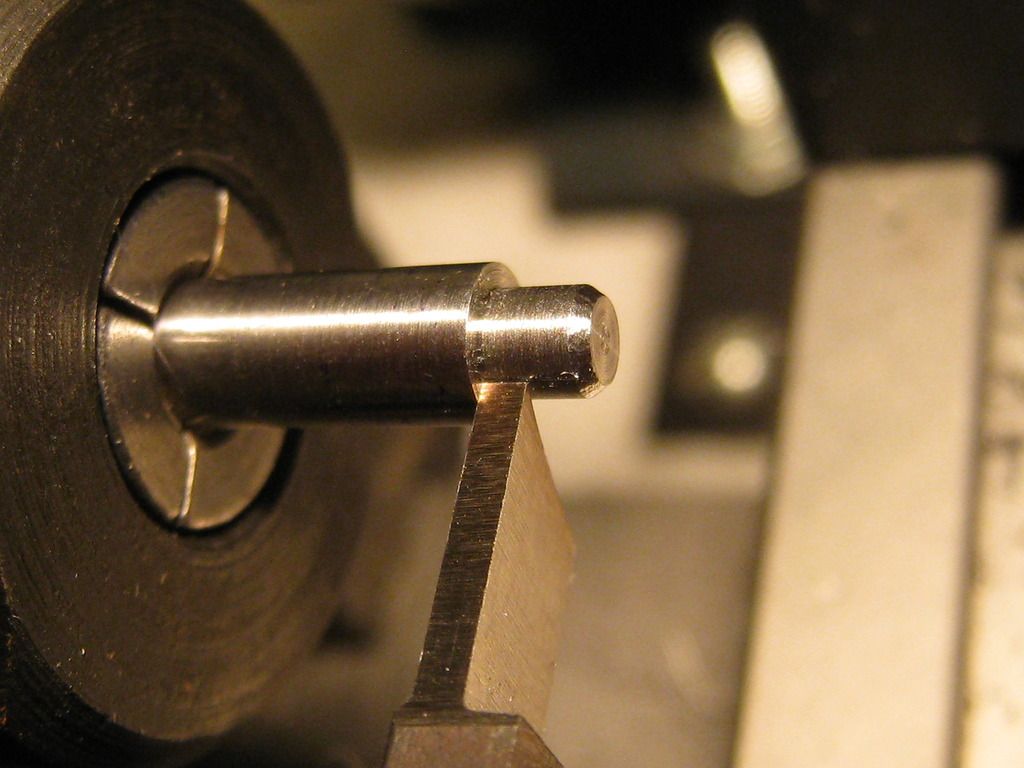
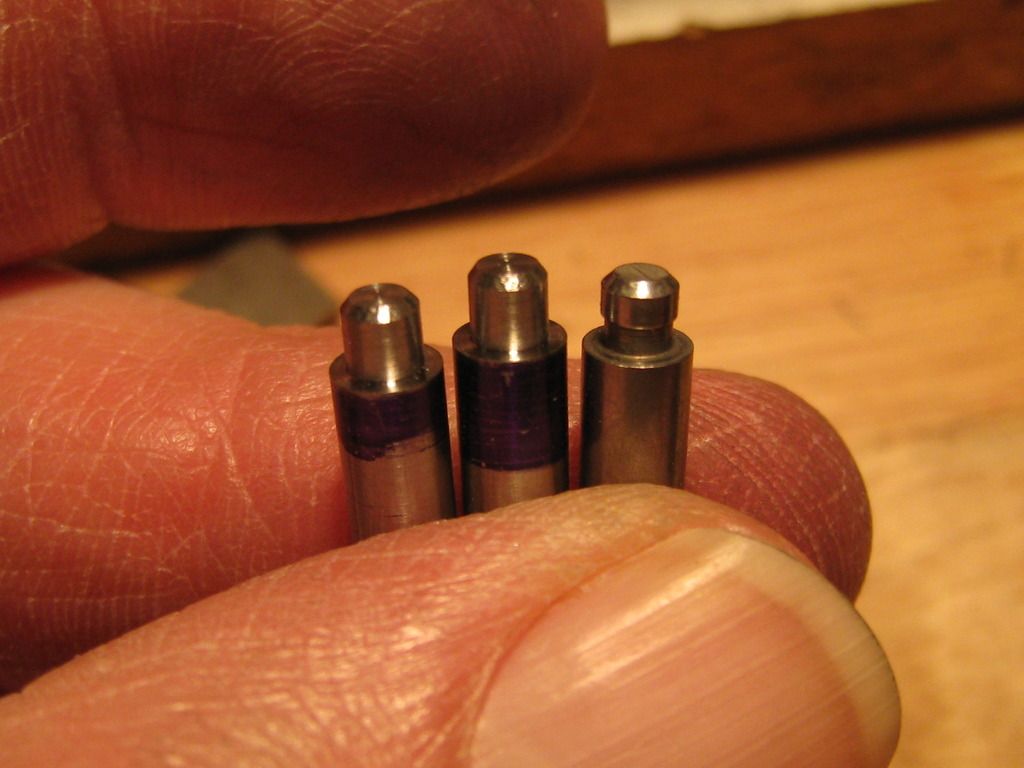
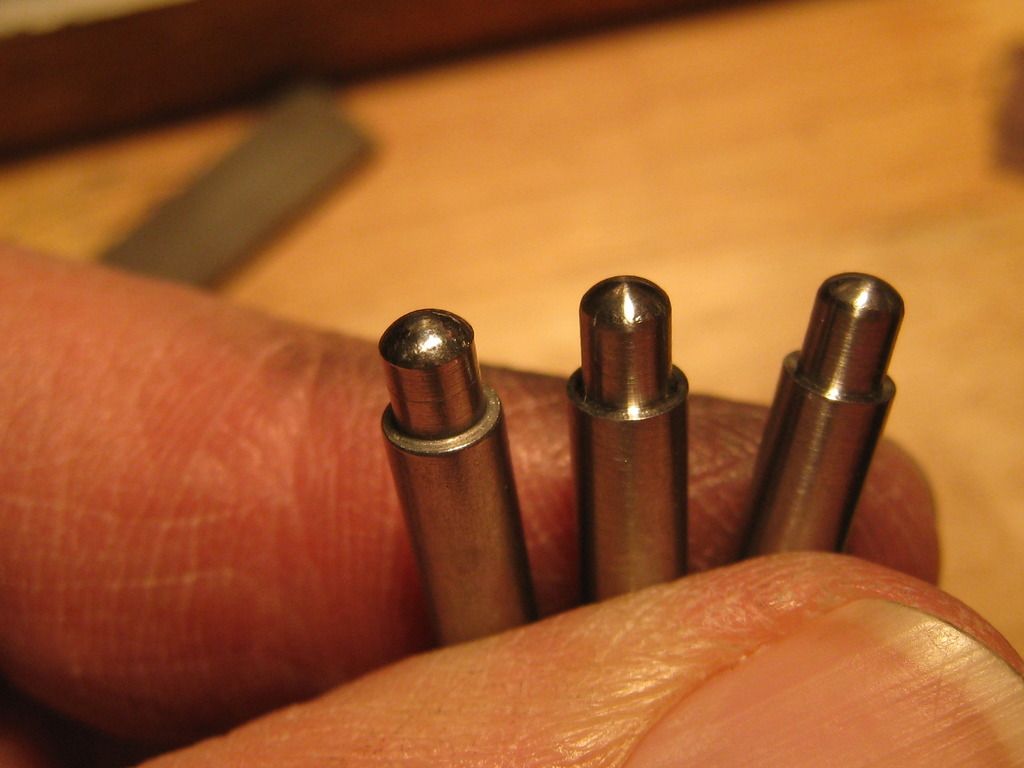
As I thought, works just fine.
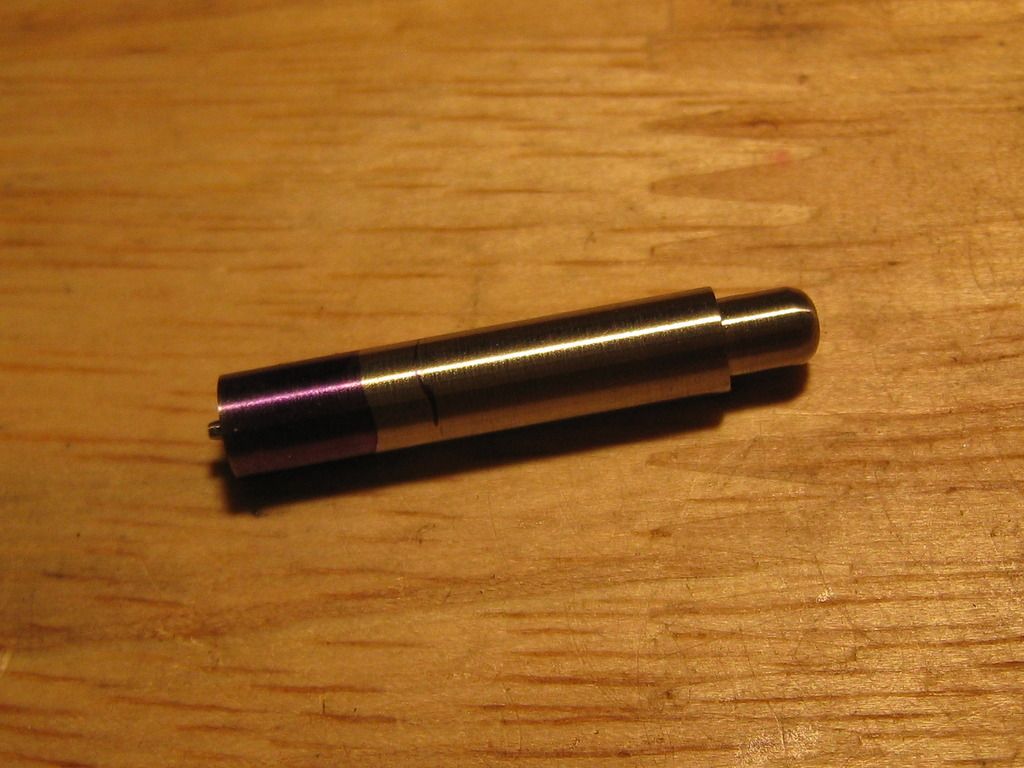
These are done! The top one is the factory part.
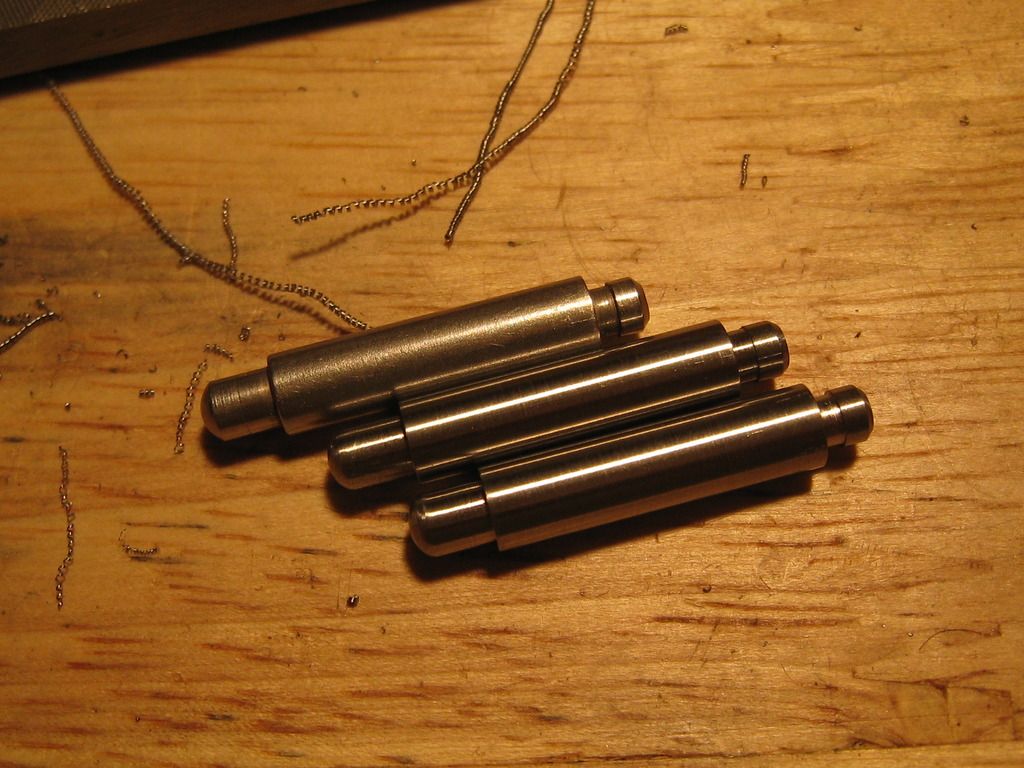
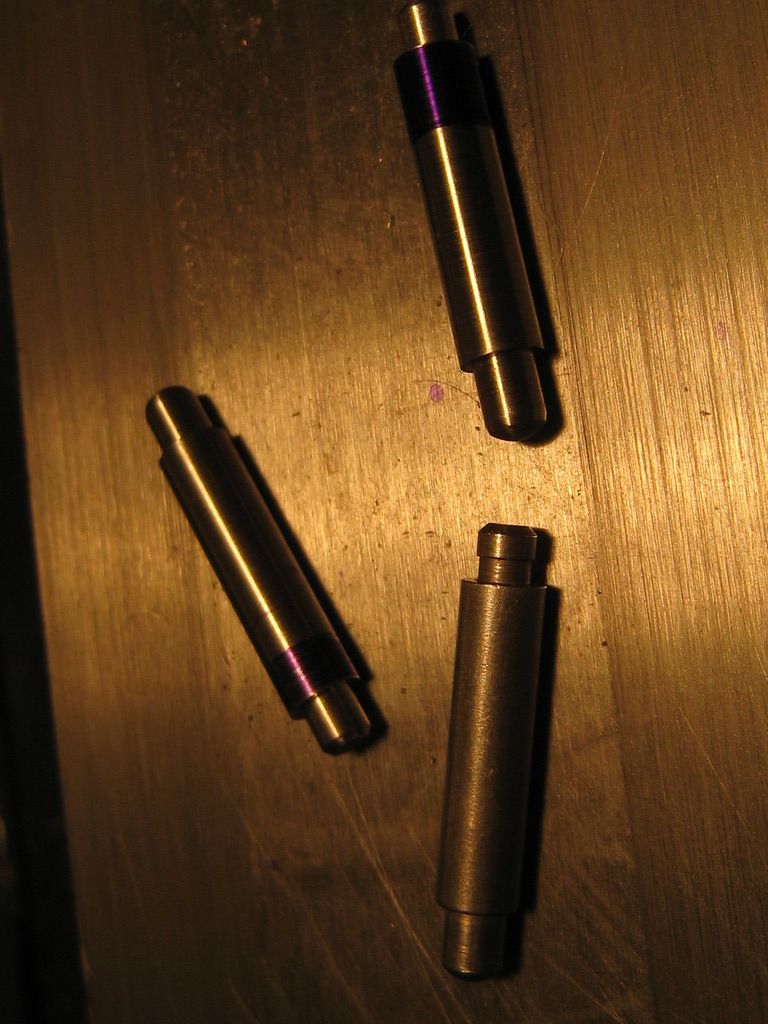
Next up we'll tackle the guiderods proper.
That short fat one is the correct length and I will base some of the measurements off that. As you can see it's about 1/8th inch shorter than the rod you'd find in say a 4516-2 with the nested spring set. Top of the frame is a piece of 12mm 416 stainless bar.
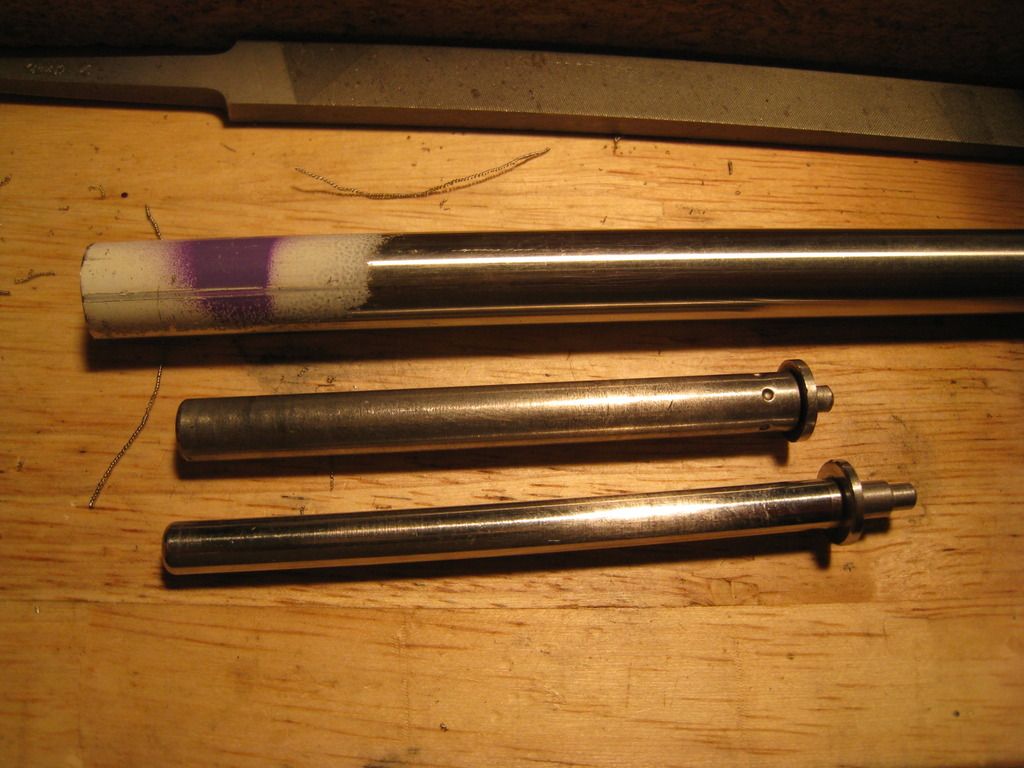
I need to do some number crunching first to figure just how long a piece to saw off for one rod with the goal of minimizing waste. Once I get that sorted and a couple pieces cut it's back to the lathe for some turning.
Stay tuned.
Cheers
Bill
__________________
Because they don't make a .46
|
|
The Following 13 Users Like Post:
|
6actual, GaryS, nocents, opaul, Richard Simmons, ShelbyV8, Shorty 45 MK2, TAROMAN, TercGen, timn8er, Turn & Bank, vigil617, wild47 |
01-24-2016, 02:44 PM
|
|
Member
|
|
|
Join Date: Mar 2015
Location: Wyoming
Posts: 77
Likes: 231
Liked 106 Times in 49 Posts
|
|
Bill
Love the work you're doing and am interested in your lathe. What type is it? I've a lathe myself but I need something a little more precise. Your input would be appreciated.
Thanks,
Jim
|
|
The Following User Likes This Post:
|
|
01-24-2016, 03:11 PM
|
 |
US Veteran
|
|
|
Join Date: Sep 2009
Location: Des Moines WA
Posts: 909
Likes: 357
Liked 592 Times in 286 Posts
|
|
And what's up with the lineup of horological devices?
Looks like a couple of Panerai, and some pocket watch work lined up.
|
|
The Following User Likes This Post:
|
|
01-24-2016, 05:04 PM
|
|
US Veteran
|
|
|
Join Date: Jun 2012
Location: SW Mississippi
Posts: 1,348
Likes: 2,224
Liked 6,204 Times in 1,040 Posts
|
|
Quote:
Originally Posted by Turn & Bank
Bill
Love the work you're doing and am interested in your lathe. What type is it? I've a lathe myself but I need something a little more precise. Your input would be appreciated.
Thanks,
Jim
|
Thanks! The lathe is a Taig. I've added quite a few attachments to the basic setup along with some custom touches. It's very accurate and quite solid. Downside is no threading capability and the work envelope is kinda small. Hindsight being 20/20 I would still have bought it, it's a great tool and very simple to work on and customize. I can see where I'm going to want something bigger with threading in the future. Perhaps a Hardinge tooloom lathe Hah not bloodly likely$$$$$. I get all my Taig stuff from Nick at Cartertools.
The Taig Lathe and Milling Machine
Cheers
Bill
__________________
Because they don't make a .46
|
|
The Following 2 Users Like Post:
|
|
01-24-2016, 05:36 PM
|
|
US Veteran
|
|
|
Join Date: Jun 2012
Location: SW Mississippi
Posts: 1,348
Likes: 2,224
Liked 6,204 Times in 1,040 Posts
|
|
Quote:
Originally Posted by BruceB
And what's up with the lineup of horological devices?
Looks like a couple of Panerai, and some pocket watch work lined up.
|
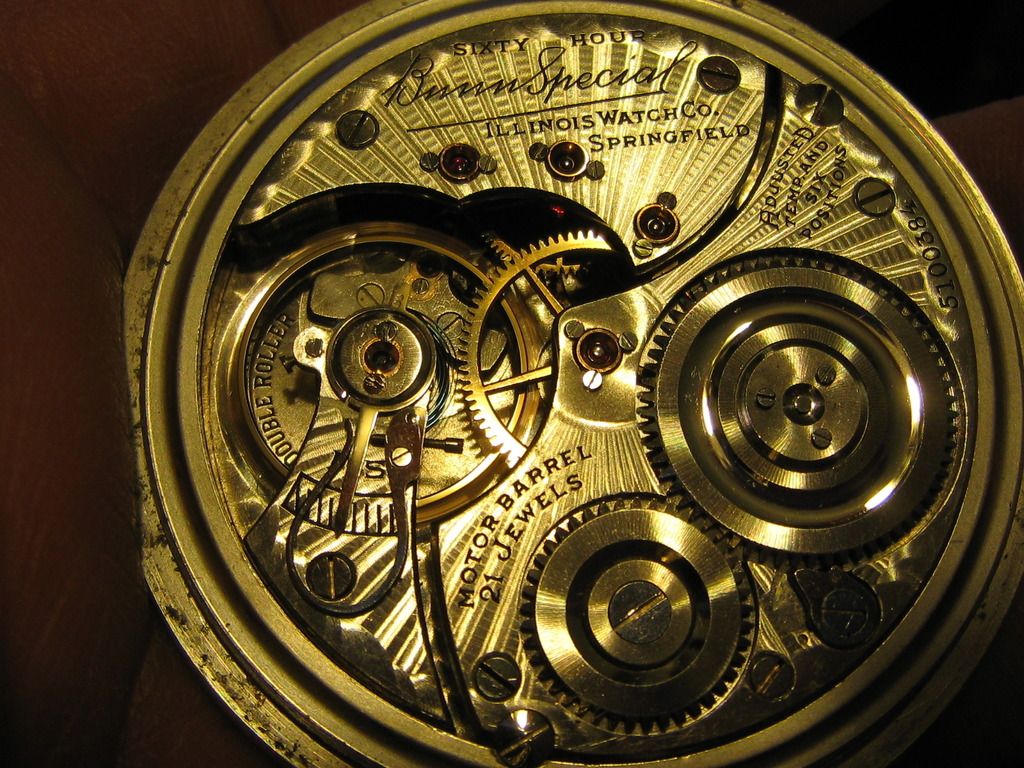
The one you don't see the the 88 year old Bunn Special that lives in my pocket
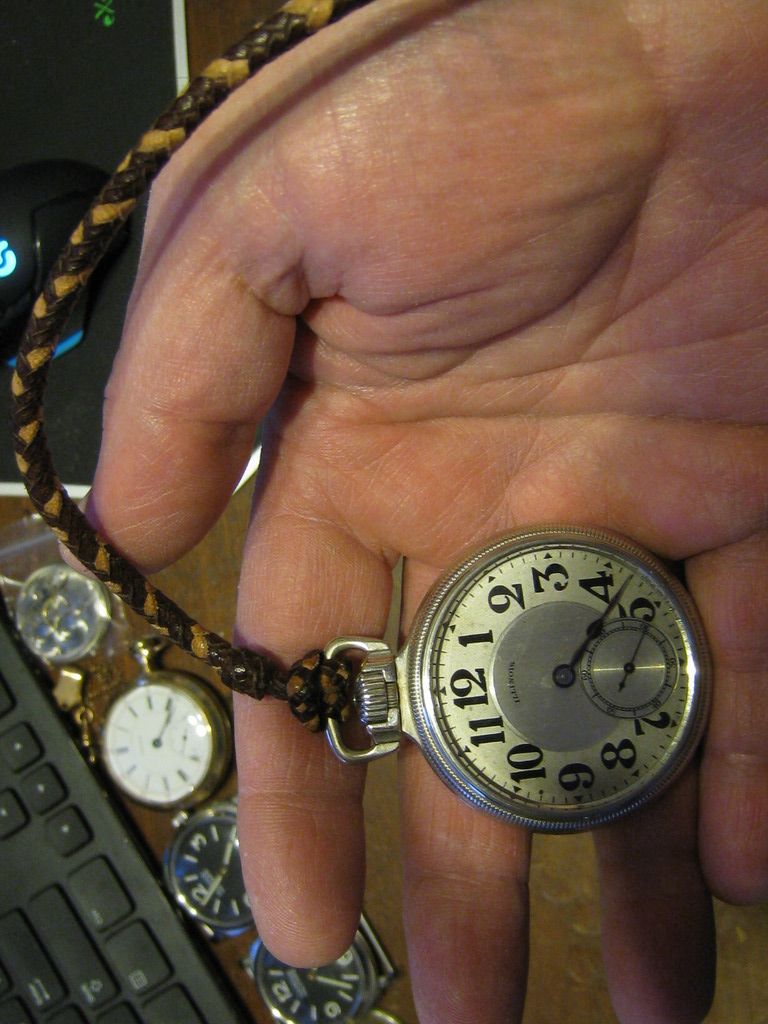
Under the hood... 21 ruby bearings in solid gold settings and all the train wheels are solid gold. Keeps time wonderfully well.
The big gold watch there is my Great Grandfather's 18 size Waltham model 1892. It's 120 years old and running fine.
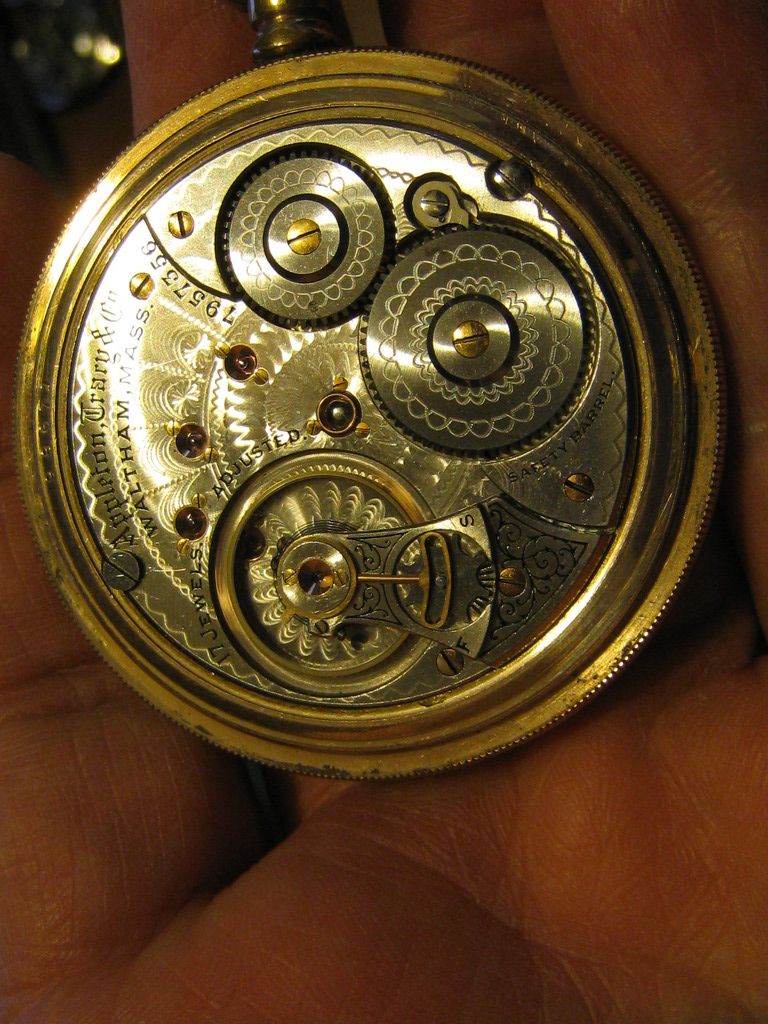
Those "PANs" are knockoff of a 1950's vintage Rolex 6152/1 Something for me to tinker with. If I ever come across an Angelus 240 movement or a Rolex Cal. 618 movement I'll case 'em up just because
Ever since I was a wee lad I've always held a fascination for all things mechanical. Thus my appreciation for these old timepieces among other mechanically thingies. Kinda sad that the skill & craftsmanship that made these is lost to history. Same as an M&P or Glock...Plastic watches with batteries have no soul.
Ok, Thanks for the break ...I'll get back to machining the guiderods and update in a couple hours.
Cheers
Bill
__________________
Because they don't make a .46
|
|
The Following 10 Users Like Post:
|
|
01-24-2016, 10:00 PM
|
|
US Veteran
|
|
|
Join Date: Jun 2012
Location: SW Mississippi
Posts: 1,348
Likes: 2,224
Liked 6,204 Times in 1,040 Posts
|
|
Getting started on the guiderods proper here.
I sawed off two pieces of that 12mm bar about 3.5 inches long. I wanted to have just enough extra length beyond whats needed for the finished guiderod to allow work positioning without any undue waste.
One piece is there in the chuck but I decided to change the setup before cutting.
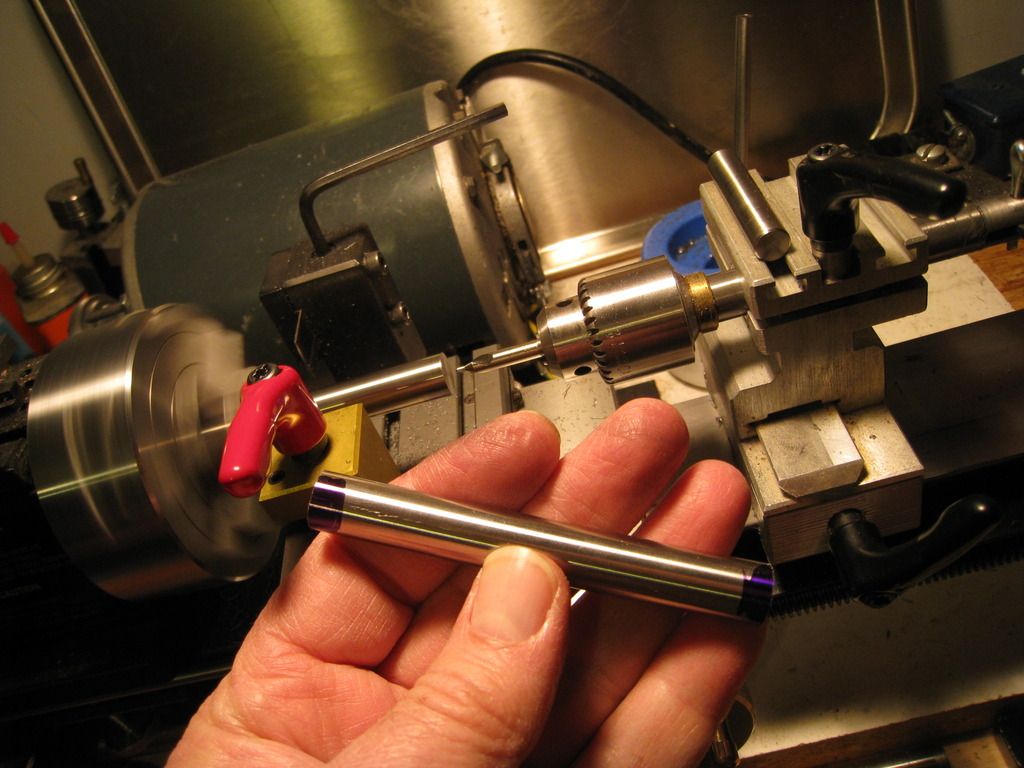
Gads! what a mess!
I changed back to the three jaw scroll chuck for this operation.

Quite a bit of unsupported stickout so I need to take pretty small cuts to prevent tool chatter.
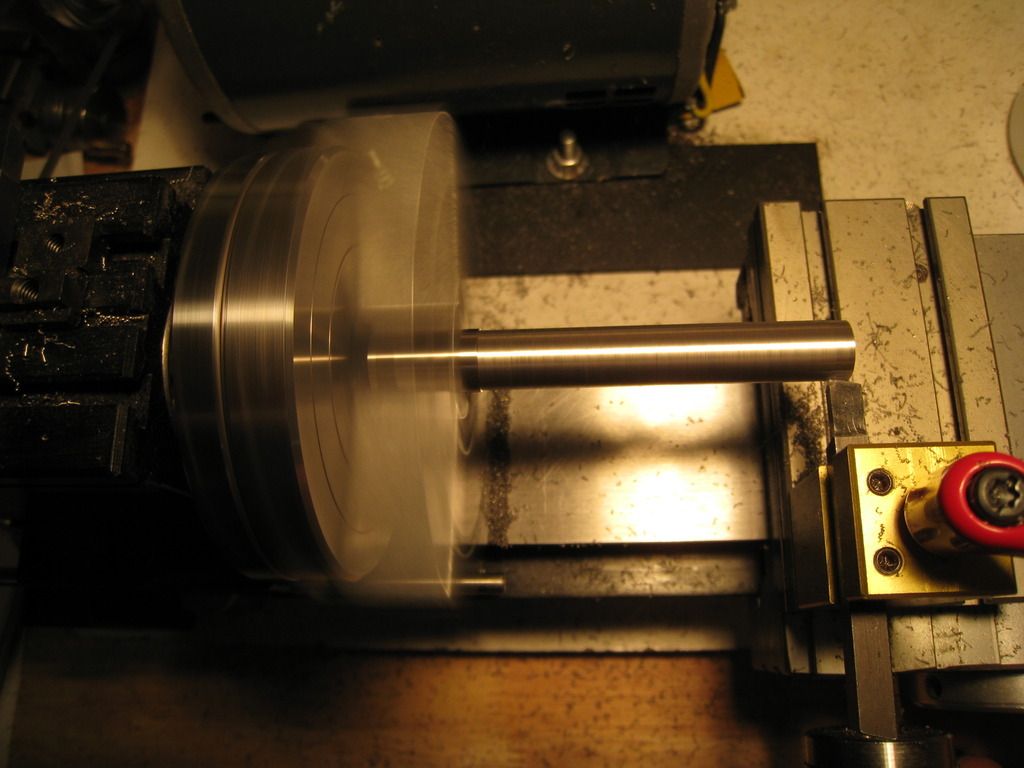
Ten thousandths 0.010" at a time. So far so good.

First operation and the bulk of the materiel removal done on both parts.
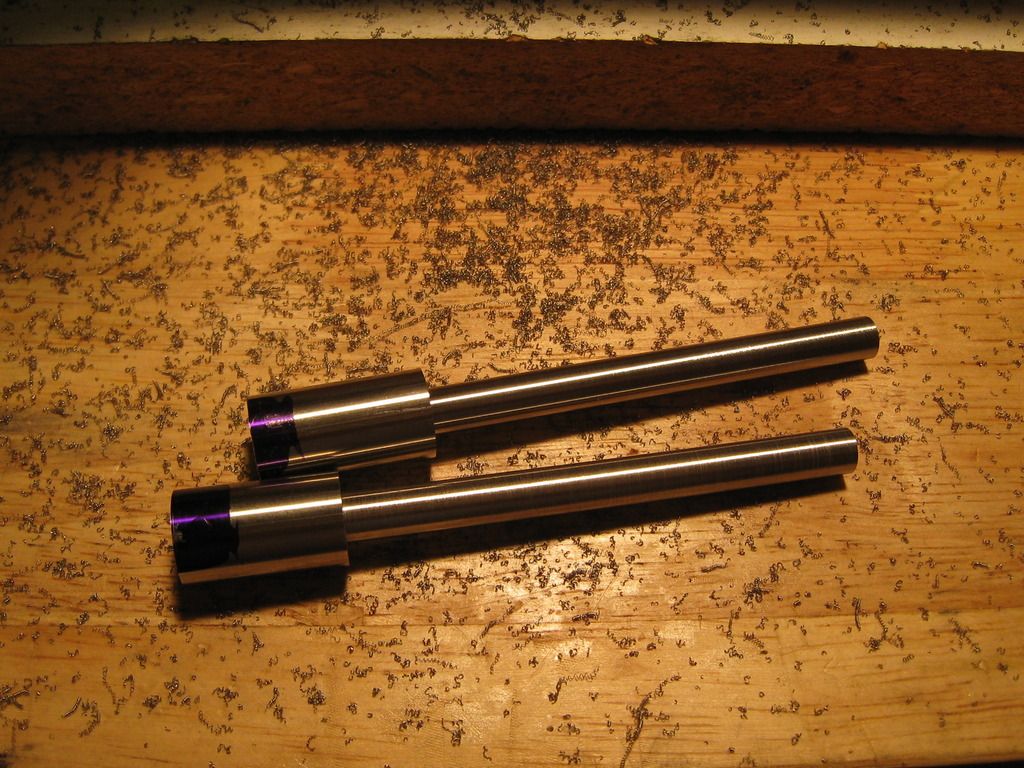
Setting up for the second operation I'm switching to the four jaw chuck. Now you might ask... Why are we swapping chucks all the time and what the hell is the difference? OK, well, the three jaw is a scroll chuck not unlike what you'd find on a hand drill. All three jaws adjust together so, if you have a part that's real rough or out of round it may have significant runout or misalignment when tightened. It's easier to use and It's accurate enough for most work.
For real tight, precise work well, that's where the four jaw chuck shines. On the four jaw chuck, each jaw is adjustable independently of the others. This allows you to hold oddly shaped pieces, square stock and even intentionally hold things off center. For this job we want the minimize runout as much as possible by adjusting the chuck until the part is as close to exactly on center we can manage.
Here's one of the rods in the four jaw held by the skinny end and indicated in with ZERO! discernible runout Spin that chuck around by hand and the needle?... she don't move
Next we're gonna make a facing cut to clean up these saw marks and true the end of the rod.
That's much better.
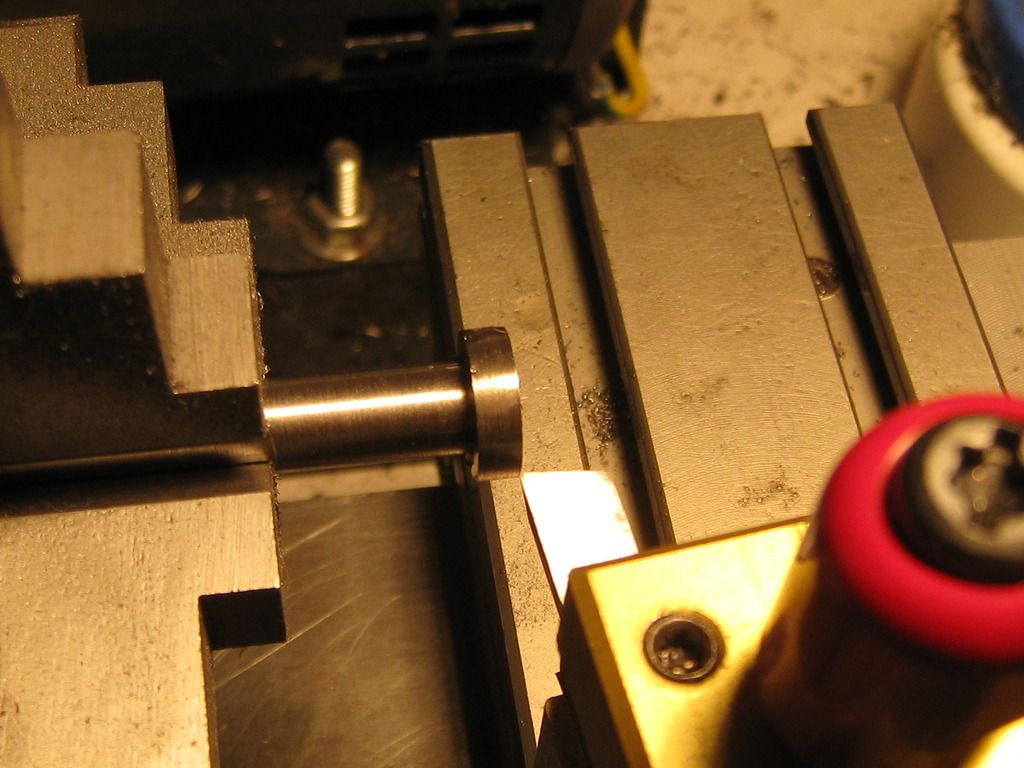
Now set up to center drill the fat end so it can be stabilized with the live center while I work on it.
There, that will do nicely. Coincidentally that hole, when finished, will be where one of those plungers will live.

Now to change tool the toolbit to a lefthand, flip the toolpost around and reverse the carriage feed. I'll be feeding the tool from left to right away from the chuck for this operation.
That's all for now
Cheers
Bill
__________________
Because they don't make a .46
Last edited by BMCM; 01-24-2016 at 11:34 PM.
|
|
The Following 5 Users Like Post:
|
|
01-24-2016, 10:34 PM
|
|
US Veteran
|
|
|
Join Date: Sep 2009
Location: Des Moines WA
Posts: 909
Likes: 357
Liked 592 Times in 286 Posts
|
|
Quote:
Originally Posted by BMCM
The one you don't see the the 88 year old Bunn Special that lives in my pocket
Under the hood... 21 ruby bearings in solid gold settings and all the train wheels are solid gold. Keeps time wonderfully well.
Those "PANs" are knockoff of a 1950's vintage Rolex 6152/1 Something for me to tinker with. If I ever come across an Angelus 240 movement or a Rolex Cal. 618 movement I'll case 'em up just because
Ever since I was a wee lad I've always held a fascination for all things mechanical. Thus my appreciation for these old timepieces among other mechanically thingies. Kinda sad that the skill & craftsmanship that made these is lost to history. Same as an M&P or Glock...Plastic watches with batteries have no soul.
Ok, Thanks for the break ...I'll get back to machining the guiderods and update in a couple hours.
Cheers
Bill |
Absolutely gorgeous!
My little 6mm and 8mm watchmaker lathes look teensy next to that Taig.
OK, back to the topic! Always totally intrigued with your projects.
OK, another side note in a different direction, I just got word that I'm getting an invitation to the decommissioning ceremony of the first and only big white one I rode. USCGC Boutwell WHEC-719 is being decommisioned in San Diego on March 16th. It was only 2 years old when I first stepped aboard, and it's hard to believe it's being retired in my lifetime. There were 311's and 327's from WWII vintage still pulling ocean stations when Boutwell was new.
Last edited by BruceB; 01-24-2016 at 10:36 PM.
|
|
The Following 3 Users Like Post:
|
|
01-24-2016, 11:03 PM
|
|
US Veteran
|
|
|
Join Date: Jun 2012
Location: SW Mississippi
Posts: 1,348
Likes: 2,224
Liked 6,204 Times in 1,040 Posts
|
|
Last update for tonight...
Ok, got the lefthand bit in there with the tool post turned around. Power feed is in reverse and part is spun up. Touching off the toolbit to start cutting.
Now that the workpiece is supported on both ends I can take much bigger cuts. Going forty thousandths a whack.
Now it's starting to look like something.
That's it for now.
What's left to do:
Reduce head diameter to 0.405
Thin head thickness to 0.065
Drill recess for spring & plunger
Cut inverse bevel to engage nail nick on barrel underside
I'll get after that stuff tomorrow.
Cheers
Bill
__________________
Because they don't make a .46
|
|
The Following 5 Users Like Post:
|
|
01-24-2016, 11:10 PM
|
|
US Veteran
|
|
|
Join Date: Jun 2012
Location: SW Mississippi
Posts: 1,348
Likes: 2,224
Liked 6,204 Times in 1,040 Posts
|
|
Quote:
Originally Posted by BruceB
I just got word that I'm getting an invitation to the decommissioning ceremony of the first and only big white one I rode. USCGC Boutwell WHEC-719 is being decommissioned in San Diego on March 16th. It was only 2 years old when I first stepped aboard, and it's hard to believe it's being retired in my lifetime. There were 311's and 327's from WWII vintage still pulling ocean stations when Boutwell was new.
|
I couldn't even consider not going. You're gonna go, yes??
Loved those old ships. I doubt very much any of those new boats made outa cheap Chinese steel will last 50-60-70 years like those old cutters.
Keep her so!
Cheers
Bill
__________________
Because they don't make a .46
|
|
The Following 2 Users Like Post:
|
|
01-24-2016, 11:20 PM
|
|
Member
|
|
|
Join Date: Nov 2006
Location: Montana
Posts: 5,164
Likes: 3,441
Liked 6,253 Times in 2,063 Posts
|
|
All I can say is WOW!!!! What a craftsman!!!
Randy
|
|
The Following User Likes This Post:
|
|
01-25-2016, 11:09 PM
|
|
US Veteran
|
|
|
Join Date: Jun 2012
Location: SW Mississippi
Posts: 1,348
Likes: 2,224
Liked 6,204 Times in 1,040 Posts
|
|
Evening Gents,
Picking up from where we left off last night...
Still have the part in the four jaw chuck and supported by the live center. Using the lefthand tool were gonna shave the outside diameter of the head down to 0.405"
As before, the part is well supported here so I can take big cuts. Turning at 1375rpm and taking 0.040" cuts.
Done.
Once they're both done we're gonna change the machine setup a bit.
Looking go so far.
Still in the four jaw chuck but with very little stickout. Indicated to virtually zero runout.
We have three operations to do from this position to each piece.
First, with the toolpost flipped back around and the righthand toolbit in place, take successive facing cuts to bring the head thickness to 0.060".
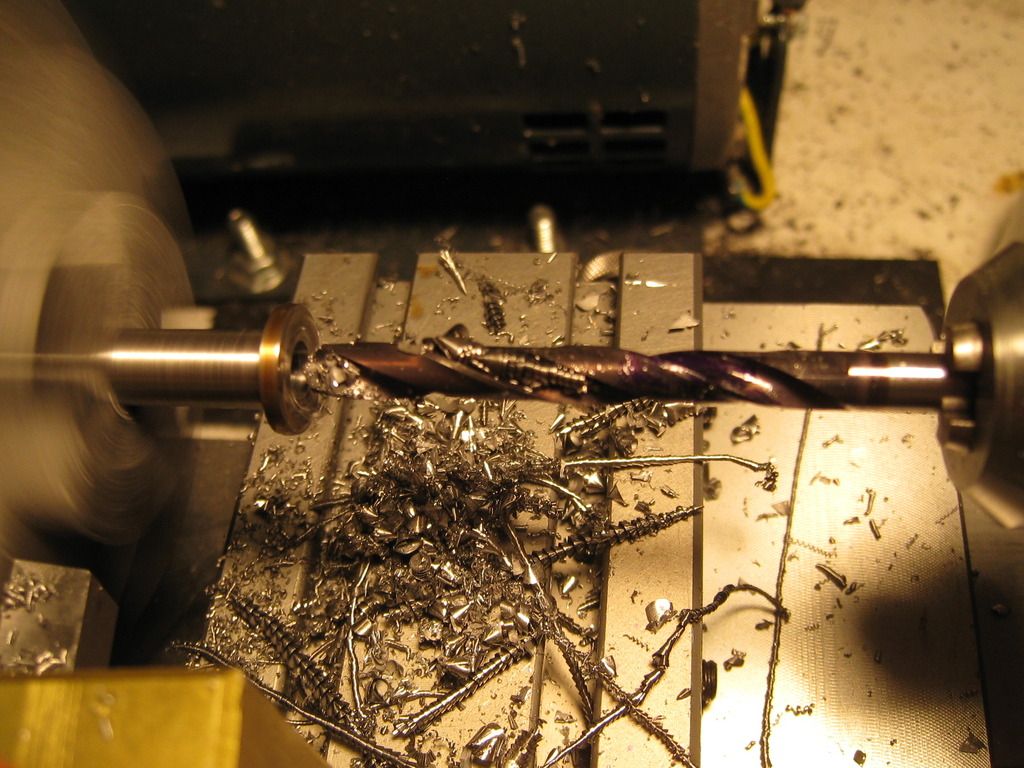
Now with the head at sixty thousandths thick the next operation is drill the recess to house the plunger & spring. The live center is removed and the drilling chuck installed in the tailstock. The drill is a #15 TiALN coated solid carbide bit. You cant see it but there is a mark on the bit in a little spot of layout dye for me to judge the correct depth. the hole needs to be 1.060" deep.
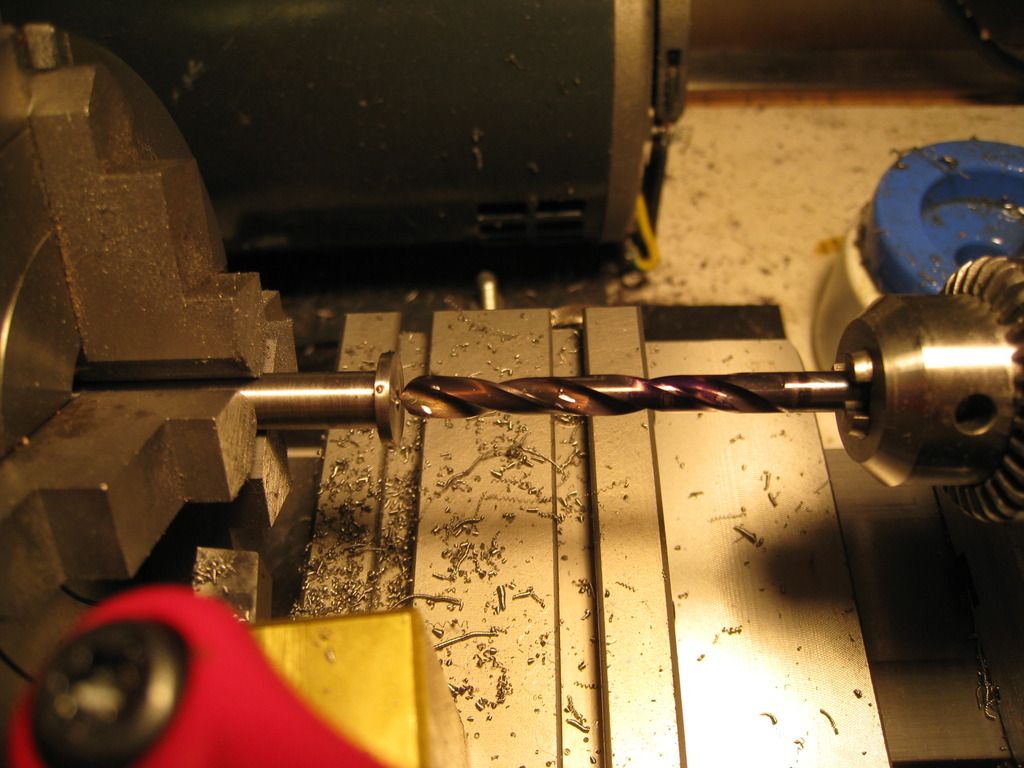
Liberal use of Rapid Tap cutting fluid and pull the bit out often to clear chips. Ya don't want to snap a bit off down in the hole
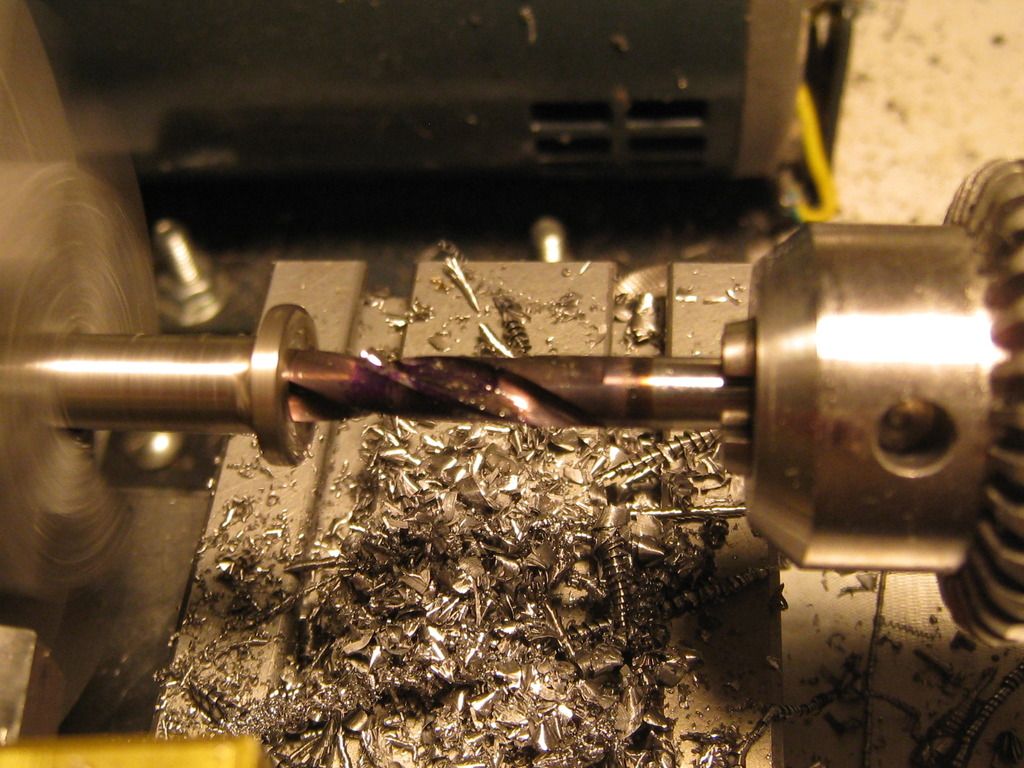
About a quarter inch to go now.
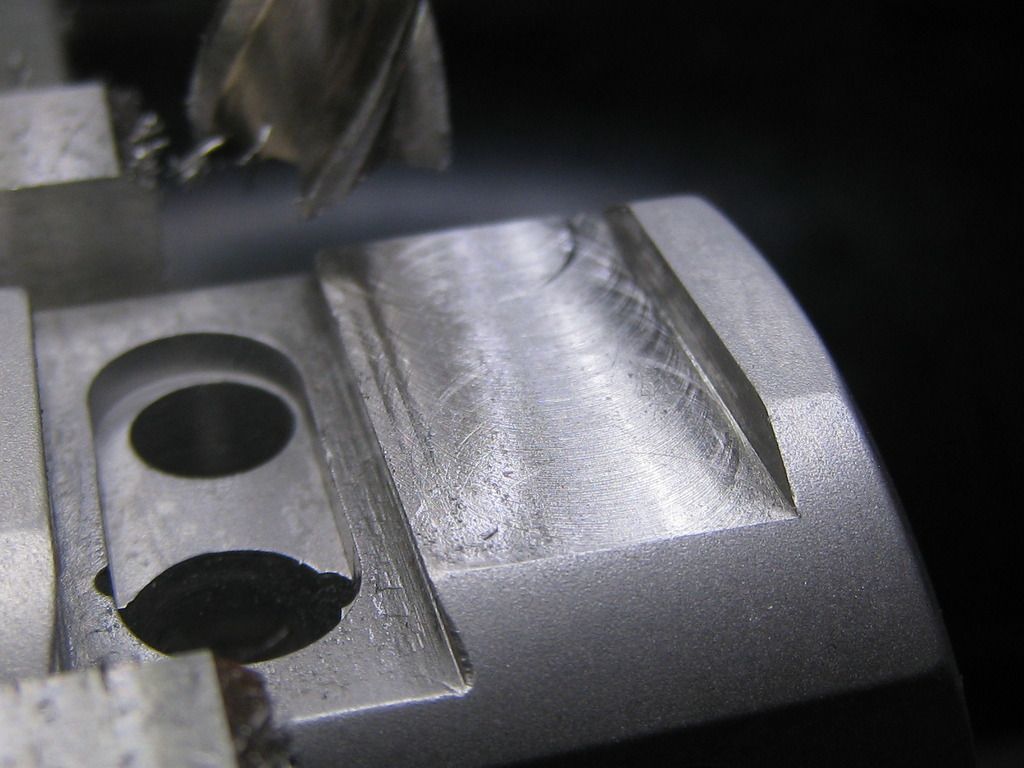
now with the hole drilled to depth, the last thing is cut the bevel to engage the barrel's "nailnick". Using the righthand toolbit angled about 30 degrees to the work.
That'll do quite nicely.

Before & After shot
Pull that piece and chuck the other one, indicate it and perform all those operations again. Once they're both done there's still a couple more things that need doing.
Well, they both pass the nailnick test but it appears they each need a bit of a trim.
So now go back to the three jaw scroll chuck since high precision isn't critical here. M42 steel 0.040" parting tool mounted on the back side. A little dye and scribe the cutoff mark.
One down and one to go.
Spinning at 500rpm and a liberal dose of Brownells do-drill fluid
And that takes care of that.
Last thing is flip 'em around in the chuck a few times at 880rpm for a bit of polishing with some 600 grit abrasive tape.
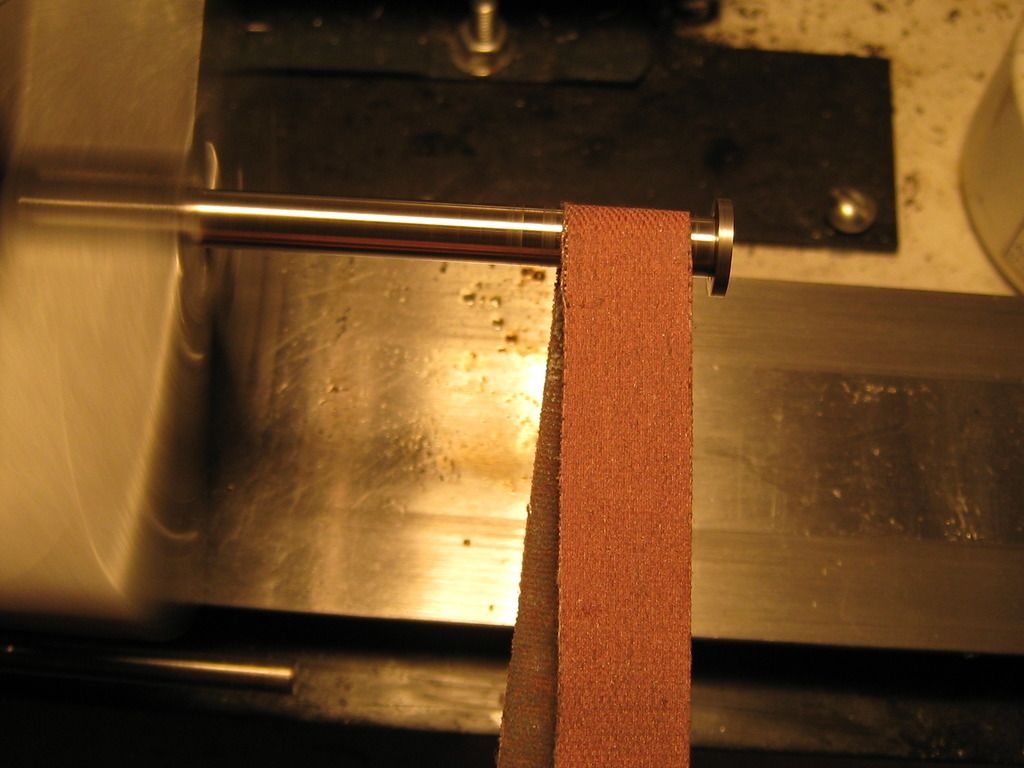
Done and Done
That's all for now. I have the stainless slide undergoing some Kroil treatment overnight so tomorrow I'll detail strip, clean & blast it. Then both slides go to the mill for the de-cocker mod.
Cheers
Bill
__________________
Because they don't make a .46
Last edited by BMCM; 01-25-2016 at 11:58 PM.
|
|
The Following 11 Users Like Post:
|
03Fatboy, 6actual, Big Shrek, BLUEDOT37, nocents, Richard Simmons, Shorty 45 MK2, TAROMAN, TercGen, timn8er, wild47 |
01-26-2016, 12:21 AM
|
|
Member
|
|
|
Join Date: Oct 2009
Location: Long Beach, CA
Posts: 1,386
Likes: 875
Liked 994 Times in 442 Posts
|
|
Learning an awfully lot here. Thanks!
__________________
USS ZELLARS
DD-777
|
|
The Following User Likes This Post:
|
|
01-26-2016, 11:33 AM
|
 |
Member
|
|
|
Join Date: Mar 2007
Location: Southeast, LoUiSiAna
Posts: 686
Likes: 171
Liked 207 Times in 100 Posts
|
|
Very interesting project...salivating in anticipation!
Carry on!
|
|
The Following User Likes This Post:
|
|
01-28-2016, 10:01 PM
|
|
US Veteran
|
|
|
Join Date: Jun 2012
Location: SW Mississippi
Posts: 1,348
Likes: 2,224
Liked 6,204 Times in 1,040 Posts
|
|
Ahoy there Gents,
Last night I decided do the slide machining for the spring loaded decocker on both slides.
Here I've gathered all the stuff needed and am setting up the mill for this operation. Since I've had the vise off recently I needed to tram it in again.
With a test indicator mounted in the spindle I sweep the table back an forth and adjust the vise mounting until the jaws are exactly parallel with the long or "X" axis of the table.
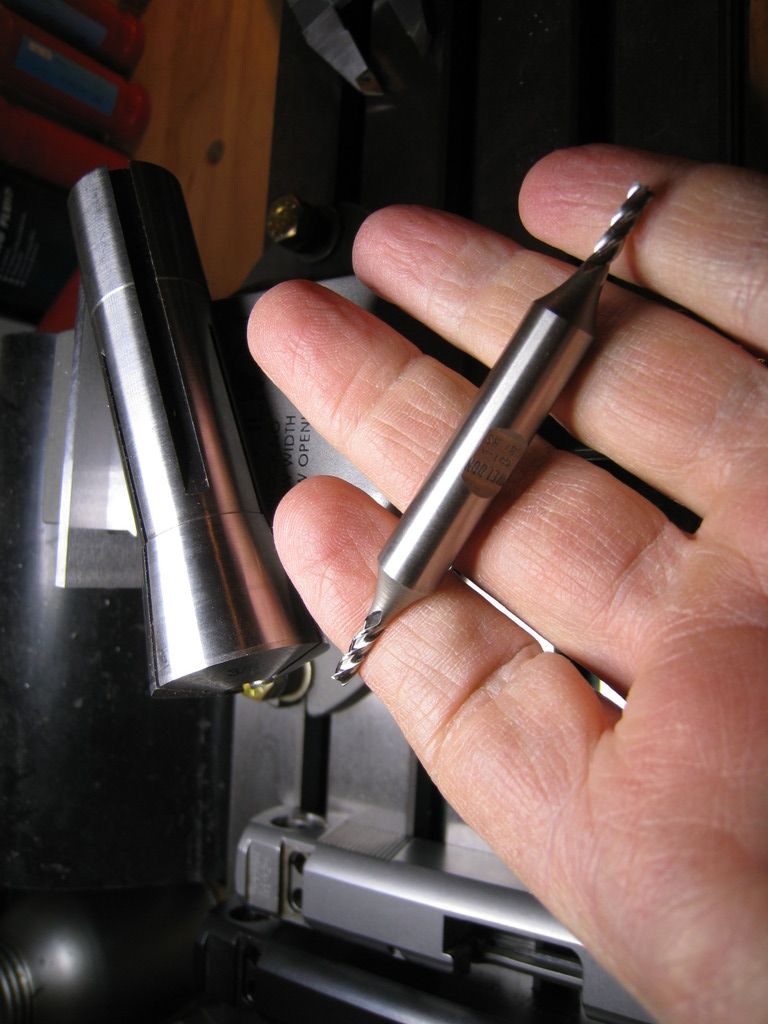
I did the end mill cuts with this Weldon 1/8" four flute mill mounted in that R-8 collet you see sitting on the vise
Came out perfect.
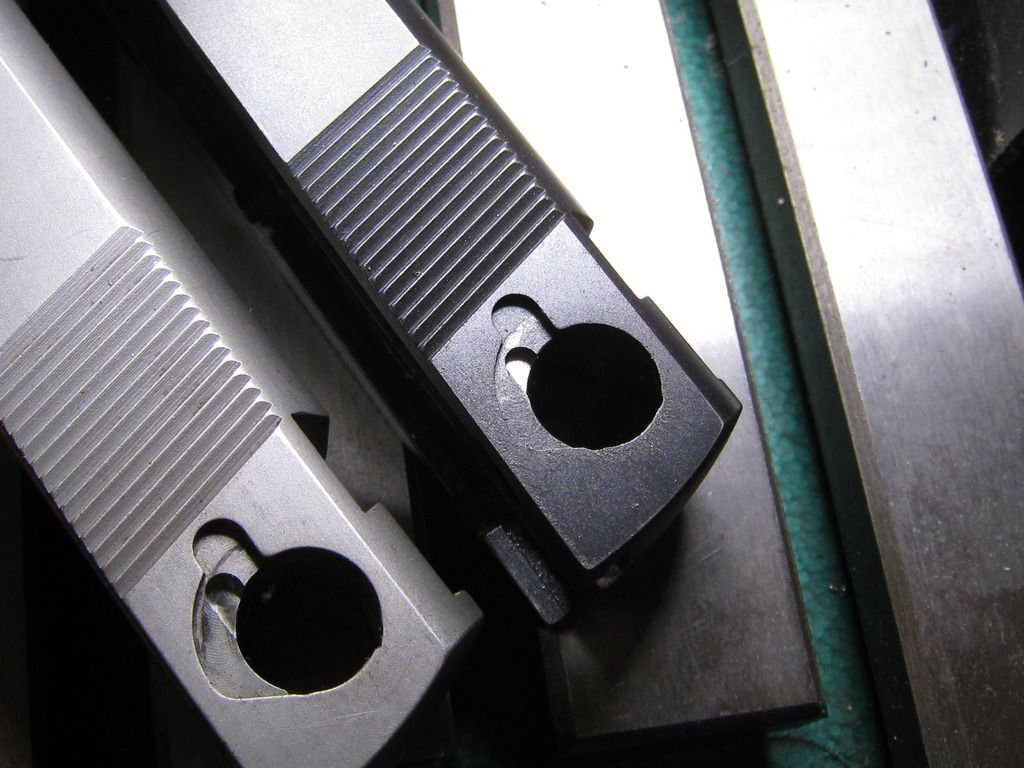
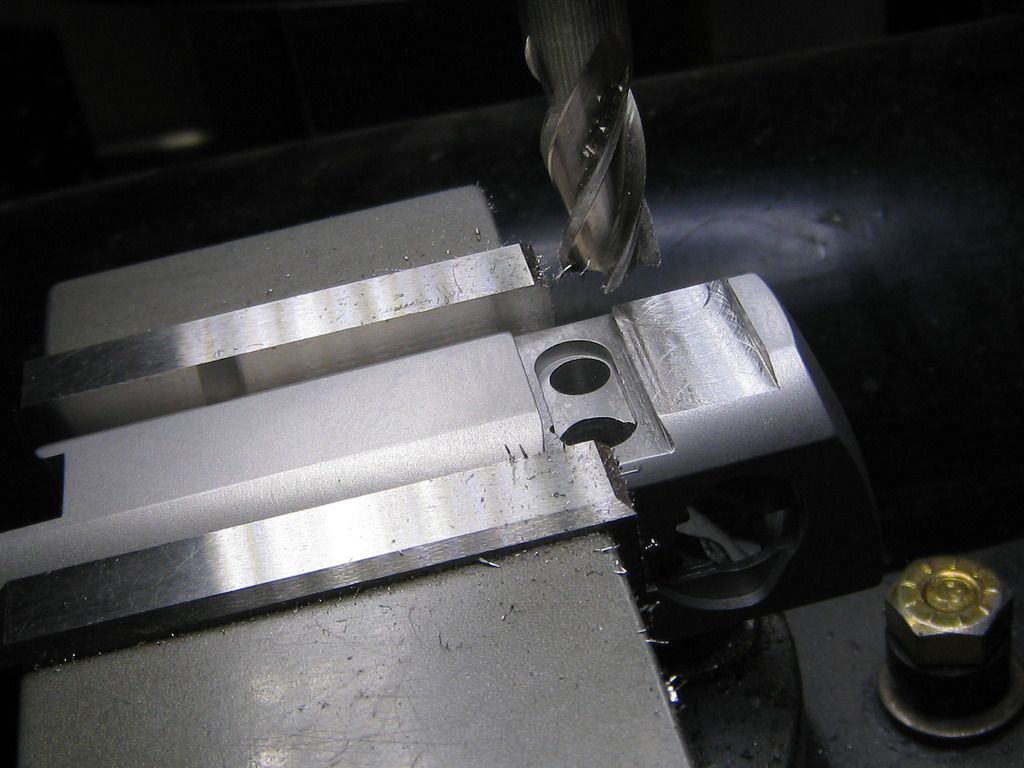
Now to drill the holes for anchoring the dead end of the spring.
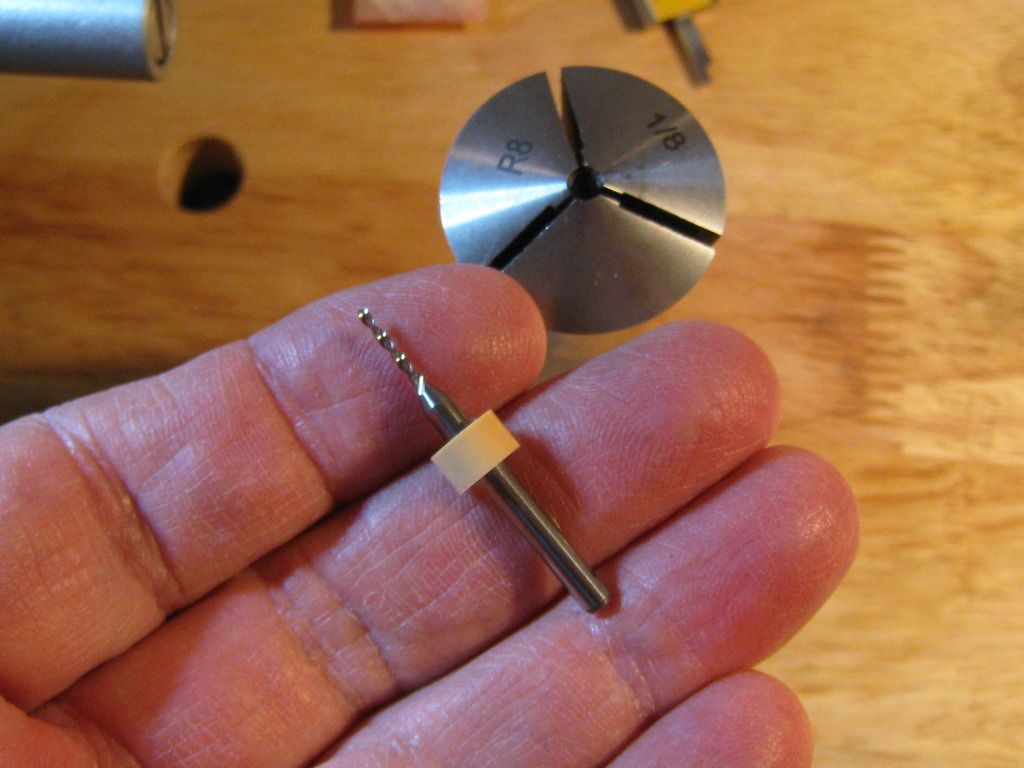
I switch to a 1/8th in collet and a #56 carbide drill which makes a hole about 0.0465" diameter. or 1.18mm.
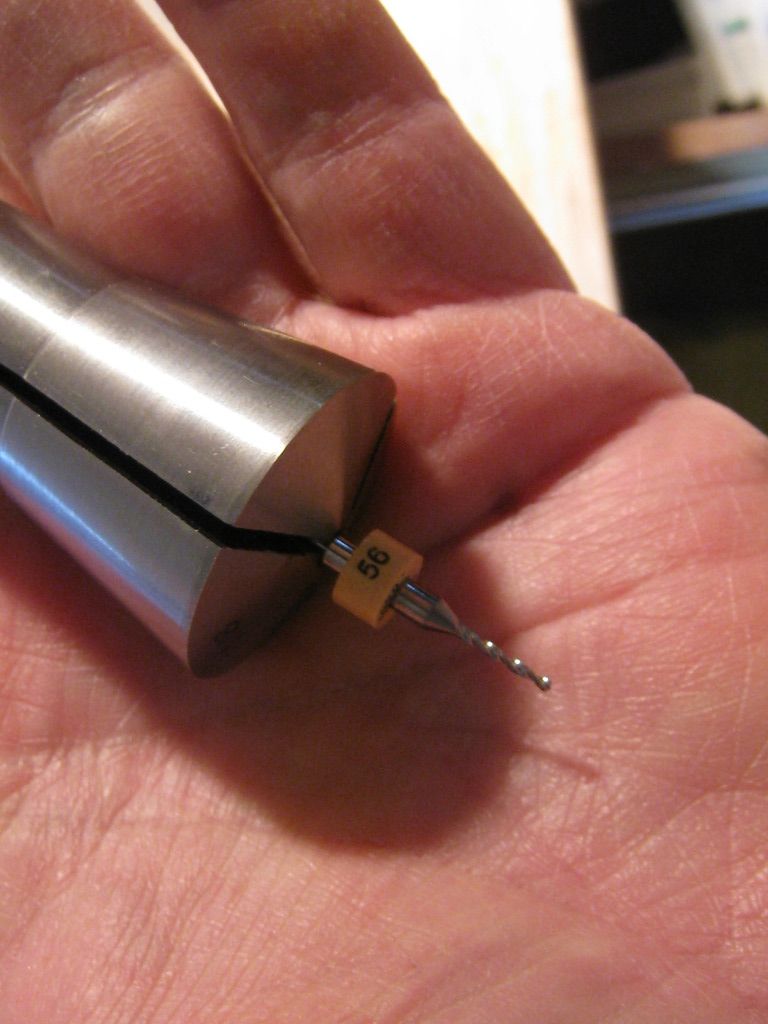
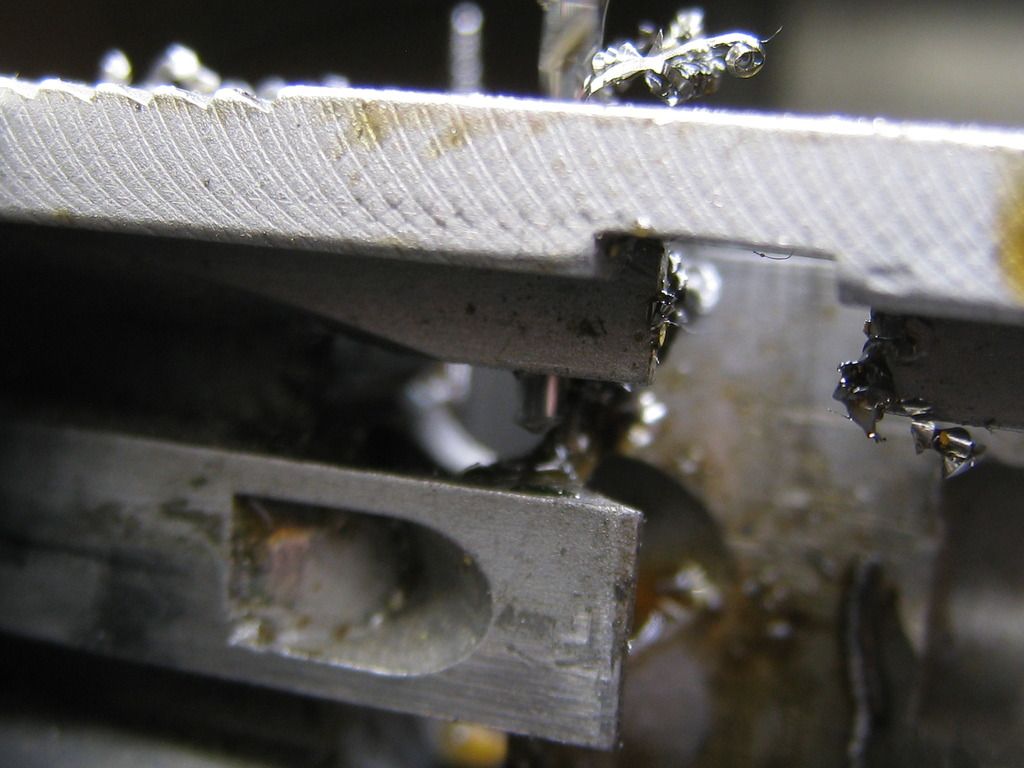
Well, I started on the blued slide first. Got everything clamped up and positioned then started drilling. Now, knowing how delicate and fragile these tiny carbide tools are, I know to feed into the work slowly, use plenty of cutting fluid and clear the chips frequently. Everything was going swimmingly until disaster struck
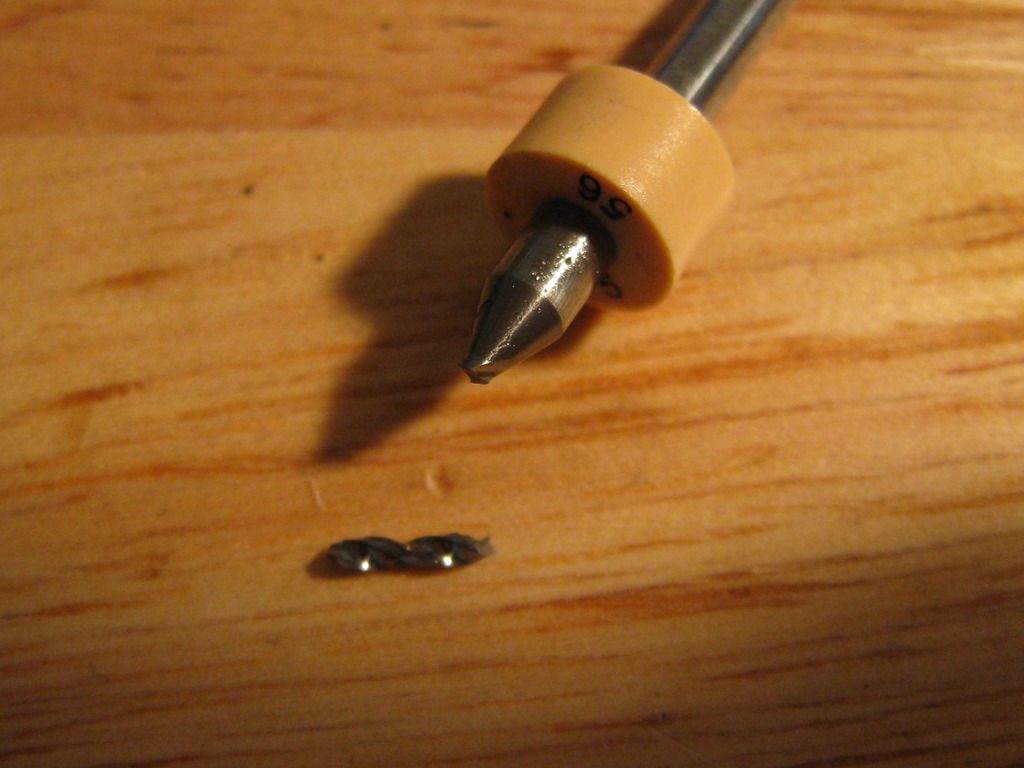
Yeah, the rest of that bit was stuck in the bottom of a blind hole  This is the second time I had one of those break. The last time I was just breaking through and was able to use a thin piece of steel wire to poke out the broken piece of carbide without too much trouble. Not so this time. Blind hole and I have nothing here that will drill carbide tooling (need diamond tools for that) so Awww Hell!
I tried a number of things to get that stub out to no avail and eventually sat down at my desk as started searching the web for someone who has a EDM tool disintegrator where I could either drive or mail the slide to and have the carbide burned out.
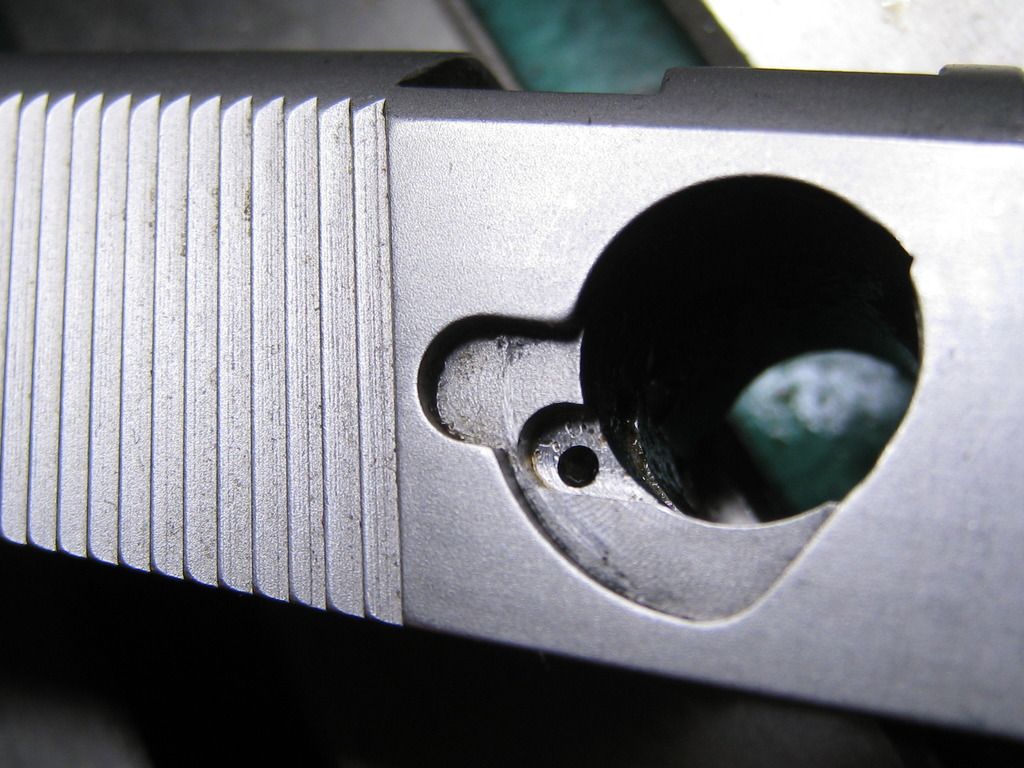
 I found plenty of outfits selling those machines but noone that had one or offered the service. Well, I decided to try one last thing. I loaded a larger carbide bit in the collet. This time a 1.6mm or about sixty one thousandths carbide bit. Drilled down to the broken stub, shattered two bits to get there bit I made it nonetheless. Then took the slide off the mill over to the bench, stuck a small pin punch down that hole, and beat the snot out of it with a hammer Knowing how brittle the carbide is and that the surrounding steel is comparatively ductile I figured to shatter the remains of the stub into tiny shards then run another bit in there to clear out the junk and perhaps finish the hole. It took one more of those 1.6mm bits being wrecked to do it but my plan of last resort was successful.
The remains of the stub were pulverized and the third drill bit was able to clear the pieces and drill through the rest of the way.
Nice clean hole and the decocker fits & functions perfectly.
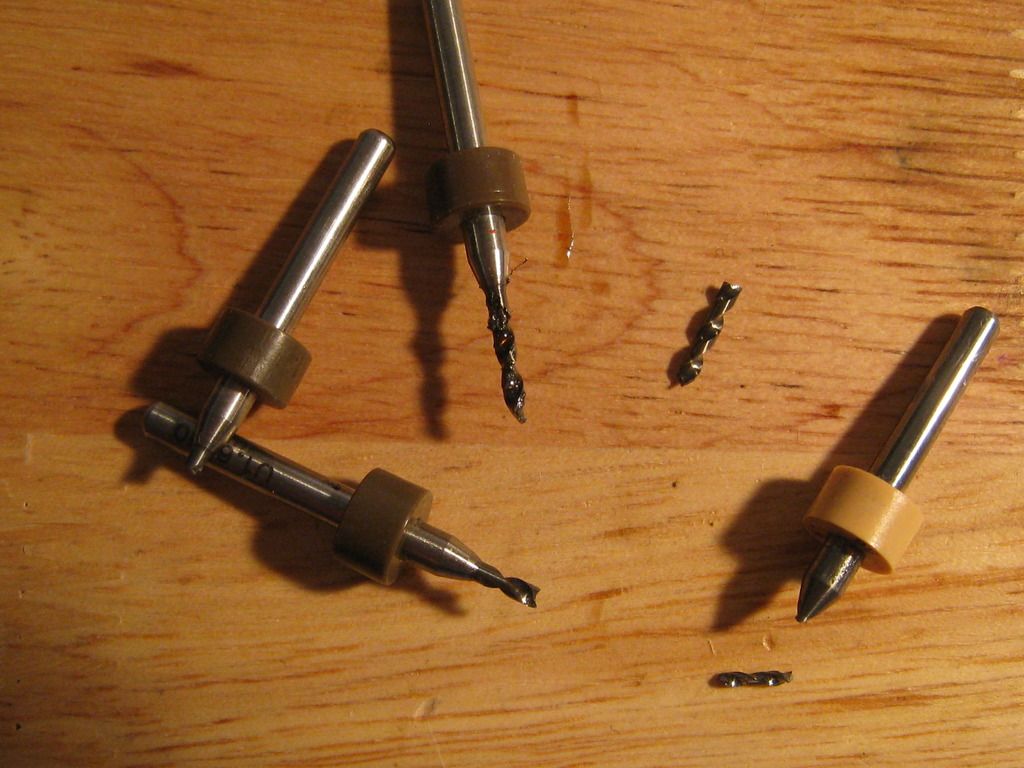
The wreckage.
I still needed to do the drilling on the stainless slide though.
I attended to that this afternoon. I did make a change to my standard routine... Up sized the drill I use for this operation to a 1.55mm and it worked perfectly.

And breakthrough.
All done here.
Next thing I deed to do is blast the stainless slide. I might get to that tomorrow. And I think I need to do something about the color mis-match on that blued piece.
Hmmm, methinks I shall give that Caswell Plating stuff a try
Cheers
Bill
__________________
Because they don't make a .46
Last edited by BMCM; 01-29-2016 at 12:16 AM.
|
|
The Following 11 Users Like Post:
|
6actual, Big Shrek, BLUEDOT37, GaryS, Richard Simmons, Shorty 45 MK2, TAROMAN, TercGen, timn8er, vigil617, wild47 |
01-29-2016, 12:30 AM
|
|
Member
|
|
|
Join Date: Oct 2009
Location: Long Beach, CA
Posts: 1,386
Likes: 875
Liked 994 Times in 442 Posts
|
|
10mm Conversion Lab - C'mon in Y'all
You referring to the black oxide kit? If so, I'd like to know how that turns out.
__________________
USS ZELLARS
DD-777
|
|
The Following User Likes This Post:
|
|
01-29-2016, 12:37 AM
|
|
US Veteran
|
|
|
Join Date: Jun 2012
Location: SW Mississippi
Posts: 1,348
Likes: 2,224
Liked 6,204 Times in 1,040 Posts
|
|
Quote:
Originally Posted by 03Fatboy
You referring to the black oxide kit? If so, I'd like to know how that turns out.
|
Yup, Caswell's Stainless Steel Blackener, You'll see the results here when the stuff is delivered. I want to do a little touchup on the slide and blacken that decocker and the ambi lever to match.
Cheers
Bill
__________________
Because they don't make a .46
|
|
The Following 2 Users Like Post:
|
|
01-29-2016, 06:31 PM
|
|
US Veteran
|
|
|
Join Date: Nov 2011
Location: Stuart, Fla
Posts: 470
Likes: 1,071
Liked 586 Times in 217 Posts
|
|
Are you planning to thin the decocker and the ambi lever down a little as well? They is pretty thick
__________________
It is the Indian not the arrow
|
|
The Following User Likes This Post:
|
|
01-29-2016, 06:40 PM
|
|
Member
|
|
|
Join Date: May 2011
Location: western NY
Posts: 720
Likes: 287
Liked 999 Times in 306 Posts
|
|
This thread just knocks my socks off!
|
|
The Following User Likes This Post:
|
|
01-29-2016, 07:16 PM
|
 |
SWCA Member
|


|
|
Join Date: Sep 2009
Location: Home of the Alamo
Posts: 5,835
Likes: 16,521
Liked 15,549 Times in 3,099 Posts
|
|
Wow, you have mad skills!
Please post more of your machine work, I find it fascinating
__________________
On the Oak Savannah
|
|
The Following 4 Users Like Post:
|
|
01-29-2016, 08:38 PM
|
|
Member
|
|
|
Join Date: Mar 2015
Location: Wyoming
Posts: 77
Likes: 231
Liked 106 Times in 49 Posts
|
|
Quote:
Originally Posted by 6actual
Are you planning to thin the decocker and the ambi lever down a little as well? They is pretty thick
|
6actual
Just my opinion on the decocker but leave it thick as it is. I have a 4013 conversion to 10MM and with the 23 lb. recoil spring I need all the grip available I can get to rack the thing. Unless a person has hands of steel it is a tough one!
T & B
|
|
The Following 5 Users Like Post:
|
|
01-29-2016, 08:46 PM
|
|
US Veteran
|
|
|
Join Date: Nov 2011
Location: Stuart, Fla
Posts: 470
Likes: 1,071
Liked 586 Times in 217 Posts
|
|
That makes good sense to me
__________________
It is the Indian not the arrow
|
|
The Following 2 Users Like Post:
|
|
01-29-2016, 10:00 PM
|
|
US Veteran
|
|
|
Join Date: Jun 2012
Location: SW Mississippi
Posts: 1,348
Likes: 2,224
Liked 6,204 Times in 1,040 Posts
|
|
Quote:
Originally Posted by 6actual
Are you planning to thin the decocker and the ambi lever down a little as well? They is pretty thick
|
With the regular M/S Safety unit, I have little problem narrowing the levers. However with the decocker, there's a fairly stout spring on those parts. I feel I get a much better purchase and can more positively manipulate the decocker by leaving the levers full width. So, I have no plans to shave the levers on the spring loaded decockers.
Cheers
Bill
__________________
Because they don't make a .46
|
|
The Following User Likes This Post:
|
|
01-30-2016, 05:33 PM
|
 |
Member
|
|
|
Join Date: Jan 2012
Posts: 433
Likes: 37
Liked 210 Times in 88 Posts
|
|
Bill,
Great work as usual. Looking forward to more updates!
Andrew
|
|
The Following User Likes This Post:
|
|
02-04-2016, 09:29 PM
|
|
US Veteran
|
|
|
Join Date: Jun 2012
Location: SW Mississippi
Posts: 1,348
Likes: 2,224
Liked 6,204 Times in 1,040 Posts
|
|
Thing have slowed down a bit. Disc blowout at L5-S1 is mashing on the right side S1 nerve root. Kinda like being kicked squarely right in the initiative. As a result I haven't been getting much done lately.
Here's where we're at as of this evening....
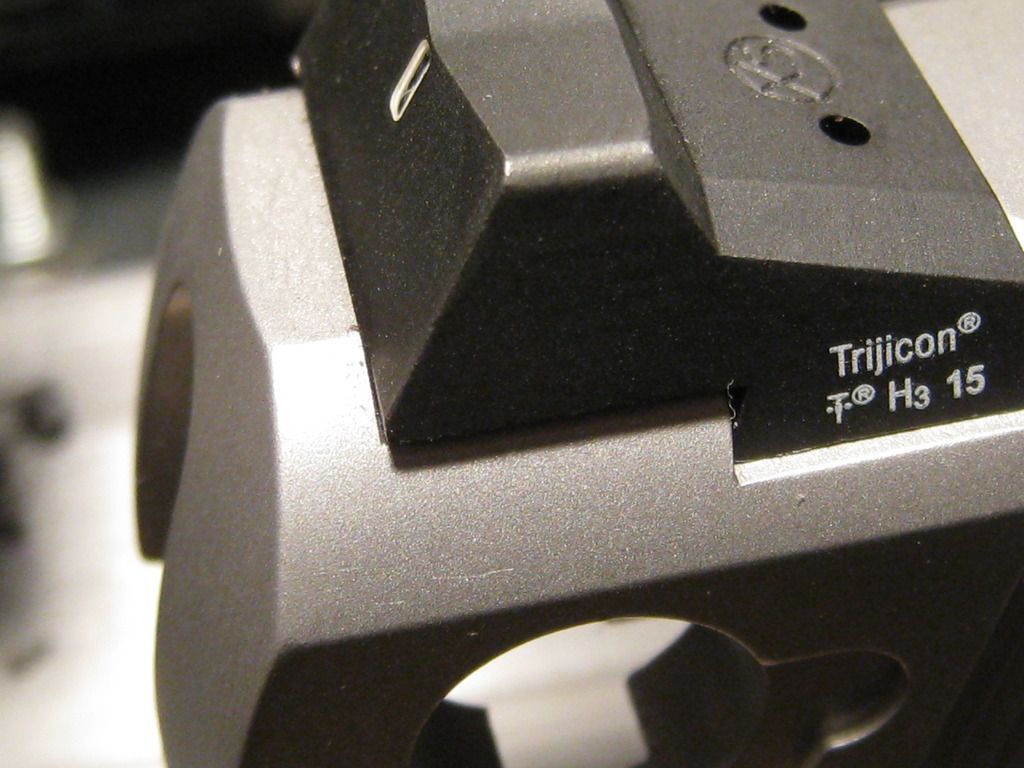
Got the stainless slide detail stripped and freshened up the finish in the blast cabinet. I got started fitting the new sights and Uggghh! This again
This is the second time I've had to deal with this. The sight is just too long for the cut in the slide.
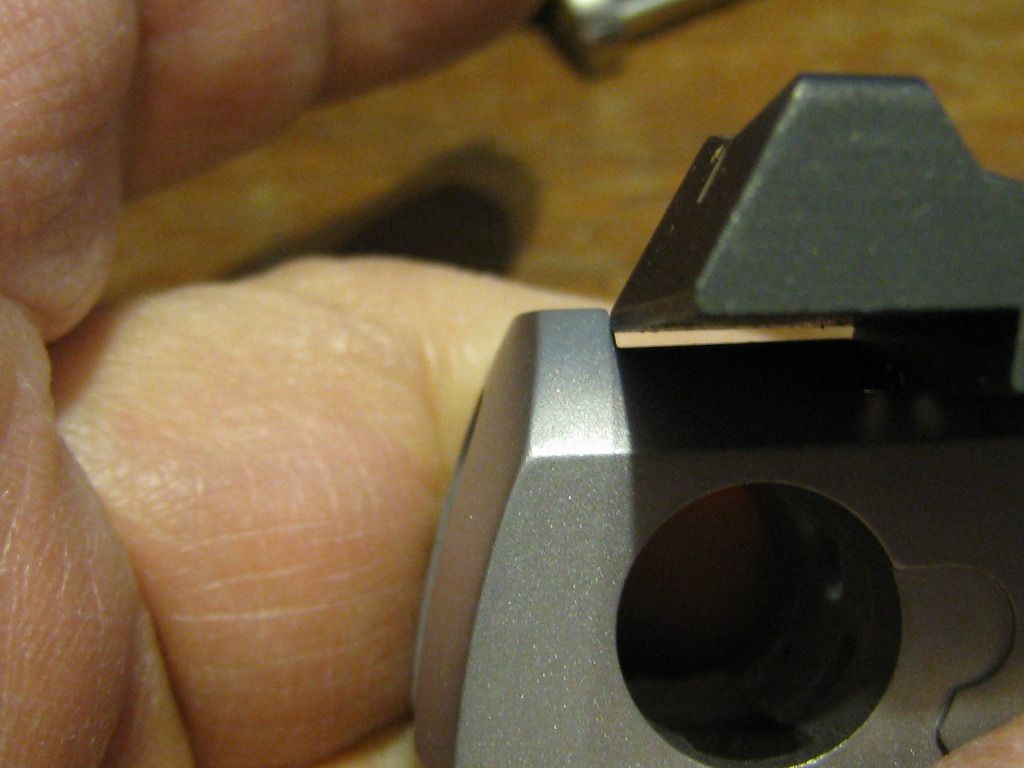
The last time I addressed this by filing the trailing edge of the sight to fit. I didn't care for the outcome in the end. It looked lousy and compromised the finish on the sight presenting an avenue for rust to take hold. I pulled the sight that time and went in another direction.
This time I decided to stretch the sight cut in the slide a bit. I only need about 0.005" longer to make it fit. And this way I will preserve the finish on the sight proper so no rust concerns with normal care.
So, over to the mill for a little trim.
Yup, that'll do nicely
I was considering re-blasting but a test fit of the sight and you'd never know anything was milled there. So, nevermind
Next, install that tiny bushing I made.
I machined a pair of those punches some months ago for another member and liked them so much I had to make another set just for me. These are just for installing and removing those little bushings. The fat one's for knocking them in and the skinny for driving them out.
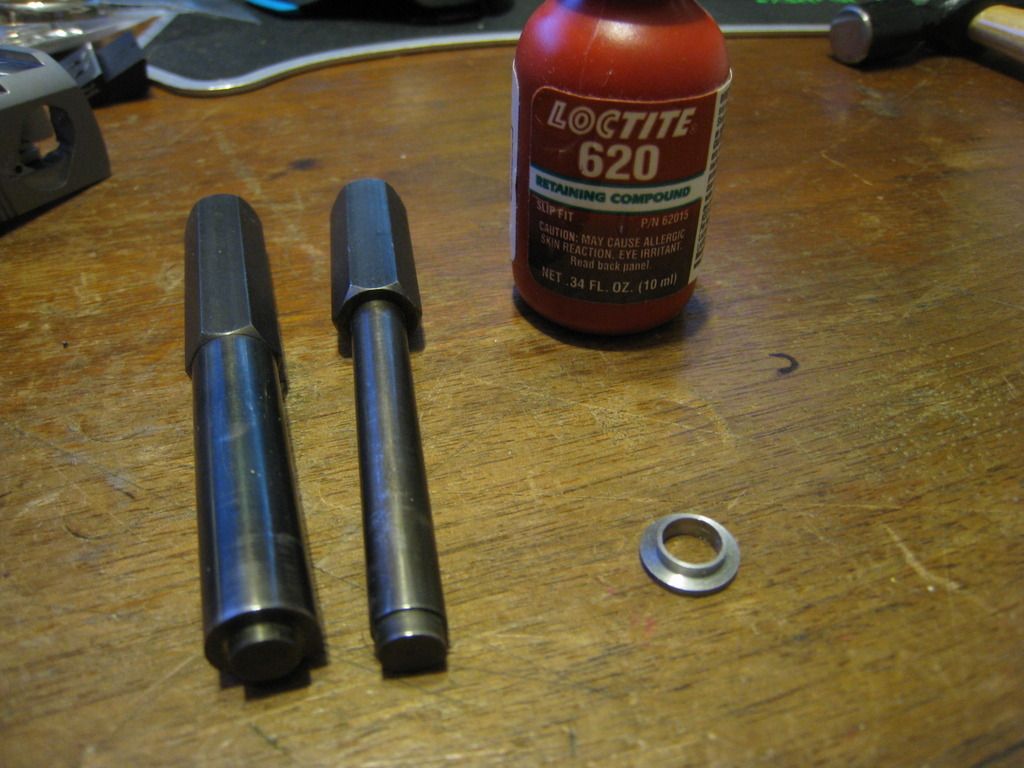
Here's the bushing sitting on the punch with a little dab of retaining compound ready to go in.
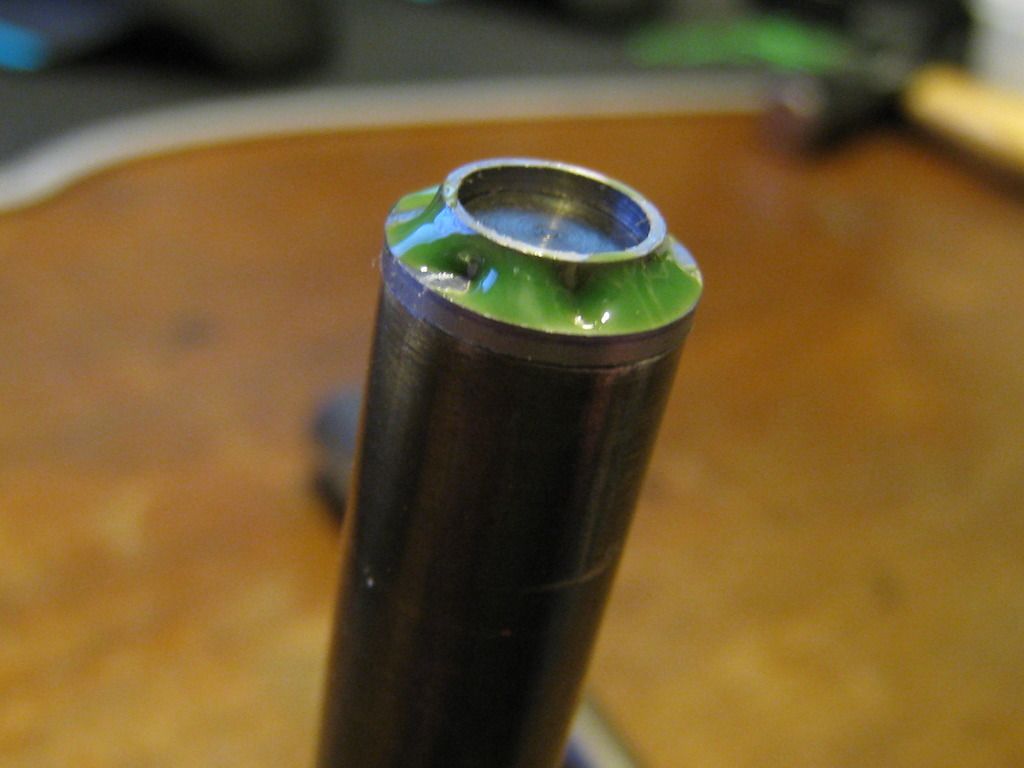
Three or four whacks with a small hammer. Note how the slide is supported on the bench block. resting on the face of the spring tunnel and not on the barrels bushing.

And..She's in.
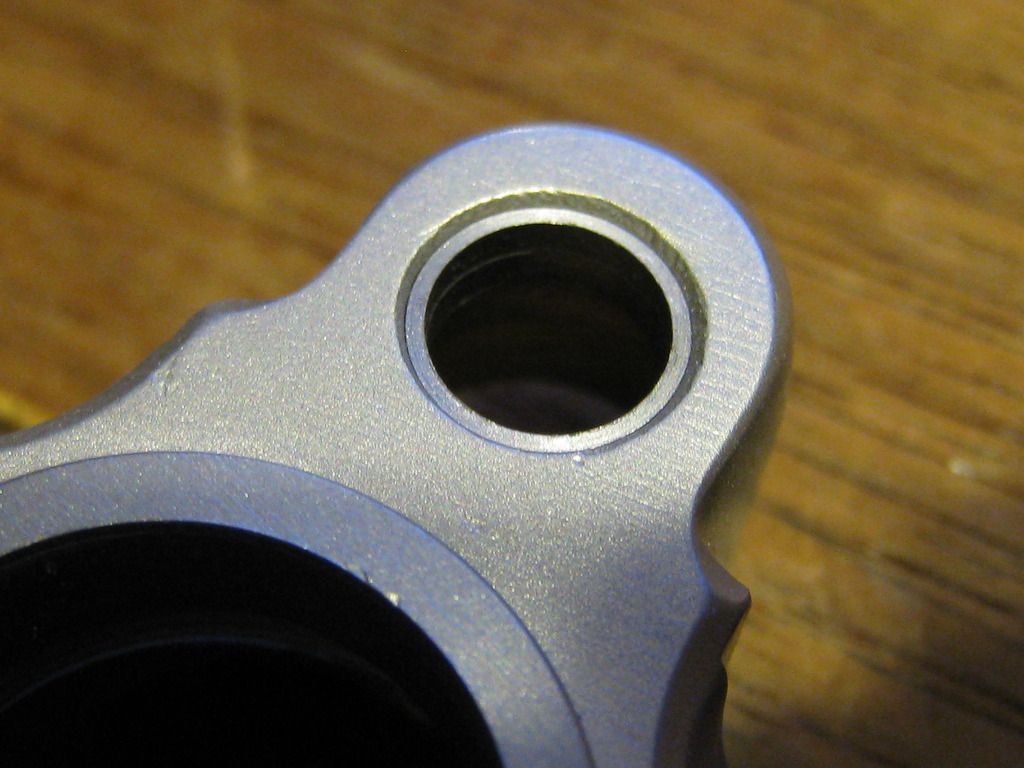
All done here with this one.
And
Waiting on delivery of the Caswell stuff to complete the 4014 slide. (ordered on the 19th and shipped only yesterday???  ) Anyway, assuming the stuff works well, I want to blacken the decocker, bushing, guiderod, and touch up the slide a little. So that'll be the next update where we get to play with dangerous chemicals .
Saving the barrels for last
Cheers
Bill
__________________
Because they don't make a .46
|
|
The Following 12 Users Like Post:
|
10mmauto, 6actual, Big Shrek, BLUEDOT37, opaul, Richard Simmons, Shorty 45 MK2, TAROMAN, TercGen, timn8er, vigil617, wild47 |
02-04-2016, 10:50 PM
|
|
US Veteran
|
|
|
Join Date: Nov 2011
Location: Stuart, Fla
Posts: 470
Likes: 1,071
Liked 586 Times in 217 Posts
|
|
Hope your back is better soon Bill, I feel your pain I have about the same lower back issues as well, the lot of the workingman.
The slide is looking good, good call on the sight install. Well done!
__________________
It is the Indian not the arrow
|
|
The Following 5 Users Like Post:
|
|
02-05-2016, 12:59 AM
|
 |
Absent Comrade
|
|
|
Join Date: Oct 2012
Location: TEXAS!!!
Posts: 8,358
Likes: 13,912
Liked 21,085 Times in 4,914 Posts
|
|
Get better quick, Bill! We need more on this wonderful thread...
__________________
Lounge Lizard Extraordinaire
|
|
The Following 2 Users Like Post:
|
|
02-05-2016, 07:31 AM
|
|
US Veteran
|
|
|
Join Date: May 2012
Location: Greenville, NC
Posts: 6,500
Likes: 19,952
Liked 14,217 Times in 4,509 Posts
|
|
You're doing a boss job, Boss!
Your method of removing that broken carbide end mill was a stroke of genius, you know.....
__________________
Ukraine -- now more than ever
|
|
The Following 2 Users Like Post:
|
|
02-07-2016, 03:29 PM
|
 |
Member
|

|
|
Join Date: May 2008
Location: Washington State
Posts: 7,465
Likes: 14,558
Liked 9,285 Times in 3,714 Posts
|
|
While the work done is over my head, and I am not inclined to do or have done anything like this project, this string and at least one other of yours are fascinating to read just to see the knowledge and effort displayed. Keep posting these.
__________________
NHI, 10-8.
|
|
The Following User Likes This Post:
|
|
02-09-2016, 12:56 AM
|
|
Member
|
|
|
Join Date: Jul 2012
Location: USA
Posts: 1,111
Likes: 5,684
Liked 1,664 Times in 730 Posts
|
|
Great project, and thanks for taking the time to explain the process in such detail! I'm not a 10mm guy but do have a 'project' 4013 of my own to get fixed up, and this has been a very informative thread.
I had the same problem with the rear XS sight on my 457, they make them a bit too long for sure and I had to file mine down.
I've also used Caswell Black Oxide on a few smaller 3rd Gen parts, and it seemed that the Stainless Oxide worked better than the Non-Stainless for me. The carbon steel parts turned out kind of grayish, and would leave rings around touchup spots (overlap on the factory blackening). I was also surprised to find out that my 6904 slide stop was actually stainless steel - thanks Caswell!
|
|
The Following 3 Users Like Post:
|
|
02-09-2016, 08:13 PM
|
|
US Veteran
|
|
|
Join Date: Jun 2012
Location: SW Mississippi
Posts: 1,348
Likes: 2,224
Liked 6,204 Times in 1,040 Posts
|
|
Things are moving along, albeit a little slowly.
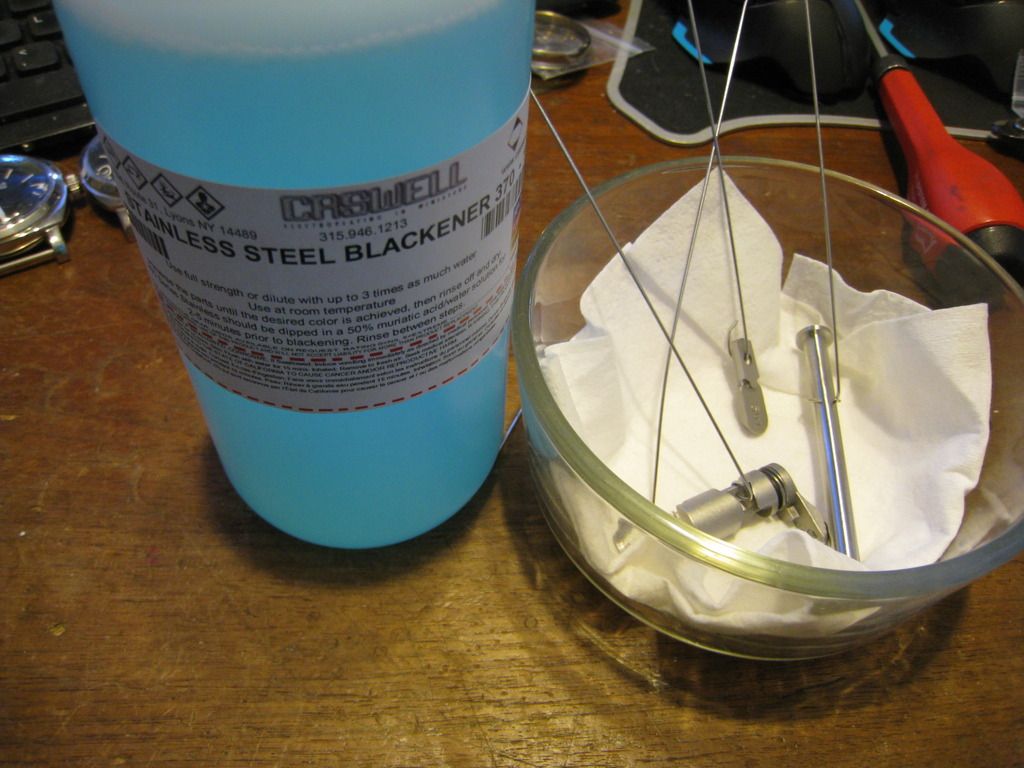
My order from Caswell showed up and I had opportunity to try it out.
Prep work involved meticulous cleaning & degreasing my parts. The directions say to use distilled water which I don't have so I used filtered water from a Berkey gravity filter. Soaked the parts in very hot water with a squirt of Dawn. Left them to soak until it was cooled enough to stick my hand in there then gave 'em a scrub, rinsed thoroughly & dried.
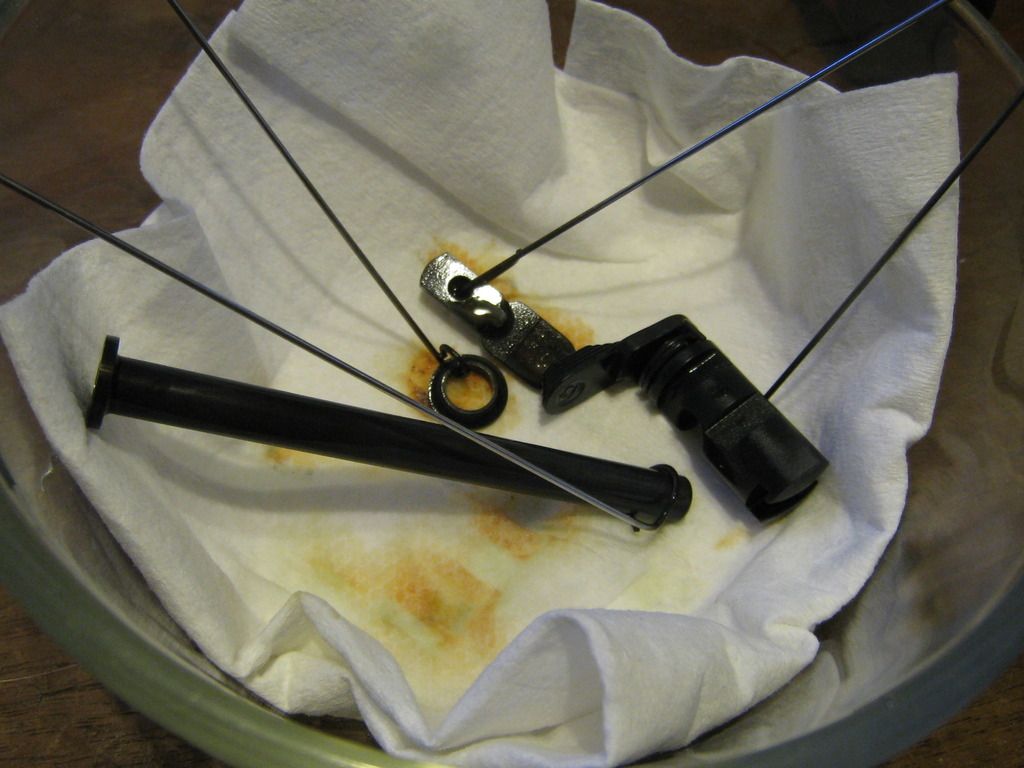
Getting ready to dip my parts. I cut up a piece of filler wire to bend some hangers for dipping the parts in the jar of acid. We have here a decocker, ambi lever, guiderod and that little bushing.
Well Huh! Those are black alright!
Lets start putting the 4014 together. Decocker goes in.
Guiderod matches nicely.
Got the little reducer bushing knocked in too.
So far so good. I still need to install the guts in the slide and stick a set of sights on there. Once those details are attended too I'll see about doing the barrels.
Cheers
Bill
__________________
Because they don't make a .46
|
|
The Following 11 Users Like Post:
|
Big Shrek, GaryS, opaul, Richard Simmons, Shorty 45 MK2, TAROMAN, TercGen, TexasG, timn8er, Turn & Bank, wild47 |
|
|
| Thread Tools |
|
|
| Display Modes |
 Linear Mode Linear Mode
|
 Posting Rules
|
|
|
|
|