|
|
 |

05-25-2020, 07:52 PM
|
 |
Member
|


|
|
Join Date: Sep 2018
Location: Pompano Beach, FL
Posts: 574
Likes: 1,126
Liked 2,135 Times in 378 Posts
|
|
 M910 Slide learning project
Hi guys,
Got home last Friday after two very frustrating days at work with no sales and lots of rain.
I have a M910 slide around and since I can not watch another Netflix series (where all are narcos, thieves and/or scammers and somehow we are rooting for them), I decided to spend some time in the "craft room" (range remains closed).
Please bare with me and be patient...
Background:
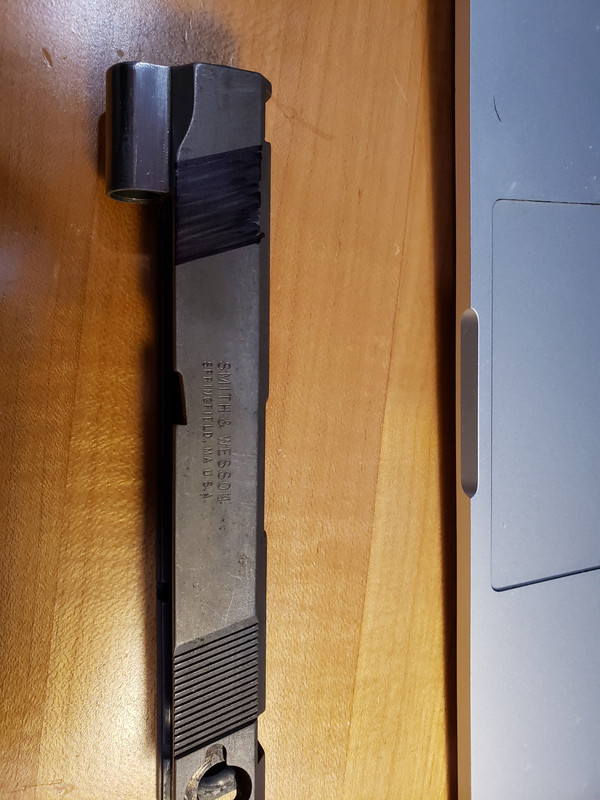
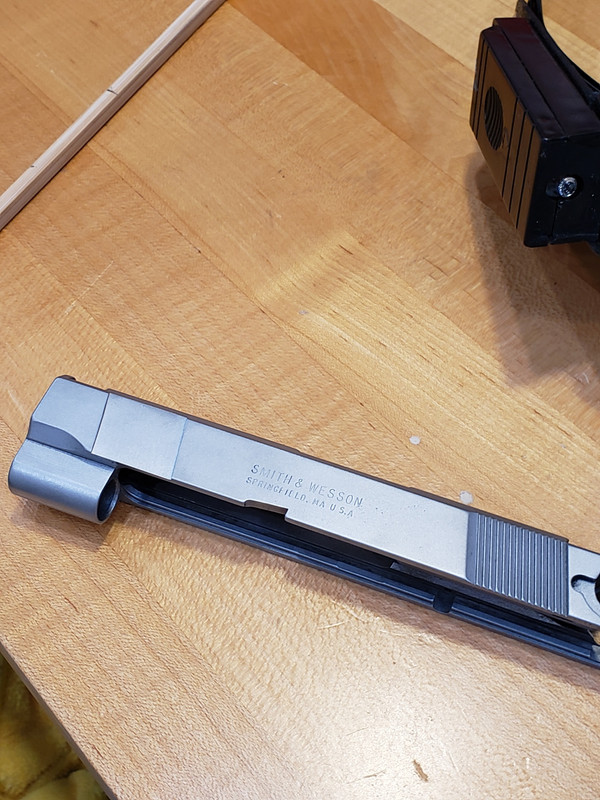
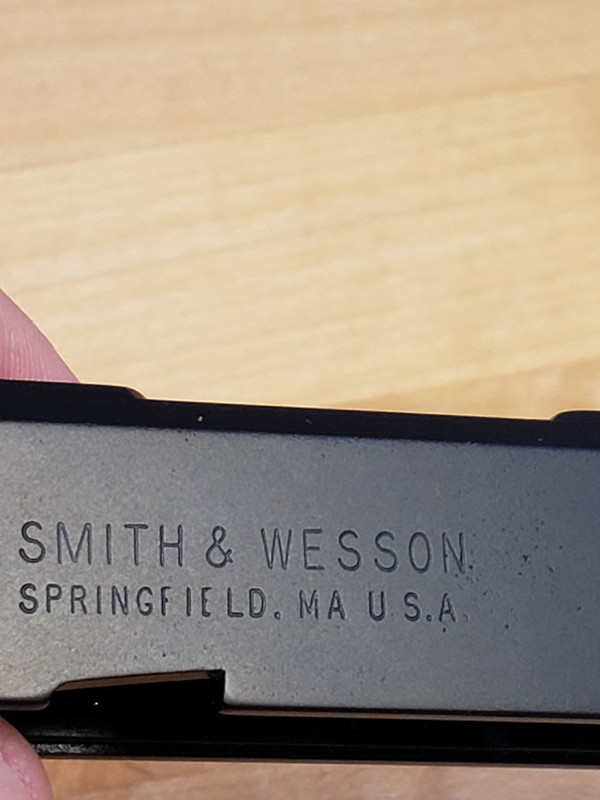
I bought my first S&W semi-auto, a M6906, in late 2018. I wanted a single side safety, so I started looking around. I contacted Noncents, and he suggested that maybe the best way forward would be to get a M910 slide...so I did.
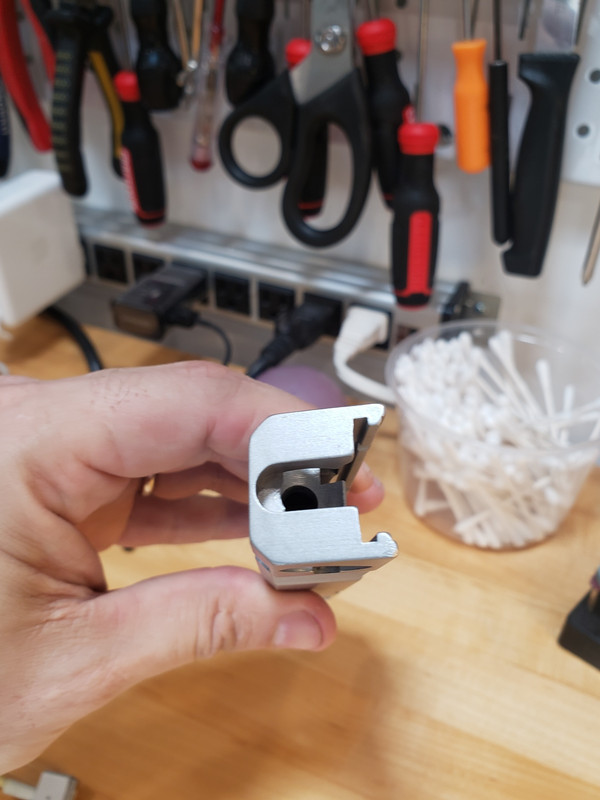
I harvested the single side safety, sold the barrel, the guide rod, harvested the extractor pin (ended making money on the project)...and I was left with a bare slide...
The project
Since I do not own a M910 nor have a frame that fits this slide I wanted to see if I could "fix" it, but this time without the pressure that "I am going to mess it up..."
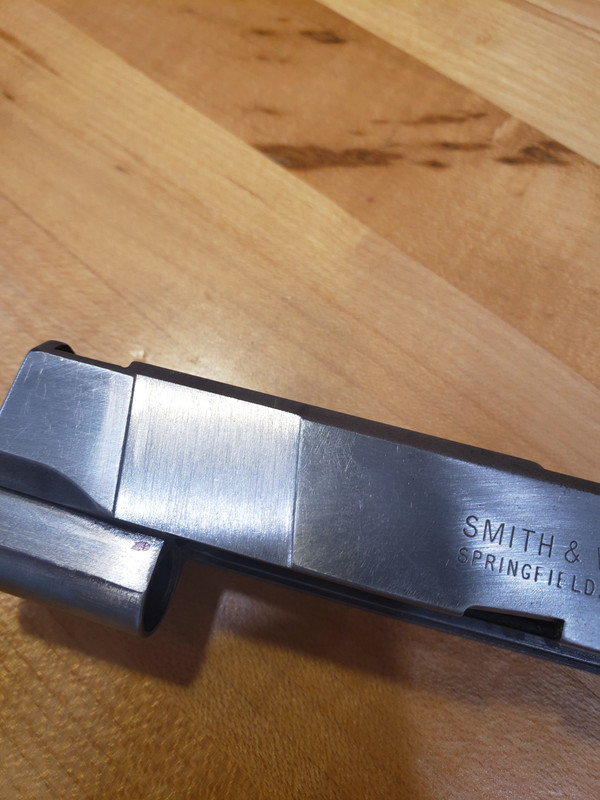
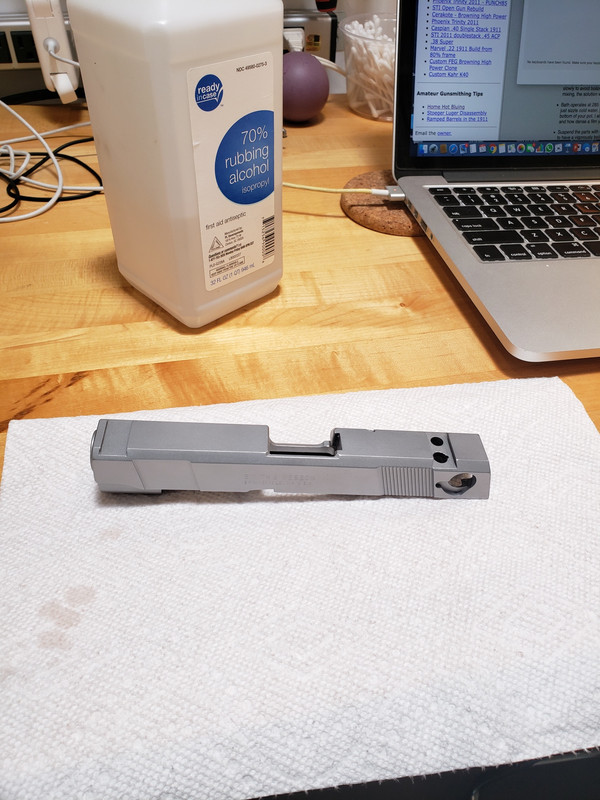
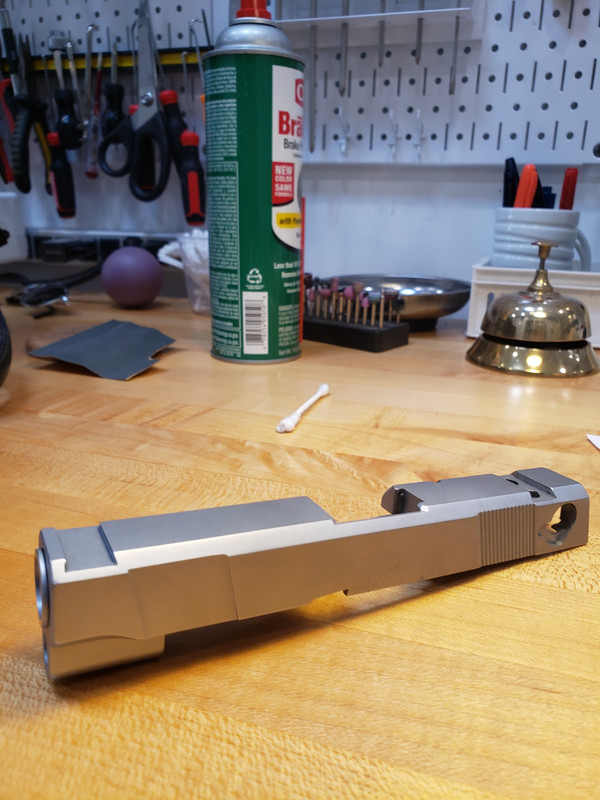
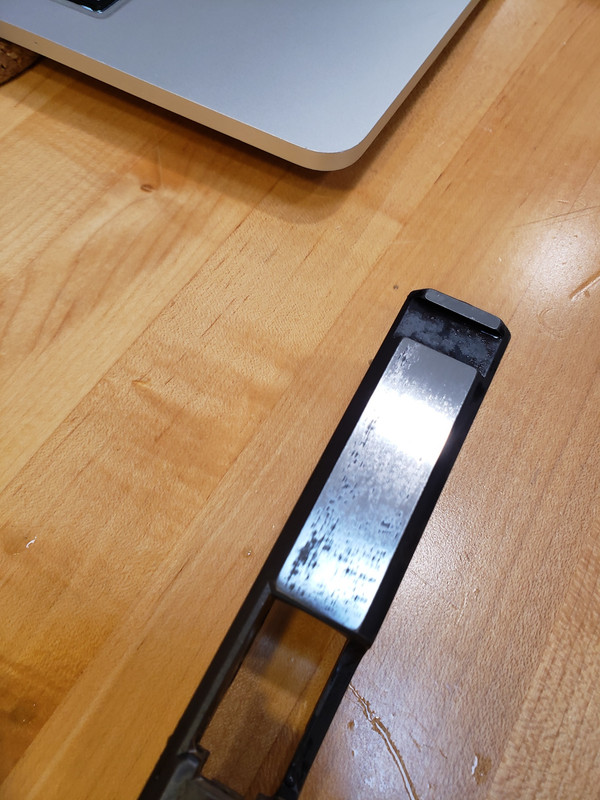
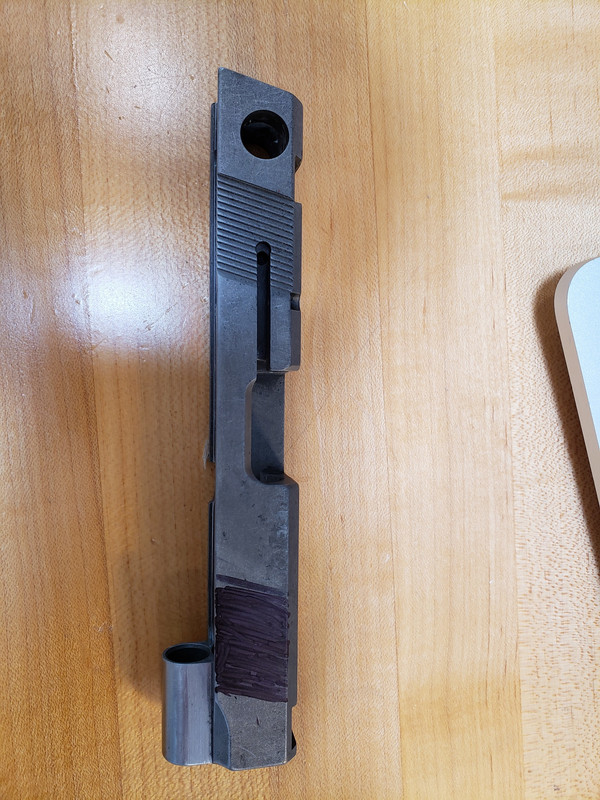
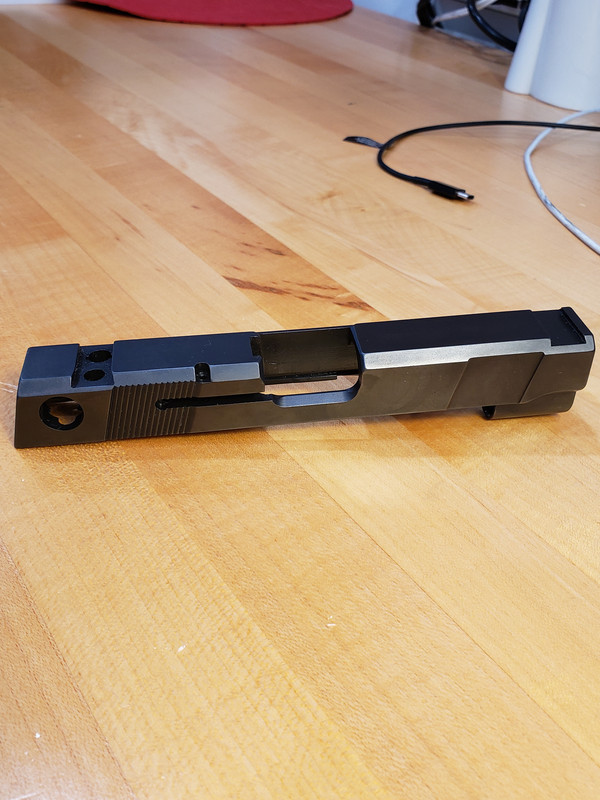
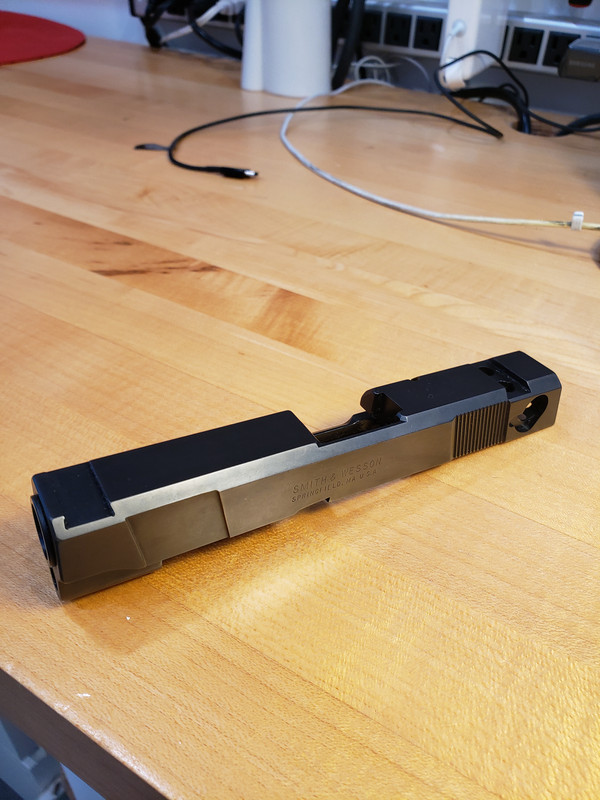
This is what I started with:
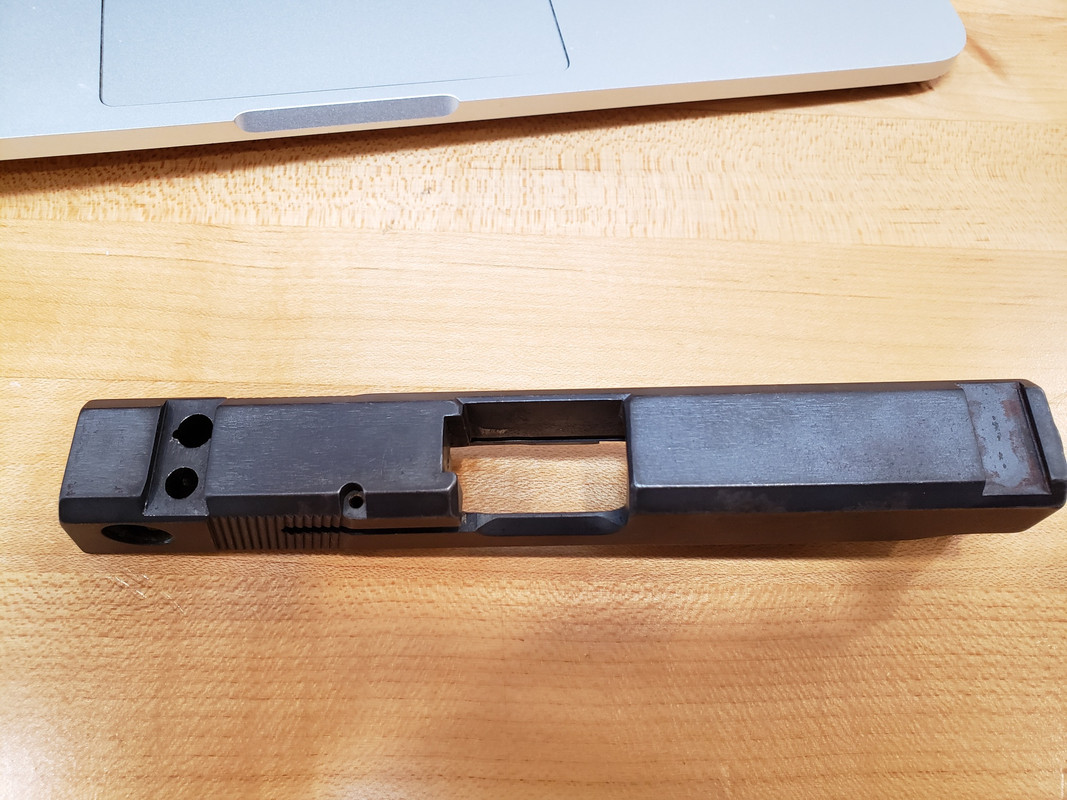
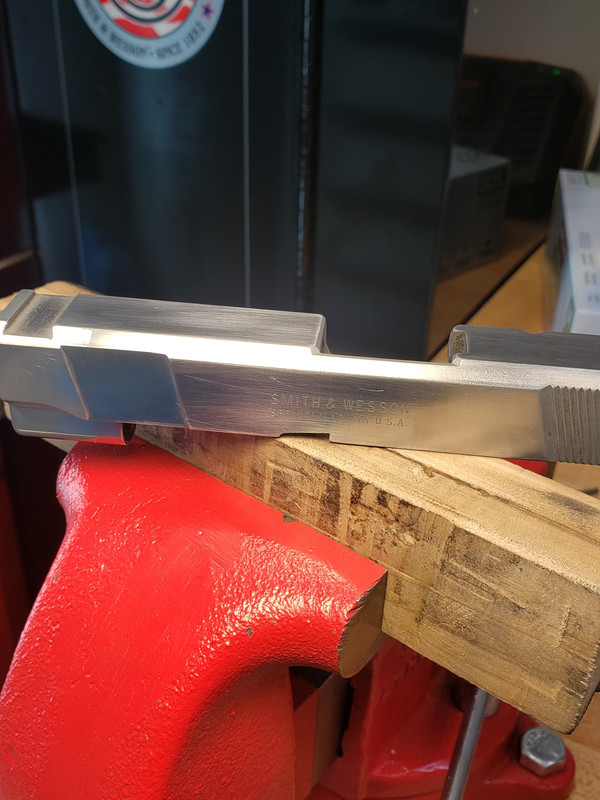
As you can see the slide has an ugly brown color, there are a lot of tooling marks on the top and has some rust spots...
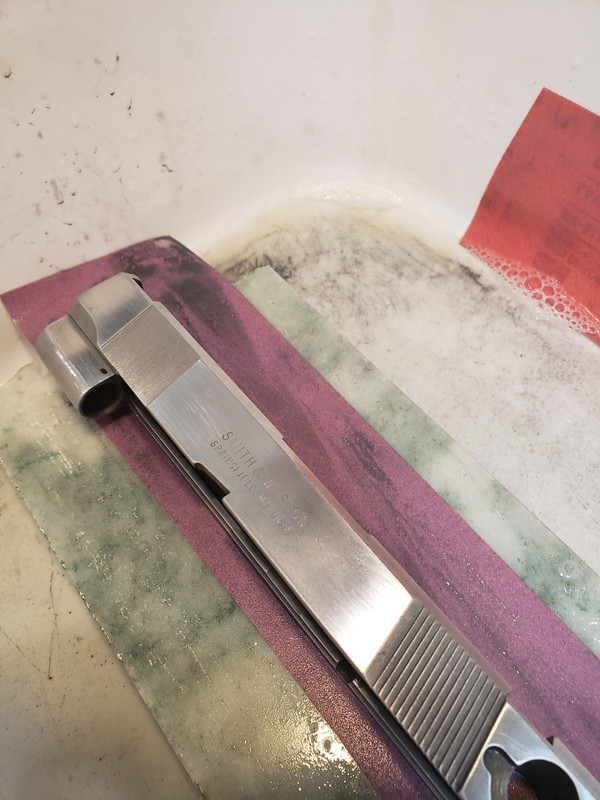
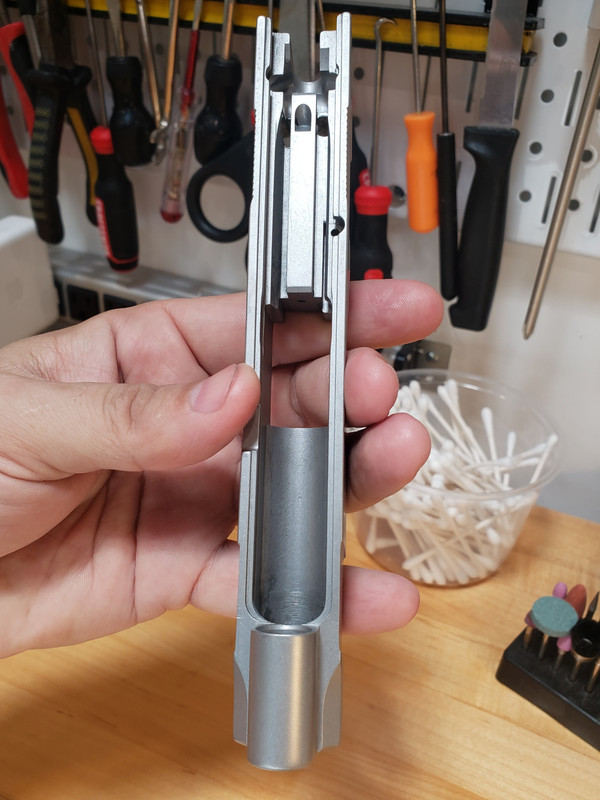
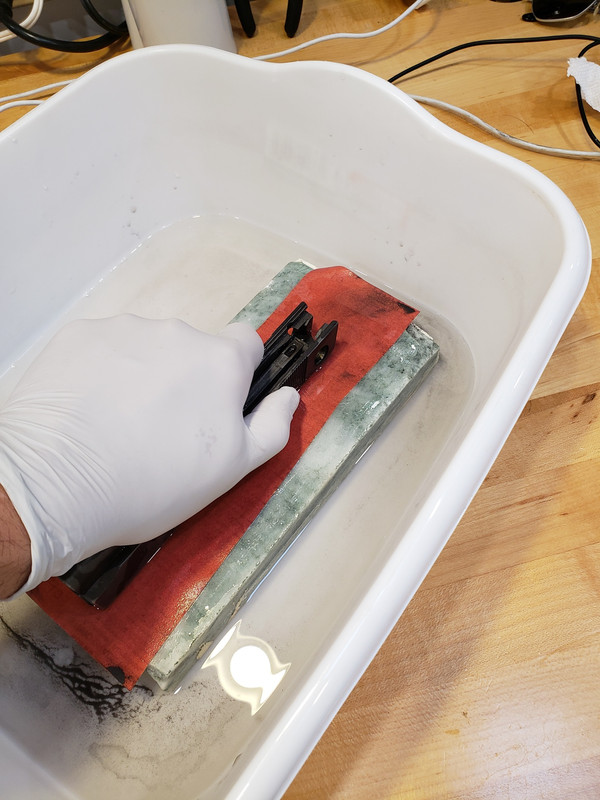
So, I decided to try to remove the tooling marks from the top. I started to work on a marble flat stone and 320 grit paper.
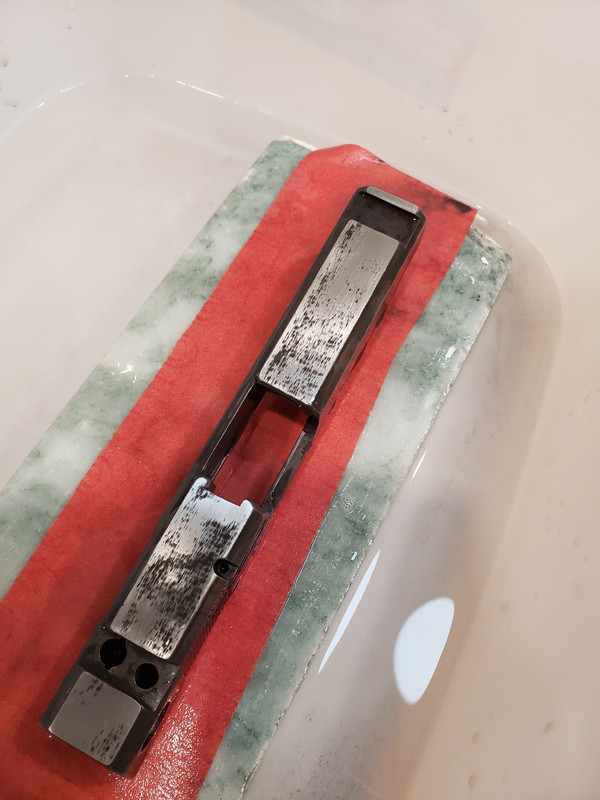
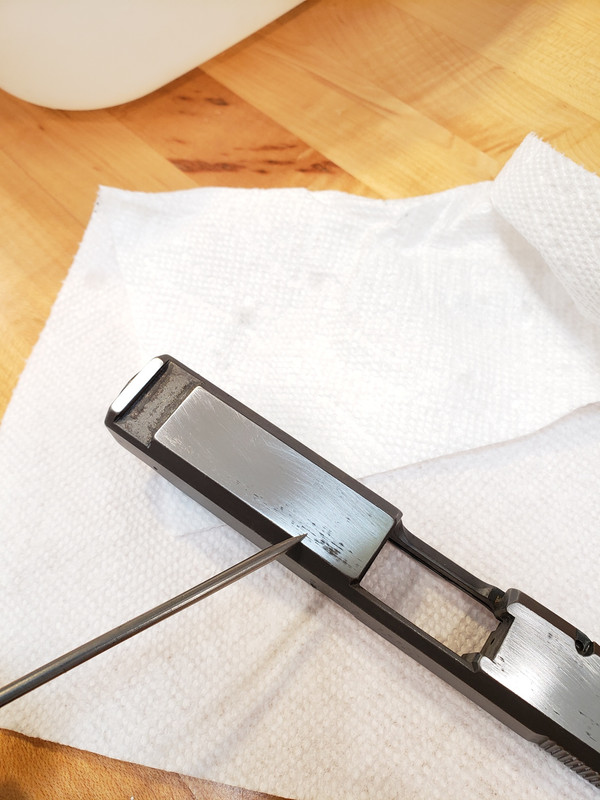
some marks were deep...
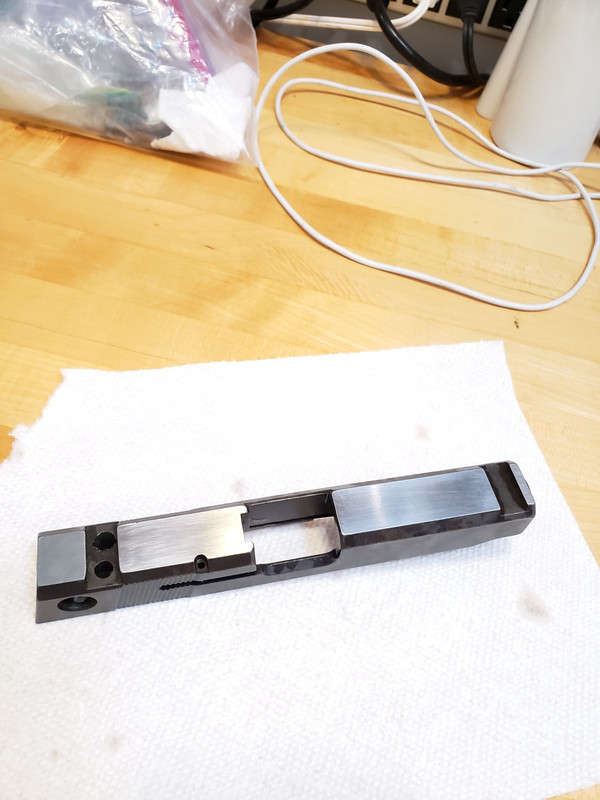
Finally...the top of the slide was "smooth"
more to come...
Last edited by guzzitaco; 05-26-2020 at 10:24 AM.
Reason: spelling
|
|
The Following 13 Users Like Post:
|
1775usmarine, BMCM, GaryS, GerSan69, JohnHL, mbliss57, mrmike7189, nocents, oink, Pine_Worker, prochi2k, skjos, stansdds |
05-25-2020, 08:05 PM
|
 |
Member
|


|
|
Join Date: Nov 2009
Location: Republic of Texas
Posts: 11,363
Likes: 9,380
Liked 17,296 Times in 6,647 Posts
|
|
Your posts are very instructive. One silly question, how do you keep the sand paper on the marble?
I have three Value Line slides. Like you, I grabbed them for the single side safety levers. I should probably try my hand at stripping them down completely to see if I can do that without damage.
__________________
Can open, worms everywhere.
|
|
The Following 2 Users Like Post:
|
|
05-25-2020, 08:48 PM
|
|
Member
|
|
|
Join Date: Sep 2018
Location: Pompano Beach, FL
Posts: 574
Likes: 1,126
Liked 2,135 Times in 378 Posts
|
|
sandpaper on marble
Quote:
Originally Posted by GaryS

Your posts are very instructive. One silly question, how do you keep the sand paper on the marble?
I have three Value Line slides. Like you, I grabbed them for the single side safety levers. I should probably try my hand at stripping them down completely to see if I can do that without damage.
|
Hi Gary,
I wet the sandpaper...the water between the flat surface of the marble create sort of a suction and the paper does not move or moves very little... (cohesion and adhesion of water I think is called)
Also, I use a couple of drops of dishwashing soap (on the sandpaper) to keep the steel particles suspended and that way the sandpaper last a bit longer... (BMCM's trick)
I am using marble instead a a granite slab, because I have a smaller marble piece that fits inside a plastic container I can work on my bench instead of using the kitchen sink... (helps to keep a good relationship with the wife) 
Last edited by guzzitaco; 05-25-2020 at 09:11 PM.
Reason: spelling
|
|
The Following 5 Users Like Post:
|
|
05-26-2020, 05:16 PM
|
|
Member
|
|
|
Join Date: Sep 2018
Location: Pompano Beach, FL
Posts: 574
Likes: 1,126
Liked 2,135 Times in 378 Posts
|
|
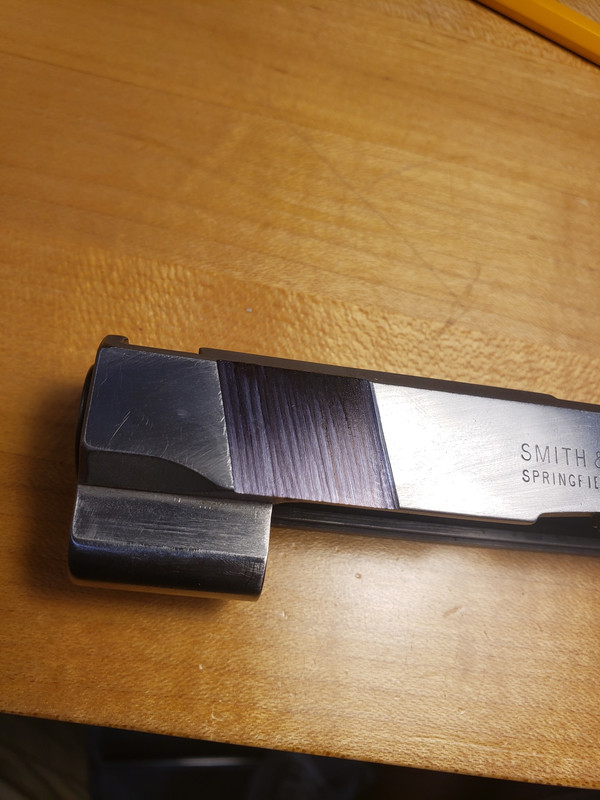
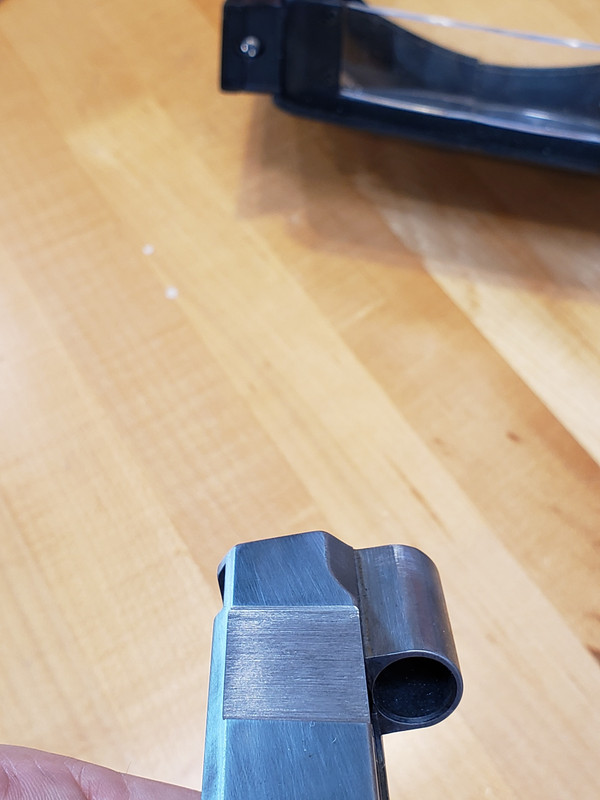
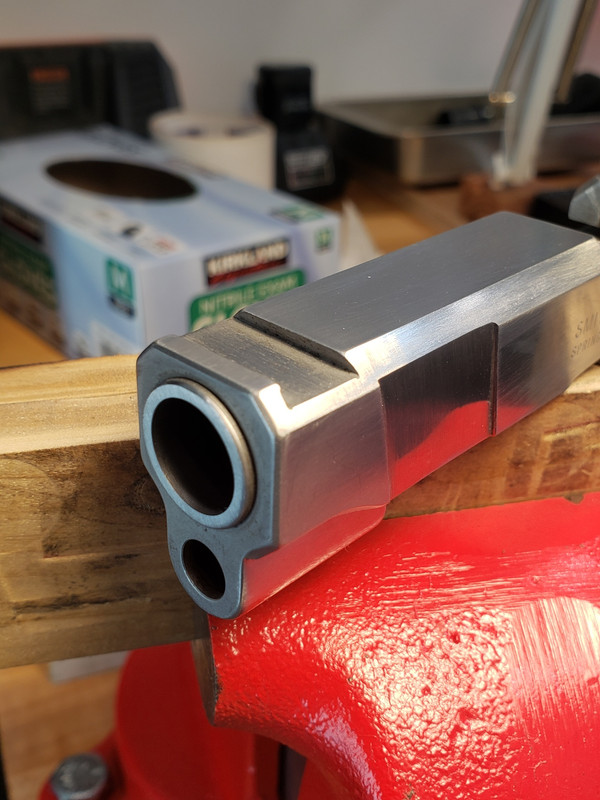
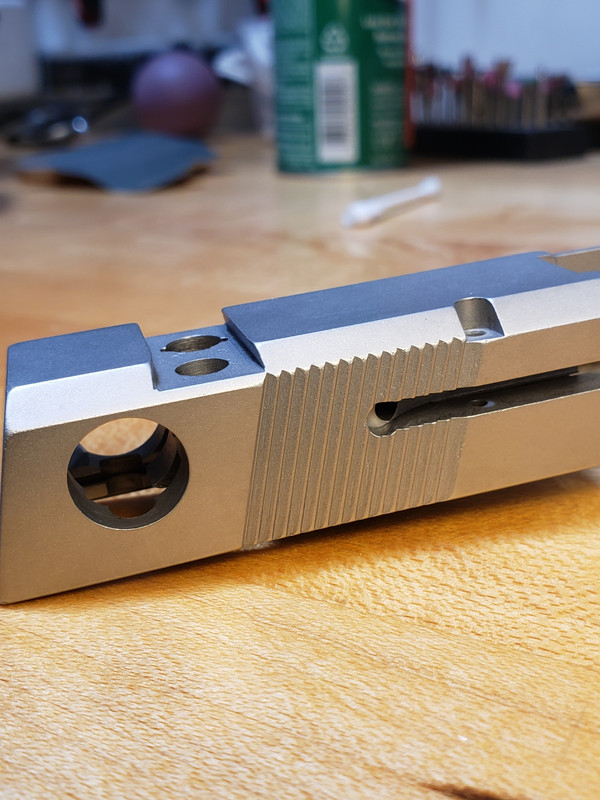
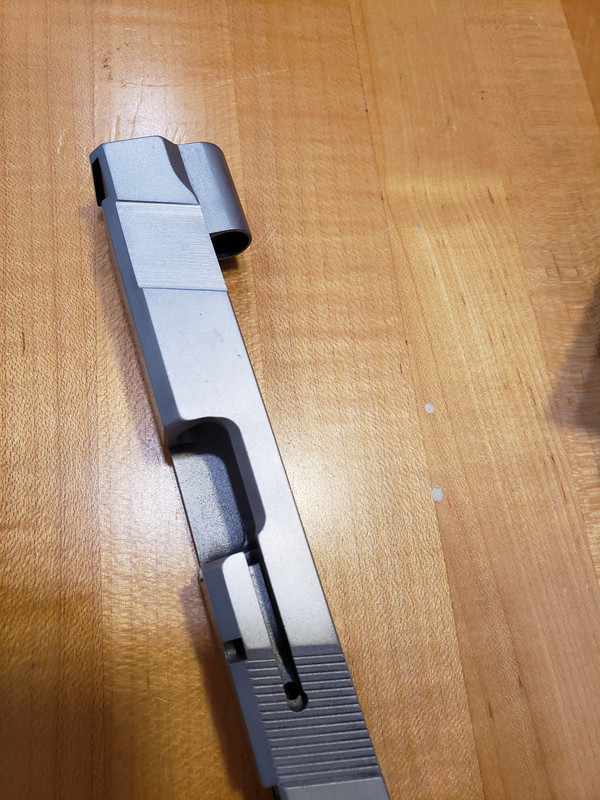
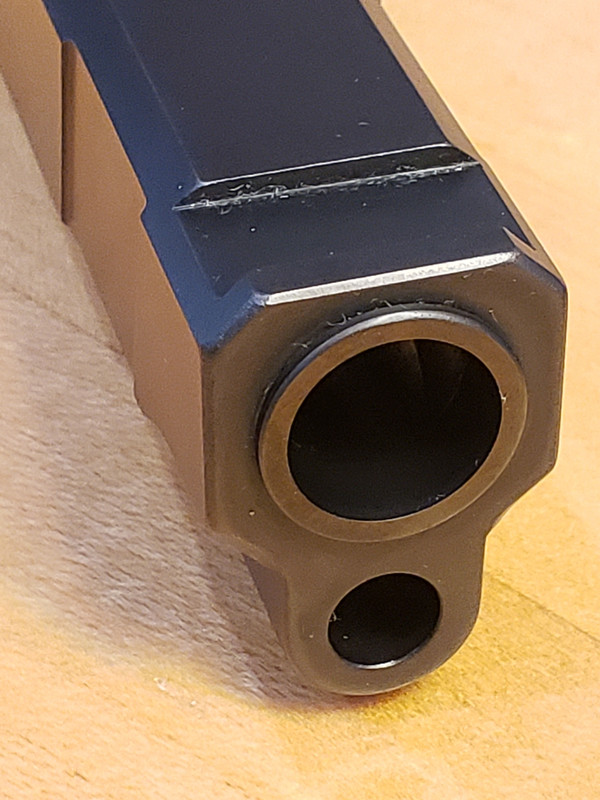
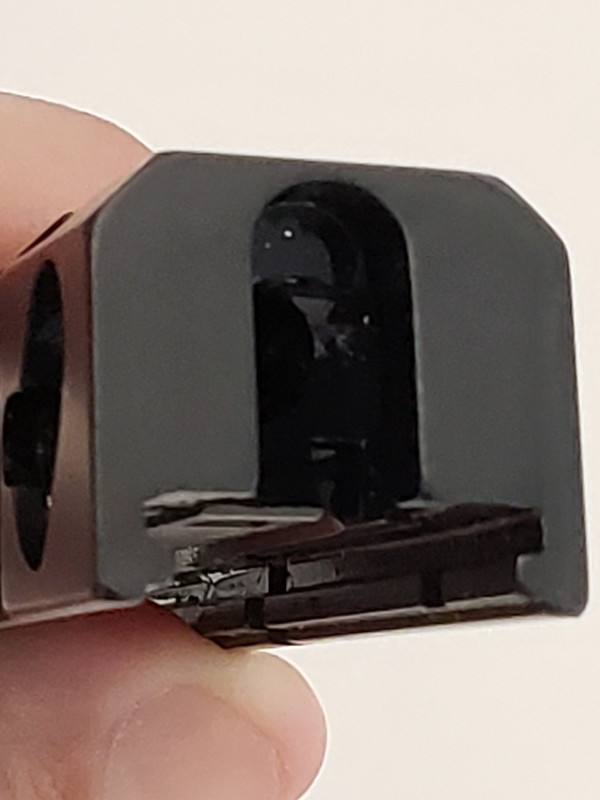
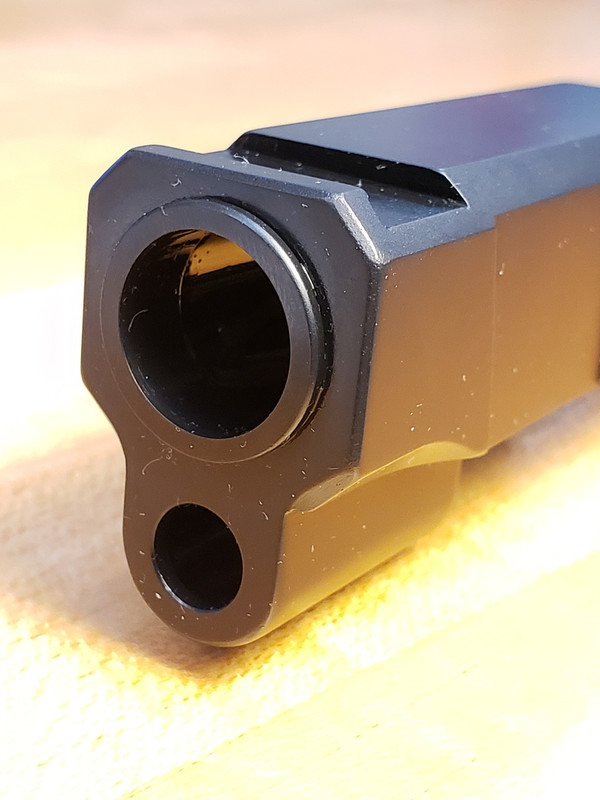
to cut or not ...there is the question...
After top was ready, I removed the bluing using Navy Jelly, not my favorite rust remover, but it is the one on hand. I wanted to see the other spots on the slide, and may times the bluing covers them partially.


The plan was simple, I wanted to address the imperfections and do a hot bluing job, but with matte flats.
However, researching old threads, I stumbled into one of squidsix, where he shows some high-power cuts he did to a M915 slide
This is the thread: Hi Power cuts on 915 slide
That got me thinking
can I make high-power cuts to this slide? Nah
the huge front sight would interfere and could look distorted. Also, the frame of the M910 is thicker than the M915 on the dustcover area, so there wouldnt be enough space
But what about carry-cuts? I have space for those
given the frame thickness, they couldnt be deeper than the back serrations, but there is space
and it could look great
maybe deep enough to do a press check
maybe
(I understand that not everybody likes them...but please remember I am learning with this)
The question was how to do them
I only have hand files
and the cuts need to be precise
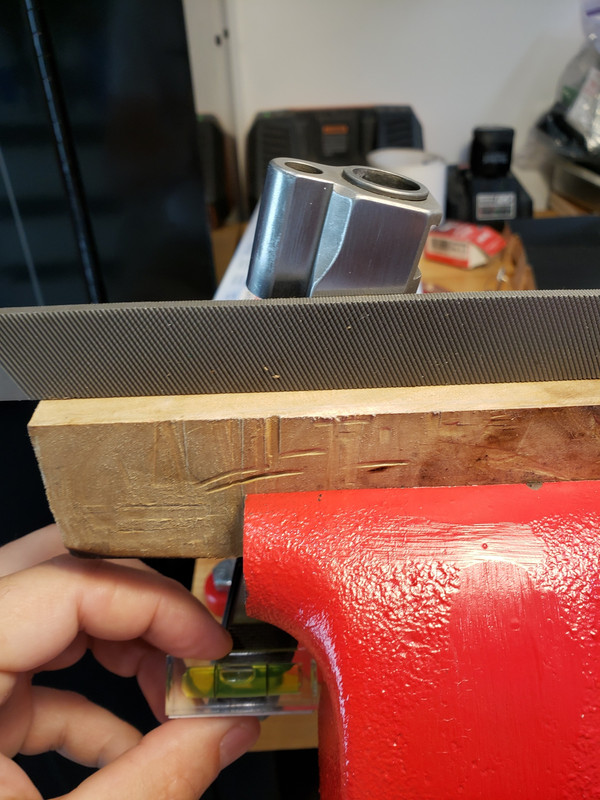
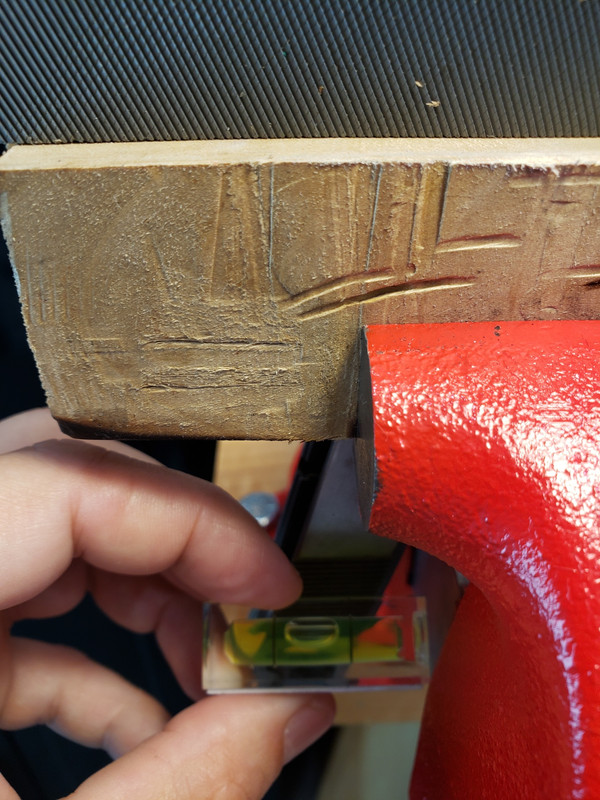
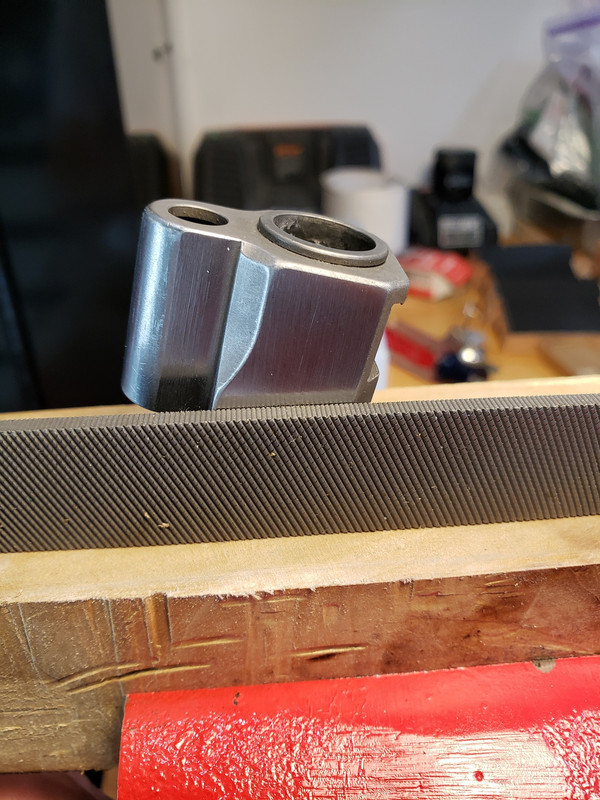
I started to research online, I found a video of a guy doing front serrations on his 1911 with a flat file and a vise.
The front serrations he was doing are flat, not in angle like the ones on a S&W 3rd gen (I think they are called broached serrations). However, the technique was there.
I needed to buy a new file...
more to come...
Last edited by guzzitaco; 05-26-2020 at 05:19 PM.
|
|
The Following 5 Users Like Post:
|
|
05-26-2020, 07:43 PM
|
|
Member
|

|
|
Join Date: Jan 2006
Location: Southern Maine
Posts: 3,528
Likes: 1,902
Liked 5,630 Times in 1,544 Posts
|
|
I actually started my project slide cuts because there was a badly pitted area on the front of the slide. The first cut lined up pretty well. I used a nylon cutting board cut lengthwise and clamped to the slide, marking each serration one at a time by moving the nylon block from one rear serration to the next, scribing a line forward, repeat.
The cuts didnt do enough to make the pitted spot disappear, so I turned it into hipower type cuts, which came out much nicer.
|
|
The Following 2 Users Like Post:
|
|
05-26-2020, 08:53 PM
|
|
Member
|
|
|
Join Date: Sep 2018
Location: Pompano Beach, FL
Posts: 574
Likes: 1,126
Liked 2,135 Times in 378 Posts
|
|
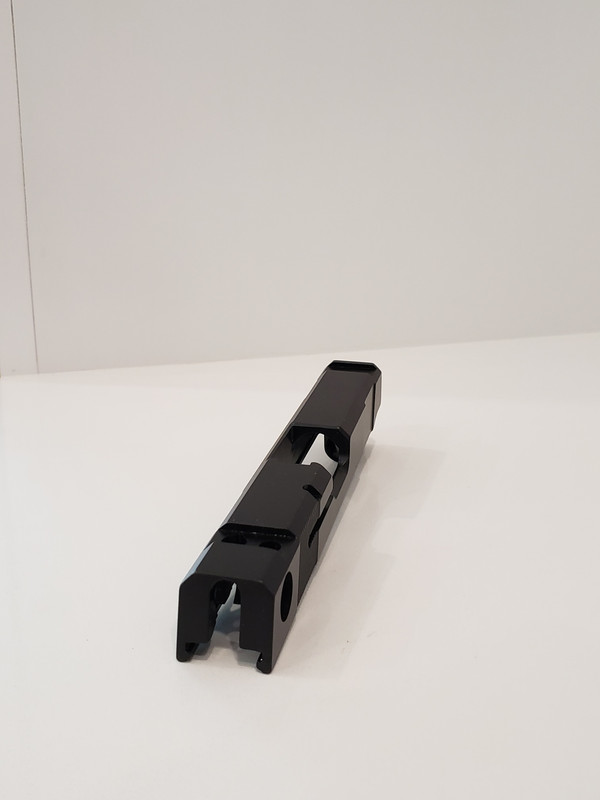
Starting the cuts
Last edited by guzzitaco; 05-29-2020 at 04:58 PM.
Reason: spelling and grammar
|
|
The Following 6 Users Like Post:
|
|
05-26-2020, 08:58 PM
|
|
Member
|
|
|
Join Date: Jan 2006
Location: Southern Maine
Posts: 3,528
Likes: 1,902
Liked 5,630 Times in 1,544 Posts
|
|
You do nice work my friend
|
|
The Following 2 Users Like Post:
|
|
05-26-2020, 09:07 PM
|
|
Member
|
|
|
Join Date: Sep 2018
Location: Pompano Beach, FL
Posts: 574
Likes: 1,126
Liked 2,135 Times in 378 Posts
|
|
Quote:
Originally Posted by squidsix
You do nice work my friend
|
thanks a lot...
it was a rainy weekend...took my time... ")
|
|
The Following 2 Users Like Post:
|
|
05-28-2020, 07:35 PM
|
|
Member
|
|
|
Join Date: Sep 2018
Location: Pompano Beach, FL
Posts: 574
Likes: 1,126
Liked 2,135 Times in 378 Posts
|
|
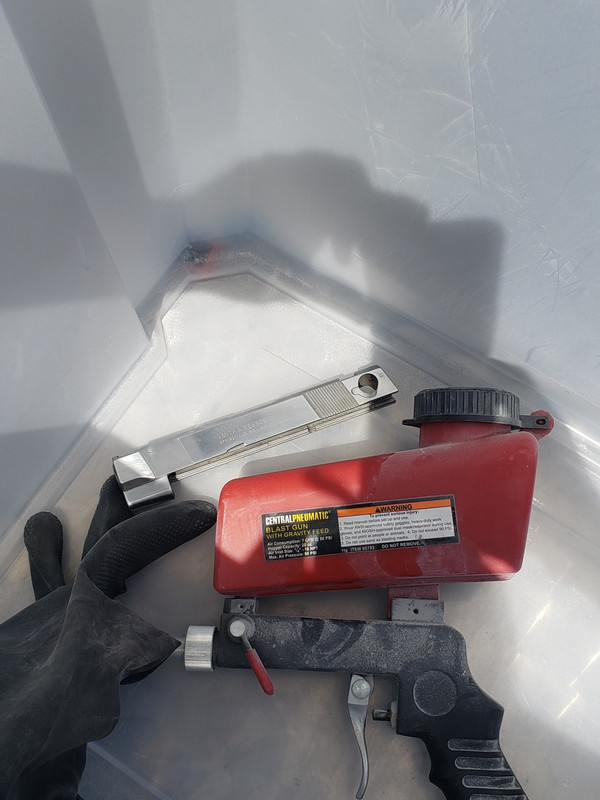
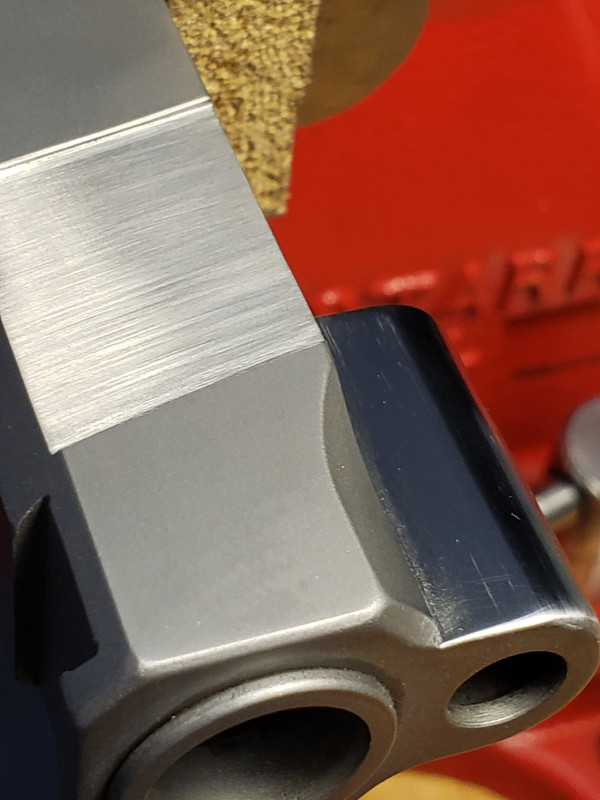
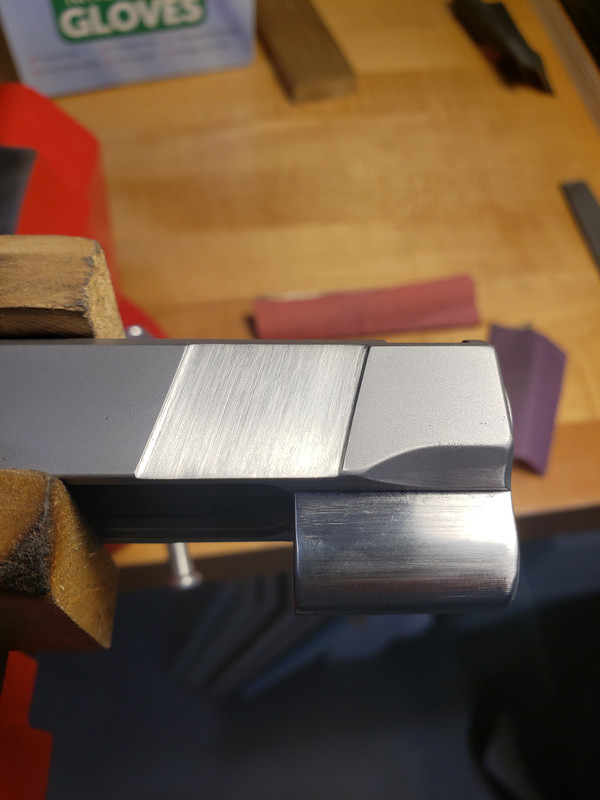
Sometimes you should use a smooth file
After some progress had been made in the cuts, both sides were dimetric at the desired depth, I decided to do a "quick blast" to check for imperfections.
It was raining a lot, and my blasting setup is rudimentary, so I only did a small pass.
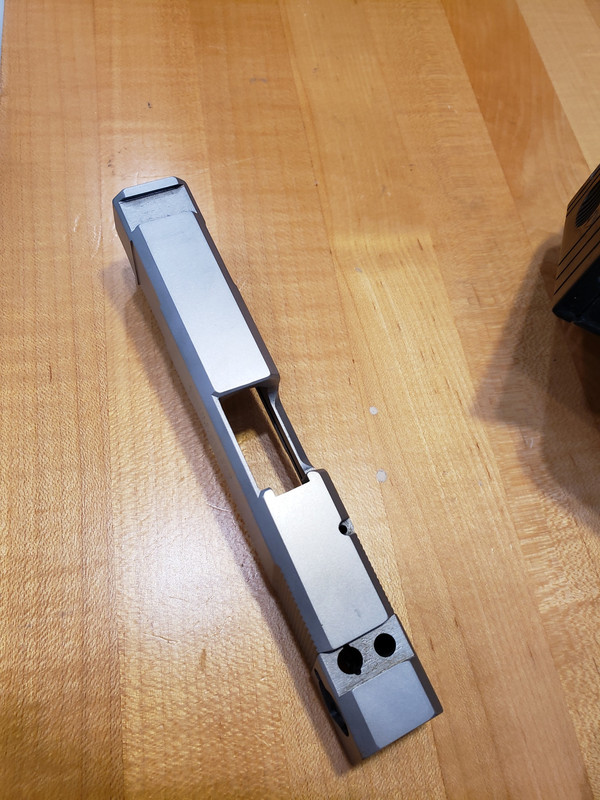
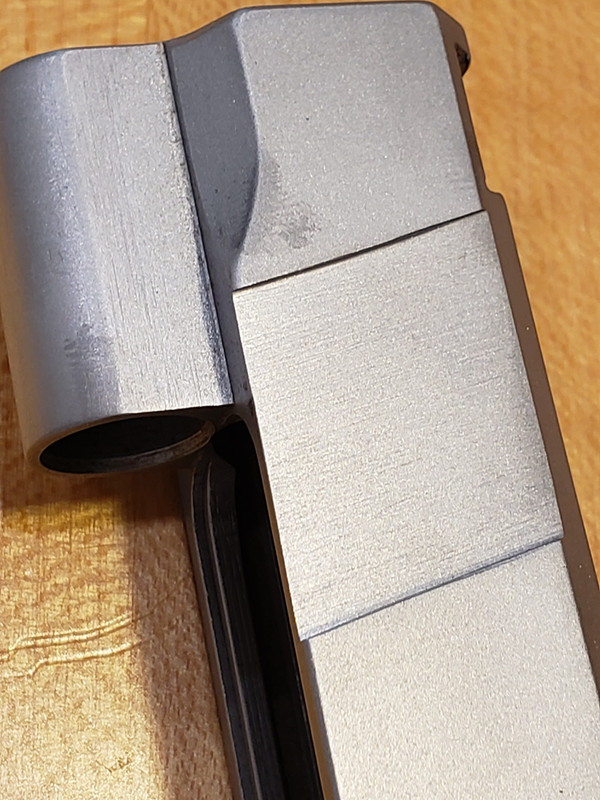
Looked ok, but there were file marks !!! 
I should have "smoothen" everything before blasting it...but to be honest...I was dying to see it...
Later on, I started to correct the filing marks and other imperfections...
more to come...
|
|
The Following 3 Users Like Post:
|
|
05-29-2020, 08:43 AM
|
|
Member
|
|
|
Join Date: Apr 2007
Location: Virginia
Posts: 8,761
Likes: 19,482
Liked 11,851 Times in 5,384 Posts
|
|
I'm liking where this thread is heading. Waiting for the next installment.
__________________
VCDL, GOA, NRA
|
|
The Following User Likes This Post:
|
|
05-29-2020, 09:07 AM
|
|
Member
|
|
|
Join Date: Sep 2018
Posts: 1,872
Likes: 2,253
Liked 2,955 Times in 1,099 Posts
|
|
You know you're going to wind up with a cool custom slide that you have to build a gun around, right? 
Another idea for you - take a look at an "Asp", you'll see a front cut like you just did, and the rear serrations were given the same cut.
|
|
The Following User Likes This Post:
|
|
05-29-2020, 02:05 PM
|
|
Member
|
|
|
Join Date: Sep 2018
Location: Pompano Beach, FL
Posts: 574
Likes: 1,126
Liked 2,135 Times in 378 Posts
|
|
Quote:
Originally Posted by stansdds
I'm liking where this thread is heading. Waiting for the next installment.
|
thanks a lot stansdds... still trying to get rid of the filling marks... 
will post when is blasted...
Last edited by guzzitaco; 05-29-2020 at 02:08 PM.
|
05-29-2020, 02:36 PM
|
|
Member
|
|
|
Join Date: Sep 2018
Location: Pompano Beach, FL
Posts: 574
Likes: 1,126
Liked 2,135 Times in 378 Posts
|
|
Quote:
Originally Posted by mikerjf
You know you're going to wind up with a cool custom slide that you have to build a gun around, right?
Another idea for you - take a look at an "Asp", you'll see a front cut like you just did, and the rear serrations were given the same cut. |
Thanks a lot mikerjf... Some thought I've had about the cuts...
My biggest concern at this point is the depth of the cuts. The M910 frame runs at the same level as the slide. Not much space there to cut, without exposing the rails of the frame.
On the M5906 frame, the dustcover is "recessed" so there is more space for the cuts to be deeper.
On the ASP, it seems that there is barely enough space...but these guys really knew what they were doing...
At this points the fronts cuts are exactly the same depth as the rear serrations. I am concerned that by erasing the serrations, I might remove to much material. Since I do not have a M910 frame, I do not want to risk it...
I don't think I will get a M910 frame...I have a couple of "orphan" M915 slides and I'm trying to find a M5904/5903 frame...the idea is to have a common platform that can inter-change slides.
If this projects ends well, I will probably try to trade the slide for something else (that can become part of another project...)
Re ASP: I have a CS9 and I think it would be a fantastic platform to give the ASP "treatment". It would have to be a collaboration: TercGen would have to make grips with a lexan window, squidsix would have to make magazines with a see-though cut, perhaps we could find an orphan slide for BMCM to "round it" and add some cuts...just daydreaming...
more to come...
Last edited by guzzitaco; 05-29-2020 at 03:50 PM.
|
|
The Following User Likes This Post:
|
|
05-30-2020, 02:23 PM
|
|
Member
|
|
|
Join Date: Sep 2018
Location: Pompano Beach, FL
Posts: 574
Likes: 1,126
Liked 2,135 Times in 378 Posts
|
|
more blasting...
Last edited by guzzitaco; 05-30-2020 at 02:24 PM.
Reason: spelling and grammar
|
|
The Following 5 Users Like Post:
|
|
05-30-2020, 07:44 PM
|
|
Member
|
|
|
Join Date: Sep 2018
Location: Pompano Beach, FL
Posts: 574
Likes: 1,126
Liked 2,135 Times in 378 Posts
|
|
Failure.
Failure. Failure. Failure.
Spent a good 2 hours this afternoon doing the hot bluing and the results were disappointing.
So, let's talk about mistakes:
1) The bluing solution was compromised: I wanted to use the same bluing solution I used for the SSV project. I kept it in the garage in a container. Today, when I went to use it, I noticed I had been spilled by "someone" and there were about 3/4 left. I said to myself "that should be enough..." WRONG...
Hot bluing requieres a precise formula in precise quantities, when I added water I diluted it too much. The result was a dark gray but not a deep black (it looks lighter in real life )
2) I left a water mark on one side of the slide: Normally one of my kids help me...but this time I was on my own. I accidentally touched the slide with a wet rubber globe and there is a HUGE water mark on one side...I think I will handle the slide with cotton gloves until it is ready to sink in the bath...
Some pics (trust me looks better in pictures)

(water mark)
the plan forward? Simple: do it again...

Last edited by guzzitaco; 05-31-2020 at 07:14 AM.
Reason: spelling and grammar
|
|
The Following 6 Users Like Post:
|
|
05-30-2020, 07:49 PM
|
|
Member
|
|
|
Join Date: Jan 2006
Location: Southern Maine
Posts: 3,528
Likes: 1,902
Liked 5,630 Times in 1,544 Posts
|
|
I have never hot blued at home, instead relying on BC perma-blue paste that can come out amazing and can look like garbage depending on me.
If I do surface prep well, and get the piece hot (toaster oven at 225 degrees) it comes out excellent. My 6915 came out great this way.
If done at room temp without a good prep, it comes out poop brown.
|
|
The Following 2 Users Like Post:
|
|
05-31-2020, 01:30 AM
|
|
Member
|
|
|
Join Date: Sep 2018
Location: Pompano Beach, FL
Posts: 574
Likes: 1,126
Liked 2,135 Times in 378 Posts
|
|
Quote:
Originally Posted by squidsix
I have never hot blued at home, instead relying on BC perma-blue paste that can come out amazing and can look like garbage depending on me.
If I do surface prep well, and get the piece hot (toaster oven at 225 degrees) it comes out excellent. My 6915 came out great this way.
If done at room temp without a good prep, it comes out poop brown.
|
Totally agreed. Surface prep makes all the diff...
I used to do do a lot of cold blue and rust blue...but hot caustic bluing is a different animal...color is deeper (much darker) and wear resistance is better...
let's see if I have better luck tomorrow...
Last edited by guzzitaco; 05-31-2020 at 07:16 AM.
|
|
The Following 5 Users Like Post:
|
|
05-31-2020, 11:19 AM
|
|
Member
|
|
|
Join Date: May 2012
Location: South Sound, WA
Posts: 641
Likes: 371
Liked 1,383 Times in 332 Posts
|
|
I've always wanted to try hot blue, but have written it off as too difficult to get right. Ever thought of doing a write-up to share the process?
|
|
The Following User Likes This Post:
|
|
05-31-2020, 01:36 PM
|
|
Member
|
|
|
Join Date: Sep 2018
Location: Pompano Beach, FL
Posts: 574
Likes: 1,126
Liked 2,135 Times in 378 Posts
|
|
hot blue write up...
Quote:
Originally Posted by skjos
I've always wanted to try hot blue, but have written it off as too difficult to get right. Ever thought of doing a write-up to share the process?
|
Hi skjos...
yes, I can do one...I can also list all the references that I have used.
I have adapted the formula to do small batches, given the size of my container and that I only do slides and small parts...
It is not complicated, but it is dangerous. Personal protection equipment is a must.
It is also a bit tedious, all the steps have to be follow, or the result is sub-optimal...
I am no expert...I'm learning, but I am happy to share what I've learned so far...
I will post it later on this week...
|
|
The Following 2 Users Like Post:
|
|
05-31-2020, 08:57 PM
|
|
Member
|
|
|
Join Date: May 2012
Location: South Sound, WA
Posts: 641
Likes: 371
Liked 1,383 Times in 332 Posts
|
|
Awesome, I'm looking forward to it.
|
06-01-2020, 07:08 AM
|
|
Member
|
|
|
Join Date: Apr 2007
Location: Virginia
Posts: 8,761
Likes: 19,482
Liked 11,851 Times in 5,384 Posts
|
|
Quote:
Originally Posted by skjos
I've always wanted to try hot blue, but have written it off as too difficult to get right. Ever thought of doing a write-up to share the process?
|
If you are going to do only one or maybe two firearms, DIY hot blueing is not going to be worth the investment of money and time. Just my opinion.
__________________
VCDL, GOA, NRA
|
06-01-2020, 08:03 AM
|
|
Member
|
|
|
Join Date: Sep 2018
Location: Pompano Beach, FL
Posts: 574
Likes: 1,126
Liked 2,135 Times in 378 Posts
|
|
you are right.
traditional hot bluing methods can be expensive, depending on the materials you buy/use.
however; the "home method" I use, costs around $40 in investment (or zero if you have the hardware), and $16 in materials that can be used for 6 to 12 batches of bluing.
So, If you have that "things" you need in your garage and only by the materials is not bad.
However; yes it is dangerous.
I will post in a separate thread.
|
|
The Following 2 Users Like Post:
|
|
06-01-2020, 08:43 AM
|
 |
US Veteran
|


|
|
Join Date: Jan 2012
Location: Desert South West
Posts: 5,539
Likes: 7,356
Liked 8,688 Times in 2,312 Posts
|
|
Excellent thread. It's nice to see this sort of work like yours and BMCMs and Squidsix and... on the forum. It give me confidence to try some things and also the information I need to know what I am not skilled enough to try and have it done elsewhere. Keep it coming. Thanks
__________________
John 1:17
NRA Life Benefactor
|
|
The Following 2 Users Like Post:
|
|
06-01-2020, 02:24 PM
|
|
Member
|
|
|
Join Date: Sep 2018
Location: Pompano Beach, FL
Posts: 574
Likes: 1,126
Liked 2,135 Times in 378 Posts
|
|
hot blue part deux
Sunday started with a blast, literally

(yeah I know, I need a haircut and loose some weight...)
Before blasting, while drinking my coffee I had already removed the previous bluing with naval jelly and washed the piece with "simple green". I dried everything with an old hair drier that I have.
To fix the problem with the bluing salts I took and easy approach. An over saturated formula is better than a weak formula. So, I added 1/3 of the original components. Spent around $8 in this.
I was extra careful in handling the slide. Glove marks, water marks, grease marks are a problem
because they will show in the bluing, and they look ugly
ruin the job.
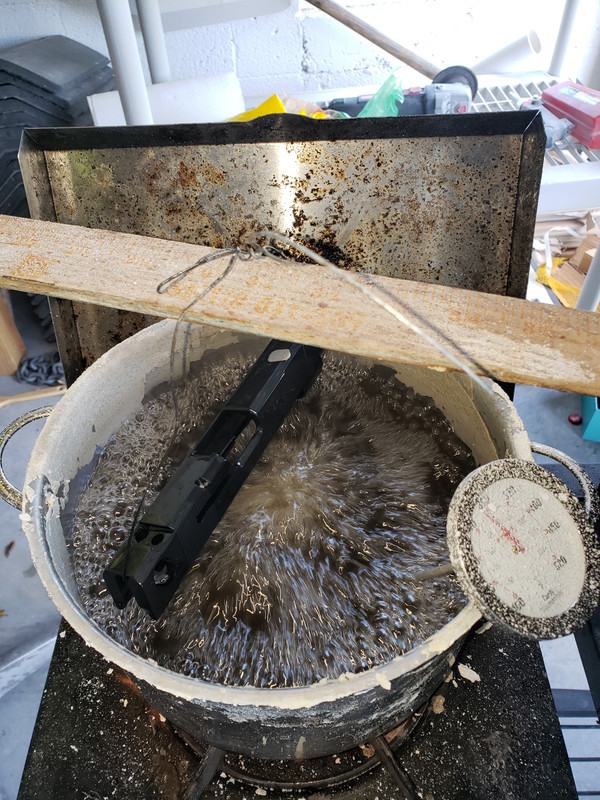
I cleaned the slide using a cotton and alcohol (home denaturalized alcohol), and dried everything using the same hair drier. I worked over a clean (ultra clean) cotton rag on my bench.
Cooked the slide for an hour inside the bath at 295 deg. The bath was over saturated and the pan almost filled, this made the whole process a bit complicated

After I took it out the bath, I submerged in a bucket of clean water with baking soda to neutralize the effects of the salts. Dried it well and the marinated it inside a zip lock bag with Mobil 1 oil for 3 hours.
Took is out and dried all the oil with paper towels.
and voila
it is black


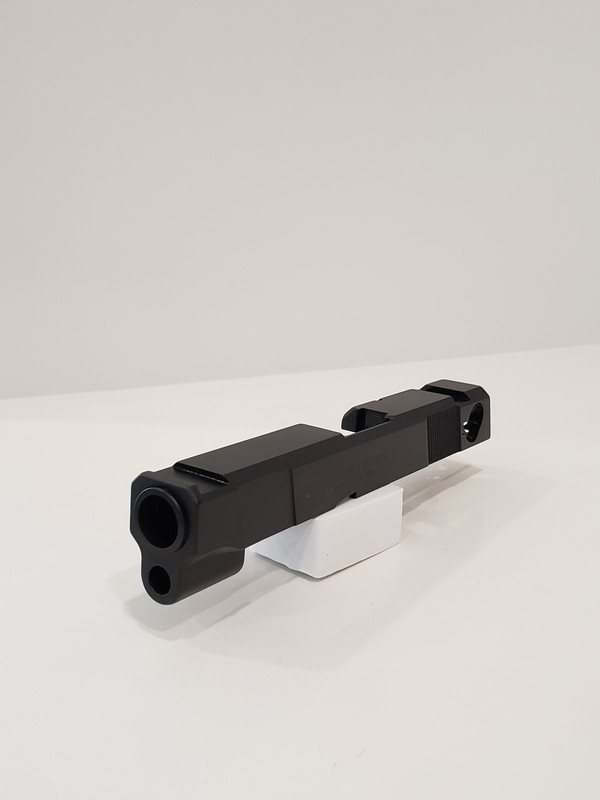

(next to a M915 slide I got recently)
I am really happy how it turn out. It is a very nice flat/sating black.
Almost there...
Last edited by guzzitaco; 06-01-2020 at 02:35 PM.
|
|
The Following 11 Users Like Post:
|
Elliojw, GaryS, GerSan69, Golphin, JohnHL, mbliss57, nocents, skjos, squidsix, stansdds, Steve912 |
06-01-2020, 02:40 PM
|
|
SWCA Member
|
|
|
Join Date: Aug 2013
Location: Foothills of the Ozarks
Posts: 3,596
Likes: 10,661
Liked 5,587 Times in 2,179 Posts
|
|
Once again, I am impressed by what a resourceful and determined individual can accomplish.
The only thing I "cooked" yesterday were some chicken thighs on the Weber.
Tasty, but certainly not as satisfying as your results.
John
|
|
The Following User Likes This Post:
|
|
06-01-2020, 02:42 PM
|
|
Member
|
|
|
Join Date: Jan 2006
Location: Southern Maine
Posts: 3,528
Likes: 1,902
Liked 5,630 Times in 1,544 Posts
|
|
Looks fantastic really. Very nicely done!
|
|
The Following User Likes This Post:
|
|
06-01-2020, 11:02 PM
|
|
US Veteran
|
|
|
Join Date: Jan 2012
Location: Desert South West
Posts: 5,539
Likes: 7,356
Liked 8,688 Times in 2,312 Posts
|
|
That looks great. It's a really nice DIY project that you can be really proud of. It looks professionally done like homemade! There is lots of hope for all of us with 910 457s, 410s etc laying around. You can call it Value Series Plus or VS Plus+Plus.
__________________
John 1:17
NRA Life Benefactor
|
|
The Following 2 Users Like Post:
|
|
06-02-2020, 07:26 AM
|
|
Member
|
|
|
Join Date: Apr 2007
Location: Virginia
Posts: 8,761
Likes: 19,482
Liked 11,851 Times in 5,384 Posts
|
|
That turned out great and I would like to know the whole process and recipe for your bluing solution. I wonder if your bluing will stay blue or turn purple like S&W's bluing on so many of their 9mm pistols?
__________________
VCDL, GOA, NRA
|
|
The Following 2 Users Like Post:
|
|
06-02-2020, 07:55 AM
|
|
Member
|
|
|
Join Date: Sep 2018
Location: Pompano Beach, FL
Posts: 574
Likes: 1,126
Liked 2,135 Times in 378 Posts
|
|
turn purple?
Quote:
Originally Posted by stansdds
That turned out great and I would like to know the whole process and recipe for your bluing solution. I wonder if your bluing will stay blue or turn purple like S&W's bluing on so many of their 9mm pistols?
|
Hi stansdds...
honestly I don't know...
I think there are several factors that will affect the color in time...
1) how long did you leave it into the solution (cooking)?
longer time could mean a denser coating.
2) did you neutralized the salts by washing and then oiling properly?
if not "neutralized" the salts keep working on the piece, even tough the piece is out of the bath. To neutralize, the piece has to be washed and oiled properly.
3) how was the piece handle and protected over time? I think a bit of maintenance can help keep the bluing in good shape.
I suspect that when the slides turn brown, is due to a low time in the bath.
I also suspect that when the slides turn purple is due to a high temp on the bath and not a proper "wash" after taking them out...(the salts weren't neutralized properly and the kept working over the years, changing the color).
However, these are only guesses, since I am no expert on the matter. My guesses are based more in what I have read than what I have done.
I will be posting a separate thread on hot bluing 3rd gens with the recipe and procedure.
I hope they don't change in color because I really like how they turn out...
Last edited by guzzitaco; 06-02-2020 at 02:01 PM.
|
|
The Following 2 Users Like Post:
|
|
06-02-2020, 08:46 AM
|
|
Member
|
|
|
Join Date: Apr 2007
Location: Virginia
Posts: 8,761
Likes: 19,482
Liked 11,851 Times in 5,384 Posts
|
|
I do know that the alloy of the steel will also affect the bluing. Some alloys will come out with a purple hue, no matter what you do.
__________________
VCDL, GOA, NRA
|
|
The Following User Likes This Post:
|
|
06-02-2020, 07:05 PM
|
|
Member
|
|
|
Join Date: Sep 2018
Location: Pompano Beach, FL
Posts: 574
Likes: 1,126
Liked 2,135 Times in 378 Posts
|
|
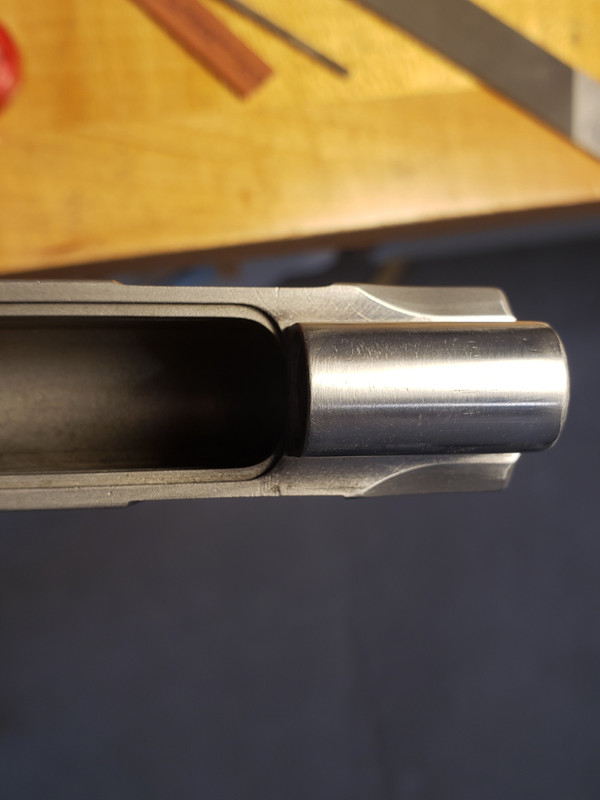
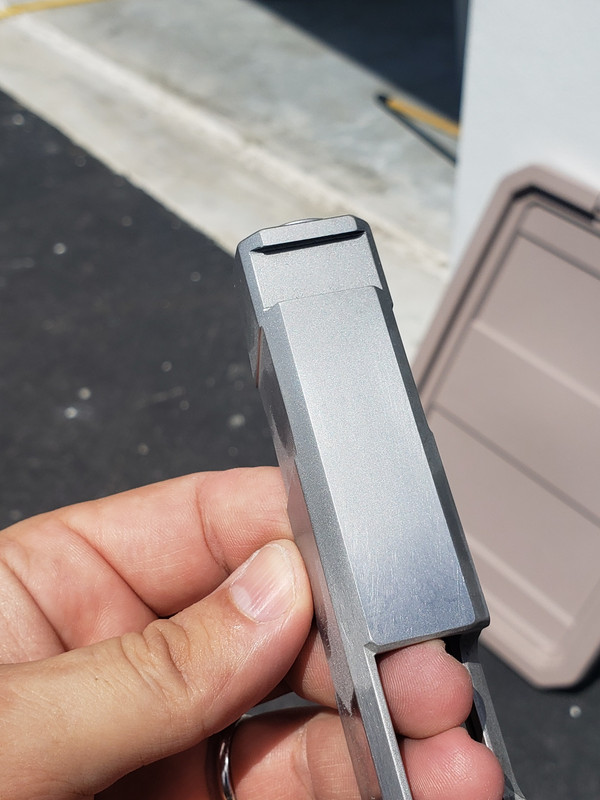
Couple of details...
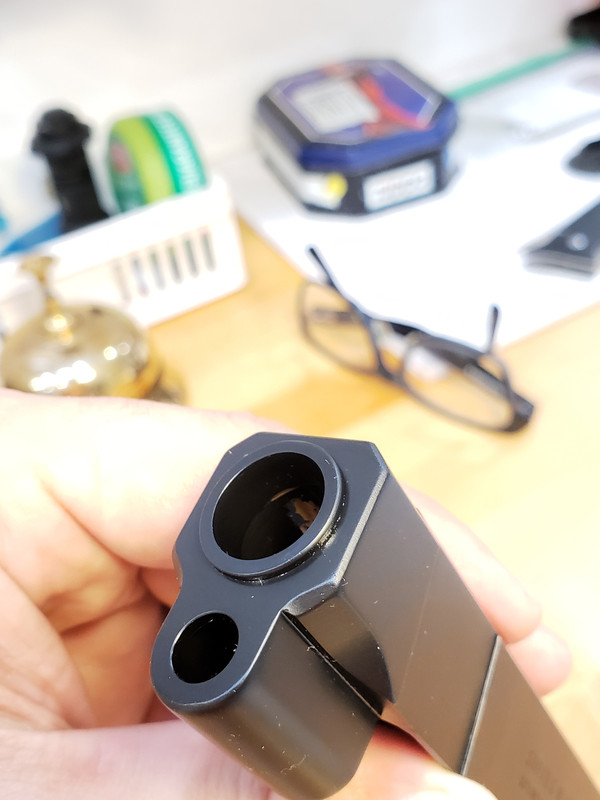
Since I am trying to be full transparent, here is a couple of small imperfections due to condition of the slide. I tried to get rid of them, but getting them 100% out would have meant removing to much material and maybe deleting the roll marks...

nevertheless, they are hard to spot...


unless you are OCD like me...
(sometimes perfect is the enemy of "good"...my boss used to say)
I will be listing the slide For Trade in the Classifieds...
|
|
The Following 5 Users Like Post:
|
|
|
| Thread Tools |
|
|
| Display Modes |
 Linear Mode Linear Mode
|
 Posting Rules
|
|
|
|
|