|
 |

12-30-2018, 03:00 AM
|
 |
Member
|
|
|
Join Date: Nov 2013
Location: Spokane, WA
Posts: 14,776
Likes: 1,476
Liked 20,504 Times in 8,122 Posts
|
|
Making a holster
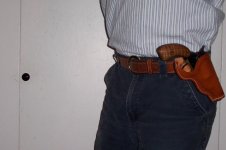
I'm making my first full-sized holster - a flap holster for my Luger.
I'm using some dark brown chrome tanned, pre-dyed leather I picked up at the local Tandy store. I've got the pieces all cut out and ready to stitch together, but I have a question or two about finishing the edges.
I figured this would be the best place to pose some questions for our leather-working and holster-making experts.
First question: For the single thickness belt loop on the back, I presume I need to burnish the edges BEFORE stitching it onto the back of the holster?
Second question: I'm thinking that since I will be gluing the edges wherever two layers are sewn together, I'm thinking it will work best to glue and stitch those edges together and then burnish them together AFTERWARDS, right?
Third question: With this chrome-tanned semi-soft leather that is just over 1/8" thick, what is the best & easiest method to burnish the edges?
One technique that I've read about is to apply a clear acrylic paint on the edge and then sand it, repeating the process as many times as necessary to achieve a smooth slick edge. Anyone have another method to suggest that will work better and/or is easier/quicker?
Lobo, Snubby, and all the other leather gurus, I am really in need of your expert opinions. Thanks in advance for any suggestions you care to offer this neophyte.
|
The Following 3 Users Like Post:
|
|

12-30-2018, 04:00 AM
|
 |
Member
|
|
|
Join Date: Apr 2006
Posts: 19,257
Likes: 9,347
Liked 30,144 Times in 9,767 Posts
|
|
Snubby has a Youtube Channel that you can watch him making holsters on. He goes into detail on important points.
Chooglin' with Snubby - just do a search on Youtube!
|
The Following 2 Users Like Post:
|
|

12-30-2018, 11:00 AM
|
Member
|
|
|
Join Date: May 2008
Location: Near Birmingham
Posts: 7,259
Likes: 5,001
Liked 8,457 Times in 2,233 Posts
|
|
1. It is definately easier to burnish the belt loop before stitching.
2. That's the way I do it. I use a sanding drum in a bench top drill press to even up the edge.
3. Go back to Tandy and buy some vegetable tanned leather. Seriously.
I use a 1/2" oak dowel placed in the bench top drill press. I cut different size grooves in the dowel with files and sandpaper. I put bees wax on the edge of the leather and run it across the dowel with the drill press running.
I use a beveler to round the front and back edge and dye the edge dark brown or black before burnishing .
There is more than one way to get this done but the above works for me.
I don't use chrome tanned leather and 1/8" of that might be a little flimsy but using the drill press would allow you to hold the leather tight while burnishing.
Check out Youtube for some videos or look up a leather worker forum for more info.
Good luck and let us know how it turns out.
Last edited by bamabiker; 12-30-2018 at 11:13 AM.
|
The Following User Likes This Post:
|
|

12-30-2018, 12:13 PM
|
 |
Member
|
|
|
Join Date: Jan 2016
Posts: 1,530
Likes: 624
Liked 3,247 Times in 1,007 Posts
|
|
Quote:
Originally Posted by bamabiker
1. It is definately easier to burnish the belt loop before stitching.
2. That's the way I do it. I use a sanding drum in a bench top drill press to even up the edge.
3. Go back to Tandy and buy some vegetable tanned leather. Seriously.
I use a 1/2" oak dowel placed in the bench top drill press. I cut different size grooves in the dowel with files and sandpaper. I put bees wax on the edge of the leather and run it across the dowel with the drill press running.
I use a beveler to round the front and back edge and dye the edge dark brown or black before burnishing .
There is more than one way to get this done but the above works for me.
I don't use chrome tanned leather and 1/8" of that might be a little flimsy but using the drill press would allow you to hold the leather tight while burnishing.
Check out Youtube for some videos or look up a leather worker forum for more info.
Good luck and let us know how it turns out.
|
^^Good advice. I use a slightly different approach to burnishing (there's different techniques out there). I use a wet sponge to wet the holster edge with water and rub glycerine soap into the edge for burnishing with the drill press. Then I rub beeswax into the edge and rub/polish the edge with canvas.
__________________
Vegan by proxy.
|
The Following 2 Users Like Post:
|
|

12-30-2018, 12:22 PM
|
Member
|
|
|
Join Date: Dec 2011
Posts: 36
Likes: 2
Liked 34 Times in 14 Posts
|
|
i would stay away from the chrome tanned leather as it will sause the gun to rust if left in the holster for extended periods. Use a good quality veg tanned leather 7-8 oz. will work well and use Fiebings pro dye.
|
The Following 4 Users Like Post:
|
|

12-30-2018, 01:35 PM
|
 |
Member
|
|
|
Join Date: Nov 2013
Location: Spokane, WA
Posts: 14,776
Likes: 1,476
Liked 20,504 Times in 8,122 Posts
|
|
Thanks for the replies so far. Keep the good info coming guys.
Just FYI, I said the leather I have is chrome-tanned, but I don't actually know that. I just assumed that because it is pre-dyed. The more I look at it the less sure I am about that. I really don't know I would be able to tell for certain one way or another. Maybe someone can clue me in on that.
Now that I look at it again, it is actually pretty stiff, and it in reality it is a little more than 1/8" thick.
Last edited by BC38; 12-30-2018 at 02:25 PM.
|
The Following User Likes This Post:
|
|

12-30-2018, 03:44 PM
|
 |
Member
|
|
|
Join Date: Jul 2012
Location: southern hemisphere
Posts: 2,745
Likes: 1,984
Liked 8,480 Times in 2,328 Posts
|
|
Quote:
Originally Posted by BC38
Thanks for the replies so far. Keep the good info coming guys.
Just FYI, I said the leather I have is chrome-tanned, but I don't actually know that. I just assumed that because it is pre-dyed. The more I look at it the less sure I am about that. I really don't know I would be able to tell for certain one way or another. Maybe someone can clue me in on that.
Now that I look at it again, it is actually pretty stiff, and it in reality it is a little more than 1/8" thick.
|
Well, then, step one on your journey, don't be confused about whether leather is chrome or veg. A bit like being a gas station attendant and not knowing the gas pump from the diesel pump; not the same and definitely not interchangeable.
__________________
The Holstorian
|
The Following User Likes This Post:
|
|

12-30-2018, 04:46 PM
|
 |
Member
|
|
|
Join Date: Nov 2013
Location: Spokane, WA
Posts: 14,776
Likes: 1,476
Liked 20,504 Times in 8,122 Posts
|
|
Quote:
Originally Posted by rednichols
Well, then, step one on your journey, don't be confused about whether leather is chrome or veg. A bit like being a gas station attendant and not knowing the gas pump from the diesel pump; not the same and definitely not interchangeable.
|
Gotcha. Can you offer any helpful tips on how to make that determination?
|
The Following 2 Users Like Post:
|
|

12-30-2018, 05:39 PM
|
 |
Member
|
|
|
Join Date: Apr 2011
Location: Twin Cites, Minnesota
Posts: 5,486
Likes: 12,125
Liked 11,597 Times in 3,502 Posts
|
|
BC38, when it comes to making holsters, you are going to get a lot of good and bad information. Some of it will directly conflict with other information (for example, some will get the vapors if someone mentions putting neatsfoot oil on a holster, whereas some literally dip the finished holster or gun belt in it).
I will agree with the others that you need to get some vegetable tanned (un-colored, preferably) leather. Don't even consider using the chrome tanned for holsters.
The very best thing to can do to improve your holster making knowledge is to buy this book from Tandy leather:
|
The Following User Likes This Post:
|
|

12-30-2018, 09:13 PM
|
 |
Member
|
|
|
Join Date: Nov 2013
Location: Spokane, WA
Posts: 14,776
Likes: 1,476
Liked 20,504 Times in 8,122 Posts
|
|
Thanks Warren Sear.
Can anyone tell me how to determine if a piece of leather is vegetable tanned or chrome tanned? Appearance? Smell? Water absorption?
|
The Following User Likes This Post:
|
|

12-30-2018, 09:29 PM
|
Member
|
|
|
Join Date: May 2008
Location: Near Birmingham
Posts: 7,259
Likes: 5,001
Liked 8,457 Times in 2,233 Posts
|
|
BC, I'm not sure how you can tell once you've bought it. Might have to go back to the Tandy store and show them which pile you got it out of.
|
The Following User Likes This Post:
|
|

12-30-2018, 09:32 PM
|
 |
Member
|
|
|
Join Date: Jul 2012
Location: WVa East Panhandle
Posts: 29,189
Likes: 72,296
Liked 83,827 Times in 18,874 Posts
|
|
I do my edges in this order. First I glue them then sand then on a horizontal belt sander and a drum sander chucked into a drill press for tight curves to get them all nice and smooth. After that I'll mark my stitch line then do my stitchin'. I punch my stitch holes with a stitching chisel with 3mm spacing then hand stitch using a double needle saddle stitch.
After stitching, I'll check the edges and if they have ripples from the stitches, I'll sand them smooth then bevel, dye and burnish. I use a wooden burnishing tool from Tandy and hand burnish. I have 2, one for black and one for other than black. First, I'll do a water burnish then a Gum Tragacanth burnish than coat the edge with Tan-Kote so it'll stay good looking. If all goes right, it all comes out looking something like this:

In this case, I also grooved the stitch line. That's not always necessary but in this case, I thought it'd look good grooved.
Hand burnished welted edge:
__________________
Keep on Chooglin'
Last edited by snubbyfan; 12-30-2018 at 09:37 PM.
|
The Following 10 Users Like Post:
|
|

12-30-2018, 10:15 PM
|
 |
Member
|
|
|
Join Date: Apr 2011
Location: Twin Cites, Minnesota
Posts: 5,486
Likes: 12,125
Liked 11,597 Times in 3,502 Posts
|
|
^^^ Snubby Fan, you wrote that you dye the leather after stitching? How do you keep the tread from getting colored? I have done this, but I don't like how the thread looks dingy afterward.
|
The Following 2 Users Like Post:
|
|

12-30-2018, 10:28 PM
|
Member
|
|
|
Join Date: May 2008
Location: Near Birmingham
Posts: 7,259
Likes: 5,001
Liked 8,457 Times in 2,233 Posts
|
|
Can't speak for Snubby but I use a small paint brush.
|
The Following 2 Users Like Post:
|
|

12-30-2018, 10:32 PM
|
 |
Member
|
|
|
Join Date: Apr 2011
Location: Twin Cites, Minnesota
Posts: 5,486
Likes: 12,125
Liked 11,597 Times in 3,502 Posts
|
|
I cut out the leather using my pattern, then use an air brush to apply the dye evenly and avoid streaking. After that I drill the holes and saddle stitch, then finish the edges.
Here are pictures of a holster I made, using an air brush to apply the dye before stitching...
Last edited by Warren Sear; 12-30-2018 at 10:44 PM.
|
The Following 3 Users Like Post:
|
|

12-30-2018, 10:49 PM
|
 |
Member
|
|
|
Join Date: Nov 2013
Location: Spokane, WA
Posts: 14,776
Likes: 1,476
Liked 20,504 Times in 8,122 Posts
|
|
Quote:
Originally Posted by bamabiker
BC, I'm not sure how you can tell once you've bought it. Might have to go back to the Tandy store and show them which pile you got it out of.
|
OK, so if the difference is so hard to tell, why is the chrome tanned such a no-no?
Is there something about the tanning process makes it THAT bad for the finish on guns? Is it bad enough to be a big deal even if the gun doesn't get left in the holster for extended periods?
Contrary to Red's analogy of the gas station attendant, who would be pumping gas every day, but still doesn't know the difference between gas & diesel, this isn't something I do every day - or something I have ever done for that matter.
A more apt analogy might be a guy who's never driven or fueled a car before. In that case not knowing the difference between the pumps wouldn't be because he's stupid, but rather it would be because he lacks any frame of reference.
That's kind of where I'm at here - no real frame of reference. That's why I'm asking the experts!
For example: I didn't even know what saddle stitching was until I looked it up.
Last edited by BC38; 12-30-2018 at 10:51 PM.
|
The Following 2 Users Like Post:
|
|

12-30-2018, 11:07 PM
|
 |
Member
|
|
|
Join Date: Apr 2011
Location: Twin Cites, Minnesota
Posts: 5,486
Likes: 12,125
Liked 11,597 Times in 3,502 Posts
|
|
Anything but vegetable tanned leather is supposed to cause rusting (or so I am told). Also, I don't think anything other than vegetable tanned leather can be wet-molded.
|
The Following 2 Users Like Post:
|
|

12-30-2018, 11:42 PM
|
Member
|
|
|
Join Date: May 2008
Location: Near Birmingham
Posts: 7,259
Likes: 5,001
Liked 8,457 Times in 2,233 Posts
|
|
It has to do with what is used in chrome tanned vs. veg tanned but I'm not informed enough on the details to explain it to you.
As long as you do not leave the gun in the holster I believe you will be OK but if you are going to be making them you might as well buy the leather better suited for the project.
I'll stay out of any discussion about what Red has to say.
Last edited by bamabiker; 12-30-2018 at 11:43 PM.
|

12-31-2018, 12:37 AM
|
 |
Member
|
|
|
Join Date: Jul 2012
Location: WVa East Panhandle
Posts: 29,189
Likes: 72,296
Liked 83,827 Times in 18,874 Posts
|
|
Quote:
Originally Posted by chief38
Snubby has a Youtube Channel that you can watch him making holsters on. He goes into detail on important points.
Chooglin' with Snubby - just do a search on Youtube!
|
And click on "playlists."
__________________
Keep on Chooglin'
|
The Following User Likes This Post:
|
|

12-31-2018, 12:49 AM
|
 |
Member
|
|
|
Join Date: Jul 2012
Location: WVa East Panhandle
Posts: 29,189
Likes: 72,296
Liked 83,827 Times in 18,874 Posts
|
|
Quote:
Originally Posted by Warren Sear
^^^ Snubby Fan, you wrote that you dye the leather after stitching? How do you keep the tread from getting colored? I have done this, but I don't like how the thread looks dingy afterward.
|
I dye the leather after I have all the bits cut out. I just don't dye the edges 'til they're sanded and beveled. Sometimes I'll use a small brush if I'm dyeing the edges a different color or I'll use a q-tip if it's the same color.
__________________
Keep on Chooglin'
|
The Following User Likes This Post:
|
|

12-31-2018, 12:50 AM
|
 |
US Veteran
|
|
|
Join Date: Nov 2008
Location: Colorado
Posts: 7,939
Likes: 21,281
Liked 34,478 Times in 5,860 Posts
|
|
Quote:
Originally Posted by BC38
OK, so if the difference is so hard to tell, why is the chrome tanned such a no-no?
Is there something about the tanning process makes it THAT bad for the finish on guns? Is it bad enough to be a big deal even if the gun doesn't get left in the holster for extended periods?
Contrary to Red's analogy of the gas station attendant, who would be pumping gas every day, but still doesn't know the difference between gas & diesel, this isn't something I do every day - or something I have ever done for that matter.
A more apt analogy might be a guy who's never driven or fueled a car before. In that case not knowing the difference between the pumps wouldn't be because he's stupid, but rather it would be because he lacks any frame of reference.
That's kind of where I'm at here - no real frame of reference. That's why I'm asking the experts!
For example: I didn't even know what saddle stitching was until I looked it up.
|
Chrome tanning refers to producing leather from hides by immersion and infusion in solutions of chemical salts, usually heavy metals (such as chromium). The resulting leather is typically soft and pliable (thus not suitable for forming into a shape that will be held over time), and more importantly the leather remains loaded with chemical salts that can be highly corrosive. The majority of firearms are produced of steel, iron-based alloys that are subject to oxidation (also known as rust). Even so-called "stainless steels" can be etched or otherwise corroded when subjected to metallic salts such as those used in the chrome tanning processes.
Vegetable tanning utilizes tannins from plants, most commonly tree bark, to cure and preserve the hide as leather. The resulting leather is firm and can be wet-molded into shapes that can be retained over long terms of use. No residual chemical salts are involved. For this reason vegetable tanned leather is generally preferred for holster making.
Regardless of tanning processes, all leather articles tend to collect, absorb, and retain moisture from the atmosphere, from precipitation, or from the user's perspiration. Quality firearms should never be stored in leather holsters or cases because of this. The firearm should be removed from the holster after each day of use, wiped down with an oily cloth or silicone-treated cloth, and stored separately from the holster. Holsters should be stored in areas having some air flow to permit residual moisture to evaporate away; otherwise you may expect mold or fungus growths to occur.
|
The Following 3 Users Like Post:
|
|

12-31-2018, 12:53 AM
|
 |
Member
|
|
|
Join Date: Jul 2012
Location: WVa East Panhandle
Posts: 29,189
Likes: 72,296
Liked 83,827 Times in 18,874 Posts
|
|
Quote:
Originally Posted by Warren Sear
I cut out the leather using my pattern, then use an air brush to apply the dye evenly and avoid streaking. After that I drill the holes and saddle stitch, then finish the edges.
Here are pictures of a holster I made, using an air brush to apply the dye before stitching...
|
Sometimes I'll dye leather with a dauber, like this matching saddle tan belt and holster set:
With this mahogany holster, I used the "damp sponge" technique:
I have an airbrush and I'd like to try dyeing with it, Maybe doing some fade effects but since my motor nerve condition started, My hand's gotten too gimpy.
__________________
Keep on Chooglin'
Last edited by snubbyfan; 12-31-2018 at 12:56 AM.
|
The Following 4 Users Like Post:
|
|

12-31-2018, 01:09 AM
|
Member
|
|
|
Join Date: Jan 2012
Location: Hancock County Ohio
Posts: 710
Likes: 2,507
Liked 525 Times in 235 Posts
|
|
Call up the Tandy store and ask.
|

12-31-2018, 01:24 AM
|
 |
Member
|
|
|
Join Date: Nov 2013
Location: Spokane, WA
Posts: 14,776
Likes: 1,476
Liked 20,504 Times in 8,122 Posts
|
|
Quote:
Originally Posted by LoboGunLeather
Chrome tanning refers to producing leather from hides by immersion and infusion in solutions of chemical salts, usually heavy metals (such as chromium). The resulting leather is typically soft and pliable (thus not suitable for forming into a shape that will be held over time)...
...Vegetable tanning utilizes tannins from plants, most commonly tree bark, to cure and preserve the hide as leather. The resulting leather is firm and can be wet-molded into shapes that can be retained over long terms of use...
|
Based on these two descriptions, I'm pretty certain the leather I have is indeed vegetable tanned, it has just been dyed. It seems pretty stiff for it's thickness.
Quote:
Originally Posted by HCH
Call up the Tandy store and ask.
|
I don't think a phone call will do it. I guess I'm going to have to swing over to the Tandy store and ask them to be sure. Worst case scenario I have to buy another piece of leather. At least the one I have cut out can serve as a good pattern.
|

12-31-2018, 05:06 AM
|
 |
Member
|
|
|
Join Date: Jul 2012
Location: southern hemisphere
Posts: 2,745
Likes: 1,984
Liked 8,480 Times in 2,328 Posts
|
|
Quote:
Originally Posted by BC38
Based on these two descriptions, I'm pretty certain the leather I have is indeed vegetable tanned, it has just been dyed. It seems pretty stiff for it's thickness.
I don't think a phone call will do it. I guess I'm going to have to swing over to the Tandy store and ask them to be sure. Worst case scenario I have to buy another piece of leather. At least the one I have cut out can serve as a good pattern.
|
You're on the right track already. There is a pretty easy way to tell the two tannages apart and yet I stopped in at a leather supplier here and they looked me in the eye and told me a chrome side was vegetable tanned. The 'experts' don't necessarily know! Incredible.
Chrome leathers simply don't react to water the way that a veg does. Many will even shed water. The kind of veg one would make a holster from, will be relatively stiff; and will instantly absorb hot water like cloth will. And the wet leather can be rubbed and become dark and shiny; chrome will shrug that off. Fibres of a vegetable leather will lay down back into the edge when the edge is polished and take on a shine, fibres of a chrome edge simply refuse.
Now: we use veg leather to make holsters because it is thick, it is stiff, and it will take a shape when wet. It is untrue that it is the preferred leather for protecting your pistol; a wet veg holster will literally attack steel, and the steel will reciprocate, within a half hour. Chrome, because it will not take up the water in the first place, has been used to line ALL major makers' holsters since the 1960s. Today you'll see it lining every Safariland Kydex holster: it can be heated in their process while veg will curl and shrink (they learned that the hard way) and is super thin and is super cheap!
Don't believe the hype, use a chrome for a lining if you want to: it's thin and strong, ideal for a lining. Veg cannot be made thin without also being easy to tear. Just don't try to use a chrome leather for the body unless you want a waterproof holster that has a baglike fit.
My gas station attendant analogy wasn't meant to indicate smart vs. stupid, but to say that it is baseline knowledge to BE a gas station attendant. Knowing veg from chrome is a baseline knowledge.
__________________
The Holstorian
Last edited by rednichols; 12-31-2018 at 05:09 AM.
|
The Following User Likes This Post:
|
|

12-31-2018, 05:18 AM
|
 |
Member
|
|
|
Join Date: Jul 2012
Location: southern hemisphere
Posts: 2,745
Likes: 1,984
Liked 8,480 Times in 2,328 Posts
|
|
Quote:
Originally Posted by Warren Sear
The very best thing to can do to improve your holster making knowledge is to buy this book from Tandy leather:
|
Gave me the shivers seeing this book again. I bought it, too, at age 17 a half century ago and it wasn't helpful. If one starts with it then one is, well, a half century behind. The state of the art has advanced dramatically since that book was written and then published. Want to be a real pro someday? Go to work for an established maker, nothing quite like volume to teach the best way to do things.
A real difficulty for makers today is that their 'frame of reference', to use the OP's phrase, is too narrow. The folks who run Sparks, for example, know no more about making holsters than they learned from Milt. And Milt knew no more about making holsters than he learned as a sewing machine operator for Eubanks; and designing holster than he learned from cloning Andy Anderson's designs. That is really OLD information from which to be running a holster company.
__________________
The Holstorian
|

12-31-2018, 11:04 AM
|
Member
|
|
|
Join Date: Aug 2014
Location: West Texas
Posts: 2,448
Likes: 5,289
Liked 3,905 Times in 1,519 Posts
|
|
BC38,
Been just fooling with leather for many years, but it's all been mostly on the job training. The motivation for me in the beginning was to repair items in need of such as well as making a few things that I wanted for myself. I do not ever recall my first attempts at any of these things to have been totally satisfactory. I do not recall any that did not result in me learning how I could have or should have done better or differently. There's no substitute for personal experience. Some things I learned was that I needed to take what I had just learned and start over again with a fresh piece of leather or other things, both materials and tools being used. There are better ways to do things that will become obvious. There are better and worse products that can be purchased for your use. Types and brands of leather dyes are just one example! I commend you for your willingness to make your first holster, and I commend you for asking lots of questions and trying to learn things from experienced people.
You'll have to sort through all the information you get cause it all won't be in agreement! There are, of course, different ways to do things and and folks like or are satisfied with different results. But you are starting down a long road that will have some disappointments along with a great deal of satisfaction if you don't get discouraged and give it up. Just know that from the beginning, the learning curve really never completely ends, and where this will take you, only you can know. Leather work, new construction or repair or remodeling, is and can be a very satisfying way to spend time, and it is also challenging, physically and mentally. If I'm having trouble with something, sometimes the best thing I can do is put it down, let it sit for a while during which I cogitate on what I want and how to get there, and then go back and start again. Take your time, look and see what's happening and the results of that. Remember that doing the same thing over and over again the same way while expecting different results is the definition of insanity!
Good luck, be careful (you can cut yourself with sharp metal items, you know?), and most of all have fun along the way!
__________________
So long ... Ken
Last edited by kthom; 12-31-2018 at 11:06 AM.
|

12-31-2018, 11:41 AM
|
 |
Member
|
|
|
Join Date: Jan 2016
Posts: 1,530
Likes: 624
Liked 3,247 Times in 1,007 Posts
|
|
Quote:
Originally Posted by rednichols
Gave me the shivers seeing this book again. I bought it, too, at age 17 a half century ago and it wasn't helpful. If one starts with it then one is, well, a half century behind. The state of the art has advanced dramatically since that book was written and then published. Want to be a real pro someday? Go to work for an established maker, nothing quite like volume to teach the best way to do things.
A real difficulty for makers today is that their 'frame of reference', to use the OP's phrase, is too narrow. The folks who run Sparks, for example, know no more about making holsters than they learned from Milt. And Milt knew no more about making holsters than he learned as a sewing machine operator for Eubanks; and designing holster than he learned from cloning Andy Anderson's designs. That is really OLD information from which to be running a holster company.
|
As a hobbyist, I'm curious what you consider these new advances in leather holster making are. It's just a molded pouch that retains a pistol, right? Maybe an adjustable retention with a screw and grommet? Vacuum molding instead of hand boning? Active retention for leather police holsters?
I guess I'm just not seeing these technology disrupting advancements in holster construction your talking about.
__________________
Vegan by proxy.
|
The Following User Likes This Post:
|
|

12-31-2018, 12:32 PM
|
 |
Member
|
|
|
Join Date: Nov 2013
Location: Spokane, WA
Posts: 14,776
Likes: 1,476
Liked 20,504 Times in 8,122 Posts
|
|
Quote:
Originally Posted by rednichols
You're on the right track already. There is a pretty easy way to tell the two tannages apart and yet I stopped in at a leather supplier here and they looked me in the eye and told me a chrome side was vegetable tanned. The 'experts' don't necessarily know! Incredible.
Chrome leathers simply don't react to water the way that a veg does. Many will even shed water. The kind of veg one would make a holster from, will be relatively stiff; and will instantly absorb hot water like cloth will. And the wet leather can be rubbed and become dark and shiny; chrome will shrug that off. Fibres of a vegetable leather will lay down back into the edge when the edge is polished and take on a shine, fibres of a chrome edge simply refuse.
Now: we use veg leather to make holsters because it is thick, it is stiff, and it will take a shape when wet. It is untrue that it is the preferred leather for protecting your pistol; a wet veg holster will literally attack steel, and the steel will reciprocate, within a half hour. Chrome, because it will not take up the water in the first place, has been used to line ALL major makers' holsters since the 1960s. Today you'll see it lining every Safariland Kydex holster: it can be heated in their process while veg will curl and shrink (they learned that the hard way) and is super thin and is super cheap!
Don't believe the hype, use a chrome for a lining if you want to: it's thin and strong, ideal for a lining. Veg cannot be made thin without also being easy to tear. Just don't try to use a chrome leather for the body unless you want a waterproof holster that has a baglike fit.
My gas station attendant analogy wasn't meant to indicate smart vs. stupid, but to say that it is baseline knowledge to BE a gas station attendant. Knowing veg from chrome is a baseline knowledge.
|
Great info Red, thank you very much for taking the time to type that all up. I'm acquiring the baseline knowledge with the help of you and all the other nice folks here. I appreciate it.
While I'm at the Tandy store I'm gonna see if I can find that book on holster making too. Just for grins. It may be outdated, but then so am I (  ) and it looks like it might at least give me some basic fundamentals for a small investment....
Last edited by BC38; 12-31-2018 at 12:38 PM.
|

12-31-2018, 03:57 PM
|
 |
Member
|
|
|
Join Date: Jul 2012
Location: southern hemisphere
Posts: 2,745
Likes: 1,984
Liked 8,480 Times in 2,328 Posts
|
|
Quote:
Originally Posted by Ziggy2525
As a hobbyist, I'm curious what you consider these new advances in leather holster making are. It's just a molded pouch that retains a pistol, right? Maybe an adjustable retention with a screw and grommet? Vacuum molding instead of hand boning? Active retention for leather police holsters?
I guess I'm just not seeing these technology disrupting advancements in holster construction your talking about.
|
Fair question :-). One would have to be a maker to know how holsters are made differently than they were originally. And the list is too long. Consider, that Brills had their welts entirely hand stitched into the 1960s. Horsehide was a big change that appeared at that time. Leather parts are cut by machines not knives. Some still use the old harness machines but the rest of us have had to step up to the new needle-only machines that do things the oldies can't do. Thread was linen industry-wide until the '70s. Straps are gone while they were required prior.
The outwardly obvious changes have turned the design of holsters from a craft into a science. "Science" simply means to us, that we can force a design to do what it's told, rather than puzzling over why it won't. The Sparks company has admitted to having trouble keeping the rear sight from printing. But how that's done is easy when one understands. That's exactly what separates the science of riding motorcycles -- with an understanding of the science of controlling their unusual physics, one tells the bike what to do rather than being surprised by what it decides to do (such as 'tank slappers', high siders, etc.).
Want to know about backwards though?! Remember when we all made fun of holsters down on the thigh and tied to it, like an Ojala? Have a look at what coppers wear now -- same but in Kydex. Backwards.
__________________
The Holstorian
Last edited by rednichols; 12-31-2018 at 03:59 PM.
|
The Following User Likes This Post:
|
|

12-31-2018, 04:26 PM
|
 |
Member
|
|
|
Join Date: Nov 2013
Location: Spokane, WA
Posts: 14,776
Likes: 1,476
Liked 20,504 Times in 8,122 Posts
|
|
Well, I swung by the Tandy store and found out that this leather is neither vegetable OR chrome tanned. It is OIL-tanned.
Guess that explains why it isn't as floppy as chrome-tanned OR as stiff as vegetable-tanned. More in-between.
The guy at the counter said it should work OK for a holster - though it will be more difficult to wet-mold to the gun than if it were vegetable-tanned. He also said it might be a bit tougher to burnish the edges - unless I use a product meant for that purpose.
Unless someone gives me a really good reason NOT to, I think I will proceed with the burnishing, gluing, and stitching.
Oh and I found the holster making book - actually it is more like a BIG booklet. Only 20 pages or so. I thumbed through it and didn't see anything that convinced me it was worth 20 BUCKS (!) except maybe a pattern for a flap holster for a Luger. Since I have already created my own pattern I decided to pass on it - at least for now.
|

01-01-2019, 03:47 PM
|
 |
Member
|
|
|
Join Date: Jul 2012
Location: southern hemisphere
Posts: 2,745
Likes: 1,984
Liked 8,480 Times in 2,328 Posts
|
|
Do more research :-). Oil-tanned leather is simply a veg tan that has been oiled to make it waterproof (p.s. also makes it more tear proof). You won't find it suitable to wetting and molding, unlikely to like being glued, either. Used for bags, portions of chaps, etc.
Elmer Keith once wrote that he thought the thin half-lining used on Brills was oil-tanned and that's possible but unlikely; more likely is that it was (is?) a goatskin or a veg bookbinding leather.
__________________
The Holstorian
|

01-01-2019, 05:49 PM
|
 |
Member
|
|
|
Join Date: Oct 2008
Location: Red River Valley
Posts: 7,724
Likes: 13,115
Liked 28,813 Times in 5,196 Posts
|
|
Oil-tanned is often call harness leather in my part of the world.
Good strong and dense leather....Not a good molding leather.
If your serious about holster making, check this vendor out.
Item Detail
.
__________________
"IN GOD WE TRUST"
|
The Following User Likes This Post:
|
|

01-01-2019, 07:21 PM
|
 |
Member
|
|
|
Join Date: Nov 2013
Location: Spokane, WA
Posts: 14,776
Likes: 1,476
Liked 20,504 Times in 8,122 Posts
|
|
Quote:
Originally Posted by rednichols
Do more research :-). Oil-tanned leather is simply a veg tan that has been oiled to make it waterproof (p.s. also makes it more tear proof). You won't find it suitable to wetting and molding, unlikely to like being glued, either. Used for bags, portions of chaps, etc.
Elmer Keith once wrote that he thought the thin half-lining used on Brills was oil-tanned and that's possible but unlikely; more likely is that it was (is?) a goatskin or a veg bookbinding leather.
|
Interesting. The stuff I have isn't waterproof by ANY stretch of the imagination. It doesn't quite soak up water like regular veg tanned, but it does soak up water pretty well. It isn't water repellent like chrome tanned at all. I wetted the edges to start the burnishing and also to mash it flatter and thinner where I installed the snap for the flap. It also absorbs and bonds with water-based glue very well.
Quote:
Originally Posted by keith44spl
Oil-tanned is often call harness leather in my part of the world.
Good strong and dense leather....Not a good molding leather.
If your serious about holster making, check this vendor out.
Item Detail
|
Thanks for the link keith44spl, but to be honest, I'm not a "serious" holster maker by any stretch of the imagination. I'm just giving it a try because I couldn't find one I liked for my Luger that didn't cost more than I wanted to pay.
Last edited by BC38; 01-01-2019 at 07:23 PM.
|

01-01-2019, 09:09 PM
|
 |
Member
|
|
|
Join Date: Nov 2013
Location: Spokane, WA
Posts: 14,776
Likes: 1,476
Liked 20,504 Times in 8,122 Posts
|
|
Some Photos
Thought I'd post a few photos to show how it's turning out.
Here it is empty and with my Stoeger 22LRLuger in it.
Last edited by BC38; 01-01-2019 at 09:27 PM.
|
The Following 4 Users Like Post:
|
|

01-01-2019, 09:24 PM
|
 |
Member
|
|
|
Join Date: Nov 2013
Location: Spokane, WA
Posts: 14,776
Likes: 1,476
Liked 20,504 Times in 8,122 Posts
|
|
A couple of more
And here it is with my nickel P08 Luger - which is slightly smaller than the Stoeger - plus a shot of it on my belt (with the P08 in it). Not a very professional job, I know, but it looks like it will work to do a good job of protecting the gun, and it should be pretty sturdy. Good enough for who it's for I guess
Last edited by BC38; 01-01-2019 at 09:32 PM.
|
The Following 4 Users Like Post:
|
|

01-01-2019, 11:39 PM
|
Member
|
|
|
Join Date: May 2008
Location: Near Birmingham
Posts: 7,259
Likes: 5,001
Liked 8,457 Times in 2,233 Posts
|
|
I think you did a great job. Looks good.
|

01-01-2019, 11:57 PM
|
 |
Member
|
|
|
Join Date: Nov 2013
Location: Spokane, WA
Posts: 14,776
Likes: 1,476
Liked 20,504 Times in 8,122 Posts
|
|
Quote:
Originally Posted by bamabiker
I think you did a great job. Looks good.
|
Thanks! I'm pretty pleased with it seeing how it is a first effort and having to create my own pattern and all.
One thing I wish I had done different is the toe. Should have rounded it instead of having it come to such a point. I may actually modify that. I think I can do that without having to completely pull apart and restitch the whole main seam.
I'm also thinking about shining it up a bit with some brown shoe polish.
Last edited by BC38; 01-02-2019 at 12:26 AM.
|
The Following User Likes This Post:
|
|

01-02-2019, 03:07 AM
|
 |
Member
|
|
|
Join Date: Jul 2012
Location: southern hemisphere
Posts: 2,745
Likes: 1,984
Liked 8,480 Times in 2,328 Posts
|
|
As a first effort, better than most :-)
Don't use brown shoe polish!! It will rub off on your clothes. Perhaps Tan Kote, available in small bottles from Tandy. Rub it in with a pad, nourishes and seals and adds gloss to porous leathers.
__________________
The Holstorian
|
The Following 2 Users Like Post:
|
|

01-02-2019, 11:39 AM
|
 |
Member
|
|
|
Join Date: Nov 2013
Location: Spokane, WA
Posts: 14,776
Likes: 1,476
Liked 20,504 Times in 8,122 Posts
|
|
Quote:
Originally Posted by rednichols
As a first effort, better than most :-)
Don't use brown shoe polish!! It will rub off on your clothes. Perhaps Tan Kote, available in small bottles from Tandy. Rub it in with a pad, nourishes and seals and adds gloss to porous leathers.
|
Thanks Red.
I appreciate the tip on the Tan Kote. I'll look into that.
|
The Following User Likes This Post:
|
|

01-03-2019, 01:05 AM
|
 |
Member
|
|
|
Join Date: Jul 2012
Location: WVa East Panhandle
Posts: 29,189
Likes: 72,296
Liked 83,827 Times in 18,874 Posts
|
|
I agree with Red, Good first effort. I'd be embarrassed to show my first effort.
Also, I use Tan-Kote to finish my leather. Protects the leather and gives it a nice gleam.
__________________
Keep on Chooglin'
|
The Following User Likes This Post:
|
|

01-03-2019, 01:15 AM
|
 |
Member
|
|
|
Join Date: Nov 2013
Location: Spokane, WA
Posts: 14,776
Likes: 1,476
Liked 20,504 Times in 8,122 Posts
|
|
Thanks Snubby. The kind words from all you guys who make such beautiful leather goods is very encouraging.
After seeing the photos you guys are posting I'm thinking an application or two of Tan-Kote will probably go along ways towards improving the appearance of my amateurish efforts.
Last edited by BC38; 01-03-2019 at 01:56 AM.
|
The Following User Likes This Post:
|
|

01-03-2019, 01:48 AM
|
 |
Member
|
|
|
Join Date: Jul 2012
Location: southern hemisphere
Posts: 2,745
Likes: 1,984
Liked 8,480 Times in 2,328 Posts
|
|
Quote:
Originally Posted by snubbyfan
I agree with Red, Good first effort. I'd be embarrassed to show my first effort.
Also, I use Tan-Kote to finish my leather. Protects the leather and gives it a nice gleam.

|
I've a card in hand from my oldest brother in the Pacific Northwest, because I sent him a copy of The Book and he's mentioned in it. In the card he mentions he still has several holsters I made for him in the late '60s.
Doesn't sound like he still has the 'unsnap with the second finger' version of the thumbsnap I invented then for his Browning HP (as seen on the Safariland SSIII beginning in the '80s). He lived next door to the police chief in Central Cal but that didn't stop burglars from stealing all his guns with their holsters; yet somehow two holsters of mine survived that :-).
Tan Kote has lots to offer; but I use it only because Fiebing's Harness Dressing is not available here, which is what we used at Bianchi to create our lacquer-free finish in the late '70s. HD does not darken the leather, nor is it particularly glossy, as TK does.
__________________
The Holstorian
|
The Following User Likes This Post:
|
|
 |
Posting Rules
|
|
|
|
|