|
|
 |

03-18-2013, 02:22 PM
|
|
Member
|

|
|
Join Date: Mar 2008
Location: Jackson Hole, WY
Posts: 190
Likes: 24
Liked 150 Times in 28 Posts
|
|
 First attempt at gun restoration
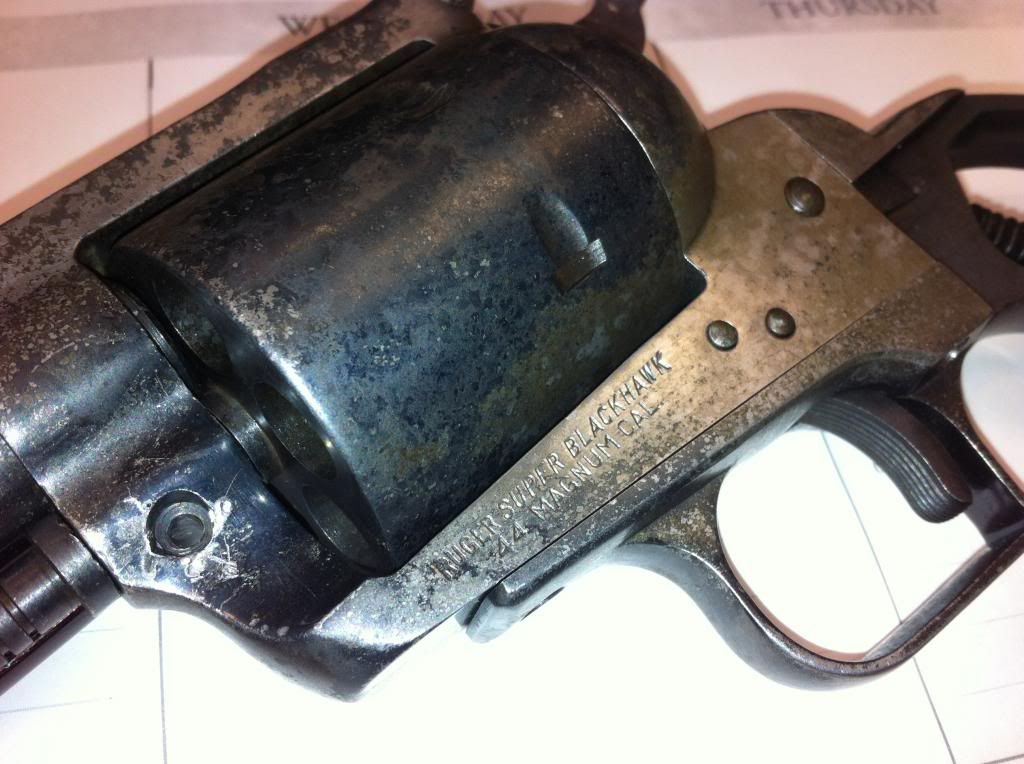
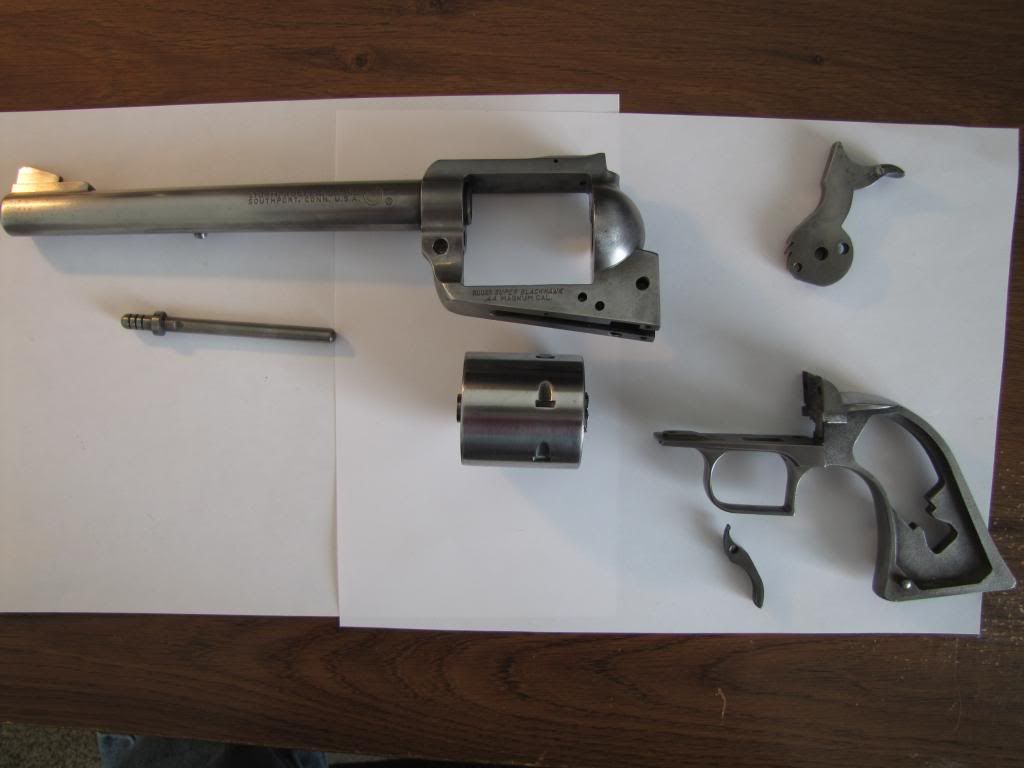
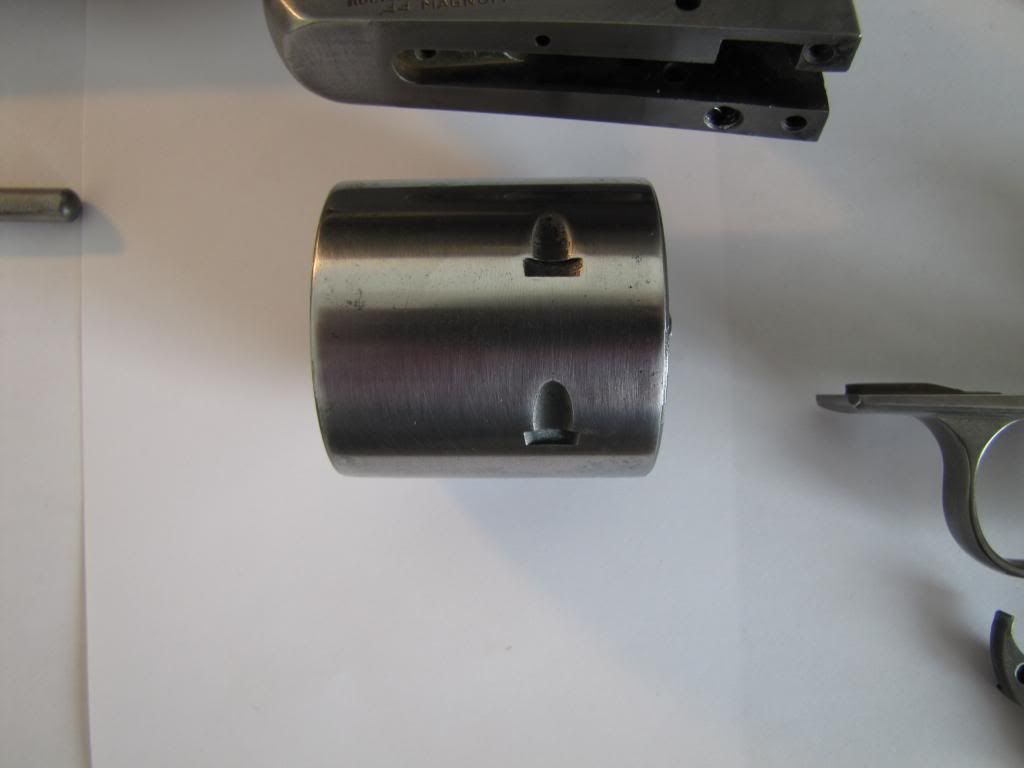
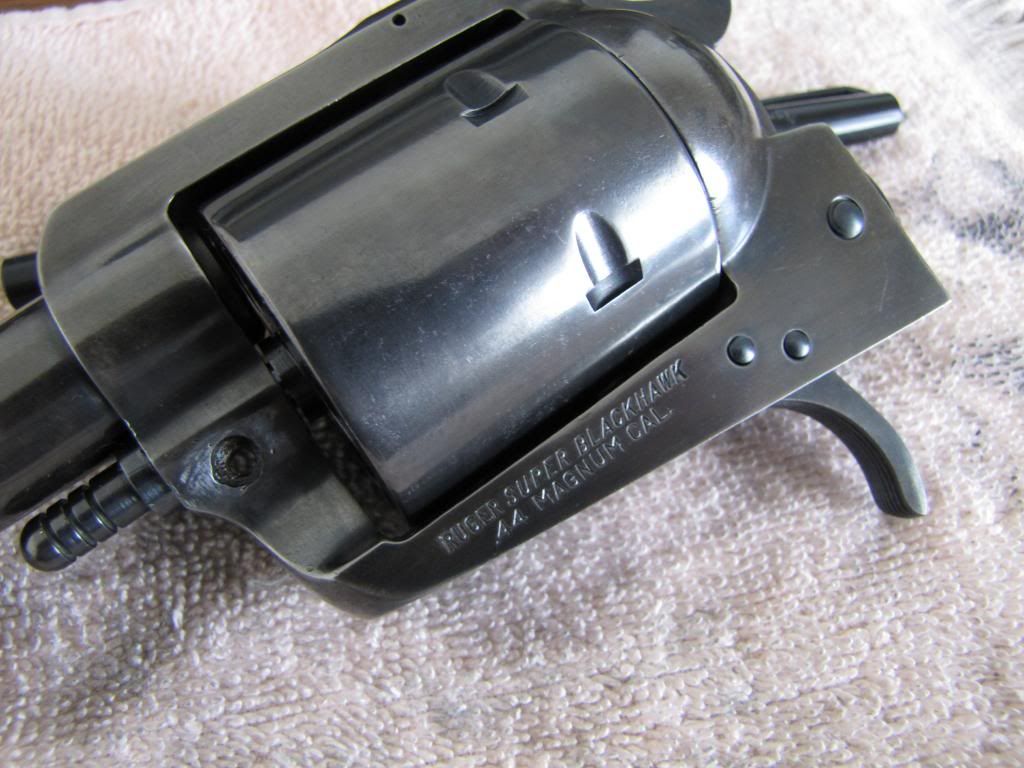
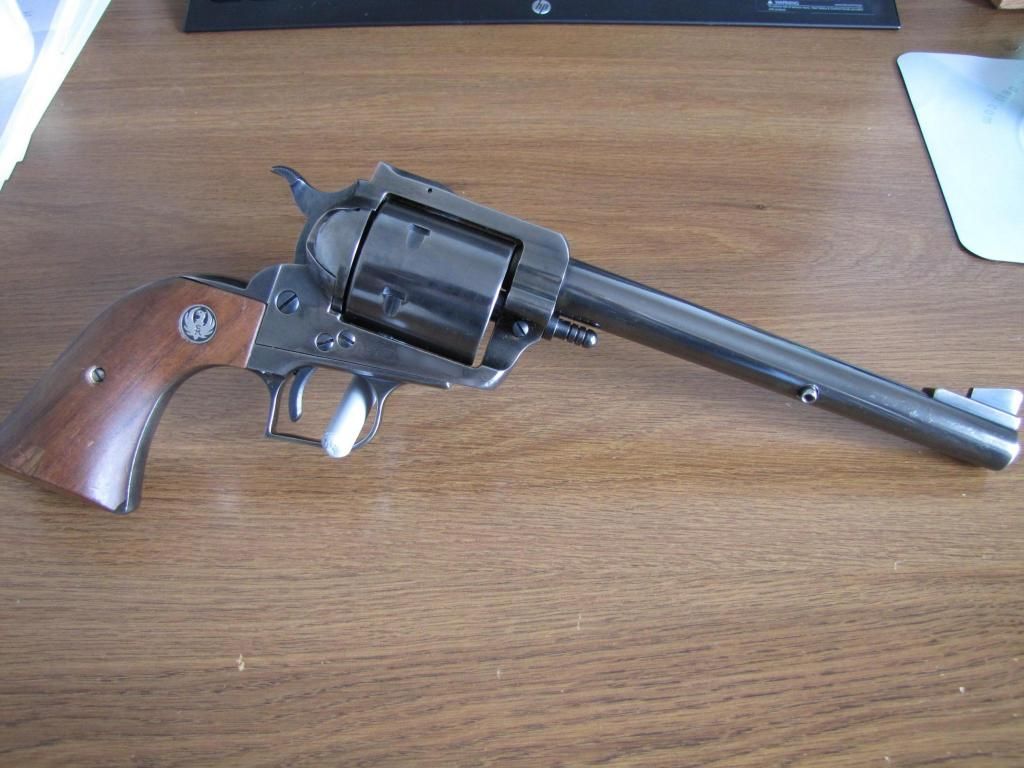
Since it's a Ruger I'll post it here. I put it on a Ruger sight too. I found this gun in a drawer where it had sat for 30 years. Destined for the trash, I had to grab it. It was crusted over with rust and carbon. It had obviously been in a fire. There were 4 cooked off rounds with cases still in the cylinder. One of the rounds flying out the front of the cylinder bent the take down pin over. The spring on the ejection rod had balled up and pushed through the side of the tube.
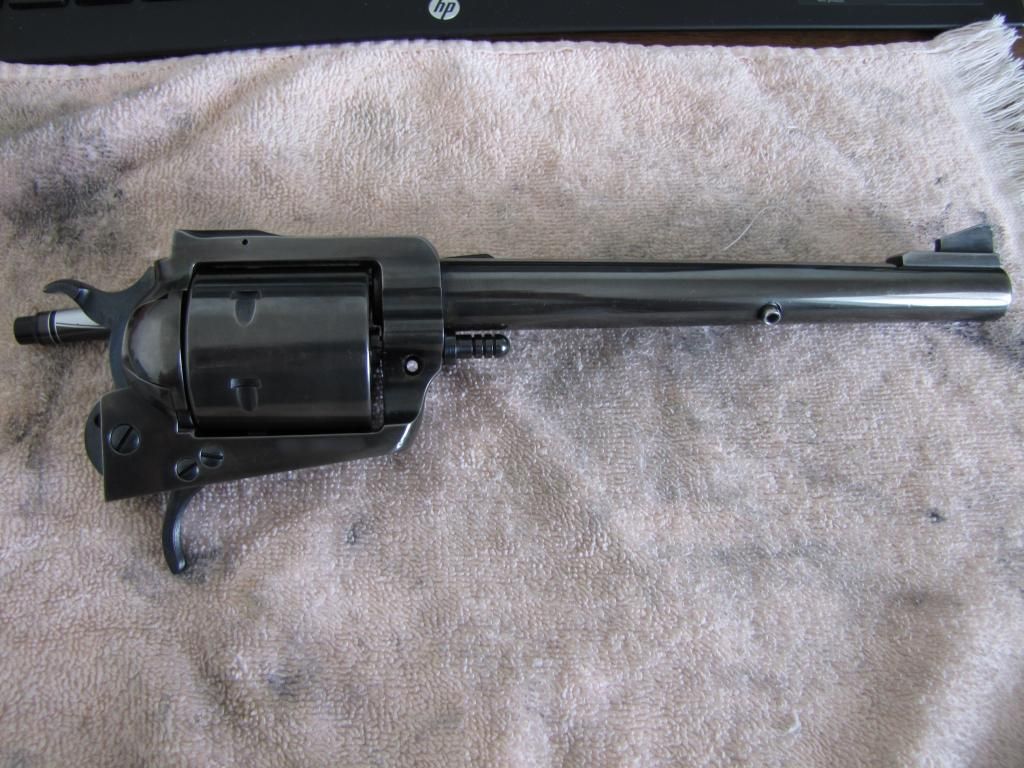
I think it got hot enough to warp the frame a bit. The barrel seems to tilt to the right and the cylinder sits in the frame crooked.
Now the disclaimer: I KNOW THIS GUN IS UNSAFE AND COULD NEVER BE FIRED. Yes, I will ensure the gun is rendered inert so someone 3 years from now doesn't find it and try to fire it.
I decided on a whim to see if I could get the gun apart and clean it up a bit. Using just CLP and a bronze brush I scrubbed and scrubbed. I had to pry that take down pin out to further dissassemble it. I was shocked when the spent cases just popped right out. I didn't take any "as found" pics.
I was actually able to get the thing to function. Of course the springs were all ruined, but it turned the cylinder, etc.
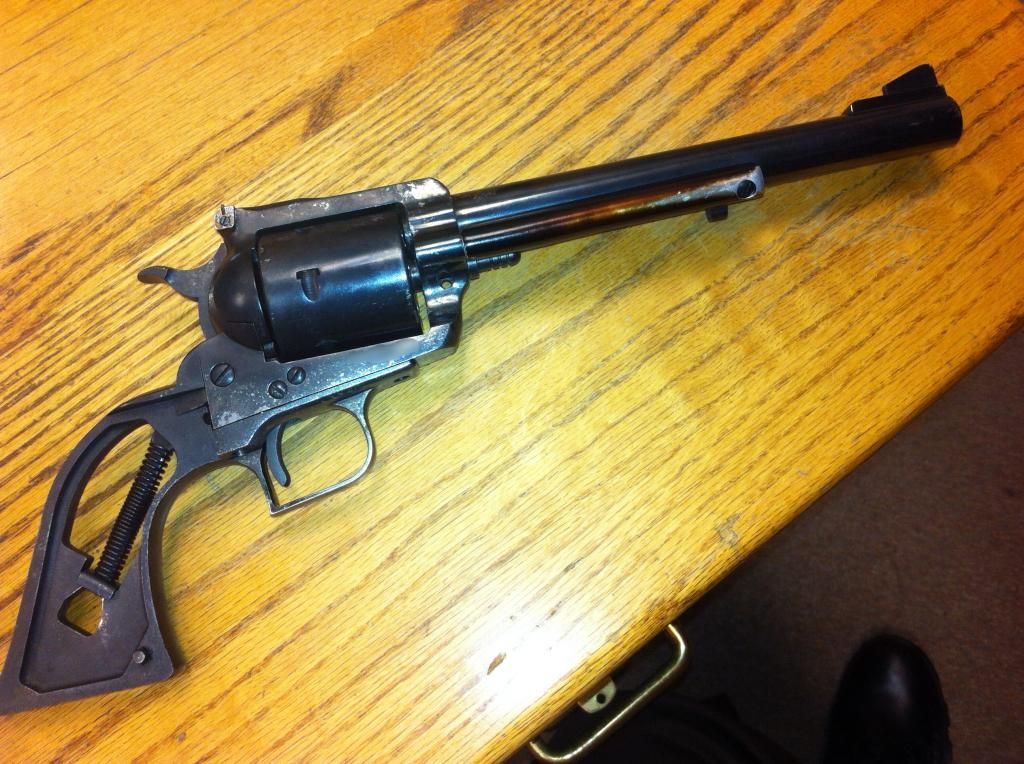
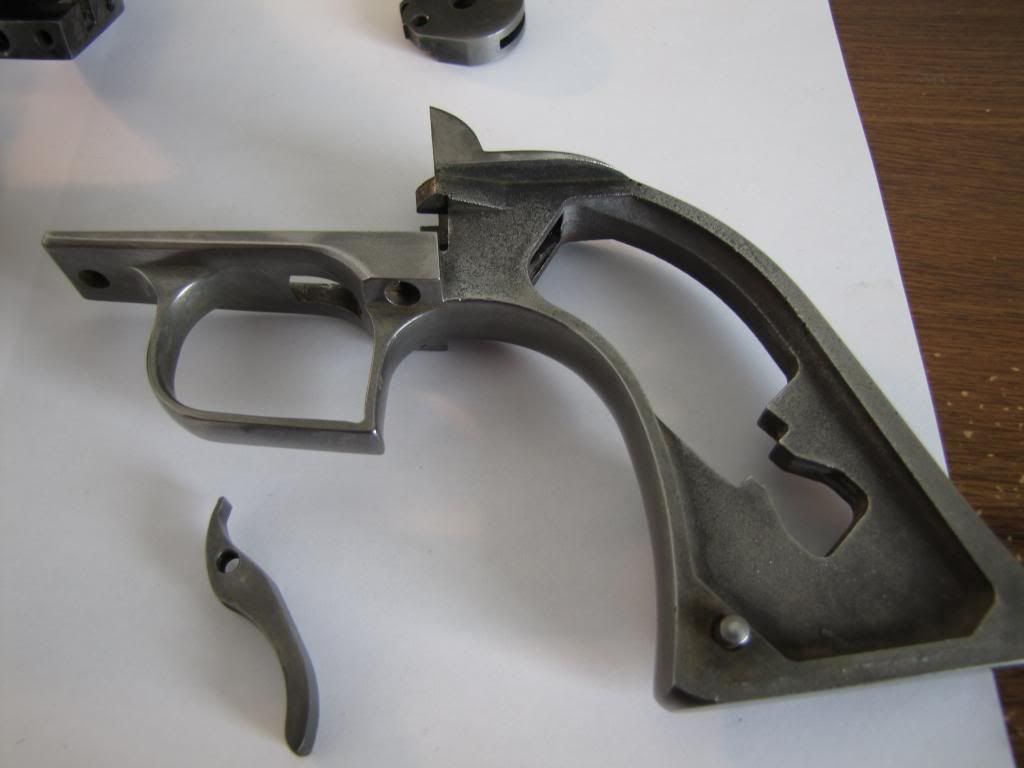
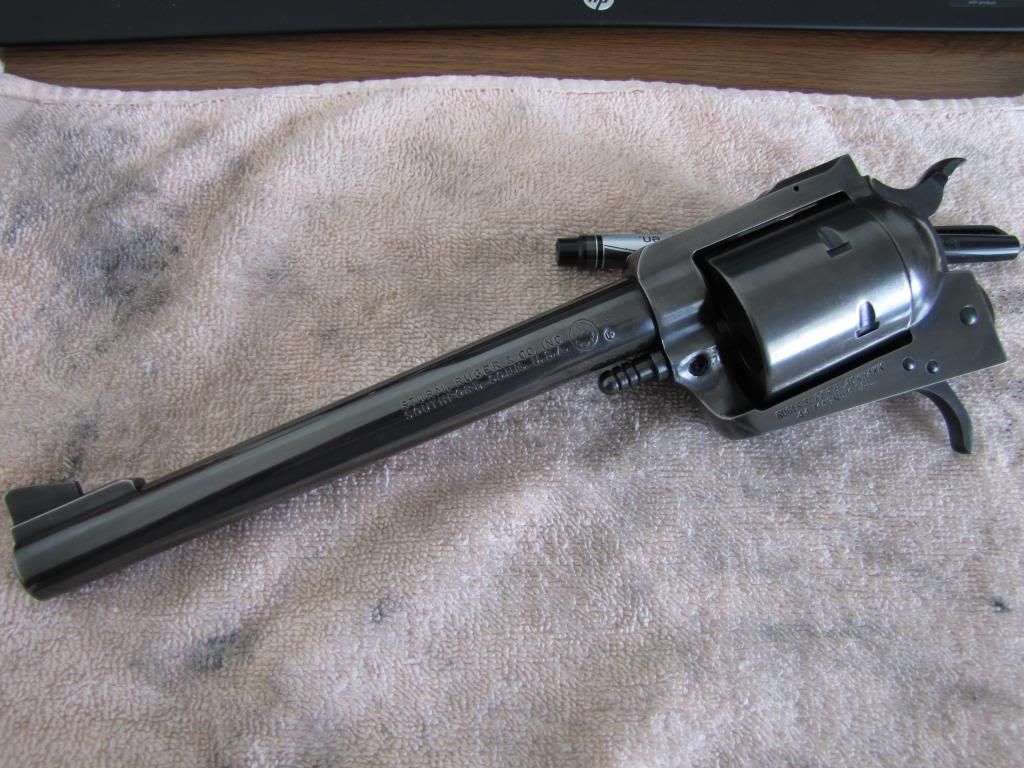
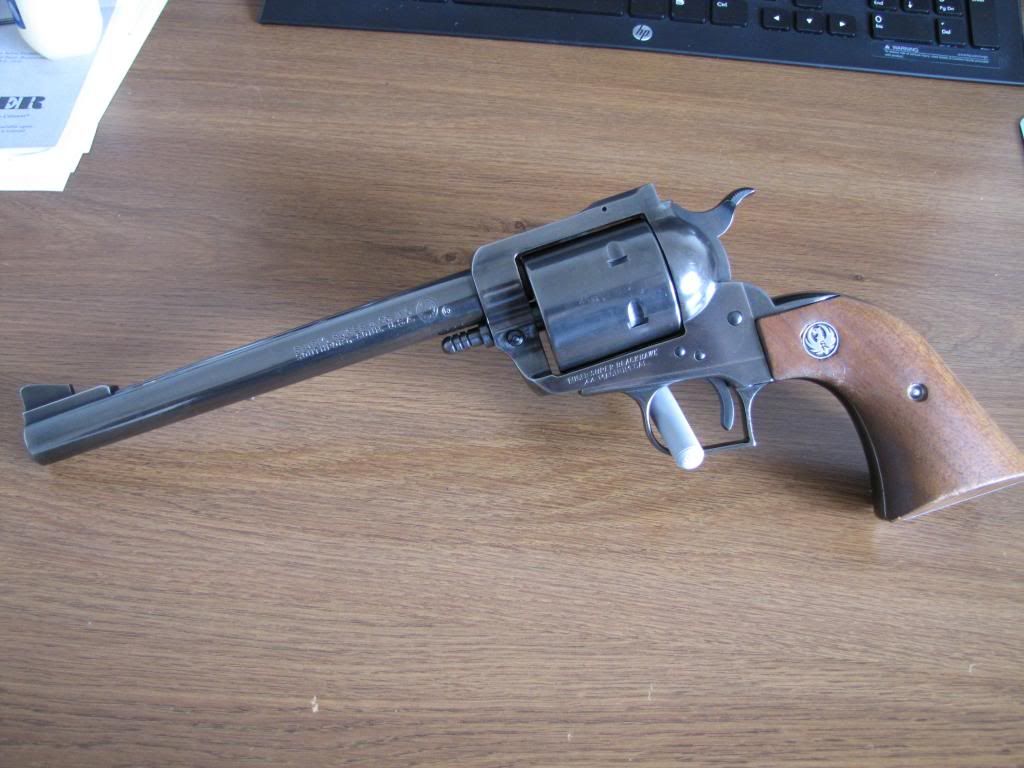
Here are the post clean up pics:
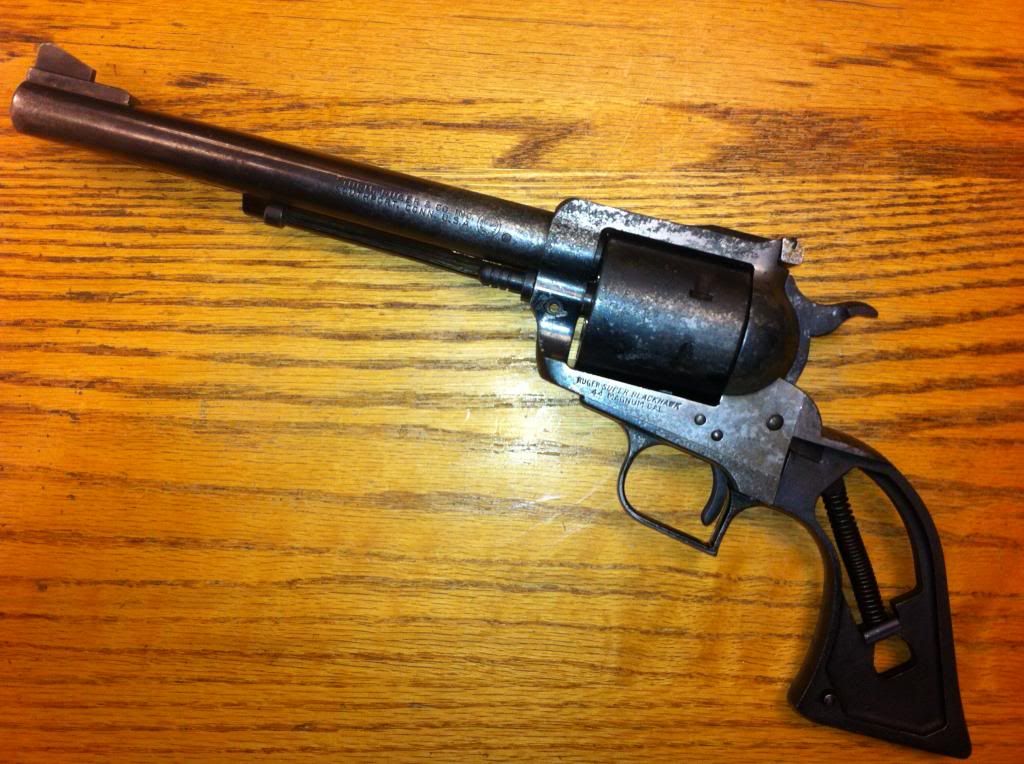
I thought it would make a cool wall hanger. Found a set of well used grips:

I read some things on the cold bluing kits and watched a couple You-Tube videos. I decided to try it as I had the perfect test bed. I wasn't out anything if I ruined it.
I bought the Birchwood Casey kit locally and went to work.
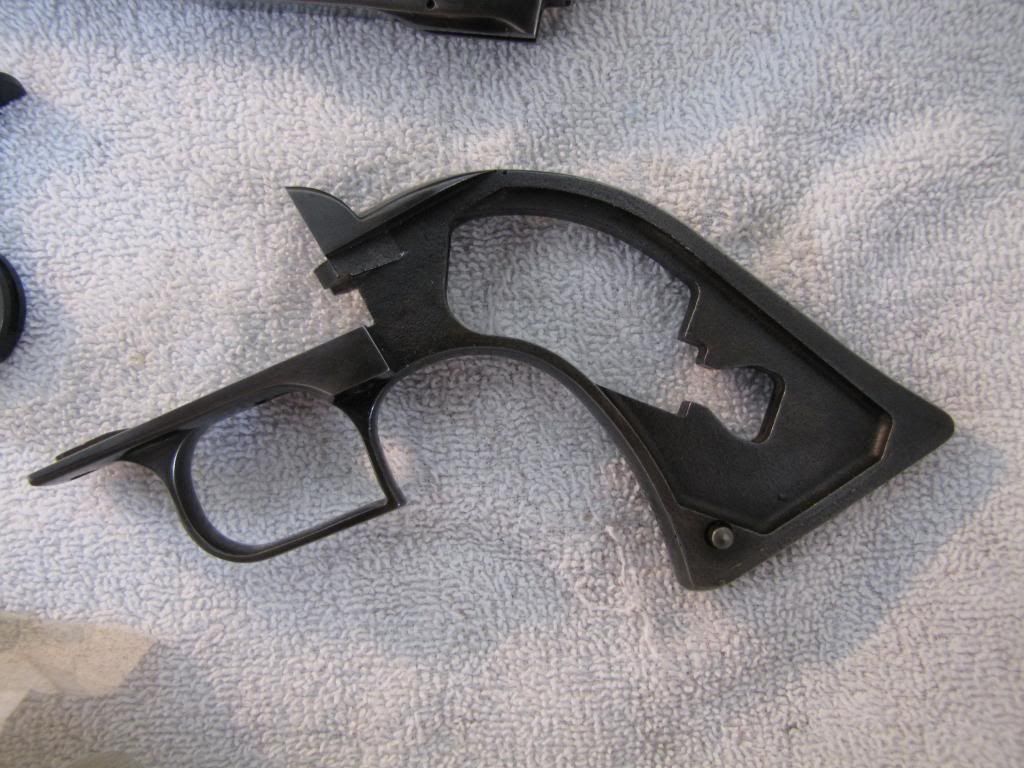
Lots of sanding and steel wooling I ended up with this:

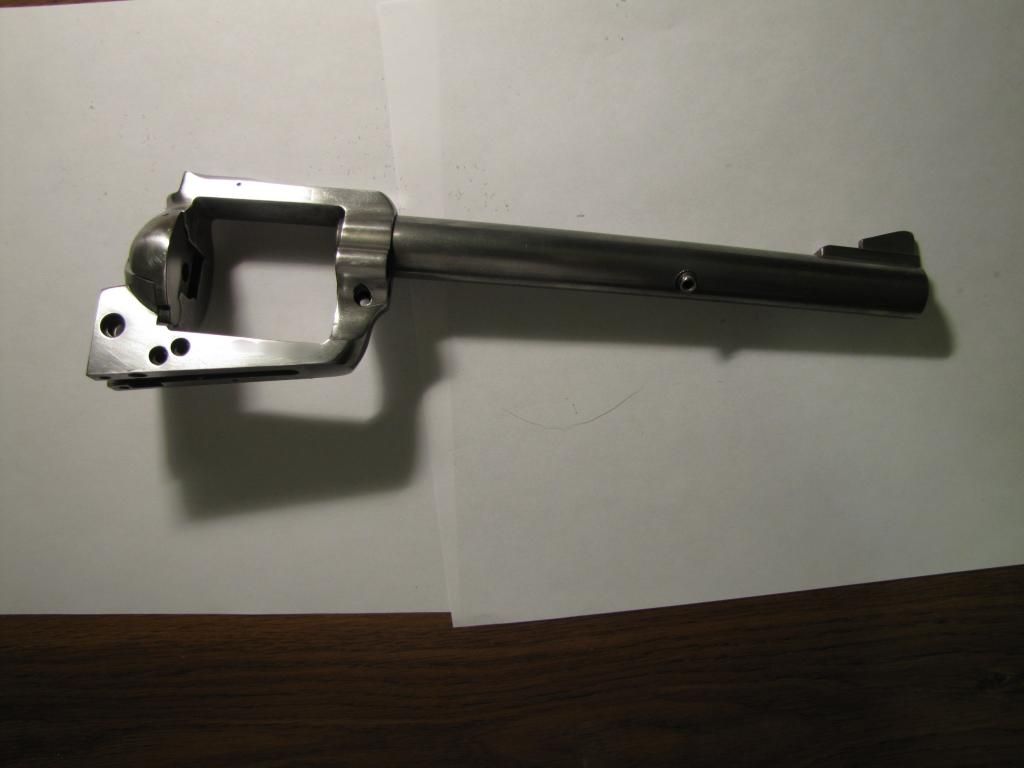

I followed the instructions: degrease, dry, rust and blue remover, steel wool, clean and degrease again. Then I started bluing: apply blue, rinse it water, steel wool to smooth and blend, clean it again and repeat, repeat, repeat...I ended up with 4 applications of the blue. I have to say I was shocked how it was turning out. Much better than I thought it would.
Almost done:


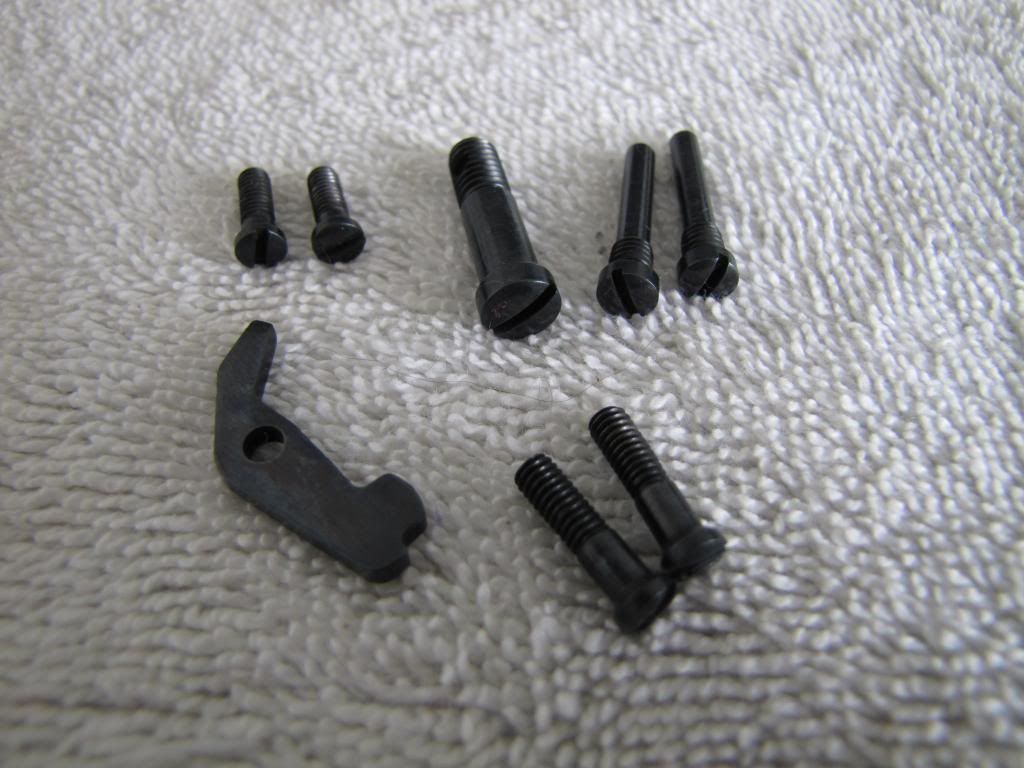
I did order a few small parts: springs, a missing screw,etc. I am waiting for those to arrive before final assembly. I'll end up with about $30.00 in it. It occupied my time for a few days, so I think it was worth while.
I'll add the final pics once I get it together.
Thanks for looking.
__________________
M&P Pistol and Rifle Armorer
|
|
The Following 13 Users Like Post:
|
arjay, don5, Fishslayer, Frank46, GerSan69, iouri, Jebus35745, Mickey D, Onomea, P&R Fan, Pop's2, skeetshooter, timn8er |
03-18-2013, 02:34 PM
|
 |
US Veteran
|


|
|
Join Date: Jun 2003
Location: Due south of Orlando
Posts: 7,202
Likes: 597
Liked 3,451 Times in 1,412 Posts
|
|
__________________
Dick
|
03-18-2013, 02:47 PM
|
 |
US Veteran
|


|
|
Join Date: Jan 2013
Location: Georgia
Posts: 1,147
Likes: 1,761
Liked 1,128 Times in 492 Posts
|
|
Y'all help out someone unfamiliar with gunsmithing:
What would be the easiest and most effective way to render a gun like that unshootable?
|
03-18-2013, 02:57 PM
|
|
Member
|
|
|
Join Date: Mar 2008
Location: Jackson Hole, WY
Posts: 190
Likes: 24
Liked 150 Times in 28 Posts
|
|
I ground off the firing pin. I'm going to inject some epoxy into the hole to seal it up with what's left of the firing pin. I am also thinking of having someone make me up 5 dummy bullets then epoxy them into the cylinder. I'm sure there are other ways to do it.
__________________
M&P Pistol and Rifle Armorer
|
03-18-2013, 03:25 PM
|
|
Member
|
|
|
Join Date: Sep 2005
Posts: 7,750
Likes: 1,642
Liked 9,152 Times in 3,380 Posts
|
|
Take whats left of the firing pin, it's spring and the firing pin bushing right out of the gun.
Open the gate,,you'll see a pin coming into the frame at an angle from the upper left side of the frame. That intersects the firing pin bushing and holds the assembly in place.
Just drive it out to the left far enough to punch the remains of the firing pin & bushing out into the cylinder opening, then tap that pin back into place.
I'd solder, TIG or at least epoxy the cylinder pin itself back into the frame once the dummys are in place in the cylinder. Otherwise it's too easy to place another cylinder in place in an attempt to fire the thing.
You can go wild and TIG the edge of the cylinder & the hammer to the frame, TIG the gate shut ect,,,but then you can't fan it...!
Like you said,,lots of ways to do it,,you just have to decide under what conditions the gun may end up in where someone might try and fire it.
Most of these extreme damage fire guns get stripped for the few small parts that are still salvagable and the rest get destroyed.
You did an awfully nice job cleaning that one up!

|
03-18-2013, 05:20 PM
|
|
Member
|
|
|
Join Date: Mar 2008
Location: Jackson Hole, WY
Posts: 190
Likes: 24
Liked 150 Times in 28 Posts
|
|
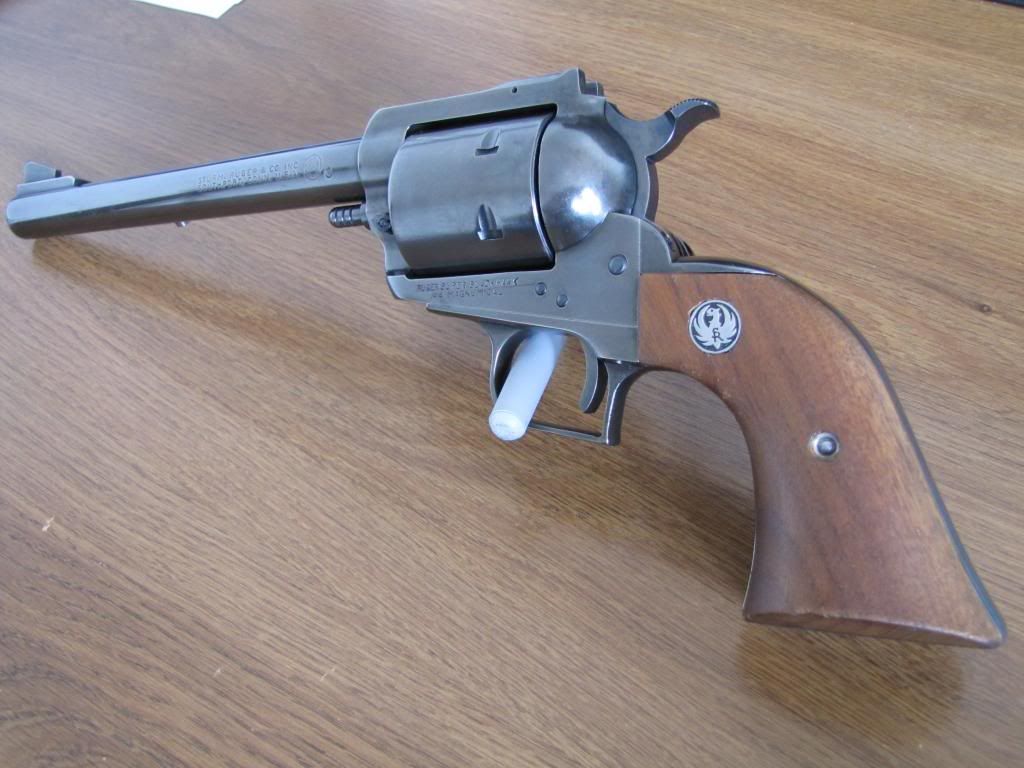
Mail brought a couple of the last parts I needed.
Here it is 98% done. I still need to refinish the aluminum parts and find a spring for the ejector rod.
__________________
M&P Pistol and Rifle Armorer
Last edited by ToddS112; 03-18-2013 at 05:25 PM.
|
|
The Following 2 Users Like Post:
|
|
03-18-2013, 05:24 PM
|
 |
Member
|

|
|
Join Date: Jul 2012
Location: WVa East Panhandle
Posts: 28,615
Likes: 71,047
Liked 81,471 Times in 18,450 Posts
|
|
Looks great, I reblued a rusty shotgun reciever with the Birchwood Casey kit for a friend and it turned out great. I should have gotten before and pictures.
|
03-18-2013, 06:12 PM
|
|
Member
|
|
|
Join Date: Feb 2008
Location: USA
Posts: 247
Likes: 19
Liked 157 Times in 69 Posts
|
|
Wow, my hat is off to you. What a transformation. Great Job!
|
03-18-2013, 06:24 PM
|
|
SWCA Member
Absent Comrade
|


|
|
Join Date: Apr 2006
Location: Texas
Posts: 1,612
Likes: 107
Liked 387 Times in 188 Posts
|
|
You did a great job. It took many hours to achieve that kind of result.
Charlie
__________________
SWCA # 2294
|
03-18-2013, 06:30 PM
|
|
Member
|
|
|
Join Date: Feb 2007
Location: vermont
Posts: 2,015
Likes: 375
Liked 717 Times in 376 Posts
|
|
Too bad it got cooked, way to nice to be a paper weight.
|
03-18-2013, 07:22 PM
|
 |
Member
|

|
|
Join Date: May 2005
Location: Oregon & Japan
Posts: 14,200
Likes: 46,160
Liked 33,330 Times in 9,102 Posts
|
|
Very nice! Makes a great curio to have on your desk or bookshelf because you don't need to worry about someone picking it up and shooting it.
How about write a note about the gun having been in a fire and restored by you, rendered inoperable for reasons of safety, etc., and slip the note under a grip panel for the edification of posterity?
|
|
The Following User Likes This Post:
|
|
03-18-2013, 09:43 PM
|
|
Member
|
|
|
Join Date: Dec 2007
Location: South West Suburbs IL
Posts: 1,348
Likes: 82
Liked 108 Times in 49 Posts
|
|
Wow that turned out great, nice job.
|
03-18-2013, 09:50 PM
|
 |
Member
|
|
|
Join Date: Dec 2012
Location: (outside) Charleston, SC
Posts: 31,012
Likes: 41,677
Liked 29,262 Times in 13,835 Posts
|
|
Looks great
My gosh that looks great. Can't believe that is your first try at it and hope it won't be your last.
|
03-18-2013, 11:20 PM
|
|
US Veteran
Absent Comrade
|
|
|
Join Date: Jan 2010
Location: San Diego, PRK
Posts: 9,237
Likes: 11,531
Liked 11,249 Times in 3,916 Posts
|
|
Quote:
Originally Posted by ToddS112

The barrel seems to tilt to the right and the cylinder sits in the frame crooked.
|
I think they come from the factory that way now... 
Great job on the restoration.
|
03-18-2013, 11:47 PM
|
 |
Member
|

|
|
Join Date: May 2003
Location: DUNNELLON, FLORIDA USA
Posts: 11,115
Likes: 1,691
Liked 16,326 Times in 4,241 Posts
|
|
Hi:
Before you "Deactivate" it, contact Ruger Customer Service. Advise Ruger this revolver had been in a fire and you would like to determine if it is safe to fire. It could very well be the metal is not unsafe. Its worth a phone call. Ruger might replace it in order for them to get it back and destroy it theirselves for liability reasons.
|
|
The Following User Likes This Post:
|
|
03-18-2013, 11:55 PM
|
|
Member
|
|
|
Join Date: Mar 2008
Location: Jackson Hole, WY
Posts: 190
Likes: 24
Liked 150 Times in 28 Posts
|
|
Quote:
Originally Posted by rwsmith
My gosh that looks great. Can't believe that is your first try at it and hope it won't be your last.
|
Thanks alot. I have to say I've been thinking about that ol' Model 28-2 I have with nearly no finish on it.
__________________
M&P Pistol and Rifle Armorer
|
|
 Posting Rules
|
|
|
|
|


 Linear Mode

