Lou_NC
Well-known member
*** Update ***
I just got a reminder from a fellow Forum member to remind everyone who tackles this type of project to ONLY turn the reamer in a clockwise (cutting) direction. Do NOT turn the reamer counterclockwise at any time, or the cutting edges of the reamer could be damaged. I read this information in previous posts on this subject as well, but neglected to remind folks of this important piece of information. (Thanks Engineer1911!!).
I decided to post this in the revolver section since I've learned so much here from my fellow S&W revolver enthusiasts, and wanted to share some of my new-found experience.
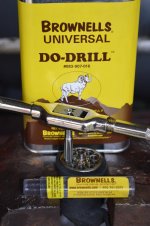
My Clymer .22 cylinder chamber finishing reamer recently arrived from Brownell's along with my pint of Do-Drill cutting fluid. So, I decided to get to work on finishing the chambers of my S&W .22's for easier extraction, starting with my model 18-3.
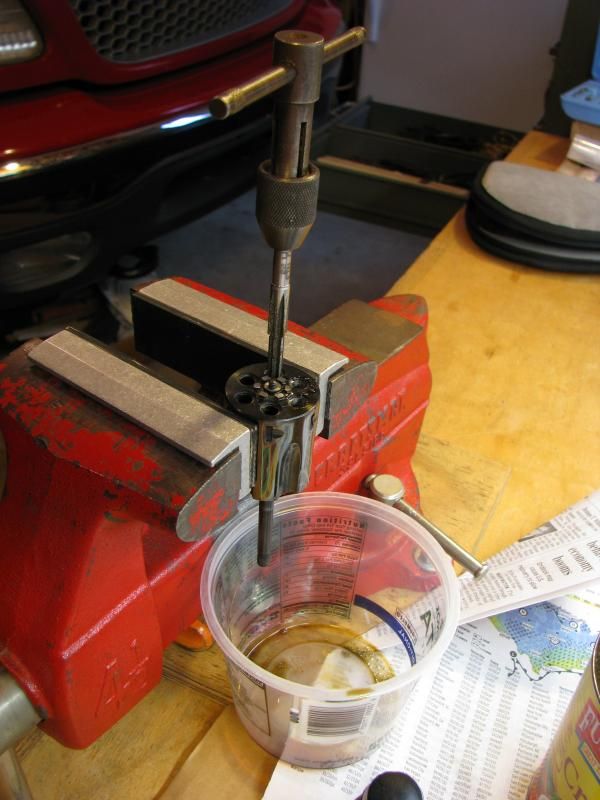
First, here's an overall view of the setup. Cylinder held in rubber vice jaws, reamer mounted in a tap T-handle, and a scrap container under the cylinder to catch dripping cutting fluid and shavings:
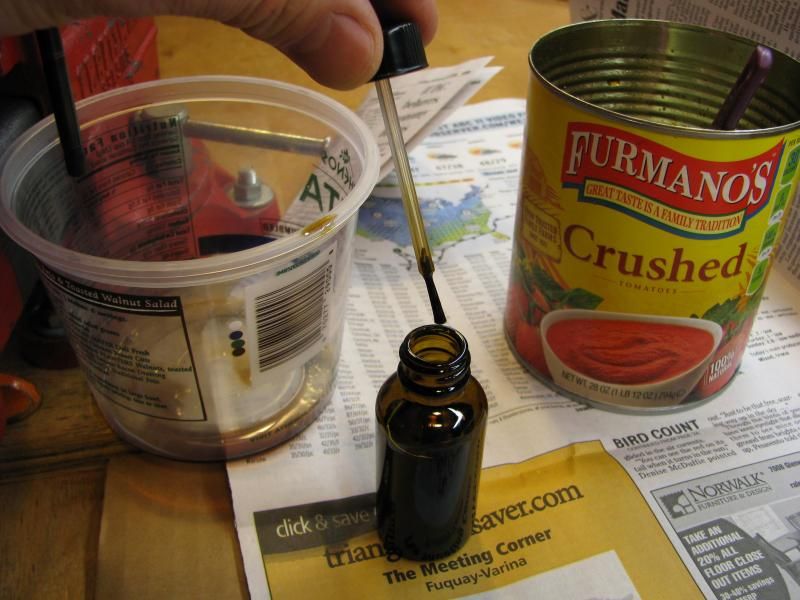
Here's a good tip - recycle a small bottle and fill it with cutting fluid (be sure the jar has a built-in brush like this one). This makes it MUCH easier to keep the reamer well lubed as you cut, without spilling fluid all over the bench:
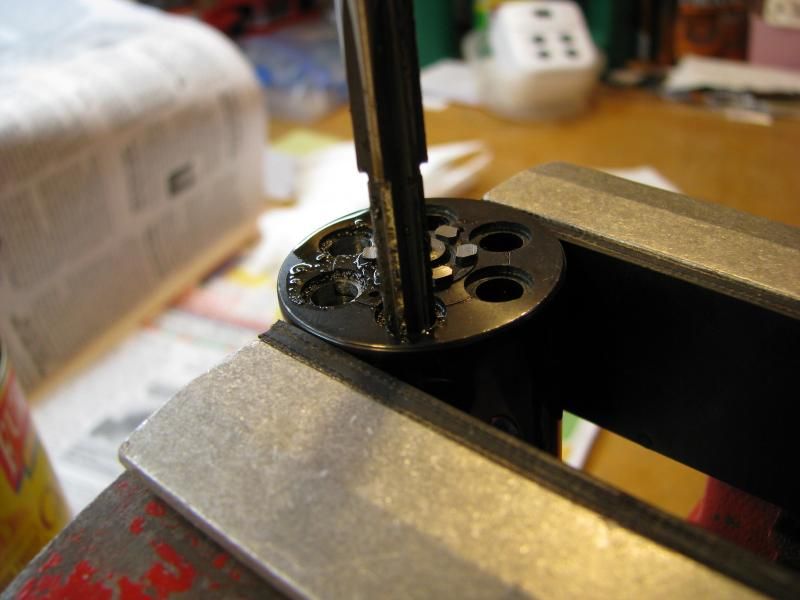
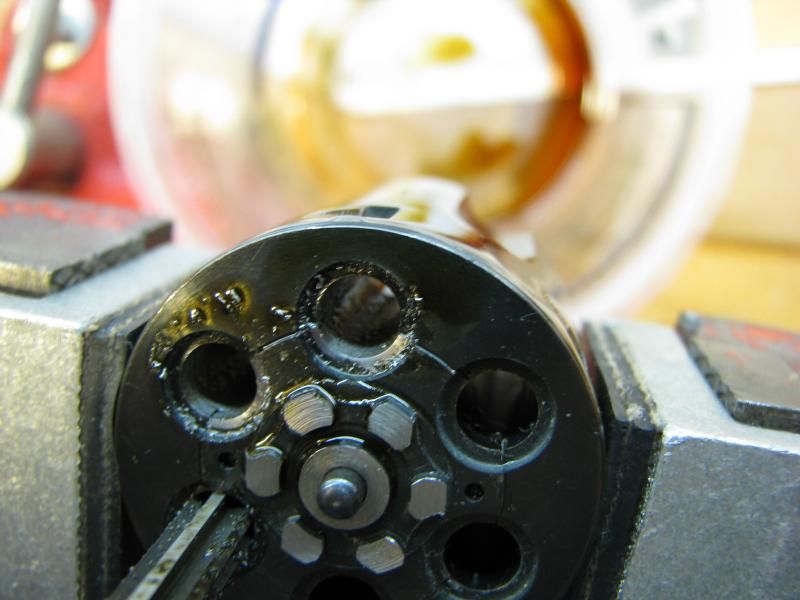
Next up is a view of the reamer inserted into an unfinished chamber. This is what it looks like before you start turning:
Here's a shot about 3/4 through one of the chambers. I removed the reamer and cleared the shavings after every 5 turns (actually about 8-10 half-turns). The flutes were about 1/2 full after four or five turns and I didn't want the reamer to "bind-up" with shavings. Better to clean more often than necessary than to let the flutes get clogged and bind. The reamer moves about 1/8" into the chamber with every five turns. It's slow steady progress:

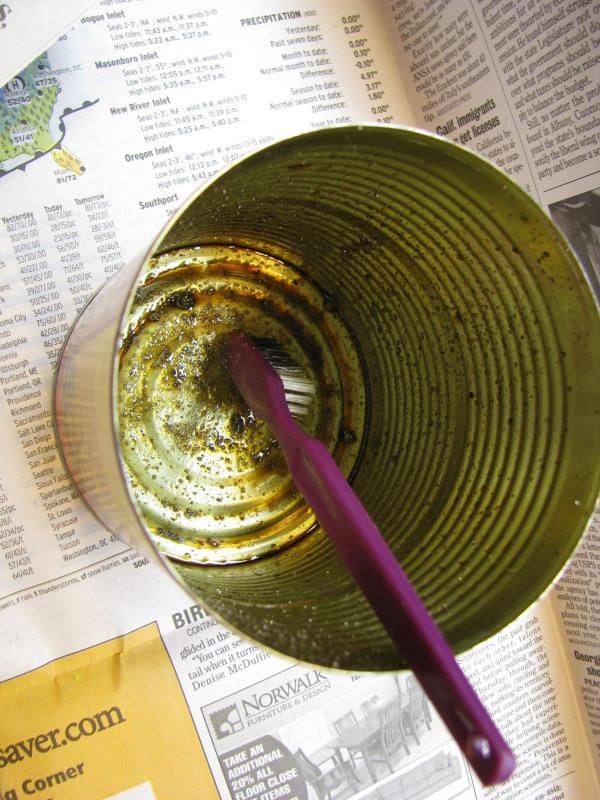
Here's a tip for clearing the reamer cutting flutes - hold the reamer in a can and use an old toothbrush to clear the flutes. This keeps the shavings from scattering all over the bench when you clear them with the toothbrush:
Finally, here's an interesting shot showing the bluing worn off the extractor star before the reamer contacted the cylinder itself. Before starting, I made sure the extractor did not have any fouling underneath and was making good contact with the cylinder:
The entire operation took about five to ten minutes per chamber, plus some cleanup time at the end. I can't wait to take it to the range and enjoy the smooth extraction with ANY brand of ammo!
I would encourage anyone who can operate a tap to go ahead and try this bit of home gunsmithing. It really isn't that difficult.
Good luck and feel free to ask questions,
Lou
I just got a reminder from a fellow Forum member to remind everyone who tackles this type of project to ONLY turn the reamer in a clockwise (cutting) direction. Do NOT turn the reamer counterclockwise at any time, or the cutting edges of the reamer could be damaged. I read this information in previous posts on this subject as well, but neglected to remind folks of this important piece of information. (Thanks Engineer1911!!).
I decided to post this in the revolver section since I've learned so much here from my fellow S&W revolver enthusiasts, and wanted to share some of my new-found experience.
My Clymer .22 cylinder chamber finishing reamer recently arrived from Brownell's along with my pint of Do-Drill cutting fluid. So, I decided to get to work on finishing the chambers of my S&W .22's for easier extraction, starting with my model 18-3.
First, here's an overall view of the setup. Cylinder held in rubber vice jaws, reamer mounted in a tap T-handle, and a scrap container under the cylinder to catch dripping cutting fluid and shavings:
Here's a good tip - recycle a small bottle and fill it with cutting fluid (be sure the jar has a built-in brush like this one). This makes it MUCH easier to keep the reamer well lubed as you cut, without spilling fluid all over the bench:
Next up is a view of the reamer inserted into an unfinished chamber. This is what it looks like before you start turning:
Here's a shot about 3/4 through one of the chambers. I removed the reamer and cleared the shavings after every 5 turns (actually about 8-10 half-turns). The flutes were about 1/2 full after four or five turns and I didn't want the reamer to "bind-up" with shavings. Better to clean more often than necessary than to let the flutes get clogged and bind. The reamer moves about 1/8" into the chamber with every five turns. It's slow steady progress:
Here's a tip for clearing the reamer cutting flutes - hold the reamer in a can and use an old toothbrush to clear the flutes. This keeps the shavings from scattering all over the bench when you clear them with the toothbrush:
Finally, here's an interesting shot showing the bluing worn off the extractor star before the reamer contacted the cylinder itself. Before starting, I made sure the extractor did not have any fouling underneath and was making good contact with the cylinder:
The entire operation took about five to ten minutes per chamber, plus some cleanup time at the end. I can't wait to take it to the range and enjoy the smooth extraction with ANY brand of ammo!
I would encourage anyone who can operate a tap to go ahead and try this bit of home gunsmithing. It really isn't that difficult.
Good luck and feel free to ask questions,
Lou
Last edited:
")