Severely Scratched the side of my 686 - How to restore?

samlee1890

Member
Joined
Jul 24, 2016
Messages
15
Reaction score
6
Hello all, I recently scratched my 686 revolver and I've tried to dremel to polish the scratches...

But I actually made it even worse. I cleaned my gun today and I noticed how severely different the stainless steel looked and wanted to ask you guys on how I can restore it back to normal.

Here are the photos:

Dropbox - IMG_2531.JPG

Dropbox - IMG_2609.JPG

Great thanks in advance..
 

Attachments

  • IMG_2531.jpg
    IMG_2531.jpg
    91.8 KB · Views: 700
Register to hide this ad
The very word "Dremel" is a curse around guns!

But all is not lost. Handwork with a Scotchbrite pad will fix you up. They come in various grits, each denoted by a different color. I generally use the green pads for an overall matte finish; others prefer coarser or finer. Most likely, once you find the degree of abrasiveness that you want you will have to go over the entire gun to get an even finish, not just the damaged area. But this chore is not as onerous as it sounds. An evening spent in front of the TV watching your favorite show while buffing your revolver will give you very impressive results.
 
Just another idea; I use 3M Automotive sandpaper. It's not paper - it's foam-backed. I have both 3000 and 5000-grit. 3000-grit might get the scratches to a more manageable level - then, if it were mine, I would use 5000-grit to smooth it over and set the grain. I picked up an M64 off of here a few months back - I used the 3M stuff and it looks great - especially the barrel...

That said, and I guess a statement of the obvious, I haven't found anything which will exactly match the polishing wheels/compound used by the mothership. The 3M automotive does a better job on Rugers but only pretty good on the S&W's ... :(
 
Last edited:
I've never much cared for the scratchy look of a stainless revolver. Even so I do love my 640 AFTER I sent it to Smith' for a high bright polish. It's still holding up after 5+ years as my EDC. Unfortunately, the glare is too sharp to capture with this quick pic.
 

Attachments

  • fullsizeoutput_1287.jpg
    fullsizeoutput_1287.jpg
    151.4 KB · Views: 454
There are 3 basic finishes for a stainless steel S&W revolver.
1. Brushed or Satin. This is this factory original finish for your revolver.
2. Bead blasted or matte, a dull uniform, finish.
3. Polished. Sometimes confused with a nickel finish.

To fix your problem and restore it to an original looking brushed finish:

You can touch up the original finish on a brushed finish stainless steel gun and fix significant scratches with Scotch Brite pads.

Scotch Brite pads come in different levels of coarseness.
Light Grey, called Ultra Fine Hand Pad - (600-800) 800 grit.
Green, called Light Duty Hand Pad - (600) 600 grit
Maroon pad, called General Purpose Hand Pad - (320-400) - which is very coarse for removing deeper scratches. In my area a dedicated paint store is usually going to carry all three.

The scratches I see on your side plate do not look deep enough to need a maroon pad. I think you could start with a green pad.

Study your revolver finish or the finish of another one and follow the direction of the pattern you see from the factory. STROKE IN ONE DIRECTION ONLY.

Work in a small area with tiny (1" square) piece of pad and stroke in one direction only following the linear polishing direction from the factory. Avoid any surfaces but the brushed stainless surfaces. In your case where the entire side plate seem involved you should remove the side plate screws. Start in the most unobtrusive area first to make sure you get a feel for it and like the result. Go slow, literally pushing the pad fairly slowly, and use a light hand. Start with about a pound of pressure. It doesn't take much. Generally the green pad can be used for all applications varying the pressure dependent upon the degree of the scratch you attempting to fix. I think it looks best to finish off with the light grey pad. I highly recommend looking at You Tube for examples of how to do it or further research the S&W Forum.

Best of luck.
 
Last edited:
I bought a Ruger Police Service Six for my wife which had a bunch of surface scratches marring the stainless steel. I used a 3000 grit Scotch automotive sanding pad to get all the surfaces looking the same, then I used Mothers Mag Wheel polish to bring up a nice sheen.
By the way, the only things I've ever used a Dremel tool for on guns were polishing rough feed ramps and cutting a stuck scope mount screw off.
 
Most people use mothers mag pollish then grey, dark grey or brown scotch brite pads to refinish the entire gun after such an incident. I've used them myself on several occasions and had VG results. You can do a search on that process here.

That said, It's hard to get a uniform finish unless you start with somethign fairly uniform. You may have done things with that Dremel that are irreversible by home spun means. Your gun may now need professional refinishing attention.
 
Last edited:
The very word "Dremel" is a curse around guns!
+1
Unless left unplugged. :)
Another option is look for someone with a bead blaster but use appropriate blast media. Gun will need disassembled and certain areas protected.
And regardless of method used, it may not match factory finish but I think you can improve the current looks to an acceptable level by following suggestions others have posted.
I prefer factory look so I'm not a fan of bright SS. Not a complete re-finish but in my limited experiences, I've had best results using combination of green scotchbrite and Mother's mag polish for touchups that closely match original finish.
 
A grey scotchbrite pad and an hour or two will fix that right up.
 
Believe it or not, Birchwood Casey's Lead Remover & Polishing Cloth, works wonders! It provides a nice satin finish, very similar, if not just like S&W's own!

012-31002.jpg
 
Look at: Your best looking Smith thread, last page, #312.
I bought the Model 67 Combat Masterpiece that had several dings
and scratches. I had it bead blasted. Think it turned out quite
attractive. What do you think? Might work for yours?
 
Thanks for all the reply guys.

Actually the last attempt I tried to fix my scratches was with the green scotch brite.

But it came out looking even more scratchier.

I bought a flitz compound last night so Im hoping thatll work.

Considering going to Home Depot and grabbing a 2000 grit sandpaper...

It seems every time I try to make an attempt to fix it, it gets worse and worse
 
Simi chrome polish with a soft rag and lots of elbow grease. Simi chrome polish removes machining marks in plastic injection molds.

NO SANDPAPER. Just simi chrome polish
 
Simi chrome polish with a soft rag and lots of elbow grease. Simi chrome polish removes machining marks in plastic injection molds.

NO SANDPAPER. Just simi chrome polish

Will i have to chrome polish the entire gun to get an even finish?

Im getting the impression there are no ways to restore the one area back to factory unless I apply it to the whole gun..
 
Dremels should he made to shut off the moment they in contact with a firearm.
 
I should clarify that the current damages have been mostly caused by scotch brite green pad after I made the original mistake of using a dremel.

i pretty much covered up the damage but ended up scratching it even more with the scotch brite
 
There are 3 basic finishes for a stainless steel S&W revolver.
1. Brushed or Satin. This is this factory original finish for your revolver.
2. Bead blasted or matte, a dull uniform, finish.
3. Polished. Sometimes confused with a nickel finish.

g8rb8 has the best description of most of the responses IMHO.

The Brushed or Satin finishes that S&W uses are different from time to time. Some of the earlier Satin finishes are very fine, smooth and difficult to copy. Some of the most recent finishes are very random and rough looking, most of which look very well used right out of the box. I have some early, like new, unused models that have a beautiful smooth consistent finish, that I would have a very difficult time to duplicate.

"Bead blasted" finishes are the easiest to duplicate. But, I've never seen a strictly bead blasted finish on a Smith revolver from the factory.
I've matched the bead blasted top strap of stainless Smith revolvers easily, with an inexpensive bead blaster and 80 grit glass bead media from Harbor Freight.

I've polished out several rough finished Smith revolvers that I didn't like to a beautiful finish, using Stainless polishing rouge, dremel and a 6" polishing wheel, followed with Mothers or Flitz hand polishing. I always wax with Ren Wax

Restoring the factory finish is more difficult matching the grit and direction used. It takes time and patience to find the correct abrasive texture and technique if you want a flawless restoration.

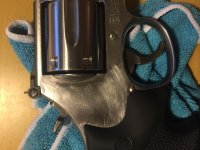
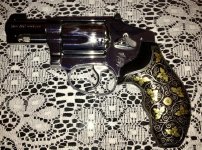
Here's one of my polished examples with a lasered American Flag and Eagle I added. I also bead blasted the cylinder insets to contrast the polishing.IMG_1230 (2).jpg
 
I've never much cared for the scratchy look of a stainless revolver. Even so I do love my 640 AFTER I sent it to Smith' for a high bright polish. It's still holding up after 5+ years as my EDC. Unfortunately, the glare is too sharp to capture with this quick pic.
Hi I'm new here. I thought of getting my new 60LS polished. someone told me it was not a good idea because if in danger the shine will identifiy my location...does that make sense. And how did you find out that S&W will do that? thanks
 

Latest posts

Back
Top