kframefansc
Member
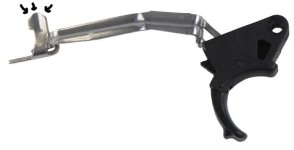
I did a lot of research on how to fix the gritty takeup on my new M&P9 and it seemed that the logical fix was to remove the striker block and polish the plunger and the bore hole. That is a PITA as it involves removing the rear sight. After spending nearly two hours of disassembly, fine sanding and polishing, and re-assembly, I didn't see any difference. The grittiness was still there. I had given the contact points on the trigger bar a lick and a promise but did not do a lot of sanding or polishing on it. After reading numerous posts here on the S&W Forum, I found that a lot of people actually got better results by simply polishing the trigger bar. I went back and did a more complete fine sanding and polishing of the trigger bar and voila, it was completely fixed.
")
