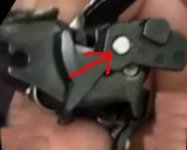
..............I decided to polish what I could without disassembly. This fixed about 50% of the problem. I still had an annoying “click” or sharp bump right after take up but before getting to the wall. It was the grip safety deactivation bump. I polished that heavily and reduced the click about 75%.
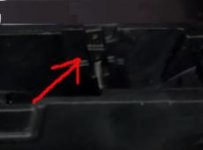
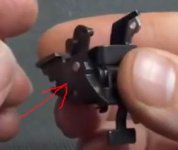
With the slide removed I stripped all lubrication from the fire control parts. I placed my left thumb in front of the cocked hammer. I pulled the trigger but caught the hammer, easing it forward until I could reset it by pushing it back with my thumb. This allowed me to dry fire and polish the trigger parts through cycling at about 3x the speed of doing it with slide on. I did this approximately 450x in three sessions.
My trigger pull lightened a 1/4# to 4.5#, and smoothed out to about 90%. There is still a tiny click noticeable to me from the grip safety deactivation mechanism on a slow, dry fire. In actual live firing, with a proper, quick trigger pull, it is not noticeable.
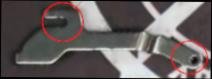
My hint? Polish by cycling instead of disassembly, using the hammer stop method for greater speed. Then lubricate mating trigger control parts with a swipe of moly grease because it stays in place. Perform 50 or so assembled dry practice firing cycles. I’ll bet you’ll be happy.
Measure your satisfaction with proper live fire trigger actuation, not slow “feel it” target pulls.


")


")