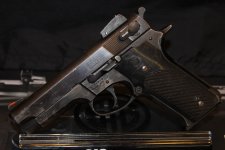
The magazine nut (button) has a small plunger and a spring underneath it.
If the spring has become badly rusted, it might be grungy or damaged (or it might've been damaged by the "attention" of a previous owner who did some "work" on it).
The nut height is adjustable. The nut has a pair of small cut channels on the bottom, into which the head of the spring-loaded plunger fits, locking the nut in position. The 2 cut channels are at 180 degrees, which allows the nut to be turned a half turn at a time for "adjustment".
The nut is not just tightened down (no "finger tight"). It's adjusted to the right height, threaded onto the left end of the mag catch body, which is what controls the depth of the right end of the mag body's reach into a magazine's window cut.
Normally, the nut is supposed to be turned and adjusted so the
top of the plunger ends up being flush with the outside of the frame, or slightly below it (after the plunger has snapped up into the cut channel on the bottom of the nut, locking it in that position).
Now, if this was a 3rd gen gun, I'd remove the grips so the right side would lay flat on a hard surface, which would keep the eight end of the mag catch body flush with the right side of the frame. Or, I'd leave the grips on and slip a nickel under the right end of the mag catch to hold the right end of the mag catch body flush with the right side (positioned to clear the grip edge).
The 559 will have grip studs sticking out with the grips removed, though, and you also don't want to damage those older 2nd gen grip panels ($20, last I looked). If it were me, I'd try using a nylon armorer's bench block (or board with holes drilled to clear the grip frame studs).
Anyway, once the right end of the mag catch is securely held flat with the frame (normal position), the mag catch nut can be adjusted on the left side of the frame.
The nut is adjusted for height by screwing it onto the threaded end of the mag body and turning it
while trying to hold down the spring-loaded plunger underneath it. This can seem to be a bit of an awkward 3-handed job, because the parts are so small, and easily result in a
flying plunger (safety glasses were required in the class, and are a very good idea

).
Armorers were originally told they might make a special "spanner" tool to make the job a little easier. This involved filing a wide relieved space in the edge of the middle of the tip of a slot screwdriver, wide enough to allow the threaded left end of the mag body extension to clear the filed tip's edge.
This allows the outside edges of the blade to act as the "spanner" tool, turning the nut and controlling it with one hand, while the other hand uses a pin punch tip to hold the plunger depressed against its spring. Finger tips might be a bit wide to let some folks easily grasp and turn the nut
while keeping the plunger securely depressed and seeing what's going on. Just depends on the person and their experience.
I use a small pin punch to keep the plunger head depressed, turning the nut half a turn at a time ... and allowing the plunger to snap up into one of the cut channels (on the bottom of the nut), checking to confirm when the top of the plunger is flush with the frame (or slightly below). The plunger snapping up into one of the cuts now holds the nut in that position ... which controls the reach and depth of the mag catch body into the frame.
Depressing the nut should be smooth. If it feels rough, tapping the nut (button) with a plastic mallet (hard yellow plastic one) can "set" the parts. (Presuming clean, rust-free and undamaged parts.)
If your plunger spring is broken, or visibly rusted and corroded so its function is compromised, replace it. Clean out the plunger channel (usually of rust and any congealed goo that's migrated into the plunger hole).
It's not a bad idea to have a spare/repair nut, plunger and plunger spring on hand when using and acquiring old (and possibly hard-used and/or neglected & abused) S&W pistols.
Obviously, I can't have any idea what's happening with your 559, not being able to look at it in person, but those are the things I'd check (as a S&W trained 3rd gen armorer) if a gun with the same symptoms came across my bench.

