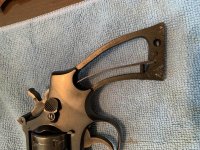
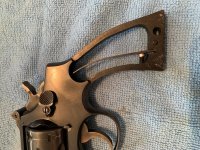
1st time “under the hood” … as it were

Many years ago I ground down the sides of a cheap straight blade screwdriver to create a tool to safely remove/reinstall the safety plunger mechanism. The tool available at Brownell's is better

A set of gun specific hollow ground screwdrivers or tips, a gunsmith hammer with brass & nylon faces and a few other revolver specific tools will help you avoid damage to your fine piece of machinery. The tool to disassemble a cylinder comes to mind as the difference between a ruined ejector rod and a pristine one.

Or you can simply let a properly equipped gunsmith do the work for you.
 
The pictures of the strain screws was nicely done, but many/most current production don't have the rounded tip. Or at least the one's I've received.

BTW, you are making sure the mainspring is centered in the frame right? The spring is tapered so drag on the stocks should be slight, but none is better.
 
Last edited:
So, I broke it down and cleaned the gunk out of the action. Looked like it hadn't been opened in decades (if ever since leaving the factory)

Did you clean the frame mounted firing pin. This is often overlooked. With that much gunk in the action, usually there's gunk in front of the firing pin introduced thru the firing pin aperture in the recoil shield. The gunk will inhibit the forward travel of the firing pin.

Recognize the firing pin must travel farther forward from inertia than the hammer pushes it forward when the hammer is resting on the firing pin with the trigger pulled.

Flush it out with an aerosol cleaner thru the firing pin aperture while pushing the pin to the rear with a pin punch until the black gunk quits running out. Then test fire again.

If that doesn't do it, I'd get a new mainspring. They can lose tension after 70 years.
 
Last edited:
Did you clean the frame mounted firing pin. This is often overlooked. With that much gunk in the action, usually there's gunkaround the firing pin introduce thru the firing pin aperture in the recoil shield. The gunk wil inhibit the forward travel of the firing pin.

Recognize the firing pin must travel farther forward from inertia than the hammer pushes it forward when the hammer is resting on the firing pin with the trigger pulled.

Flush it out with an aerosol cleaner thru the firing pin aperture while pushing the pin to the rear with a pin punch until the black gunk quits running out. Then test fire again.

If that doesn't do it, I'd get a new mainspring. They can lose tension after 70 years.

I don't think we've had frame mounted firing pins for 70 years?
 
That was referring to the main spring.

But we've actually had frame mounted firing pins in Smith .22s 110 years since 1911 when the .22/32 Bekeart HFT was introduced.
 
Last edited:
  • Like
Reactions: KFW
A few more possibilities to check.

Thanks, fellas. It's always nice to have someplace to ask questions.
 
Trying the "spent primer" fix next … the end of the screw showed definite sign of being cut/ground down.

It looks to the eye like it's making a difference in tension. I'm not likely going to be able to test fire until Thursday.
 

Attachments

  • 13D404DE-0C97-444A-BA1A-4D7B87CBB256.jpg
    13D404DE-0C97-444A-BA1A-4D7B87CBB256.jpg
    118.7 KB · Views: 41
  • 7FBF900E-D501-4484-9D0F-D3DCDD04A7B8.jpg
    7FBF900E-D501-4484-9D0F-D3DCDD04A7B8.jpg
    120 KB · Views: 41
… aaaaaand, problem solved. The spent primer fix did the trick. My K-22 is now working flawlessly in both single AND double action.

Thanks guys! :D
 
Back
Top