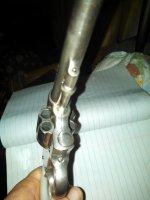
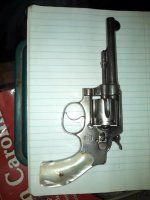
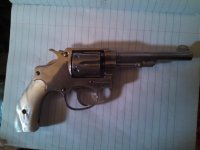
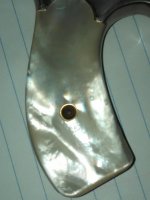
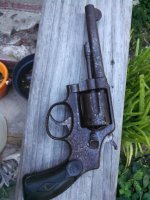
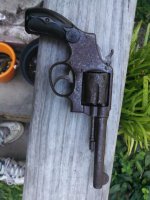
I didn't say it was factory nickel now, just that it was originally produced as a nickel plated gun. You didn't tell us if the hammer and trigger are plated or if the color case hardening is just all worn or polished off.
Old gun protocol for heirlooms & new members:
You have a quality made, very well engineered, and assembled with skilled craftsmanship, and hand fitted revolver, no longer affordable on a competitive market basis, and that we'll never see again, ever.
Shoot it to your hearts delight, and it will delight you with its fine accuracy, and comfortable recoil.
Simply put, the only usual issue with these marvels of yesteryear is they are gummed up and dirty. Old oils of its time do not match the quality of these old guns nor the science of today, and actually dry up and harden to the point of impeding operation and accelerating wear. The simple solution does not need a gunsmith. Just one of a few premium modern gun products from any sporting goods, gun store or hardware store.
Most are both cleaning and preserving agents; Breakfree, Kroil & M-Pro7 are some of the best, but there are others. Disassembly is not necessary. With grips removed and a spray can version of the product, flood and flush the revolver thru every opening and crevice until the black gunk stops flowing out, let it drain for an hour and wipe it down good.
To remove grips: loosen the grip screw completely and carefully push down on the screw head until the bottom grip separates, then remove. Now push the top side grip off with a finger or toothbrush from the backside thru the grip frame. Scrub barrel bore and cylinder chambers with a simple cleaning rod kit found at the same places as the cleaning agents above, and patches cut from rags is all you really need. And scrub any observed exterior and crevice crud with an old toothbrush with bristles cut off short for stiffness.
For rust spots, use Bronze wool, not steel wool, size 0000 and toothbrush with bristles cut short, and a rust removing agent/gun cleaner like M-Pro 7 (odor free), Kroil or Breakfree and gentle scrubbing.
Rust pitting must have all red color removed to arrest it's cancerous growth (use 5x glasses or stronger to see progress). Then cleaned with acetone or lacquer thinner to remove all traces of oil. White areas of cleaned pitting can be 'toned down' and
touched up with OxPho Blue cream (from Brownells) and works best after heating the metal with a blow dryer until it’s too hot to touch.
Then re-oil or wax over. Rust pits can only be removed with a re-finish.
Once cleaned and lubricated, with a few simple checks you can determine if it’s safe to use. Open the cylinder and verify the barrel is unobstructed. Cock the hammer in single action mode. Gently push on the hammer to confirm that it will not drop w/o pulling the trigger. Cock the hammer slowly and confirm the cylinder is locked in position for each of the 6 chambers. If satisfactory, now operate the gun by pulling the trigger slowly until the hammer drops. Again, confirm each time after cycling the action, that the cyl is still locked in position.
Cylinders can have fore and aft movement and rotational movement. Check rotational movement with the hammer cocked, that's all that is really important from a safety concern. It shouldn't be much at all when cocked, if any. If so, then unless you experience 'spitting' at the barrel/cyl gap, you have no reason for concern.
Polishing isn’t required after a good cleaning but a gentle application of wax will make the gun look almost new if you want something to do while watching the news!
You have a quality made, very well engineered, and assembled with skilled craftsmanship and hand fitted revolver, no longer affordable on a competitive market basis, and that we'll never see again, ever.
Shoot it to your hearts delight, and it will delight you with its fine accuracy, and comfortable recoil.
If you do want to venture further to disassemble, although not needed, here are two videos using a gun almost like yours, a .38 Special Model 10, showing step by step disassembly and reassembly:
SMITH & WESSON MODEL 10 SERVICE REVOLVER PART 1 - YouTube
Note: The part referred to in the video as the crane is actually the yoke in S&W terminology. Crane is the Colt name for that part.
[ame=http://www.youtube.com/watch?v=KneMUM9rfw4]SMITH & WESSON MODEL 10 SERVICE REVOLVER PART 1 - YouTube[/ame]
SMITH & WESSON MODEL 10 PART 2 - YouTube
[ame=http://www.youtube.com/watch?v=2SyZpmw1K-A]SMITH & WESSON MODEL 10 PART 2 - YouTube[/ame]

