AR build

Joined
Jul 6, 2018
Messages
2,581
Reaction score
3,397
Location
Southern FL, East side.
I know this isn't the AR forum but I don't really want to join another forum. Other than shooting one a few times I really don't know much about them. My Dept issue was a Mini-14, although they've since then gone to ARs.

Anyhow, I ordered one of the PSA stripped lowers and a lower pistol kit, along with a complete 10.5" 5.56 upper. The upper arrived already but the lower was one of the cute Betsy Ross lowers that was a pre-order. So I guess I have a couple of weeks to get my stuff together.

Well, being as this is my first AR build (probably the only build) just what tools do I need to get the lower build job done correctly?

I guess I should have some upper tools too but the upper came complete so lower tools are the priority.

Thanks
 
Register to hide this ad
I have built a couple of the PSA ARs. Other than standard tools, the only thing I recall is there is an AR tool (armorer's wrench) that is really helpful. You use it one time in a build. I have been fortunate enough to just borrow one for both my builds. They only cost maybe $10-$15.

I called up YouTube videos of the build and watched through it...then just started the video over and watched step 1...then DID step 1...watched step 2.... It made it really easy. The only thing I thought was challenging was getting the trigger stuff installed. Not difficult, but I don't have the greatest dexterity.

THey are fun to build! Good luck!
 
Last edited:
Not to many tools needed for a lower build. You really don't need a armorer's wrench for the lower but you will need a spanner wrench for the castle nut.
You'll need a roll pin punch for the bolt catch.
When you install the roll pin it's best to use some masking tape on the receiver to prevent marring.
It's very helpful to use a 1/4 inch universal Clevis pin when installing the pivot pin spring and detent. There are very easily launched across the room never to be seen again.
Beyond that you probably have what you need in your tool box.
 
Last edited:
You really only need an armorer's wrench if you are assembling an upper. Since you are buying a complete upper, you dont need it.


The only out of the ordinary tool used to assemble a lower is kind of a spanner wrench for the buffer tube lock ring, but I have used a padded set of channel locks to do that (or a winchoke wrench). The rest of the lower is mainly a screwdriver and something thin and flat to hold the spring pins in when you install the reciever pins.

Using a clevis pin for installing the pivot pin is much better then the flat metal approach and they only cost about 2 bucks.

Slip the clevis pin in the left side of the gun, aligning the first hole with the hole in the receiver for the spring and detent, insert spring and detent depress with a small punch rotate clevis pin locking the detent in place.
align the pivot pin with the clevis and slowly insert the pivot pin.
 

Attachments

  • 008236714661.jpg
    008236714661.jpg
    21.5 KB · Views: 28
Last edited:
Being this is your first build, masking tape.

Watch some videos, start to finish, to get familiar before you start. Tape it real well especially where you're going to be taping the pins the vids will show that. Be liberal with the tape.

If you have a small brass punch you can get away with using that, and a small hammer, to tap the buffer locking ring.

Take you time and you'll do fine.

BTW if you want a tool you can find them on GB for cheap. The cheapest I fount was $11.99 shipped. Search "AR Tool DPMS"
 
All of the above! The videos are where you will find different ways of doing the same thing. I still watch them when I have to work with a AR ,always something to learn.
 
I thought the wrenches looked familiar. Looked in my junk closet and found this still in the packaging. I don't remember where I got it or what brand or even if it's junk or not. The only mention I could find on Google was an old auction which had no info on it (Home | Mayo Auction & Realty). Package says SEMI AR15 TAR189 Super Tool Black Heavy Duty Multipurpose Wrench. Junk? Good tool for the job? Anyone familiar with it?
7958935_0.jpg
7958936_0.jpg


Also found my old longer slapper (S&W B96L) so it went on the mantle with related stuff (stick and sap gloves). Still don't know where my short one is. I wonder where my old Aetco side handle is?
 
Last edited:
It will certainly do everything you need to build a lower. The upper part of the photo is what you use to tighten the castle nut.
 
The only special tool you really need for the lower is a LONG shank roll pin punch to seat the roll pin that anchors the bolt release. You'll want to use tape to protect the surrounding area, and the long punch can be larger in diameter than the pin because you want to SEAT the pin not drive it through. You will need to use tape and maybe a small clamp to hold the bolt release in place to align the holes, though you can start the pin without the bolt release in place, then insert spring, release, and align it for the quick tap to lock it in place. If you don't have a half-dozen or more AR builds under your belt, the best way is to find a helper to hold the bolt release while you drive the pin.

The next most important thing is the ORDER of assembly. For instance you cannot insert the safety-selector pin and spring until you install the safety selector, and then you'll need the pistol grip screwed on to secure the selector pin and spring. While you're at it do a test fit of the safety/selector pin in it's "barrel" (hole) to ensure it moves freely and the hole is fully drilled through. If not, use an appropriate size drill bit to "finish ream" the hole by hand.

Next is the rear takedown pin locking pin and spring. These cannot be installed until the rear takedown pin is in place and you're ready to mount the stock, or stock tube, buffer, or receiver extension - the same thing by whatever name you hear it called. You will need to screw the castle nut onto the buffer tube, then slide on the rear receiver cover plate. It's this plate that locks the rear takedown pin, locking pin, and spring in - and that can be a pain to lock down. With all this done, you screw the buffer tube in - take note the receiver cover plate rotates with it due to an indexing tab - this comes in handy in a moment.
With the buffer tube screwed in to the correct depth you will see the cover plate is aligned with the receiver. You then over-rotate it just a tad - screw it further in, so as to expose the locking pin hole. Into the hole goes the locking pin, followed by the rather long and eager to bend, pinch, and bind spring which will stick out past the end cap. Then, you carefully press and guide this tiny spring into the hole, and if needed use the flat of a screw driver to cover it and prevent it flying out. Then rotate the buffer tube and end plate back into alignment with the receiver and press firmly down onto the screw driver, then withdraw the screwdriver. Then you screw the castle nut down to lock the end cap to the receiver.

As for fitting the buffer tube - some tubes come with the opening uncut, others come with it already cut and shaped. The open end of the tube has a notch on the bottom that aligns with the cover plate and keeps the tube from rotating. At this point the tube needs a small half-circle cut slightly larger than the buffer retaining pin tip. Then you screw the tube in with the buffer retaining pin and spring installed until the pin snaps up into the small notch. Note how much tube material extends past the edges of the lower receiver's forward surfaces - scribe, remove, then grind away and finish, then refit.

When it comes to determining how long the buffer tube needs to be, you start with the above which removes zero functional length from the tube. The the tube mounted and castle nut tightened, you then install the buffer spring and buffer, then hold the bolt and push it firmly into the buffer tube as far as possible. It should stop with the gas key some distance away from making contact with the top of the lower receiver buffer tube ring - this is important because you don't want the gas key striking the receiver at this location. However, you DO want the gas key to move back very close - why? Because you want the bolt to move back far enough to be locked back by the bolt release. Generally, if you have the buffer tube length sized to allow the bolt carrier to get within 3/16" of the lower receiver buffer tube ring, when you do the final assembly the bolt will have adequate travel to lock back.

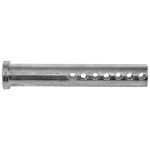
Do NOT test fit the front takedown pin locking pin without placing the long spring into the hole first! To do so risks the pin going in and never, EVER coming back out! Fitting the front takedown pin is fast and easy otherwise. insert spring into the hole, then the pin, and using the front locking pin with its flat face to the locking pin, ease the locking pin and spring into the fully compressed condition with the front locking pin being held parallel to its hole. Then press the pin through and the locking pin will snap into place.

When you install the magazine release - it's easier to do before installing the bolt release, it's easier to place the spring into the opening on the right side, then press the magazine release button into the hole and hold it. Then start and screw the mag release in from the left side. Generally it's in far enough with you see the threaded portion come level with the mag release button. If you need to screw it in or out, use something to press the mag release button FULLY which causes the release to protrude far from the left side for easy adjustment.

As for the FCG parts, unless you have a few dozens under your belt they can and will be frustrating. When installing the trigger and disconnector, it's worth it to get an extra trigger pin and shorten it into a "slave pin" where it goes through the trigger and disconnector with spring installed, and allows the entire assembly to fit down into the receiver.

The most important thing after a build is the function check. The purpose is to insure the parts work correctly, but the most important thing is to INSURE the hammer does not drop when the BCG slams home under fire! This is all controlled by the disconnector-to-hammer interface. Both surfaces must be correctly shaped with adequate spring force so the disconnector holds the hammer back when the bolt is allowed the slam home - yes SLAM home, not ride it like your daughter's little pony home.

You know you have a good function check when you start hammer back, then pull the trigger and HOLD! The hammer will fall. While holding the trigger back you retract the bolt fully and release it to slam home. Then, release the trigger! What you SHOULD hear is an audible and strong "clunk" sound as the disconnector releases the hammer back onto the trigger sear. If you do NOT hear the clunk, the hammer went forward with the bolt which is an unsafe condition and will allow the weapon to fire when chambered, and likely allow it to fire "uncommanded" which is fancy Army speak for "go full auto" which is a serious NO NO in real life. But the real criticality of the function check is to insure you have a rifle that won't fire when you chamber it, or when you don't want it to fire.

So about the only "tool" you need for the lower is a flat head screw driver. A stock wrench is fun to have, but you can do the same thing with a flat head screwdriver and mallet - tape the tip, place into the castle nut notches and tap, tap, tap to tighten the nut, and add some BLUE Loc-tite on final assembly. The only other "special" tool is a long reach punch which really makes installing the bolt release pin a lot easier.
 
Thanks guys sounds more complicated than I anticipated. I'm not generally totally inept so I'm sure I'll figure it out. I'm already thinking about what the best fodder for it will be as it's going to be a 10.5" 1/7 barrel.
 
Thanks guys sounds more complicated than I anticipated. I'm not generally totally inept so I'm sure I'll figure it out. I'm already thinking about what the best fodder for it will be as it's going to be a 10.5" 1/7 barrel.
69gr or above for 1/7

Sent from my SAMSUNG-SM-G890A using Tapatalk
 
I'm hoping it doesn't take too many weeks for the pre-order lower to get here. It was one of the designs they (PSA) advertised after Nike dropped the sneakers with the Revolutionary flag. No big deal but I thought it looked cool:
psa_betsy_-15_addvert_left.jpg
bestyflagfix.png


They did a Minute Man version too that was also nice.
 
A spanner wrench is nice as others have said, but I've put AR's together with only a hammer and a punch. There's lots of videos and simple instructions on the net.
 
I just finished putting an ar pistol together a few days ago. I did buy a lower bench block and magwell block for putting in a vise. Other than that a small hammer and punch set was all the tools I used. Next time I will use masking tape so as not to put any marks on the finish. Also a few extra springs and retainer pins can be handy.


Sent from my iPhone using Tapatalk
 
Excellent post by Bill Lear!

One additional note I did not see. When you install the rear trigger guard pin, make SURE the lower is well supported at the pin site. Otherwise, you could easily break the lower at that location. If you do, there is no repair possible.

I "built" my one and only lower way back in 2010, and had forgotten how much was involved in it. I did not have any problems putting it together and have never had a problem with it since. And I put it all together with tools available from my toolbox. Good luck on your build.
 
I bought the following for my first build and it went very well.

Grip AR-15 Roll Pin Tool Kit... [ame]https://www.amazon.com/dp/B07GDRL2LX?ref=ppx_pop_mob_ap_share[/ame]

Patriot Pin Castle Nut Wrench - Spanner Wrench & Carbon Scraper [ame]https://www.amazon.com/dp/B07S77YTDC/ref=cm_sw_r_cp_api_i_LB1mDb2FHEH0M[/ame]
 
Back
Top