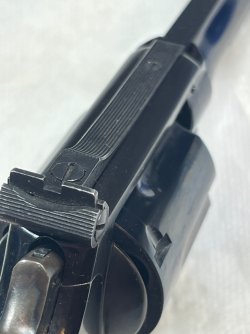
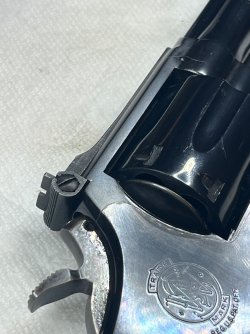
I've been wondering for a while what would happen if I tried only rebluing part of a gun and not the whole thing. We're all familiar with using cold blue for touchups.....can slow rust bluing be used the same way? My theory is that it depends. A big scratch right in the middle of an otherwise pristine sideplate probably won't work, but a distinct area that is somewhat separated from the rest of the gun might be possible. Let's find out.
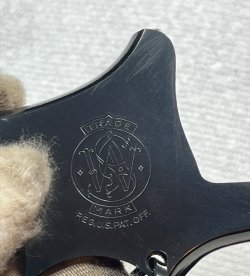
Our test sample for today's adventure is a Model 15-3:
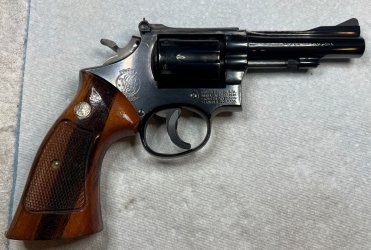
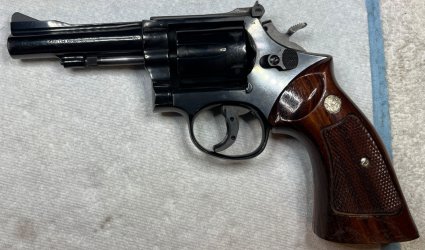
From those two pictures you may be saying "But that's a nice looking gun Coach, why are you messing with it?"
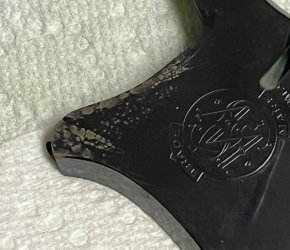
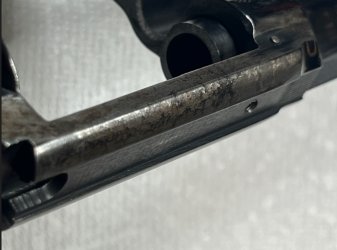
I got this one cheap because it's an overseas re-import and because of this:
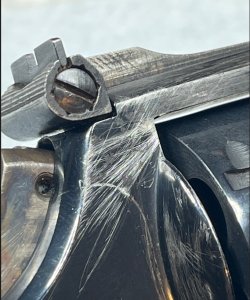
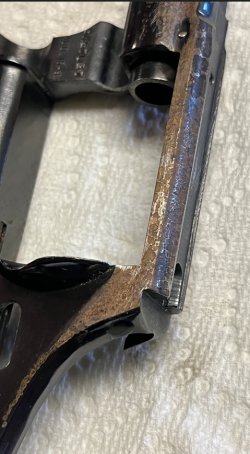
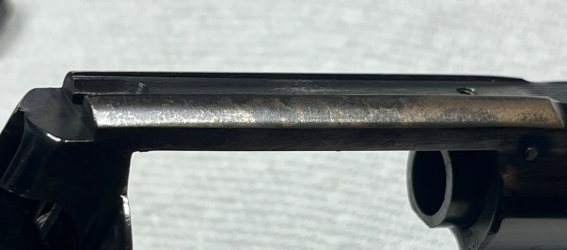
...and this:
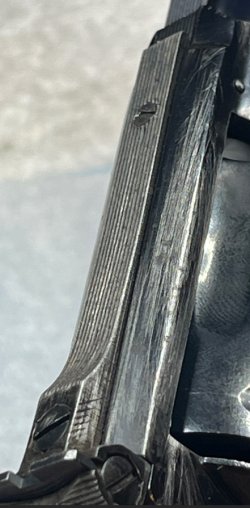
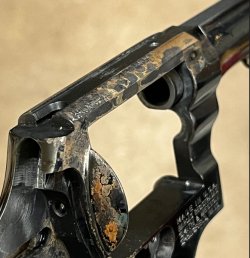
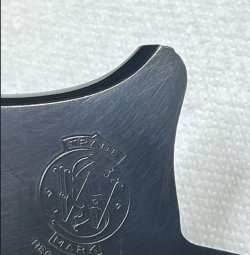
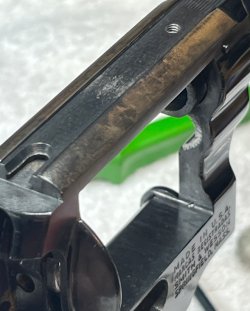
...and this:
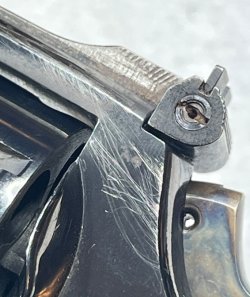
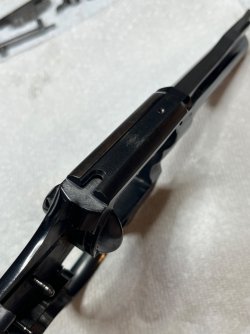
I'm not sure if it's holster wear, storage wear, or from shooting wearing chain mail gloves, but the top strap and the area immediately below it are rather nasty. I'm only into this gun for a couple of hundred bucks, so it's a perfect candidate. If things don't go well I'll just dip the whole thing and reblue it all.
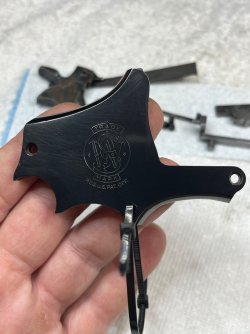
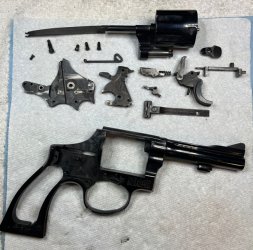
Step 1 was to move all the insides to the outside and give it a good scrubbing. The sideplate has some stories to tell about how the insides are working, but we'll get back to that later.
A piece of 240 grit sandpaper was used to finish removing the old blue from the top strap so that we could see what we had to work with.......and there they were: rust pits. Sandpaper wasn't going to be enough for those, so a #2 file was chalked up and we went to work.
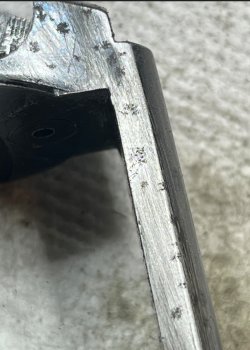
Of course there were pits on the top too. Having them only on the flat part would have been waaay to easy.
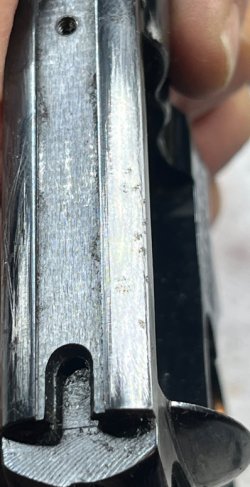
Always work on the round part first, then do the flats. That way your last step restores the edge line instead of taking it away....
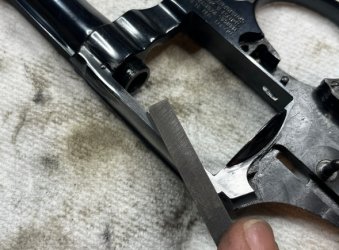
When the pits were gone and the edges edged again, some 240 sandpaper was used to clean up the file marks. The sides of the frame were sanded front to back, while the top strap was sanded top to bottom using only downward strokes to simulate the pattern that would be obtained from briefly touching the top strap to a belt sander. The downward strokes wrapped around the curve and got progressively lighter until it was only the weight of the sanding block providing pressure.
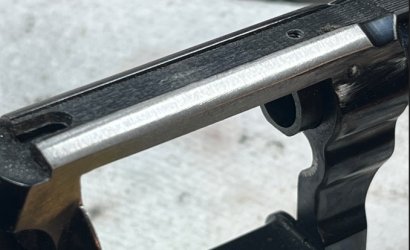
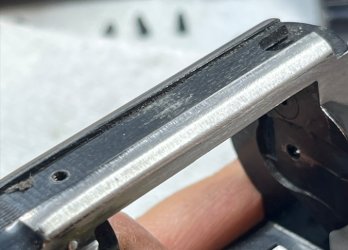
Then the entire process was repeated on the other side. This picture caused me to go back and do more work because I hadn't noticed the row of small scratches near the sight channel until I saw it on my phone.
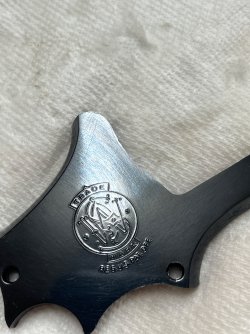
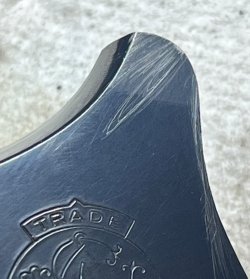
I chose not to do any sanding on the sideplate. If things don't work out I can always go back and do that, but this is an opportunity to demonstrate what would happen if the scratches were reblued without any other prep.
After attaching some zip ties to the frame and sideplate, both pieces were degreased with spray brake cleaner and it was rubber glove time.
The sideplate received one swipe of a pad barely wet with 25% rusting solution and was immediately wiped dry with a clean pad. The idea is to very slowly add color only to the scratches without disrupting the other finish.
The frame received one swipe on every area that was in the white using 100% rusting solution. These areas are bare metal and need a better "base" for the rust blue to build on.
Both pieces are currently hanging in the bathroom for their first 2 hour rust. After a nap, we'll boil them, card them, and do a quick inspection to see if we're headed in the right direction.
Our test sample for today's adventure is a Model 15-3:


From those two pictures you may be saying "But that's a nice looking gun Coach, why are you messing with it?"
I got this one cheap because it's an overseas re-import and because of this:

...and this:

...and this:

I'm not sure if it's holster wear, storage wear, or from shooting wearing chain mail gloves, but the top strap and the area immediately below it are rather nasty. I'm only into this gun for a couple of hundred bucks, so it's a perfect candidate. If things don't go well I'll just dip the whole thing and reblue it all.
Step 1 was to move all the insides to the outside and give it a good scrubbing. The sideplate has some stories to tell about how the insides are working, but we'll get back to that later.

A piece of 240 grit sandpaper was used to finish removing the old blue from the top strap so that we could see what we had to work with.......and there they were: rust pits. Sandpaper wasn't going to be enough for those, so a #2 file was chalked up and we went to work.

Of course there were pits on the top too. Having them only on the flat part would have been waaay to easy.

Always work on the round part first, then do the flats. That way your last step restores the edge line instead of taking it away....

When the pits were gone and the edges edged again, some 240 sandpaper was used to clean up the file marks. The sides of the frame were sanded front to back, while the top strap was sanded top to bottom using only downward strokes to simulate the pattern that would be obtained from briefly touching the top strap to a belt sander. The downward strokes wrapped around the curve and got progressively lighter until it was only the weight of the sanding block providing pressure.

Then the entire process was repeated on the other side. This picture caused me to go back and do more work because I hadn't noticed the row of small scratches near the sight channel until I saw it on my phone.

I chose not to do any sanding on the sideplate. If things don't work out I can always go back and do that, but this is an opportunity to demonstrate what would happen if the scratches were reblued without any other prep.

After attaching some zip ties to the frame and sideplate, both pieces were degreased with spray brake cleaner and it was rubber glove time.
The sideplate received one swipe of a pad barely wet with 25% rusting solution and was immediately wiped dry with a clean pad. The idea is to very slowly add color only to the scratches without disrupting the other finish.
The frame received one swipe on every area that was in the white using 100% rusting solution. These areas are bare metal and need a better "base" for the rust blue to build on.
Both pieces are currently hanging in the bathroom for their first 2 hour rust. After a nap, we'll boil them, card them, and do a quick inspection to see if we're headed in the right direction.

