I had three changes I wanted to make to the thumb safety on my M&P9c: increase the force required to move the safety to the fire position (more like my Colt 1911), cut off the right side paddle flush with the frame, and cut down the left side paddle width as much as possible. This is an image of the sear assembly and safety lever after removal from the frame, before making any modifications. View is from the left side of the pistol. A pin punch is holding the safety lever and sear assembly together:
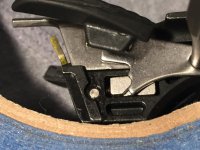
The spring loaded "selector" near the center of the image above engages one of the two detents in the safety lever bar; the upper detent is the fire position, and the lower detent is the safe position (as pictured). Notice the detents are shaped like a V-notch, while the selector is rounded. The idea is to file the shape of the notch more like the shape of the selector, which steepens the ridge that must be overcome to switch to the fire position. The needle file I used was elliptical in cross section and tapered:
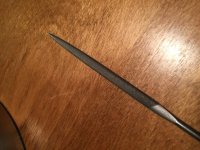
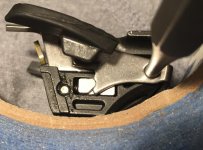
I used the section of the file about 1 cm from the tip, which is about 0.75mm thick in the shorter dimension. I positioned the sharper side of the file pointing toward the bottom of the V, and pressed the broad rounded side of the file mostly into the ramp of the lower notch leading to the ridge between the notches, trying to avoid deepening the notch. Maybe 5 or so sweeps with the file, then reattached to the assy with the pin punch and tested. I could feel the difference almost immediately, you're not taking a whole lot of material away. Took 6 passes of 5 sweeps. After getting the positive "click" I was looking for, I installed everything in the frame, and found the extra leverage the frame provides left the safety still feeling a little soft, so took it apart and filed a bit more and got it just right.
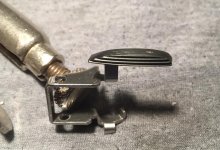
Then I cut off the right paddle with a dremel, and removed width from the left paddle plastic until I hit metal. I carefully rubbed the part evenly on 80 grit sandpaper, then 600 grit, then polished with a dremel brush:
Finished pistol:
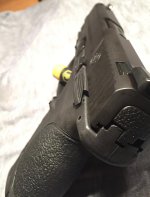
I'm sure I could take a bit more material off the lever, but at this thickness I can no longer feel it when in the holster, so I'm happy with it.
Modify at your own risk, of course.

The spring loaded "selector" near the center of the image above engages one of the two detents in the safety lever bar; the upper detent is the fire position, and the lower detent is the safe position (as pictured). Notice the detents are shaped like a V-notch, while the selector is rounded. The idea is to file the shape of the notch more like the shape of the selector, which steepens the ridge that must be overcome to switch to the fire position. The needle file I used was elliptical in cross section and tapered:

I used the section of the file about 1 cm from the tip, which is about 0.75mm thick in the shorter dimension. I positioned the sharper side of the file pointing toward the bottom of the V, and pressed the broad rounded side of the file mostly into the ramp of the lower notch leading to the ridge between the notches, trying to avoid deepening the notch. Maybe 5 or so sweeps with the file, then reattached to the assy with the pin punch and tested. I could feel the difference almost immediately, you're not taking a whole lot of material away. Took 6 passes of 5 sweeps. After getting the positive "click" I was looking for, I installed everything in the frame, and found the extra leverage the frame provides left the safety still feeling a little soft, so took it apart and filed a bit more and got it just right.

Then I cut off the right paddle with a dremel, and removed width from the left paddle plastic until I hit metal. I carefully rubbed the part evenly on 80 grit sandpaper, then 600 grit, then polished with a dremel brush:

Finished pistol:

I'm sure I could take a bit more material off the lever, but at this thickness I can no longer feel it when in the holster, so I'm happy with it.
Modify at your own risk, of course.

