Mainsail
Member
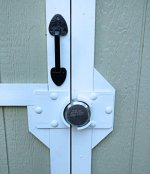
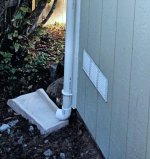
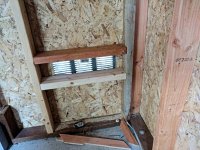
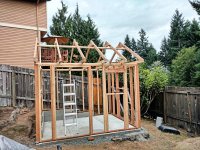
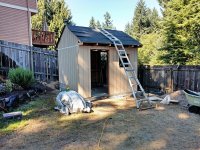
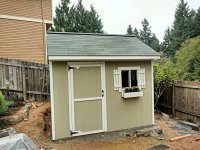
I needed a garden shed to store the mower and other yard tools, but I also wanted a small storage building to get some things out of the garage to give me more room there. This house has no basement and boy do I miss basements. Storage shed means I want it sealed up tight to keep bugs from finding an easy way in, and I would end up pumping ten tubes of caulk into the nooks and crevasses before I get done. Bear in mind that I have little experience or knowledge in building, although this would be my second shed.
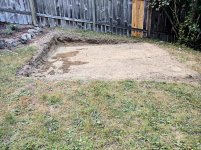
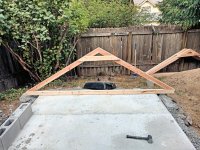
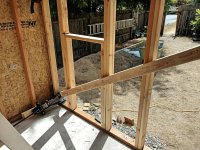
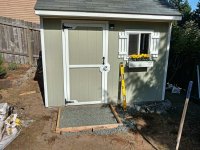
To get started I needed a spot in the yard and a plan. There is no flat spot in the yard for even a small shed so there was going to be some digging. If I went with a wood floor on skids, I would need to dig a lot because the slope is towards the front of the shed; I figure a 2x6 deck, plus flooring and skids, that could put the door sill almost a foot in the air. Been there, done that, not doing that again. Like last time, however, I would be building this one as I go, no written plan.
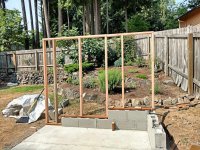
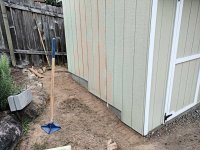
So I made the decision to do a slab. I called a guy and he quoted me $750 for an 8x10 slab. No way, and I started digging. Got a level spot dug in, graveled, tamped, and put the forms up. Then I called the guy again and he quoted me $650. What the....? My milsurp trailer trailer worked great for hauling the gravel, it's a lot easier raking it off into a cart or wheelbarrow than to lift it one shovel-full at a time from a pile on the ground.
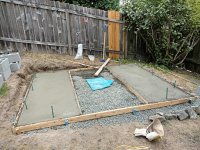
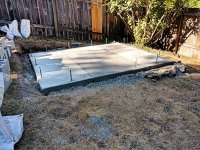
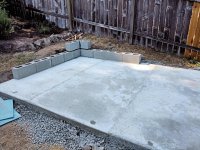
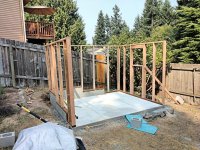
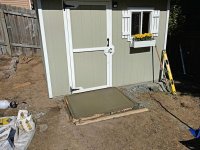
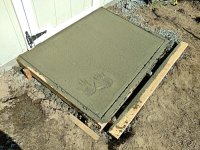
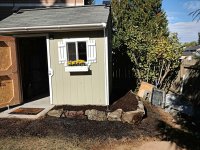
The biggest problem would be to mix and pour the 60 or so bags of concrete and get it in the form before the beginnings would be partially cured. So I decided to use some movable internal forms to break it up. The first two pours would be 3x8 and the third would be 4x8. That worked out OK with just the seams to show for it. I considered pouring some self-leveling concrete to hide the seams, but the mantra was, “It's a garden shed”. In the picture you can see how much better I got at working the concrete from the first part, on the right, to the second, on the left, and then the center last. The apron pour would go even better.
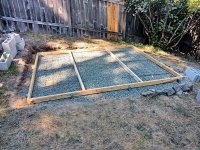
To get started I needed a spot in the yard and a plan. There is no flat spot in the yard for even a small shed so there was going to be some digging. If I went with a wood floor on skids, I would need to dig a lot because the slope is towards the front of the shed; I figure a 2x6 deck, plus flooring and skids, that could put the door sill almost a foot in the air. Been there, done that, not doing that again. Like last time, however, I would be building this one as I go, no written plan.
So I made the decision to do a slab. I called a guy and he quoted me $750 for an 8x10 slab. No way, and I started digging. Got a level spot dug in, graveled, tamped, and put the forms up. Then I called the guy again and he quoted me $650. What the....? My milsurp trailer trailer worked great for hauling the gravel, it's a lot easier raking it off into a cart or wheelbarrow than to lift it one shovel-full at a time from a pile on the ground.
The biggest problem would be to mix and pour the 60 or so bags of concrete and get it in the form before the beginnings would be partially cured. So I decided to use some movable internal forms to break it up. The first two pours would be 3x8 and the third would be 4x8. That worked out OK with just the seams to show for it. I considered pouring some self-leveling concrete to hide the seams, but the mantra was, “It's a garden shed”. In the picture you can see how much better I got at working the concrete from the first part, on the right, to the second, on the left, and then the center last. The apron pour would go even better.
Attachments


Last edited:


")