Slow Rust Blue

Joined
Aug 9, 2013
Messages
668
Reaction score
393
Location
Texas
At the request of several members, both here and over at Cast Boolits, I put this tutorial together to show my experiences with slow rust bluing. Slow rust bluing is a process that actually rusts your gun in a way to protect it. Pretty scary sounding, but the end results are beautiful. Rust bluing is also very cost effective and best used on those guns that might not necessarily warrant a professional reblue.

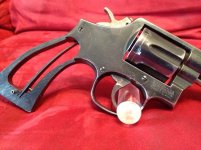
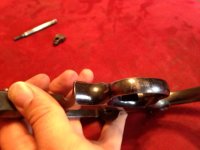
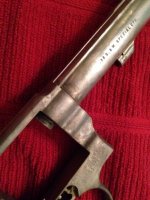
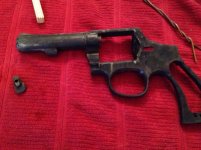
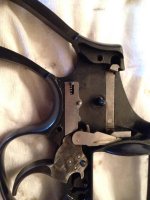
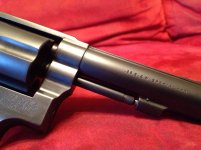
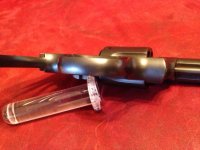
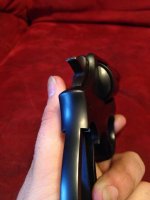
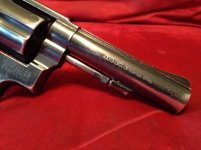
First up the victim. She is a S&W 10-10 police trade in that I purchased through Bud's about 3 or 4 years ago.
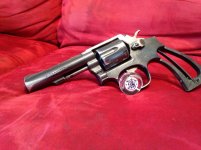
ImageUploadedByTapatalk1419810009.874692.jpgImageUploadedByTapatalk1419810029.291023.jpgImageUploadedByTapatalk1419810048.546033.jpg

As you can see she was no beauty queen but certainly didn't deserve one of those nasty spray or baked on finishes.

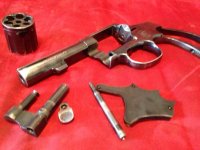
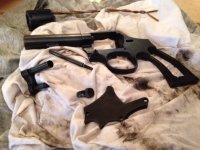
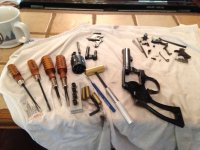
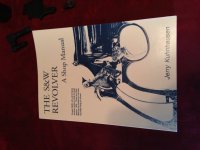
Step one: Complete disassembly. For those nervous about disassembling a S&W do yourself a favor and pick up a copy of Mr. Kuhnhausen's excellent book. Also be sure to have all the proper tools.
ImageUploadedByTapatalk1419810376.607579.jpgImageUploadedByTapatalk1419810393.373866.jpg
 
Last edited:
Register to hide this ad
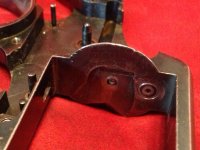
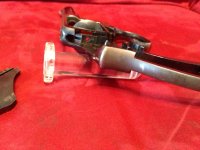
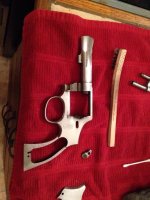
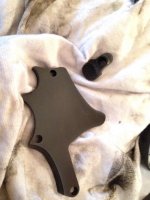
Now we are down to the six basic parts of my S&W that required a reblue.

ImageUploadedByTapatalk1419810599.641058.jpgImageUploadedByTapatalk1419810616.141369.jpgImageUploadedByTapatalk1419810629.407416.jpgImageUploadedByTapatalk1419810648.224512.jpg

Again she was no beauty queen, so don't be too hard on me for removing the original finish.
 
Last edited:
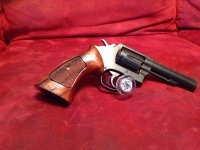
Next step is the most important. A complete refinish. The instructions that came with my rusting solution said not to go finer than a 320 or 400 grit finish. Apparently too high of a polish will not allow for the rust to "stick."

ImageUploadedByTapatalk1419810941.759072.jpg

I left the original finish on at first because it made it easier for me to see the scratched and dinged areas I needed to work on.

For lack of anything better I simply used sand paper in stages from 100grit up to 400grit. I used a wooden block wrapped in sand paper for the flat areas and a small piece by hand in the rounded areas. Just take your time and go with the "grain" of the metal if that makes any sense.
 
Last edited:
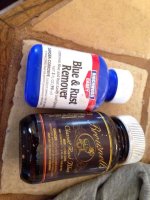
Next step is to degrease and remove all remaining blue. I used a brand of Birchwood Blue Remover and was happy with the results.

ImageUploadedByTapatalk1419811372.423876.jpgImageUploadedByTapatalk1419811392.624452.jpgImageUploadedByTapatalk1419811410.540315.jpg

As you can see the degreasing and blue stripping will leave the metal looking dull and cloudy. A second polishing is required.

ImageUploadedByTapatalk1419811500.557693.jpg

(Edit. Be sure to also degrease any tools and the steel wool used in the next steps.)
 
Last edited:
Now time for the scary part. I used a brand of browning solution sold by Brownells. The instructions are pretty good and they emphasize a light coat in one direction with no overlaps. How one achieves this I have no clue but the point is to do your best with as little overlaps as possible.

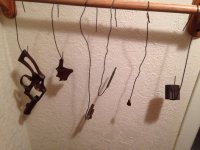
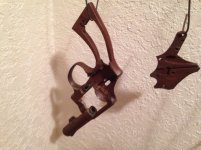
Then simply hang the parts in a humid environment. I used my bathroom.

ImageUploadedByTapatalk1419812068.323035.jpgImageUploadedByTapatalk1419812104.200666.jpg

The rust shown is what accumulated overnight.
 
Last edited:
Now I am at a cross road. I could simply polish off the rust as is, reapply the bluing/browning solution and get a nice brown patina. Or if I boil the parts I can convert the red rust to black.

ImageUploadedByTapatalk1419813312.656542.jpgImageUploadedByTapatalk1419813344.806274.jpg

(Edit. Be sure to use distilled water. Minerals found in well water and chemicals found in city water can both cause discoloration in the finish.)
 
Last edited:
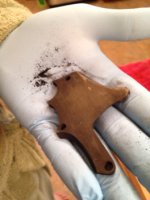
Now to "card" off the fuzzy black rust with steel wool while not removing the thin layer of blue.

ImageUploadedByTapatalk1419814216.301211.jpg

(The picture looks a little brown but it is actually a slate grey black color)

As you can see I missed a few spots, but that is no big deal you will get it on the next layer.

(Edit. Notice the gloves. The gloves protect your skin from the bluing solution but more importantly it protects the metal from any oils in your skin.)
 
Last edited:
Now simply repeat the steps of applying the bluing solution, wait for the rust to accumulate, boiling, and carding.

The first two layers look terrible, but by the third layer the finish starts to even out.

ImageUploadedByTapatalk1419814634.304344.jpg
 
Last edited:
The fourth layer looked really good and I did a fifth layer for good measure.

ImageUploadedByTapatalk1419814823.803516.jpg

Once the desired finish is achieved you need to soak the parts in oil for 12-24hrs to halt the rusting process.

ImageUploadedByTapatalk1419814849.520478.jpg

Once the rusting has been halted you simply rub of any loose bluing with a cotton rag.
 
Last edited:
Is it possible to get a high gloss finish with more layers and a lot more carding with a true carding brush. I ask because this was a common method of bluing around 1900 and I'm curious how an original Hand Ejector from 1898 would compare to the finish on something like a mid 50's vintage pre 27.

BTW, WD-40 was originally developed as a water displacing rust preventative oil and in my experience it is an excellent product to use for maintaining a Black Oxide finish. What I do is wipe the finish wet with the WD-40, "dry" it with a paper towel, and then apply a coating of wax to seal the oil into the black oxide.
 
How did you card out all the rust in the machined areas behind the side plate so it wont keep rusting. There are a lot of nooks and crannies for small spots of the rust process to remain ?

Thank You
Model 52
 
just how durable is the Brownells Rust Blue?


I have been told that rust bluing and browning are far more durable than any commercial hot bluing because of the many layers.

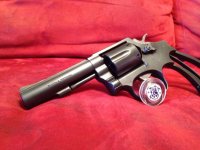
Here is a picture of a second gun I did a few years back. It has shown no wear even after some respectable holster time while riding horse back.

ImageUploadedByTapatalk1419822946.698224.jpg
 
Last edited:
How did you card out all the rust in the machined areas behind the side plate so it wont keep rusting. There are a lot of nooks and crannies for small spots of the rust process to remain ?


Thank You

Model 52


Notice the fourth picture in my #4 post. That little toothbrush like wire brush helped me get the nooks and crannies.
 
Is it possible to get a high gloss finish with more layers and a lot more carding with a true carding brush. I ask because this was a common method of bluing around 1900 and I'm curious how an original Hand Ejector from 1898 would compare to the finish on something like a mid 50's vintage pre 27.

BTW, WD-40 was originally developed as a water displacing rust preventative oil and in my experience it is an excellent product to use for maintaining a Black Oxide finish. What I do is wipe the finish wet with the WD-40, "dry" it with a paper towel, and then apply a coating of wax to seal the oil into the black oxide.


A good question and one I am not qualified to answer, but I will share what I learned from an experiment. I took a carbon steel knife blade and polished it up to a 600 grit finish. I had trouble getting the rust to coat uniformly and the polish of the finish seemed to be limited by the fact that the rust sort of frosts the finish. Based of my limited experience I don't think you could get a high gloss finish with rust bluing.
 
Looks good!
Rust blue is a great finish.
Interiors of gun parts are generally left
'in the white' when done with rust blue to avoid having the problem of getting the carding wheel or brushes into the tight corners and crevices.

Many of the better guns had the exposed inner surfaces carefully hand polished brightly after the bluing was done. This cleaned the metal up and offered up a dramatic looking effect between the blued and the bright polished accented steel. Mauser rifles (bolt rails, sear channels, ect) are a good example of this as well as those Luger pistols that were rust blued (pre 1935/36).
Even Astra Model 300, 400 & 600 pistols were rust blued and the deep inside surfaces of the slides and frame were left clear of the bluing soln generally so as not to cause a problem for carding.

You can get a high gloss finish by using different bluing solns.
The time/temp/humidity of the rusting is most important to how much etching the coating places into the steel. You want minimal if going for a glossy finish.
You don't need much of a rust coating anyway to creat another color coating. The thick heavy rust coating just dirtys up the water early.

Even the material you use to card with effects the final look.

It does take a lot of experience to get to know which steel will produce what finish with what rusting soln(s).
Polishing the coatings down with ultra fine grit (1500+) after the carding and before the next rusting is also a way to increase the gloss but that's a 3 steps forward and 2 steps back type approach. Most people don't want the extra work and are just looking for 'blue'.
As with everything, most of the results are in the techniques used to apply it, not in any fancy equipment. Same for damascus finishing.

I've been doing slow rust and hot rust bluing for 40+ years and it still throws me a curve every now and then just to keep me on my toes I guess.
 
Back
Top