Need 357/44 B&D info

The 357 cylinder is recessed and the B&D is not. That is why the ratchet sticks out farther on the B&D. But that is not the problem. I suspect the yoke tube on your gun is a bit to long for your B&D cylinder. Cylinders sometime just fit, but often do not and require some adjustment.

With the yoke removed from frame does the B&D cylinder, with extractor rod and star, fit between recoil shield and barrel? If so how much clearance between barrel and cylinder face?

You need a good revolver smith. It is possible that things can be adjusted so both cylinders work, but it is possible that you may have to chose only one.
 
Ah, excellent suggestion, thanks!

First, I shot the Model 27 for the first time today with stout 357 SWC handloads and found it to be a dream shooter. Really nice gun.

I just now followed your suggestion. The later B&D cylinder will fit with the yoke removed, and locks up and functions perfectly. The cylinder to barrel gap is ever so slightly less than the original cylinder. (See photo).

It's possible that the front center of the B&D cylinder, where it rests against the yoke, needs to be shortened ever so slightly. This would allow the cylinder to move just a hair forward on the yoke. Although upon further inspection, it seems the forward movement of the cylinder on the yoke is controlled internally, where either the front or the tapered shoulder of the yoke touches the cylinder. Since I don't want to modify the gun at all, this would suggest that the indexing point on the inside of the cylinder needs to be moved rearwards a hair.

Gunsmith, here I come! :D
 

Attachments

  • 94779AA0-4DC2-4ACC-A40A-109BC95C49D1.jpg
    94779AA0-4DC2-4ACC-A40A-109BC95C49D1.jpg
    37.6 KB · Views: 72
That could be done using a special reamer. Another method is to shorten the yoke tube, but the end must be kept square. Plus, if tube is shortened shims must be placed in original 357 cylinder to make up for the length and make function correctly. The little tube sticking out of the front center of the cylinder is the gas ring and while it is possible it might be riding on the raise area of yoke, but actually it should not. There should be a tiny space between it and the raise part of yoke right in front of it.

Unless you are good with tools and willing to do some studying by reading something like Kuhnhausen's Shop Manual, I suggest you have the cylinder fit by a revolver smith. Besides the fit into the frame and barrel to cylinder gap, headspace should be checked along with timing. I have learned a lot by doing things myself, but. I have also made some mistakes. I should have read more at first.

I have thought of a 357 B&D and might make one some time. I have several shooter model 28s. I have a 22 Jet and a 22 Kay Chuck, Would like to make a hot rod 30 caliber bottle neck N frame. But, reality is I can easily beat a 357 B&D by simply using my 41 Mag or a 44 mag with light bullets.
 
Last edited:
Thanks—I will be bringing it to a gunsmith in the upcoming weeks.

The point of this project is to do something fun and different. It remains to be seen how successful it will be. It has the potential to be extremely speedy, not to mention flat-shooting compared to a 44 or a conventional 357 Magnum.

IF it works...which is by no means a foregone conclusion. :rolleyes:
 
Oh, I get the just interesting thing to do part for sure. LOL,

If I could get my hands on a blank N frame cylinder I would ream it drill and ream it to take a shortened 30-30 case with a blown out body and a 30 caliber bullet. A slightly shorter version of the 30 Herret that OAL fits a 44 mag length cylinder.
 
Okay, three steps forward, two steps back. After buying a new (used) yoke and yoke retention screw and having my gunsmith fit them, the gun seemed to mechanically function perfectly.

Until I got home and attempted to chamber rounds.

It seems the recoil shield is a little further forward on the right side of the frame than the left side. All rounds easily drop into the cylinder, but as the cylinder turns, they drag badly on the right side, to the point of virtually locking the gun up. This is before even firing, mind you.

Some of my newly formed (empty) brass seems to work fine, while others drag. I cut down an old 44 Special case andnthat one has no issues at all.

I suppose it may be possible that the case shoulder is too far forward (even though the Redding sizer die was kissing the shellplate pretty hard), and the case rim isn't indexing properly on the back face of the cylinder. It's also possible that primers are sitting ever so slightly proud of the back of the cases. But the problem is clearly limited to only the right side of the gun. My feeler gauges tell me clearance between the back of the cylinder and the recoil shield is .068" at the top left (and much more at bottom left) but only .064" at top and bottom right.

I was fortunate to be able to buy a second set of dies (RCBS this time) so I will re-re-form some cases and literally give it another whirl.

If it becomes a consistent problem, I may have to have the back of the recoil shield clearanced somewhat.

Stay tuned.....:rolleyes:
 
Last edited:
Good news. My new (used) RCBS sizer die is noticeably smaller than the Redding die. Cases which were already resized in the Redding die passed again through the Redding die with almost no resistance, but then took noticeable additional effort to run through the RCBS die. Once passed through the RCBS sizer, they then dropped easily into the cylinder, and the cylinder rotates freely, as it should. I suspect the RCBS die bumped the shoulder down a bit, enabling the cases to fit in the cylinder properly.

I'm in business. Hoping to do some test firing with chronograph on Friday....
 
Last edited:
...and we're back.

I'm happy to report my first range trip with my 357/44 B&D Model 27 was an unqualified success!

It was the first time I ever played with a chronograph. I was therefore not so concerned with pinpoint accuracy as I was with load functioning, and not blowing my new chronograph to smithereens. :rolleyes:

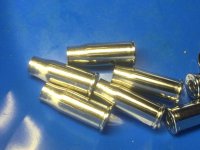
I used the Hornady data (published in my other thread on 357/44 load data) with the expectation that I would not get to go all the way up to their max load, since their data was tested in and intended for the T/C Contender. I was using new Midway cases, WLP primers and WW-296 powder, with Hornady 158gr XTP bullets, and my Model 27 has a 6.5-inch barrel. The average velocity for five-shot strings was:

20.0 — 1469
20.5 — 1485
21.0 — 1472
21.5 — 1546
22.0 — 1552
22.5 — 1585

I started getting adverse pressure indications at 22.5, in the form of slightly flattened primers and difficult case extraction, so I stopped there although I had loaded rounds through 24.0 (24.9 was max published).

It is very fun to shoot, although one could make the case that similar results could be achieved more easily by simply ignoring published 357 Magnum data and overloading those cases, to bring them up to 1935-era pressures and performance. I suspect if you were to find a box of 357 Magnum factory ammo from the late 1930s it would deliver similar performance to the B&D, but these days the cartridge has been downloaded due to the preponderance of revolvers having smaller, lighter frames. The max load for 357 Magnum using 296 in the Hornady book is 1250 FPS.

Now that I know where the limits are, I will likely brew up a few batches of 21.5 and 22.0 and shoot for accuracy next time. I have a feeling it will be very effective.

Thanks to all who offered words of wisdom. I heard privately from several people who said they had B&D revolvers (or cylinders) gathering dust in the back of their gun safes. I hope this inspires you to get them out and enjoy them!

As an aside, I was also shooting 357 Auto Mag with the same bullets and almost the same loads, with both 6.5 and 8.5-inch barrels. Here are those results:

6.5-inch:

21.5 — 1632
22.0 — 1631
22.5 — 1686

8.5-inch:

22.0 — 1770
22.5 — 1788

The Auto Mag gets about 75-100 FPS more with the same load and barrel length, likely due to the lack of the barrel/chamber gap. Barrel length is slightly misleading because automatic barrels include the chamber as part of the barrel length. So the 6.5 inch auto barrel is really more like 5 inches of actual barrel.

Fun stuff!
 
Glad you got it running and are having fun with it. Be interesting to see what kind of velocities you get from the same frame and barrel shooting the same bullet from 357 mag cases, running the original cylinder.

Just how much was gained by the Bain and Davis
 
Glad you got it running and are having fun with it. Be interesting to see what kind of velocities you get from the same frame and barrel shooting the same bullet from 357 mag cases, running the original cylinder.

Just how much was gained by the Bain and Davis

That sounds like a very interesting challenge. I shall convert it back and try it out and let you know!
 
I didn't get a chance to refit my 357 Magnum cylinder, because I discovered a new problem.

My first batch of ammo described above was loaded with Redding dies. The sizing die was a bit too long so the rounds stuck out a thousandth too much out of the rear of the cylinder, so it didn't turn freely. But they all shot just fine.

I re-resized all my cases with a recently procured RCBS sizing die, which moved the shoulder down just enough. I didn't really notice that it was creating longitudinal striations on the cases. However, when I went to the range again yesterday, I suffered a lot of case failures, where the cases would split along those striations. Pressures are not excessive—the cases that did not split dropped easily from the cylinder. But I suffered case destruction with a full 1/3 of my cases.

I'm afraid I may well have wrecked 500 brand new cases with this RCBS die! I tried increasing the amount of case lube but that just resulted in dented shoulders.

Here are some photos. The first shows never-fired cases after a trip through the RCBS sizer. The second shows the results—lots of split cases. The third shows the difference between cases sized in the RCBS vs Redding dies, and the last shows the inside of the RCBS die.

What, if anything, can be done about this?
 

Attachments

  • C04A76CF-83B9-4CB8-A42B-128C36181DFE.jpg
    C04A76CF-83B9-4CB8-A42B-128C36181DFE.jpg
    56.1 KB · Views: 72
  • A1532D35-ABD2-4B6D-BBA2-573DCF0323AA.jpg
    A1532D35-ABD2-4B6D-BBA2-573DCF0323AA.jpg
    66.4 KB · Views: 71
  • 01D710CD-F5C2-458B-9D1F-CAAA1A203932.jpg
    01D710CD-F5C2-458B-9D1F-CAAA1A203932.jpg
    37.8 KB · Views: 70
  • 1B3CF45D-9F89-457F-8C9E-F1F629FACA7E.jpg
    1B3CF45D-9F89-457F-8C9E-F1F629FACA7E.jpg
    44.1 KB · Views: 67
  • E53D061F-DCEF-4B68-97A9-38688F48FFCD.jpg
    E53D061F-DCEF-4B68-97A9-38688F48FFCD.jpg
    37.8 KB · Views: 66
Your die has some problems. Probably got used on dirty brass at some time. You might be able to polish it out. Take a 5/16" wood dowel and use a hacksaw to put a split down it. Put some 320 or 400 grit sandpaper in the split and use it to try to clean up the die. Then, take a piece of formed brass and drill and tap the primer pocket to 1/4 20 thread in a piece of threaded rod and put a nut up against the head to double nut it do it don't turn on the rod anymore. Use some valve lapping compound on the brass and try to polish the inside of the die. Good luck.

OR, you could try grinding say .05 off the bottom of the Redding die so uou can adjust it down just a bit farther and see if cases worked with it work
 
Thanks—it was driving me nuts and I stayed up until the wee hours doing research on the inter webs. There were numerous different methods described for restoring the inside of a dirty die, but the best news I found was that apparently RCBS will clean it out for free. I will phone them Monday and if it's possible, I will pop it in a box and send it to them, and hopefully it will be good as new when it returns?

I also plan to have a friend machine the bottom of my Redding die. It pays to have a backup plan.

It still remains to be seen if any of this brass will survive long term, or if I'm going to need to start all over again....

Thanks!
 
Update—I spoke with RCBS and they said they would make the die good as new again, for free, so it's in the mail to them now.

I also bit the bullet (so to speak) and bought more virgin brass. I will likely junk the first batch, all of which suffer from the striations that result in the cases splitting. An expensive lesson.

But damn, is this thing ever fun to shoot! Here is a still from a video a friend took. I hope to post the video on YouTube soon.
 

Attachments

  • D72424A1-91A3-44E5-90DA-26E9B74E35F8.jpg
    D72424A1-91A3-44E5-90DA-26E9B74E35F8.jpg
    48.1 KB · Views: 67
Last edited:
To late for the first batch of brass, but when I am doing something odd I always start with a small batch and make sure I have everything sorted out before I make up a bunch. That way if there is a problem you haven't got to redo a bunch f stuff or worse something like your problem.
Worked out for
22 Harvey K Chuck
30 and 357 Herret
making 77mag brass into 350 Remington mag
 
I got my die back from RCBS, good as new. Interestingly, it came with a handwritten note from the technician, along with a highlighted note buried in the instructions that are included with each die set. (See attached).

They both warn against the use of nickel cases, stating specifically that the problems I had which resulted in the loss and failure of so many cases are specifically caused BY those cases.

I quickly cancelled my order of new nickeled cases and changed it to Remington brass cases which should arrive on Monday. Following the advice above, I will form just a hundred cases and try them out this week.
 

Attachments

  • 80810CFC-4371-45A4-BD92-C6B883C4ACBC.jpg
    80810CFC-4371-45A4-BD92-C6B883C4ACBC.jpg
    87.3 KB · Views: 41
  • 0FEC9120-C041-4344-937B-EC4C3D43C944.jpg
    0FEC9120-C041-4344-937B-EC4C3D43C944.jpg
    36.3 KB · Views: 36
Okay, 300 cases formed with nary a scratch to be found. Imperial sizing wax is terrific stuff, and the reconditioned die worked perfectly with new Remington brass cases.

This leads to the question of what to do with all the loaded ammo I have with the scratched nickel cases. I fired a handful of those rounds the other day and as expected, suffered up to 50% case failure. I suspect the right thing to do is break out my bullet puller and recycle the bullets, rather than just continuing to shoot them. My thinking is that the cylinder is meant to cope with expanding brass cases, but not actual combustion gases.

Thoughts?
 
I just found this thread, and want to encourage you to continue posting your trials and tribulations with this somewhat unusual cartridge.

My thoughts on the splitting nickel cases - I would continue shooting them until gone.

Here's my reasoning;
The splitting cases are not necessarily detrimental to the revolver, or the cylinder. Both are handling the pressures just fine. A good scrubb8ing of the cylinder would put it back to original condition.
If you did deconstruct the loaded nickel cases, what would you do with them ? They aren't good for anything else.
Let's say you did break down the loads. What then ? You would reload the same powder (minus losses) and projectile in another case. Wasted effort.

If it were me, I would shoot the loaded nickel cases, and toss them all in the recycle bin, split or not.
 
I think I'd shoot them up, too, unless there is some reason to think they might not be safe. You can re-use the survivors and see how long they last. Nickeled revolver brass looks spiffy, but I find it's generally a nuisance, and certainly not something I'd try to reform - as the information with the die set says. Your new Remington brass should do just fine. If you get more splitting, you might anneal the neck ends of a small batch of the cases and see if that helps. It shouldn't be necessary.

As to machining your Redding die, I would be loathe to do that. It's usually best to modify the cheaper component, in this case, the shellholder. I'd take a few thousandths off the shellholder and keep it separate from others, with the Redding dies. If you have access to metal stamps, you can put an "x" after the number on the shellholder (x = experimental) to identify it.
 
Back
Top