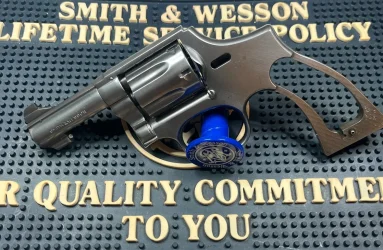
HomeSmith Custom Shop: The Junkyard Dog

Shotguncoach

Member
Joined
Jul 25, 2017
Messages
1,458
Reaction score
9,401
City & State/Province
Arizona
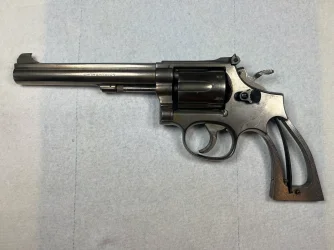
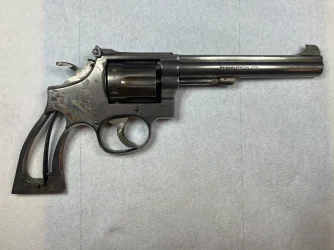
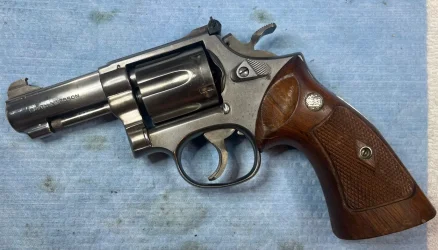
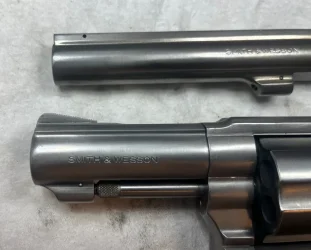
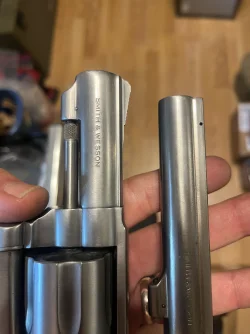
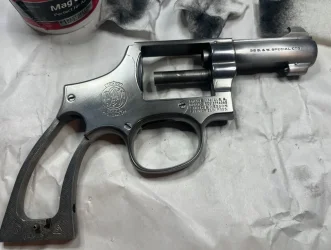
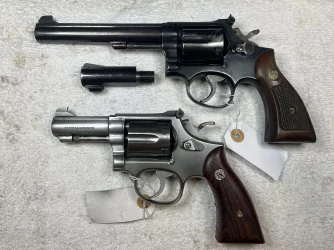
Ever since I got my Dayton/Hanen Special, I've wondered what it would be like to build a Model 14 with a 3" heavy barrel. A sad 14-4 was stumbling down the street and ended up at the Casa de Trainwreck, so let's jump down that rabbit hole and see what we find.

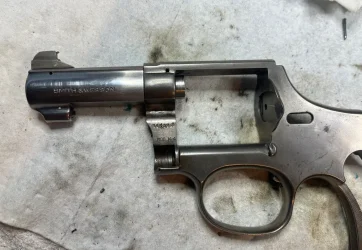
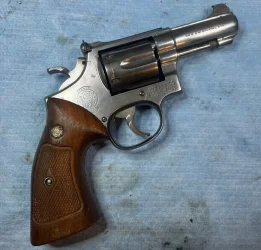
Here's our victim donor gun, a nickel finish Model 14-4 that has seen better days:

IMG_1473.webp

IMG_1474.webp

Welcome to Project Junkyard Dog.....
 
What you can't see from the 'before' pictures is that the action was gummy and sticky and just gross. The trigger pull felt like trying to drag a brick through wet cement.

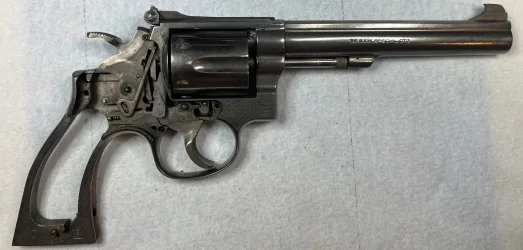
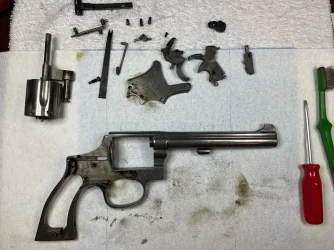
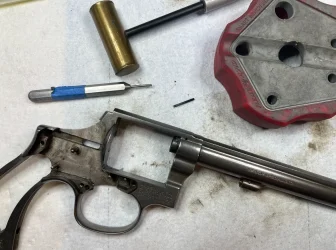
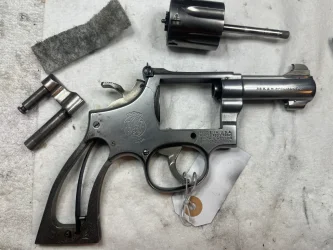
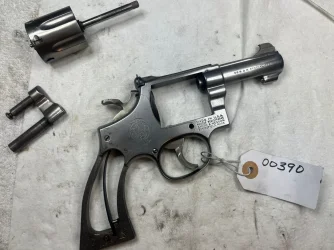
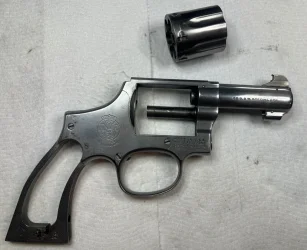
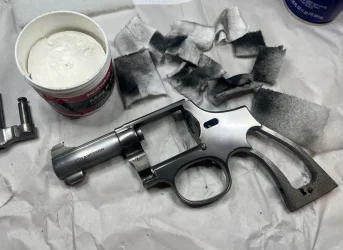
As always, our first step was to move all the insides to the outside. The guts of the gun weren't in bad shape....just neglected and filthy.

IMG_1476a.webp

IMG_1477a.webp

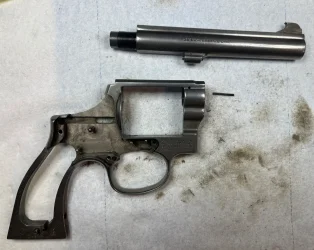
With our frame stripped, it was time to knock out the barrel pin and pop the barrel off the frame.

IMG_1478a.webp
IMG_1479a.webp
 
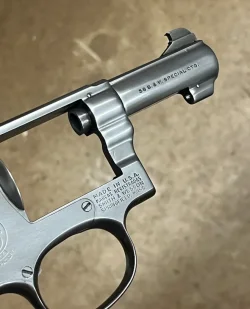
I've never liked the look of a shiny frame and a blued barrel, so stainless was the choice for our replacement barrel. I don't know how the nickel is going to recover or what the final finish of the frame will be (matte or shiny), but either way I'm confident that I can make the stainless barrel match however the frame ends up. I decided to go with a .38 Special barrel from a Model 64 instead of using one of my limited stock of .357 barrels from Model 65's just in case the project turned into a dead end.

I should have had more faith, but we'll get to that later. . .

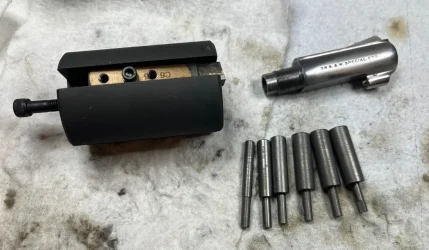
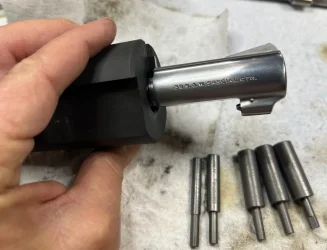
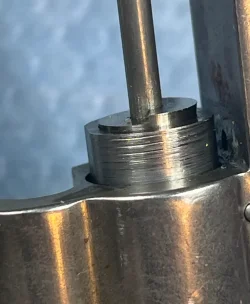
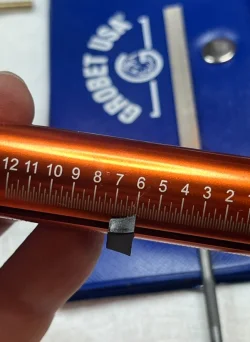
The barrel I chose would *almost* clock correctly, but needed to have just a bit of metal removed in order to clock in the right position. That gave me a chance to use this little jewel:

IMG_1493a.webp

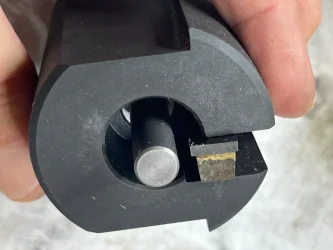
This is a Brownells Barrel Set Back Fixture. It is held in a vise and uses pilots to support the barrel, which is turned by hand to shave off tiny amounts of material. I don't think I'd enjoy taking off enough for a full turn on a barrel, but for the small amount that I needed in this project it worked like a charm.

IMG_1495a.webp

IMG_1496a.webp

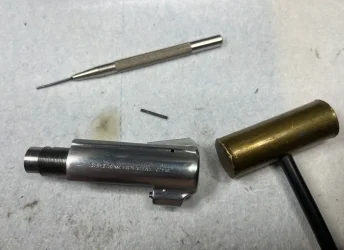
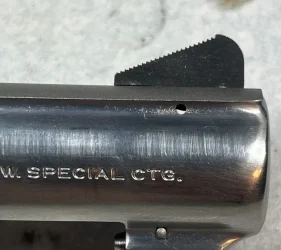
Before the barrel went onto the frame, there was one more task: making sure that the front sight would come off.

I had to use a magnifying visor to find the pin and a 1.2mm punch to drive it, but here we are:

IMG_1498a.webp

I know it appears that I'm hopping around a little bit, but there really was a method to the madness. I needed the front sight to be in place on the barrel to help index it to 12 o'clock as it was installed, but I wanted to make sure I was going to be able to remove the pin and the sight blade before I mounted the barrel. Once the barrel was mounted we came back to the bench, secured the frame in a vise, and set about removing the very well stuck front sight blade.

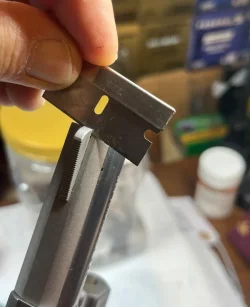
The blade was flush with the end of the barrel and a punch would just slip off, so I had to get creative. I very carefully and slowly tapped a razor blade into the crack between the sight blad and the barrel, which opened up just enough of a crack that I could get the tip of a small brass punch to catch.....and then out it came.

IMG_1501a.webp

IMG_1503a.webp

IMG_1506a.webp
 
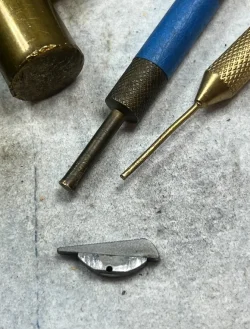
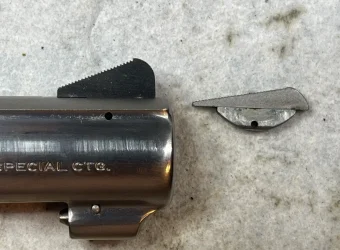
I had great plans about using a replacement front sight blade from Midway to increase the height enough to work with the adjustable sights on the Model 14 frame. Fate stepped in and threw me a hanging curve ball that I didn't expect, though. My new front sight blade was going to be great....

IMG_1507a.webp

.....until I discovered that the shank on the *bottom* of the blade was too short to reach the hole for the pin. Check the light showing through the pin hole:

IMG_1508a.webp


IMG_1509a.webp

On to plan B....

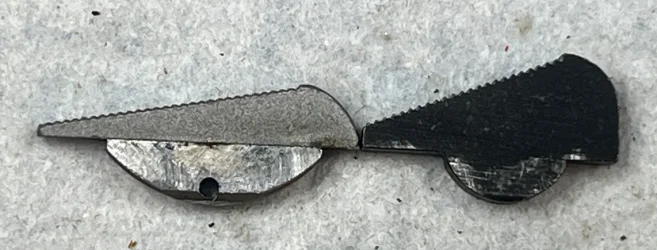
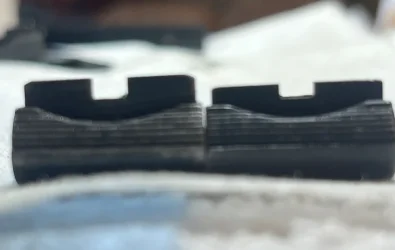
Plan B was to use the front sight from the original Model 14 barrel and to shave it down (or use a taller rear sight slide - or both) to get the point of impact correct. The blade and mini-ramp came out of the Model 14 barrel just fine - and then that curveball went the other direction.

The shank on the bottom of the Model 14 sight was deep enough to reach the pin hole, but the shank was too narrow. The Model 14 shank was .075" wide and the Model 64 shank was .125".

Joy.

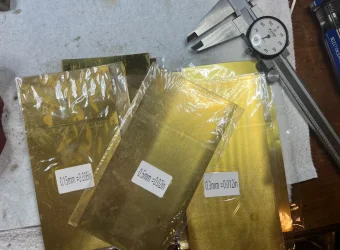
After a moment of wandering around the shop talking to myself, I remembered that making things wider is much easier than making things longer. I had wider-er stuff in one of the drawers...somewhere. The shop assistant helped me look and we finally located the shim stock in the bottom of a parts drawer in the garage:

IMG_1511a.webp

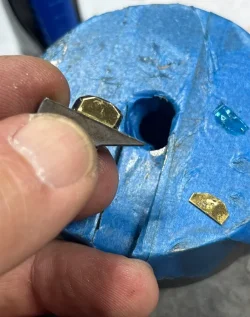
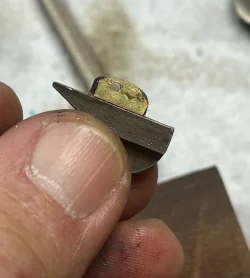
I needed to make up .050", so a sheet of .025" brass shim stock was used to create two itty bitty shims. I used a drop of super glue to hold them to the shank of the sight while I drilled the holes one side at a time.

IMG_1514a.webp

IMG_1517a.webp

The two shims worked perfectly and created a tight friction fit into the slot in the barrel. After this picture was taken I discovered that the left side shim was just slightly oversized and was preventing the sight from seating fully flush. A few minutes with a file fixed that.

IMG_1520a.webp

And of course I bent the front sight pin while I was installing it. After several tries at straightening the pin I gave up and just made a new one. The new one is slightly too long and will have to be fitted when we do the final finishing, but it works and holds everything together for now.
 
The big things were out of the way now, so we could move on to just regular gun fixing up stuff.

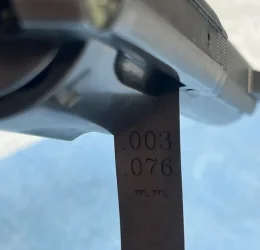
Our cylinder gap was a bit too tight:

IMG_1526a.webp

...and the forcing cone was way short:

IMG_1548a.webp


Those issues were both fixed to give us .006" of cylinder gap and a nice deep 11 degree forcing cone. The insides were cleaned and smoothed and moved back from the outside to the inside with two exceptions.

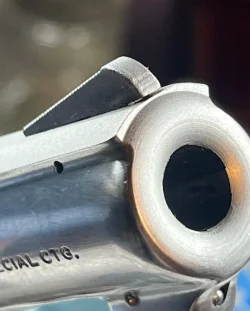
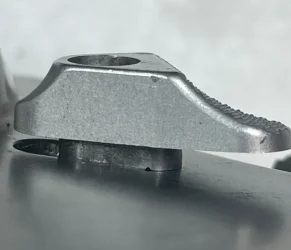
The first was the rear sight assembly. I was using a front sight from a 6" barrel on a 3" barrel, so I knew it was going to be a little bit high. The Model 64 barrel rib is just a slight bit shorter than the Model 14 rib, so that will make up some of the difference. I checked my Dayton gun and it has the same issue of the heavy barrel not quite sitting flush with the top of the frame. It's not off by much and is really something you would only notice if you were looking for it. Every little bit helps with sight height though, and in this case it was a good thing. To help on the other end, I replaced the rear sight with an assembly out of the spare parts drawer that had a much higher slide in it.

IMG_1550a.webp

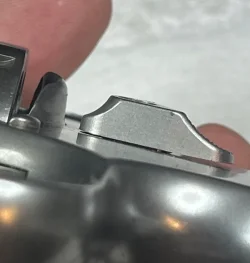
The second was a little bit of a vanity piece: the cylinder release was replaced with a teardrop release from a later model gun....'cuz it's mine and I like it that way.

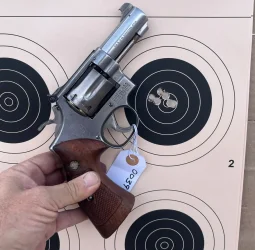
A set of nasty old stocks where thrown on and it was time to go to the range and find out if the Junkyard Dog had any potential at all...

IMG_1551a.webp

IMG_1552a.webp


It turned out that I guessed pretty darn well on the sights:

IMG_1575a.webp

In fact, I can probably go with a lower rear sight slide because this group was shot with the rear sight bottomed out in the lowest position.

I'm going to have to drink about this for a little bit to decide where I want to go to next. The front sight is cut for an insert that is currently awol, but it's also been bent slightly at the top of the cutout for the insert. If I can straighten that and cast a new insert I'll be happy....but I would also be happy reshaping the front sight into a ramp. I also need to see what can be done about the aged nickel finish. I'll use the barrel as a test piece to see how it will come back so that I can prep the stainless barrel to match. Lastly, I need to replace the trigger if this is going to be a long term affair - I much prefer a narrow, smooth trigger to the wide, grooved target trigger that is in the gun now. Then I have to figure out what kind of wood to put on it.

Stay tuned for more on this one.......
 
Dude, one of these days I'm gonna have to get you to build me SOMETHING....just what I have no clue and probably no money either but what the heck I always liked to figure things out as I went along. I just never wrote about it the way you do but I sure do enjoy your write ups and your stuff is pretty awesome :)

Tom
 
Dude, one of these days I'm gonna have to get you to build me SOMETHING....just what I have no clue and probably no money either but what the heck I always liked to figure things out as I went along. I just never wrote about it the way you do but I sure do enjoy your write ups and your stuff is pretty awesome :)

Tom


Same…… I’ve got a 29-3 8 3/8” that is begging for a 3” or 4” barrel
 
I spent some quality time with the Junkyard Dog tonight - mostly cleaning but I learned something very important that I'm going to have to review on all my other work and everything I do going forward. More on that in a moment....

The majority of the time was spent with a piece of white scotchbrite and WD-40 just cleaning the accumulated mung and light rust off of the frame. The scotchbrite pad was clean when I started....

IMG_1586a.webp
IMG_1589a.webp

I also did some experimenting with the barrel to see what would happen if I cleaned it with the white scotchbrite/WD-40 combo, then did a WD-40 lubricated power burnish on it using a carding wheel. I only worked on the first two inches from the muzzle on the left side of the barrel so that I would have a before and after. Here's how the burnished nickle compares to burnished stainless steel on a different gun:

IMG_1588a.webp
IMG_1598.webp


I think that's close enough. I'm going to strip the frame down and do a thorough cleaning on it with the white scotchbrite and WD-40, then run the barrel through 6 or 7 grades of scotchbrite to smooth it out, then burnish the entire thing.

If that doesn't work out, the backup plan is a soft rag, a can of Mother's polish, and a movie....by the end of the movie the whole thing will be a mirror.

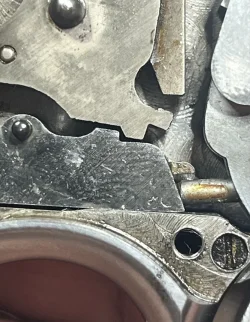
It was when I was putting the gun back together for storage that I learned "the big thing". When reassembling a gun, I've always put the thumbpiece back onto the bolt right after I install the bolt and before installing the hammer. The sideplate is always off and the yoke/cylinder are sitting on the bench - which means the bolt is in the forward position. The thumbpiece always just drops right on...
IMG_1592a.webp

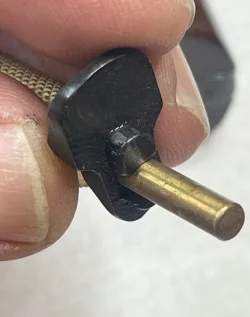
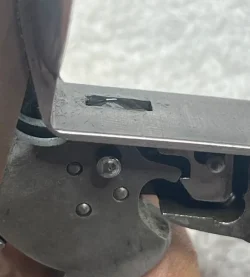
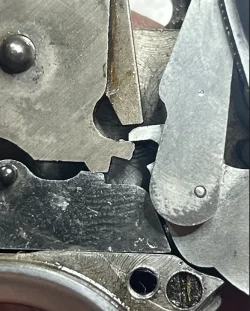
Tonight, I had the cylinder in place and closed when I went to put the thumbpiece on, which meant the bolt was in the rear position. And the thumbpiece didn't fit.

IMG_1594a.webp

This meant that the thumbpiece has been holding the bolt slightly forward and applying extra pressure on the center pin.

But does that make a difference? By my scale, it makes about 10 ounces of difference in the double action pull. I measured the double action pull on the Dog by resting the butt on the bench and cycling the trigger through the double action pull 6 times without resetting the gauge. The final result is the highest pull weight going all the way around.

Without the thumbpiece installed:

IMG_1596a.webp


With the thumbpiece installed and the bolt dragging on the center pin:

IMG_1597a.webp


And this is how the list of things to do during a trigger job gets longer.....
 
This is why some people remove the spring and plunger in the rear of the bolt. They think that is causing this problem. It is not. Shotguncoach properly diagnosed the situation. The spring in the bolt is so weak that it has no discernible effect. The spring on the center pin is way bigger and stronger and is the real culprit. There are 2 ways to cure the problem.

1- You can file the stem of the thumblatch to allow it to go back further so it's not compressing the center pin spring. I like to make it where there is a little front to back play in the thumpiece, rather than just barely enough.

2- You can shorten the back of the center pin so it doesn't push on the bolt. I don't like doing that because it reduces the amount of engagement of the center pin in the frame. You do want to make sure the center pin has enough radius on the end to keep it from scraping metal off of the recoil shield during closing of the cylinder. Some pins have only a very shallow radius and a sharp edge where the radius ends.
 
Last edited:
Productive night at the bench tonight. The first task was fitting the thumbpiece for the Dog...

A safe-sided #2 file was the weapon of choice

IMG_1601a.webp

A punch was put through the hole in the thumbpiece to support it while I worked. It took more time to gather the tools and take pictures than it did to do the actual work.

IMG_1602a.webp

IMG_1603a.webp

The modified thumbpiece restored our 6 pound DA pull

IMG_1605a.webp

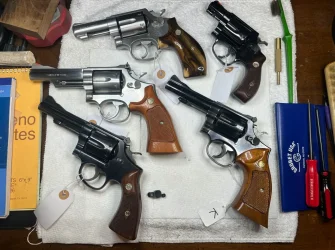
Once the Dog was done, I went through all the guns in the 'working on it' drawer and checked all of them for the same issue. The only one that needed help was the 5-screw Combat Masterpiece in the lower left.

IMG_1606a.webp

That one was polite enough to have rub marks that showed me exactly where to file

IMG_1607a.webp


Once the Thumbpiece Interregnum had been successfully handled, the Dog was stripped down to the frame, yoke, and cylinder for some finish work. All the inside pieces that were now outside pieces went into an old cashew container for safe keeping.

IMG_1609a.webp

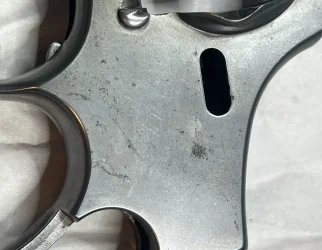
The stainless barrel got a rub down with WD-40 and 6 different grits of scotchbrite. The frame, yoke, and cylinder all *started* by being deep cleaned with white scotchbrite and WD-40 but that wasn't removing the dark spots of corrosion in the nickel.

IMG_1612a.webp
IMG_1614a.webp


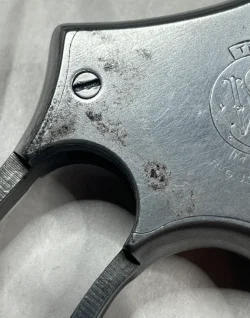
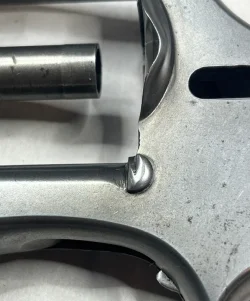
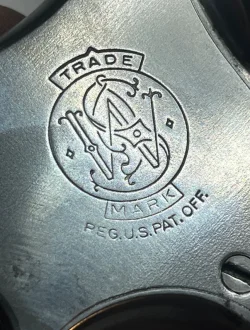
It appears that I'm not the first one to refinish this gun....the cylinder retaining stud has a very definite power buffer roundness to it, and the logo in the sideplate is much thinner in the lower left corner where someone leaned on the buffer too hard. This is precisely why I avoid using power tools for finishing whenever possible.

IMG_1615a.webp

IMG_1616a.webp
 
Once it became apparent that just scotchbrite and WD-40 was not going to be enough, I stepped up to Mothers Mag Wheel Polish applied using the white scotchbrite and then removed with cotton patches. I was going to have to make the Dog shiny in order to get the satin finish that I wanted...

IMG_1617a.webp

IMG_1619a.webp

When the nickel portions were nice and shiny and most of the dark spots were gone, we headed out to the garage for a WD-40 burnish using an old worn out carding wheel.

The color match between the stainless barrel and the nickel frame came out pretty well....

IMG_1624a.webp


So here is how the Dog looks at the moment. Tomorrow we'll work on getting a narrow trigger fitted so that it works properly and start smoothing and reshaping the trigger to the way I like it. More to come...

IMG_1629a.webp
IMG_1627a.webp
 
The big things were out of the way now, so we could move on to just regular gun fixing up stuff.

Our cylinder gap was a bit too tight:

View attachment 895143

...and the forcing cone was way short:

View attachment 895144


Those issues were both fixed to give us .006" of cylinder gap and a nice deep 11 degree forcing cone. The insides were cleaned and smoothed and moved back from the outside to the inside with two exceptions.

The first was the rear sight assembly. I was using a front sight from a 6" barrel on a 3" barrel, so I knew it was going to be a little bit high. The Model 64 barrel rib is just a slight bit shorter than the Model 14 rib, so that will make up some of the difference. I checked my Dayton gun and it has the same issue of the heavy barrel not quite sitting flush with the top of the frame. It's not off by much and is really something you would only notice if you were looking for it. Every little bit helps with sight height though, and in this case it was a good thing. To help on the other end, I replaced the rear sight with an assembly out of the spare parts drawer that had a much higher slide in it.

View attachment 895146

The second was a little bit of a vanity piece: the cylinder release was replaced with a teardrop release from a later model gun....'cuz it's mine and I like it that way.

A set of nasty old stocks where thrown on and it was time to go to the range and find out if the Junkyard Dog had any potential at all...

View attachment 895147

View attachment 895148


It turned out that I guessed pretty darn well on the sights:

View attachment 895149

In fact, I can probably go with a lower rear sight slide because this group was shot with the rear sight bottomed out in the lowest position.

I'm going to have to drink about this for a little bit to decide where I want to go to next. The front sight is cut for an insert that is currently awol, but it's also been bent slightly at the top of the cutout for the insert. If I can straighten that and cast a new insert I'll be happy....but I would also be happy reshaping the front sight into a ramp. I also need to see what can be done about the aged nickel finish. I'll use the barrel as a test piece to see how it will come back so that I can prep the stainless barrel to match. Lastly, I need to replace the trigger if this is going to be a long term affair - I much prefer a narrow, smooth trigger to the wide, grooved target trigger that is in the gun now. Then I have to figure out what kind of wood to put on it.

Stay tuned for more on this one.......
Niiice.
 
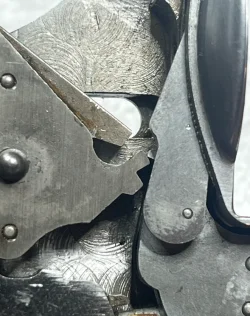
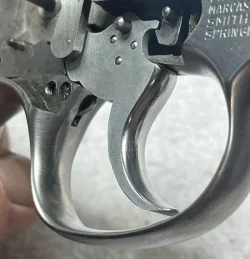
Last night was all about triggers. The big, grooved target trigger looks nice but for me what it really does is amplify any slight difference in finger placement and makes it absolutely crucial that I press straight back on the trigger. That does help me focus when shooting bullseye-style, but for fast double action work a narrow and smooth trigger works much better for me. Your mileage may vary.

After digging through the pile for some suitable candidates and with the emotional support llama looking over my shoulder, the clearance checks began. The first candidate was rejected because it wouldn't engage the single action sear. The second candidate looked much better....

The cylinder stop withdrew fully and at the correct time.....

IMG_1635a.webp

Clearance between the hammer and rebound slide at full-drop on the hammer were good....

IMG_1636a.webp

Clearance between the trigger bevel and the double action sear was good...

IMG_1637a.webp

Engagement with the single action sear was good with no push off....

IMG_1639a.webp

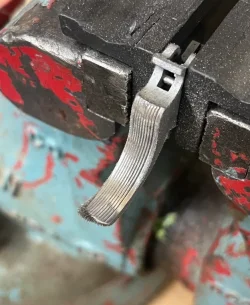
With our new trigger in hand, we set off for the garage where the Rotary Tool of Destruction was used to turn this:

IMG_1641a.webp

....into this:

IMG_1644a.webp

This operation is really the only thing that I use a Dremel for. As usual, it looked good in the garage but when it was mounted into the gun I found a couple of lines that still needed to be removed. I'll clean those up the next time I have the gun apart.

The new trigger also required a hand swap, which gave me a chance to switch from a .094" hand to one that measured .095" and moved the timing up just a little bit. The timing had been ok before, but it was right at the end of the stroke and I like to have it just a touch earlier when I can.

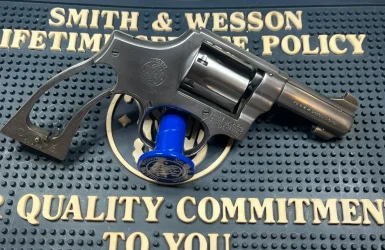
After a whole lot of clicky-clicky to test the action and the feel of the new trigger, the rest of the parts were remantled (the opposite of dismantled) and a set of PC magna stocks from our forum-friend Vitoon were mounted.

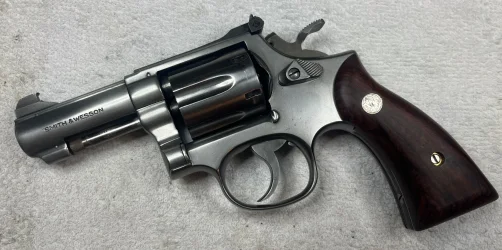
Here is how the Dog looks at the moment:

IMG_1645a.webp
IMG_1646a.webp


Next steps are going to be doing something with that giant hook on the front sight where the insert used to be.

More to come....
 
W O W !! This project is the inspiration I've been looking for. I picked up a nice Model 60 no dash at my local pawn shop and serviced it. Fine...but not for long. I wanted a bobbed hammer. Found one on 'Bay but when I received it, I found out it is an old model with the socket in the hammer. Finally, I found an old spring and strut assy on Numrich and took a chance. Fit perfectly and works reliably. I will probably blend the spur bottom into the hammer a little better in the future, but with the Fitz grips, I'm a happy camper. Thanks for giving this rookie some new horizons. (y)
 

Attachments

  • snub.webp
    snub.webp
    339.2 KB
I spent some quality time with the Junkyard Dog tonight - mostly cleaning but I learned something very important that I'm going to have to review on all my other work and everything I do going forward. More on that in a moment....

The majority of the time was spent with a piece of white scotchbrite and WD-40 just cleaning the accumulated mung and light rust off of the frame. The scotchbrite pad was clean when I started....

View attachment 895483
View attachment 895484

I also did some experimenting with the barrel to see what would happen if I cleaned it with the white scotchbrite/WD-40 combo, then did a WD-40 lubricated power burnish on it using a carding wheel. I only worked on the first two inches from the muzzle on the left side of the barrel so that I would have a before and after. Here's how the burnished nickle compares to burnished stainless steel on a different gun:

View attachment 895485
View attachment 895486


I think that's close enough. I'm going to strip the frame down and do a thorough cleaning on it with the white scotchbrite and WD-40, then run the barrel through 6 or 7 grades of scotchbrite to smooth it out, then burnish the entire thing.

If that doesn't work out, the backup plan is a soft rag, a can of Mother's polish, and a movie....by the end of the movie the whole thing will be a mirror.

It was when I was putting the gun back together for storage that I learned "the big thing". When reassembling a gun, I've always put the thumbpiece back onto the bolt right after I install the bolt and before installing the hammer. The sideplate is always off and the yoke/cylinder are sitting on the bench - which means the bolt is in the forward position. The thumbpiece always just drops right on...
View attachment 895487

Tonight, I had the cylinder in place and closed when I went to put the thumbpiece on, which meant the bolt was in the rear position. And the thumbpiece didn't fit.

View attachment 895488

This meant that the thumbpiece has been holding the bolt slightly forward and applying extra pressure on the center pin.

But does that make a difference? By my scale, it makes about 10 ounces of difference in the double action pull. I measured the double action pull on the Dog by resting the butt on the bench and cycling the trigger through the double action pull 6 times without resetting the gauge. The final result is the highest pull weight going all the way around.

Without the thumbpiece installed:

View attachment 895489


With the thumbpiece installed and the bolt dragging on the center pin:

View attachment 895490


And this is how the list of things to do during a trigger job gets longer.....
The gun looks great. I like 3" barrels. Good length for a edc gun. It carrys like a 2" but shoots like a 4".
 
... but with the Fitz grips, I'm a happy camper.....
I'd like to see a photo of the other side of your j-frame.
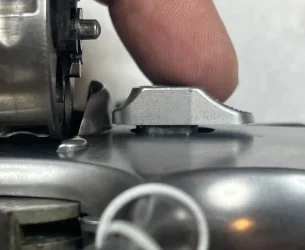
I used to have a set of j-frame Fitz gun fighter (model G-S) grips like that,
don't know why they were build that way,
but the LH grip needed a notch to clear the ejector button.
Curious if yours do too.
Fitz gunfigher grips, model G-S.webp

Also had a set of Fitz gun fighters (model G-F) wood-tone plastic grips,
they also needed a notch but not as big.
Fitz gunfighter grips, model G-F.webp

Foolishly sold them both off on this forum many years ago, also sold off the 3" model 36.
I wish I'd kept them all.
They were cool, plus they handled pretty well--
IMHO probably the best handling j-frame grips until the Spegel boot grips came along.
 
I'd like to see a photo of the other side of your j-frame.
I used to have a set of j-frame Fitz gun fighter (model G-S) grips like that,
don't know why they were build that way,
but the LH grip needed a notch to clear the ejector button.
Curious if yours do too.
View attachment 896836

Also had a set of Fitz gun fighters (model G-F) wood-tone plastic grips,
they also needed a notch but not as big.
View attachment 896837

Foolishly sold them both off on this forum many years ago, also sold off the 3" model 36.
I wish I'd kept them all.
They were cool, plus they handled pretty well--
IMHO probably the best handling j-frame grips until the Spegel boot grips came along.
I now have both the stag and GF grips. Both clear the thumb-latch...just barely. I like the GF grips better. Today. Check back with me next week.
:cool:
 
Back
Top