Brass deposit form vertical lines on Dillon powder funnel

One trick is to add car wash n' wax to the cleaning soup. Leaves a film of wax on the cases.

I have been loading new brass recently but my wet cleaning method has been using auto wash and wax. I tried this on some new brass and ran a few through my SDB after cleaning the funnel. I had brass build up and resistance build up fairly quickly. I was using Turtle Wax Zip. It just didn't seem to leave enough wax on the brass. Maybe you have a different product that works better. The actual case lubes do work well but if they cause other problems, then that needs to be addressed. Maybe your crimp needs to set tighter if the bullets move too easily.

When lubing cases for actual production, I put the cases mouth up in a case tray. I followed Hornady's instructions and sprayed at a 45degree angle and from all fours sides so lube got on the inside and outside. Dillon does recommend wiping the outside or dry tumbling after the rounds are done. They also claim that neither Lanolin, their synthetic lube, or One Shot affect powder burn in any way.
 
Usually the vertical lines are caused by the swaging die
when the brass is made. Many times the die is worn.
That wear is transferred to the shell case as a thickening
of the case wall. When you run the sized case up the
powder funnel, that "thick" part abrades off and you see
a vertical line on the funnel.

As has been stated, this "is what it is". You could minimize
this by polishing the inside of each case. Precision shooters
use neck turning dies to minimize the thick parts of the
necks on their rifle brass which minimizes runout and helps
increase accuracy. Same idea but doing it on the outside
vs inside of the shell case. I don't worry about it but know
the OCD cool kids do. I just make sure my brass is clean
so it doesn't score my reloading dies.
 
Last edited:
Many years ago when I started reloading revolver rounds(44mag) I used the standard reaming tool on the cases. Just a quick turn of the case and I never had any problems with the caliber. Only one I ever had any problem with has been the 38/357 rounds. I even used a file trim die on 41 44 45 Colt cases so that is why I reamed the cases. Even back then I found Winchester cases in those calibers to not be consistent. 38/357 was just too much bother to do the trim/ream. I never loaded much heavy loads in the smaller caliber to need to ream. I started loading pistol rounds using hand tools...mostly Tong tools. The file trim die for 44 was a RCBS that you just held and filed. Still got that sucker too.
 
I used the standard reaming tool on the cases. Just a quick turn of the case and I never had any problems with the caliber.

I tried reaming some cases and that alone was not enough. It may be that your flaring die is different than the one on an SDB. The Dillon powder funnels have an extended neck below the flaring section. It is a rather tight fit on the case ID. It is the neck where the deposits build up, not on the flare. I assume Dillon's design is to round the ID after sizing. It also has the effect of delivering the powder below where the bullet goes for the most part. You can see the logic of this when folks claim they don't like lube because powder sticks near the mouth. With the Dillon design that issue is minimized. I was watching for this when I started using lube last week.
 
Usually the vertical lines are caused by the swaging die
when the brass is made. Many times the die is worn.
That wear is transferred to the shell case as a thickening
of the case wall. When you run the sized case up the
powder funnel, that "thick" part abrades off and you see
a vertical line on the funnel.

How would this result in evenly spaced vertical lines? In my experience, it builds up over time. Each ridged case would have to be precisely lined up on the expander funnel when processed. I don't see how that can happen as each case is expanded. Perhaps I'm missing something . . . .
 
Last edited:
Each ridged case would have to be precisely lined up on the expander funnel when processed. I don't see how that can happen as each case is expanded. Perhaps I'm missing something . . . .

You aren't missing anything. The build up is from metal to metal contact. Even though the funnel is harder than the case brass is still abrasive... Rubs off...and continues to do so round after round. Do an experiment..clean the funnel take the wet tumbled brass and run it in a dry tumbler with corn cob media with polish in it...just a 1/2 hour or 45 mins. I think you will find most of the buildup on the funnel won't happen as it has been. I do it..in fact that's all I use corn cob media for to be honest. I typically use lizard litter for most dry tumbling... Cheap but gets blackened pretty quickly

Just happened to remember... Way back when I started shotshell reloading the wad fingers on the Mec loaders were brass yeah I'm old but I remember the metal powder/shot drop tube got buildups on it all the time. Left streaks on it. Wore the wad fingers out fairly quickly
.
 
Last edited:
I apply a light daub of case lube to the powder funnel, every 25 to 50, rounds when it seems to stiffen on the backside of the stroke. It's mostly a problem with new brass. With a semi-auto pistol, there doesn't seem to be much old brass.
 
Try a new powder funnel from Dillon . Never had that problem with the 10 or so I have even with new brass
 
I am looking to see if anyone here understands why brass deposit form evenly spaced vertical line around the end of a Dillion powder funnel.

background: I have been using a Dillon SDB for a few months now. I was loading 45 ACP using new brass and I started to feel substantial resistance on the upstroke. I tracked it down to stage 2. I called Dillon and they explained that new brass or overly cleaned brass will leave deposits on the funnel and there is also galling that occurs. They suggested polishing the end of the funnel and using case lube. I am working on those things. I did some Google searching and I am not the first person to run into this. Seems to be a pretty well known problem.

But I have a specific question here. Does anyone understand why the brass deposits form evenly spaced vertical lines? Makes me think the machining process somehow leaves ridges around the part.

Chuck it up in a drill press and polish it. That's what I do for mine.
 
Yeah, I have three powder funnels. I was mostly working with my 45ACP one but today I looked at my 9mm and 357Mag powder funnels. Hate to say it but the finish on then as they come from Dillon isn't that great. OK, I do have a stereo microscope to look at these things but the parts have very obvious machining grooves. I guess it's all about cost but if you ask Dillon about this problem, they tell you to polish the ends. If this part needs to be polished to function normally, then maybe Dillon should supply them polished.

I am getting better at this polishing business but I have had to buy a fair amount of stuff. The machining grooves need to be removed with sandpaper. Then one can polish them.
 
The focus has been on Dillon powder funnels. I've also seen this on some of the expander plugs on some of my other brand die sets. Not to implicate RCBS, but that what most of mine are. It shows up on 44 Special and 45 ACP plugs.

I note there circumferential machining ridges on the plugs most affected. One can easily feel the brass ridges as they develop. I remove the brass ridges with steel wool and Hoppe's only to have them re-appear. I have not polished the affected expander plugs.

As for the mechanism, I can only guess that the machining marks scrape off brass and it migrates to a brass ridge. The ridge itself can't scrape off more brass, but the clear "furrows" can because they're bare steel. The debris from the scraped off areas lands on the ridges where is can't be scraped off. This causes the increasing buildup. Again, this is mere guesswork on my part.
 
The focus has been on Dillon powder funnels. I've also seen this on some of the expander plugs on some of my other brand die sets.

Yes I am pretty sure I have felt the galling on my various manual dies. In fact, I posted a thread about it some time ago. I don't think anyone mentioned galling at that time but I have definitely felt resistance with cases coming out out my manual dies. I can't say which ones at the moment but no doubt its the same thing. They need polishing and lube also.

I think the bigger calibers (like 45ACP) are just more noticeable because there is more surface area involved.

I know I started this thread to see if there was a good physical explanation for why the deposit form equally spaced vertical line but at this point, I am more focused on the most efficient way to get them polished. I tried the compound bars yesterday and they are rather messy. You pretty much need to use a spinning tool (buffing wheel) to use the industrial polishing bars and the wheel tends to throw bits of the compound around. The retail polishing products in tubes like Blue Magic and Flitz, work fairly well if you spin the part and apply the polish with a stationary pad. The bar compound need a spinning tool to apply and I think its good to spin the part as well (double spinning). At this point I have a mini lathe and a drill press that can both spin the part. I have been using a Dremel to spin various polishing applicators (mostly foam type so far).
 
I polish stuff with my lathe using fine steel Wool with polshing compound. I used to use the old DuPont auto polish.. But haven't looked for it for years.When done I use a little wax on it too. Won't last long but still helps. Same thing happens to the expander plug on RCBS and other dies. Most of us don't notice on Single Stage presses
 
photo of polished funnel

I got my microscope camera running. I think my setup is literally 10 years old but I found the CD with the software and it actually runs on my modern day computer. This photo is my 9mm funnel. It is so shiny, that it was difficult to light it. The bright oval is the reflection of an LED ring-light on the scope. The metal on the far right is what it looked like before polishing. With the light turned up like this, you can see the degree of scratches still remaining. It is a mirror finish but far from perfect.

I used this process. I spun the part in a drill press. I removed the machining marks with 400,600, and then 800 emery paper. Then I used Osborn compound bars: Black (400 micron), White(2mircon) and then Green (1micron). The micron grit sizes are from the McMaster Catalog. The companies that make these compounds do not post the grit sizes and there websites so the micron numbers are not verified yet. Emails asking for more detailed info have so far been unanswered. The compounds I applied with felt wheels on a Dremel. I tried Flitz after the Green compound and that seemed to be less shiny. That makes sense because folks online seem to thing Flitz is about 4 microns. I am trying to get an even finer compound. We'll see how that goes.

Just FYI, 400,600, 800 emery, followed by Blue Magic and then Flitz looks pretty good to the naked eye and probably just fine for actual use. The Blue magic and Flitz, I simply put on a microfiber pad and held that against the spinning funnel. The compounds are a lot messier because they tend to fling off the Dremel felt wheel.

Yes, I kind of got obsessive about this polishing business.

attachment.php
 

Attachments

  • Dillon 9mm funnel polished #3.jpg
    Dillon 9mm funnel polished #3.jpg
    65.5 KB · Views: 110
I am assuming you guys have a chuck larger than 1/2"? These funnels won't fit in my drill press or mini lathe.

Rosewood
 
My lathes will handle 10 inch stock. Chuck a small felt wheel in your mini lathe. Polish with it
 
Well still no actual explanation why the deposits are vertical. But I have followed Dillon's advice and my SDB is running so much smoother now.

Polish the funnel
Lube the brass

I like to try different things because I am approaching this as a hobby. So far for lube, I have tried DIY 10% Lanolin in HEET gas treatment (red bottle) and Hornady One Shot Spray. They both seemed to work about the same. Zero hang-ups but still a small amount of brass transfer after 100 rounds. I also have some of Dillon's newer synthetic lube which I will try next.

I found one thing with making the DIY stuff. Ultimate Reloading has a video showing the making of DIY Lanolin lube. He shows using 99% Isopropyl Alcohol. I tried that and I found it didn't easily dissolve the Lanolin. You end up with more of a suspension that settles out after a while. I saw a lot of references in forums to using red bottle HEET which is easily obtained at any automotive store. I got mine at Auto Zone for like 3 buck a bottle. That stuff is also 99% IPA but according to its SDS, it contains 1% proprietary something. It readily dissolves the Lanolin for an actual solution. I am guessing its Ether which is listed as a solvent for Lanolin. In any event, it's easy to get and works well.

Polishing is easier said than done. Folks throw around a lot of product names. But all of the retail metal polishes have undisclosed grit size. Or you have at least have to dig to find them. I never tried to polish steel before so it was a new thing for me. I had polished epoxy surfboards before but they polish like car paint so you can use car paint products. Steel needs different products.

I had a tube of Blue Magic which was actually suggested here in another thread to remove carbon from a revolver cylinder. I bought it for that but never used it. With some digging, it turns out that Blue Magic has 400 grit which about 40 microns. That sounded course but with the right pad, it gives a pretty much mirror polish.

Also widely mentioned is Flitz. With some digging, it turns out that Flitz has 4000 grit or about 5 micros. So one approach would be to polish first with Blue Magic and then with Flitz.

With things like polishing, I would prefer to use technically specified products where the grit size is clearly stated. McMaster has such products in the form of hard bars. They suggest a two step process. First with 40 micron and then a "coloring" polish with 5 down to as small as 1 micron. So that is basically the same as Blue magic followed by Flitz. I ordered some of their compounds and will be trying them as time permits.

I happen to have a stereo microscope so as I polish I can check what is actually going on.

I do understand that dry tumbling may not have as much of this issue but that may not help with new brass which is what I am now using.
I use a combination of 90% isopropyl alcohol (it is actually a gasoline additive) and 10% pure lanolin. It mixes very well and stays in solution. I put it in a glass spray bottle. It works as well as Lyman spray on lube and is far, far less expensive.
 
I used yo polish small items with felt wheels on my Unimat lathe. made firing pins and small items with it too. Handy little tools. I have also made lube. Can be cheap...but just easier to get a bottle or can of spray lube. I use it on pistol brass and a can or bottle lasts a long time. I use Imperial Die wax on rifle stuff. BTW I have at least 3 bottles of Dillon spray lube and Hornady I got t yard/estate sales...for next to free...
 
Last edited:
I am assuming you guys have a chuck larger than 1/2"? These funnels won't fit in my drill press or mini lathe.

Rosewood

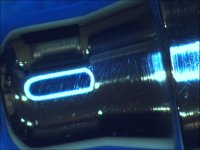
Yes I ran into this issue right away as the funnels are like .550 dia. There are a range of solutions.

Uniquetek makes an adapter just for this issue. I bought one and have it on hand but have not tried yet. So I don't know how true it will spin the funnel or if the set screw will gouge the part.
https://uniquetek.com/product/T1758

My first idea was to find a chuck that would adapt down. This turned out to be harder than I thought. Most 5/8" chucks have taper shanks of one kind or another. Like a lot of things these days, I found something on Amazon.
[ame]https://www.amazon.com/dp/B0811LYG8V?psc=1&ref=ppx_yo2ov_dt_b_product_details[/ame]

I used this in my handheld Makita. It worked but had a fair amount of wobble. I complained to the maker and they sent me another one. I have not tried the new one it to see if it runs truer.

Ultimately, I bought myself a drill press. I've wanted one for a long time and this kicked me over the edge. I bought the WEN model that is very popular on Amazon and the clincher was that they also offer a chuck upgrade that is keyless and goes to 5/8". So this is my current setup:
[ame]https://www.amazon.com/dp/B08ZVT5JKC?psc=1&ref=ppx_yo2ov_dt_b_product_details[/ame]
and
[ame]https://www.amazon.com/dp/B08R7V5B19?psc=1&ref=ppx_yo2ov_dt_b_product_details[/ame]

The chuck has a JT33 taper so if you already have a drill press with a JT33 taper, you can just buy the chuck. However, getting your old JT33 chuck off may not be so easy. The right way to do it is with a pair of tapers like these:
[ame]https://www.amazon.com/dp/B07HHJLBLG?ref=ppx_yo2ov_dt_b_product_details&th=1[/ame]
Thankfully, my WEN press came without the stock, 1/2" chuck not mounted. So I just installed the bigger chuck from the start.

Finally, a lathe is a go way to go because I like the horizontal orientation of the part. The Proxxon mini-lathe chucks up to 2.5 inches (but is a bit pricey). The funnel doesn't go through the center-hole in the chuck but it spins very nicely with the amount it does grab. You could use the live center to hold the other end if you wanted to press harder.
[ame]https://www.amazon.com/PROXXON-Precision-lathe-150-34150/dp/B0821LB28J/ref=sr_1_3?crid=7VJN2ZNTTC0K&keywords=proxxon+lathe&qid=1682003189&sprefix=proxxon+lathe%2Caps%2C149&sr=8-3[/ame]
 

Latest posts

Back
Top