OP
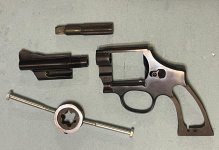
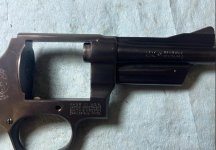
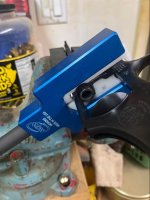
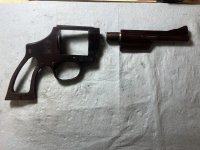
My plan all along had been to use hardwood blocks to make a set of barrel jaws that could be clamped into my vise. The idea was to drill an oversized hole lengthwise through the blocks and then use action bedding epoxy to bed half of the barrel into each block. The barrel that was coming off was trash (I'll harvest the front sight and front ejector rod retaining pieces later) so I didn't care about it and decided to see how well the $6 grooved soft jaws from Amazon would work. They were perfect.  I arranged the jaws so that the flat side was up and the sideways V shaped groove was the clamping surface, then positioned the barrel so that the major taper near the frame was outside of the clamping area. The vise was tightened using the "star torque" method: pull on the handle until you see stars and it's tight enough.
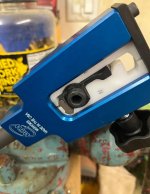
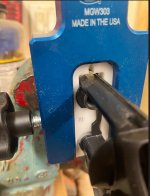
Test fitting the wrench jaws led to to the single longest task of the entire operation: fitting the assembled jaws and frame to the wrench body. I don't know why I thought it would all just fit together. My life doesn't work that way.
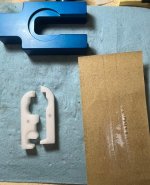
Looking back now, it's a good idea. The aluminum wrench and the delrin (I think) inserts are made separately and the work required to make matched sets would drive the price up exponentially. It's much cheaper to make the inserts oversized and let each individual user fit their own. I don't recall anyone mentioning that the inserts had to be fitted in any of the reviews or articles I've read, but I can understand why. If you're confident enough to remove/install revolver barrels you'd darn well better be able to fit a couple of inserts into a wrench.
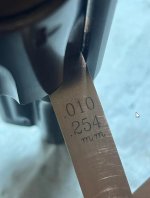
Twenty minutes and 87 test fits later I had what I considered a perfectly fit set of jaws. Using sandpaper and a sanding block I removed material from the outer edge of the jaws where they touched the wrench surface. Each test fit provided a scratch shelf that gave me an idea of how much more material needed to be removed. When the calibrated fingernail told me I was almost there I switched from 80 grit sandpaper to progressively finer grits. I ended up using 80 grit for most of the removal then a progression of 100, 120, 150, 180, and 220 grit for the final fit. The end result required using some body weight to fit the wrench body over the frame and inserts.
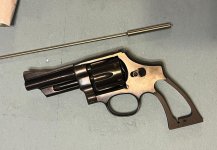
After the final, successful test fit of the wrench jaws I decided to see just how tight the barrel actually was. Right hand on the vise, left hand on the wrench handle, pull with the bicep, nothing. Add some shoulder and back muscle and BLOOP it's done. What a let down. I expected six foot cheater bars and lots of cussing. I realized afterwards that I hadn't even fully assembled the wrench....the bottom plate was still sitting on the bench.
I arranged the jaws so that the flat side was up and the sideways V shaped groove was the clamping surface, then positioned the barrel so that the major taper near the frame was outside of the clamping area. The vise was tightened using the "star torque" method: pull on the handle until you see stars and it's tight enough. Test fitting the wrench jaws led to to the single longest task of the entire operation: fitting the assembled jaws and frame to the wrench body. I don't know why I thought it would all just fit together. My life doesn't work that way.
Looking back now, it's a good idea. The aluminum wrench and the delrin (I think) inserts are made separately and the work required to make matched sets would drive the price up exponentially. It's much cheaper to make the inserts oversized and let each individual user fit their own. I don't recall anyone mentioning that the inserts had to be fitted in any of the reviews or articles I've read, but I can understand why. If you're confident enough to remove/install revolver barrels you'd darn well better be able to fit a couple of inserts into a wrench.
Twenty minutes and 87 test fits later I had what I considered a perfectly fit set of jaws. Using sandpaper and a sanding block I removed material from the outer edge of the jaws where they touched the wrench surface. Each test fit provided a scratch shelf that gave me an idea of how much more material needed to be removed. When the calibrated fingernail told me I was almost there I switched from 80 grit sandpaper to progressively finer grits. I ended up using 80 grit for most of the removal then a progression of 100, 120, 150, 180, and 220 grit for the final fit. The end result required using some body weight to fit the wrench body over the frame and inserts.
After the final, successful test fit of the wrench jaws I decided to see just how tight the barrel actually was. Right hand on the vise, left hand on the wrench handle, pull with the bicep, nothing. Add some shoulder and back muscle and BLOOP it's done. What a let down. I expected six foot cheater bars and lots of cussing. I realized afterwards that I hadn't even fully assembled the wrench....the bottom plate was still sitting on the bench.
Attachments

Last edited: