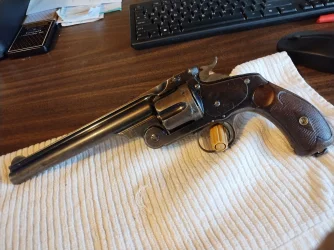
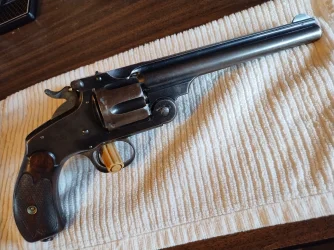
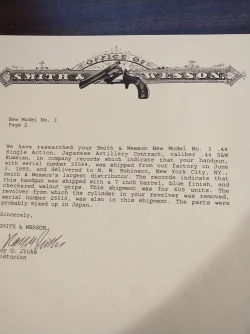
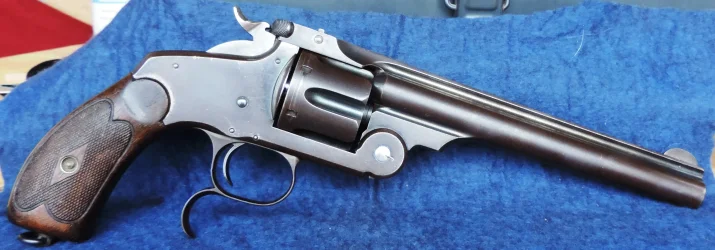
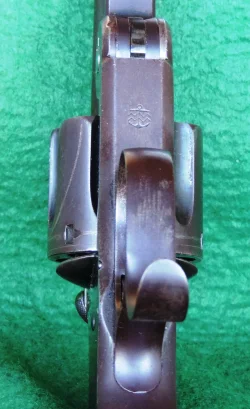
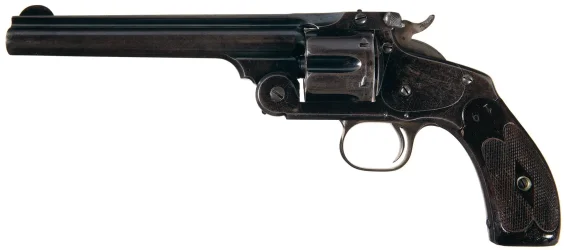
New Model 3

Great photos and How To!

P.s., the color of the handles doesn't matter... mine are red.
 
Hi There,

Great photos and How To!

P.s., the color of the handles doesn't matter... mine are red.

I would like red handles but it really doesn't matter to function. My original
pair of snap-ring pliers didn't have vinyl coated handles.
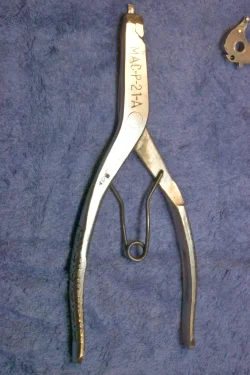
DSC_0002.webp
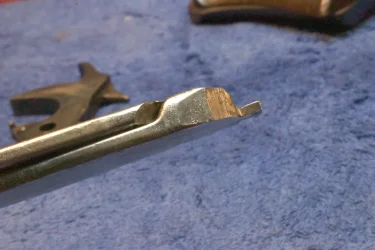
I re-ground the tips for getting into the GM Turbo-Hydramatic 350 transmission.

My first REAL job was as a auto mechanic and I worked in a Buick dealership. In
1975, there was recall campaign on a large number of GM cars with this transmis-
sion. What happened was the thrust bearing in the bottom of the trans was changed
from a flat washer coated with babbit to a radial needle bearing.

Apparently, some of the bearings were manufactured incorrectly (the needle cage
wasn't properly crimped). The needles could come out and really mess up a trans.
GM didn't know exactly which units were affected but new the faulty bearing were
in transmission having a certain date code stamped on the governor cover.

To make a long story long, GM sent out letters to customers that had recently
purchased cars with these transmission. What I had to do was collect the work
order from the Shop Manager and pull the car into the stall. Raise it up on the
lift and taking a drop-light, check the date code.

If the code fell into the possible range, then I had to remove the trans, tear it
down and R&R the suspect bearing. This bearing is the first part installed in
the trans and thus is the last part to come out.

Just to brag a little, I had done scores and scores of trans tear-downs and got
to the point that I knew the procedure so well that, from the point I pulled the
car into the stall, I would have the trans out and disassembled and the bearing
tagged in 35 minutes! To facilitate the tear-down, I modified the tips of the
spreader as such.
DSC_0005.webp

So, my old pair weren't really suited for compressing main springs and I got
another pair from Amazon.

During the 6 months of this campaign, I only found one bearing that actually
failed. The needles came out and the trans was locked-up and could only be
disassembled destructively. There is an interesting anecdotal story that goes
with this but I have wasted enough of your time.

Cheers!
Webb
 
Hi There,

A bar clamp would be a little large for this purpose. Parallel clamps are
designed to compress rather than to spread it apart. They would work
fine for Vee type springs (which usually need to be compressed and not
spread).

I checked under the side plate and sure enough the serial number was
stamp on the inside of the plate.

View attachment 849214

Now for a quickie pic-tutorial essay. Here is the lockwork of my #3 American

View attachment 849215

I use a set of snap-ring spreader pliers like this.

View attachment 849216

To remove the main spring, First, insert the tips of the spreader near the hammer.

View attachment 849217

Spreading the pliers compresses the main spring.

View attachment 849218

Then move the stirrup away from the spring hooks (and try to keep
one's hands out of the shot).

View attachment 849219

Last relax the pliers and remove.

View attachment 849220

Easy-Peasy!

Cheers!
Webb
Thank you for the visual representation for this task and the lead on the tool I need.

Regards, Lyle
 
Hi There,

Great info! Question what does the “O” signify on these?

That is the 64,000 dollar Question. At this point, I don't know. It could
have a significant meaning but likely was just an identifier of some kind.
My #3 American is only one in my collection that has this identifier.

When Lyle posted pics of his NM#3 and I saw the same marking, my
interest was peaked. So, I thought it was worth a little more investigating.
And part of the investigation is showing and asking for input on these
marking from other S&W collectors.

Cheers!
Webb
 
iby, nice Artillery marked NM #3. These are difficult to find. Mine is 25625 and I've been looking for the matching cylinder since '92.
 
  • Like
Reactions: iby
Just found a pic of my Japanese NM3
I picked this one up at an auction where the appraiser totally failed to grasp that it was a IJN issue and missed the naval acceptance stamp. Consequently, I picked it up for far less than fair market value.
 

Attachments

  • IJN NM#3DSCN3717.webp
    IJN NM#3DSCN3717.webp
    363.2 KB
  • DSCN3723.webp
    DSCN3723.webp
    349.2 KB
Exmilcop, nice Japanese Navy marked NM #3. There are four markings. They are the anchor with no wavy line, two wavy lines like yours, three wavy lines and the Artillery stamp. If you to shoot me the serial number, I'll check my reference to see where it was shipped and when. My reference is not totally complete so I might come up empty on the search. I have six Japanese shipped S&W revolvers, a #2 copy and I like researching where they were shipped. I have Yokohama, Hiroshima and one other that I don't remember off the top of my head. Three are Model #2's.
 
  • Like
Reactions: iby
Exmilcop, nice Japanese Navy marked NM #3. There are four markings. They are the anchor with no wavy line, two wavy lines like yours, three wavy lines and the Artillery stamp. If you to shoot me the serial number, I'll check my reference to see where it was shipped and when. My reference is not totally complete so I might come up empty on the search. I have six Japanese shipped S&W revolvers, a #2 copy and I like researching where they were shipped. I have Yokohama, Hiroshima and one other that I don't remember off the top of my head. Three are Model #2's.
Thank you but I found out that mine was one of a 900 pistol order. This was too nice and too valuable for the likes of me so I moved it along to a serious collector. I have a very nice but unremarkable NM#3 that is one of my bush carry pieces.
 

Attachments

  • NM#3jpg.webp
    NM#3jpg.webp
    85.7 KB
Last edited:
Back
Top