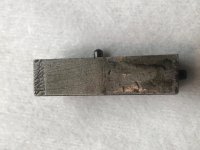

Rebound Slide Rough ...

Waveski

Member
Joined
Feb 6, 2016
Messages
1,723
Reaction score
1,970
City & State/Province
Midwest
I am cleaning up a 10-5 , learning as I go.
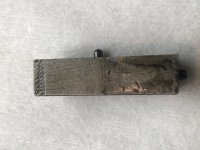
Please view the image of the bottom of the rebound slide ... aside from the general irregularities that should be polished out , there is an odd texture to the trailing edge , sort of voids?
My questions : generally , what do you make of the texture in that area , and more specifically , should I be concerned about that area - or is it forward of the contact bearing surface and therefor moot?

Take a look , feedback welcome. 'Ski
 

Attachments
  • IMG_0656.jpg
    IMG_0656.jpg
    78.1 KB
Last edited:
Polish the slide DON"T remove enough to change the dimensions of the piece The holes or pits are not going to affect the sliding of the rebound slide.All you want to do is smooth out the microscopic points .All i use is a hard (white ) Arkansas stone.
 
I went with materials on hand.
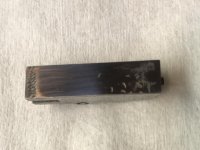
Secured a piece of 600 wet&dry to a flat machined surface , lubed generously with penetrating oil , worked the slide manually fore and aft.
Then turned the abrasive over and applied Mother's Mag Polish to the clean paper backing and worked it some more.
I do not believe that I changed the dimension appreciatively ; I did not press on to the point of removing the irregularities completely out of concern for doing so.

Is this a reasonably improved rebound slide?
 

Attachments

  • IMG_0656.jpg
    IMG_0656.jpg
    78.1 KB
  • IMG_0662.jpg
    IMG_0662.jpg
    82.9 KB
Thank you for the feedback , and I did work that backside of the slide.
 
OK - I will agree it should be OK, and also that you did just fine with what you had to work with.
I do however have to say that is one of the most dinged up slides I have seen. All the 1/2 moon dings and overall roughness of that area would have me looking for a replacement. No hurry , just keep an eye out for a nicer one. Yes, you may have to do a bit of fitting with a replacement, but that's the fun of learning, and you always have the one you got to put back in.
 
Well , that gives me something to think about. Sounds like fun. Or , I could designate those depressions as Gunslick reservoirs...

FWIW , I saw zero evidence that screws had been turned or side plate removed prior to my going in there.
 
Last edited:
The roughness was probably caused by a dull milling machine cutter that was tearing the metal instead of doing a clean cut.

Lightly smooth the bottom just enough to reduce any roughness that can cause catching.
Also, bevel or "break" the sharp inner-bottom edge of the slide.
This will prevent the sharp edge of the slide from digging into the corner of the frame where the slide moves.

One pointer; Don't pull the trigger with the side plate off to test the slide or action.
If you do there's a chance the frame pin the rebound slide fits over can bend or break off.
 
"Also, bevel or "break" the sharp inner-bottom edge of the slide."
Will do - it will give a good excuse to go back into the revolver.

"Don't pull the trigger with the side plate off to test the slide or action."
Must admit , I've already cycled the action sans side plate a number of times ... probably used up all my luck. Advise taken.
 
Actually, break all the sharp edges/corners of the rebound slide. EXCEPT, the rebound bump on the top. That's the part that causes the hammer to rebound.
 
Waveski, I’ve done this job recently to that 64 I found.

Cleaning up the slide constituted 80% of my work on the action, with the rest coming from cleaning up some surfaces in the frame itself, and dressing some edges to re-establish some straight lines.

The advice given here is pretty much aligned with the Kuhnhausen book and is quite sound.

The only other thing i would consider is to address the sliding surface on the frame where the rebound slide sits.
 
"The only other thing i would consider is to address the sliding surface on the frame where the rebound slide sits. "

I thought about that , but don't know how I'd go about it. The slide itself is easy to polish while bearing down on a flat machined surface. The interior surface ...?
 
Dremel tool with the wire brush that looks like the eraser on the end of a pencil and auto body rubbing compound. IF AND ONLY IF you're able and willing to remove ALL the action parts from the frame and properly reinstall them after removing all abrasive.

You don't create a mirror finish, just smooth up the tool marks a bit.
 
Unless the rebound slide area in the frame is noticeably rough there's not much reason to do any smoothing.

If it is rough on the bottom or side of the area in the frame, you can use wet or dry sand cloth wrapped around a small file or wood stick and do some smoothing of the areas.

I've seldom see a frame very rough in that area so you get the most bang for the buck working on the rebound slide.

An added enhancement is to use a good synthetic grease on the rebound slide. Apply a little to the bottom and back of the rebound and inside the spring hole.

If the hole in the rebound is rough you can polish it out with a strip of wet or dry sand cloth wrapped around a slotted pin chucked in a Dremel or flex shaft.
 
Back
Top