Striking Colt Single Action Army - Alvin White Engraved

... How about showing us some pictures of the Alvin White engraved Registered Magnum you have!

Here you go...


This particular gun was in the Alvin White Engravers brochure:


Here are a few detailed photos where you can see some of the similarities with the above SAA...


Last edited:
The RM is beautiful. I'd still say the scroll work on the SAA exhibits a bit more work in detail and shading.
Note on the RM where AAW planned out the side panel engraving and inlay so either full target or service style grips could be placed on the gun.
He was known for doing that on many of his DA revolver jobs.
Most engravers simply use the top edge of what ever grip set is provided with the gun as the border.
Then engrave up to that border. Underneath is blank.
Saves a lot of engraving time especially when the gun has the Target style grips which cover a lot of the side plate(s).

The platinum moon in the right side plate game scene is also something he used a few times to great effect.
The gold cartouche, he used a couple different ones including a Whale.
Nautical themes were a favorite art pastime of his, Carvings, ink drawings, jewelery engraving, ect
 
Last edited:
Outstanding AAW revolvers! They are both amazing artistry in arms. Your collection continues to amaze and inspire. Very surprised to see the RM :cool:

My one Alvin White contribution is a 2 of 200 edition of 97.241, serial: S167240 in the Museum of Springfield History. More information is in Kennely’s book. It was very, very graciously gifted to me by the BOD Chair, and I was stunned when presented with the art!! I proudly display it for all to see in my home. Guests passing by the piece, stop, snap their heads to inspect with their body slowly rotating to catch up, glare with that wheel turning intense thought stare, and ask, “Hey, what is THAT!?”

salox-albums-favorite-44s-picture23510-img-0616-a.jpg


One day, I hope all the stars align, one Alvin White engraved 44 magnum will come home with me. Great to see all the other examples and stories. He was the best at engraving and inlaid living forms.
 
Last edited:
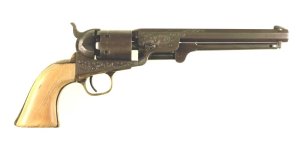
Colt Model 1851 Navy revolver. Factory engraved. Presented to Captain John C. Lowry of the 107th Illinois Infantry, Company E. This Colt is an artifact of history.


The 107th Illinois Infantry was organized at Camp Butler and mustered into service on September 4, 1862. John Lowry enlisted as a Sergeant in Company E. They were assigned to Louisville, Kentucky on October 12, 1862 to guard the Louisville & Nashville Railroad. Lowry later rose to the rank of Captain.


The 107th was later involved in numerous campaigns, including the siege of Atlanta, July 22 to August 25, 1864. The regiment lost 3 Officers and 27 Enlisted men killed and mortally wounded, and 122 Enlisted men by disease during the war. Total 152.
 

Attachments

  • Colt1851.jpg
    Colt1851.jpg
    32.5 KB · Views: 34
Beautiful pieces. Dumb question - what holds the gold inlay onto the gun? Is it durable?
 
The line inlay in the engraving is done by cutting the line into the steel with a simple point graver. Usually done with a hammer so the process would be called 'chasing'.

The line is cut as wide as you want the gold line to be. Cutting it nice and even where it should be and if needed to be tapering at the ends perhaps. Nice and smooth around the curves and scrolls. Any out of round arcs are really going to show themselves once the gold is inlayed and then the steel is blued or case colored. No going back and fixing it up!
Another common fault in doing line inlay is getting a very fine saw-tooth effect on the sides of the gold lines. Especially around the arcs. Thats from having too much of a heel on the bottom of the graver point. That drags around the cut and damages the sides of the arc when cutting. It doesn't generally effect straight lines.

Once the lines are cut, and they only have to be a few .000 deep., each side of the line is undercut to form a dovetail.
Some engravers use a very fine point graver and cut the dovetail in on both sides laying the graver slightly to the side. Some use a hammer for power,,some push the graver by hand.
More common is to use an undercut punch. A tiny punch you generally make up yourself though I have seen them for sale.
The shape is not unlike a standard wood chisel. Flat edge point, flat bottom w/a angled edge. The entire point is only about 1/16 wide though and you usually make a few of varying sizes for different jobs.
To work around the arcs, make the punches the same flat edges but the point needs to be rounded so it can work around the arcs w/o leaving squared stab cuts.
In use, the small punches are set at an angle into the side wall of the line. The gently tap the punch to upset the dovetail into the sideway. with practice you can walk the punch right along the line and keep going continuously instead of one punch, stop,,move the punch forward and make another punch. It goes quite fast with practice. The arcs can slow you down especially if you want to keep them uniform and w/o the saw-teeth look.

The under cut put in w/a punch will upset the metal upwards slightly on the surface of the work as well as the actual dovetail. That will be trimmed off after the gold is put in place.

Once the undercut is done, select a gold wire (round) of diameter that will set down into the dovetailed cut but still allow some extra gold to set above the surface of the steel slightly.
Gold wire that is too small in dia can be used but the inlay groove will not be completely filled and the steel around it will be struck by the punch used to to 'set' it in place. Quite a mess.
Too large will work as the gold is quite soft but a lot of excess is flattened off over the top and will be removed as scrap in the clean up.

To set the wire, place one end of the wire in place at the beginning of a line and use a flat punch slightly larger in dia than the line inlay to gently tap the wire into place. Usually a single tap will set it in place and hold it there. I usually set the wire in place slightly ahead if that end of the line. Then go back and punch in the absolute end later.

Once the gold wire is captured, it's a simple process of setting the wire in a continuous line into the groove with repeated taps on the punch with your hammer (same hammer usually as used to chase engrave.)

Goes quite quickly. The soft gold extrudes as you go. So 3 inches of line groove inlay will actually only use perhaps 2 1/4+ inches of actual gold wire. It all depends on how deep you made that line originally,,how deep the side dovetail undercuts are and how large dia the wire you are using.

When you get to the end of a line. Punch in the last gold just shy of the end cut of the line. Then take a flat hand graver and place it on the gold wire so the edge of the flat grave is right at the end of the line.
Press down on the graver and pull up on the loose end of the gold wire and the wire will break cleanly off right even with the end of the line cut in the steel. Then one more light tap to set that end into place.

I usually run the punch up and down the line inlay very lightly one more time. Always avoiding hitting the base steel so I don't leave any punch marks in it.
I have always used a steel punch w/ a very fine cross hatch face for this (same punch for 50yrs). Many engravers use a brass punch for setting gold and silver.

Now you have the gold wire set. Excess has extruded onto the surface along the line and you still have some very slight lift/bulge of the steel along the line from the undercut if you used a punch.
Now it's time to polish off all that and leave just a nice crisp gold line and polished steel surrounding it.

I usually use 400 w/water to flat polish the area, then 600. Higher if the job requires. You can then go over the area w/ 800 or worn 1000 used dry and that'll really polish the gold up removing scratches as well as polishing the steel a bit more.
Don't get carried away polishing as you can start digging the softer gold away from the harder steel and leave it with a scooped out appearance.

Ready for the steel engraving at that point.
I usually do all the gold inlay on a particular part first so that I can polish the areas and the part w/o any engraving on it first. Then when that's ready,,do the actual engraving.

The cartouche on the backstrap is done a little differently.
First you make a stamp with what ever initials, etc you want on it.
You cut that backwards so it stamps forwards (stamp and die work is a little tough to get used to at first)
Here AAW simply cut his letters into the die stock so that when impressed into the gold the letters were left standing.

Once you have your stamp, you have likely made the outside dimension of the stamp to a specific size so it will fit on what you need it for.

That size rectangle in this case is cut into the base metal.
The bottom if the rectangle is cut evenly but does not have to be perfectly smooth
The bottom surface can be covered with tiny saw teeth made by running the same tiny chisel you used to undercut/dovetail the lines above.
Running the chisel in three alternate directions across the bottom surface kicks up very sharp teeth.

Next you place a piece of usually 24k gold into the box on the bottom over those teeth. It doesn't have to be particularly thick. Just so when the next step is done the tiny teeth don't completely penetrate the piece of gold.

Next the stamp which fits the cut out box is placed onto the gold in the box and tapped down. Then given a solid tap to set the gold onto those teeth to secure it in there. Plus enough to impress the punch initials into the gold.

Sometimes some excess gold will extrude out the sides and can be trimmed off easily.

The teeth securely hold the gold in place. The same method is used to hold overlays on guns in game scenes. Sometimes all by themselves. Sometimes along with the edges being held in dovetail undercuts as done above.

I do most all my figure inlay & overlay work using this method but using gold wire being worked around and around building the figure. The gold cold welds together nicely so no seams show.

Sorry for the long post
 
Last edited:
Now Richard, since the Colt is chambered in .44 S&W Special, and since both guns are engraved by A. A. White, I suggest adding some smooth ivory service style grips to the Registered Magnum and then having a Huey case built to house both guns together! Don’t you love how I spend your money?[emoji1]
07e86b452e6307b5edae5d5cdcfabbd5.png

2745b9fae1aa691a7e1165bc48660da3.png

51bb97300abb5553487be2dd8534f2c3.png

54a971fee121932e8ebf40c0d53e0428.png
 
Last edited:
Wow! This information is gold!! Under rated post and needs to be filed in expert commentary. Thank you for sharing!

The line inlay in the engraving is done by cutting the line into the steel with a simple point graver. Usually done with a hammer so the process would be called 'chasing'.

The line is cut as wide as you want the gold line to be. Cutting it nice and even where it should be and if needed to be tapering at the ends perhaps. Nice and smooth around the curves and scrolls. Any out of round arcs are really going to show themselves once the gold is inlayed and then the steel is blued or case colored. No going back and fixing it up!
Another common fault in doing line inlay is getting a very fine saw-tooth effect on the sides of the gold lines. Especially around the arcs. Thats from having too much of a heel on the bottom of the graver point. That drags around the cut and damages the sides of the arc when cutting. It doesn't generally effect straight lines.

Once the lines are cut, and they only have to be a few .000 deep., each side of the line is undercut to form a dovetail.
Some engravers use a very fine point graver and cut the dovetail in on both sides laying the graver slightly to the side. Some use a hammer for power,,some push the graver by hand.
More common is to use an undercut punch. A tiny punch you generally make up yourself though I have seen them for sale.
The shape is not unlike a standard wood chisel. Flat edge point, flat bottom w/a angled edge. The entire point is only about 1/16 wide though and you usually make a few of varying sizes for different jobs.
To work around the arcs, make the punches the same flat edges but the point needs to be rounded so it can work around the arcs w/o leaving squared stab cuts.
In use, the small punches are set at an angle into the side wall of the line. The gently tap the punch to upset the dovetail into the sideway. with practice you can walk the punch right along the line and keep going continuously instead of one punch, stop,,move the punch forward and make another punch. It goes quite fast with practice. The arcs can slow you down especially if you want to keep them uniform and w/o the saw-teeth look.

The under cut put in w/a punch will upset the metal upwards slightly on the surface of the work as well as the actual dovetail. That will be trimmed off after the gold is put in place.

Once the undercut is done, select a gold wire (round) of diameter that will set down into the dovetailed cut but still allow some extra gold to set above the surface of the steel slightly.
Gold wire that is too small in dia can be used but the inlay groove will not be completely filled and the steel around it will be struck by the punch used to to 'set' it in place. Quite a mess.
Too large will work as the gold is quite soft but a lot of excess is flattened off over the top and will be removed as scrap in the clean up.

To set the wire, place one end of the wire in place at the beginning of a line and use a flat punch slightly larger in dia than the line inlay to gently tap the wire into place. Usually a single tap will set it in place and hold it there. I usually set the wire in place slightly ahead if that end of the line. Then go back and punch in the absolute end later.

Once the gold wire is captured, it's a simple process of setting the wire in a continuous line into the groove with repeated taps on the punch with your hammer (same hammer usually as used to chase engrave.)

Goes quite quickly. The soft gold extrudes as you go. So 3 inches of line groove inlay will actually only use perhaps 2 1/4+ inches of actual gold wire. It all depends on how deep you made that line originally,,how deep the side dovetail undercuts are and how large dia the wire you are using.

When you get to the end of a line. Punch in the last gold just shy of the end cut of the line. Then take a flat hand graver and place it on the gold wire so the edge of the flat grave is right at the end of the line.
Press down on the graver and pull up on the loose end of the gold wire and the wire will break cleanly off right even with the end of the line cut in the steel. Then one more light tap to set that end into place.

I usually run the punch up and down the line inlay very lightly one more time. Always avoiding hitting the base steel so I don't leave any punch marks in it.
I have always used a steel punch w/ a very fine cross hatch face for this (same punch for 50yrs). Many engravers use a brass punch for setting gold and silver.

Now you have the gold wire set. Excess has extruded onto the surface along the line and you still have some very slight lift/bulge of the steel along the line from the undercut if you used a punch.
Now it's time to polish off all that and leave just a nice crisp gold line and polished steel surrounding it.

I usually use 400 w/water to flat polish the area, then 600. Higher if the job requires. You can then go over the area w/ 800 or worn 1000 used dry and that'll really polish the gold up removing scratches as well as polishing the steel a bit more.
Don't get carried away polishing as you can start digging the softer gold away from the harder steel and leave it with a scooped out appearance.

Ready for the steel engraving at that point.
I usually do all the gold inlay on a particular part first so that I can polish the areas and the part w/o any engraving on it first. Then when that's ready,,do the actual engraving.

The cartouche on the backstrap is done a little differently.
First you make a stamp with what ever initials, etc you want on it.
You cut that backwards so it stamps forwards (stamp and die work is a little tough to get used to at first)
Here AAW simply cut his letters into the die stock so that when impressed into the gold the letters were left standing.

Once you have your stamp, you have likely made the outside dimension of the stamp to a specific size so it will fit on what you need it for.

That size rectangle in this case is cut into the base metal.
The bottom if the rectangle is cut evenly but does not have to be perfectly smooth
The bottom surface can be covered with tiny saw teeth made by running the same tiny chisel you used to undercut/dovetail the lines above.
Running the chisel in three alternate directions across the bottom surface kicks up very sharp teeth.

Next you place a piece of usually 24k gold into the box on the bottom over those teeth. It doesn't have to be particularly thick. Just so when the next step is done the tiny teeth don't completely penetrate the piece of gold.

Next the stamp which fits the cut out box is placed onto the gold in the box and tapped down. Then given a solid tap to set the gold onto those teeth to secure it in there. Plus enough to impress the punch initials into the gold.

Sometimes some excess gold will extrude out the sides and can be trimmed off easily.

The teeth securely hold the gold in place. The same method is used to hold overlays on guns in game scenes. Sometimes all by themselves. Sometimes along with the edges being held in dovetail undercuts as done above.

I do most all my figure inlay & overlay work using this method but using gold wire being worked around and around building the figure. The gold cold welds together nicely so no seams show.

Sorry for the long post
 
Terry:

If I was going to get a case made for some of my Alvin White engraved guns, this .357 SAA would probably jump to the front of the line.:D


It is embellished with "tons" of gold that nicely highlights AAW's skill with inlays of 3-D figures...


... and then there are the carved ivory grips...


AAW was a very talented artist. I love the creative way that he worked his magic on firearms, transforming them from functional beauty into heirloom pieces of exceptional art.
 
Terry:

If I was going to get a case made for some of my Alvin White engraved guns, this .357 SAA would probably jump to the front of the line.:D

Indeed Richard, those two .357 Magnums with all of those 3-D figure inlays together in a Huey case would be incredible. However the ivory service grips that you get for the Registered Magnum should now be carved ivory instead of smooth ivory![emoji1]
5e1bb30134c8f5b297a0d6beceba8953.png

6d76b471b869da287ae795783c817921.png
 
Many of AAW animal and figure overlays (raised surface) were done in 18k gold.
He regularly worked with the stuff for those type of figures as it will slightly tarnish and give the figure a natural shading effect in the low areas of the 3D carvings. 14k as well.

18k is also quite 'hard' when compared to the more often used 24k (pure) gold and will stand a lot of handling w/o showing wear to the details cut and punched into the figures.

18kyellow is not quite the brilliant yellow of 24k but is instead a mellow tone. He also used 14 and even 10k for different effect in the images.
The lower k golds can be tough to work with when it comes to inlay work.
They work harden very quickly unlike 24k.
It didn't seem to bother Mr White in the least.
Most all flush surface non-detailed line inlay was 24k so tarnish was not an issue.

His use of platinum, palladium, and the lower karat golds usually 14k in red and green tones were also common.
 
Many of AAW animal and figure overlays (raised surface) were done in 18k gold. He regularly worked with the stuff for those type of figures as it will slightly tarnish and give the figure a natural shading effect in the low areas of the 3D carvings. 14k as well.

He was a master at achieving very lifelike raised sculptures of the animals, scenes and objects he portrayed on firearms. Thank you for taking the time to share your insight on the "how" he accomplished it with various types of metals.:)
 
I have always wondered why the trigger looks “broken” in a SAA and almost as if it can travel no farther back in the trigger guard. (Sorry, I don’t know the proper terminology to describe this).

I looked it up because of this thread. This make sense when you look at notches in the hammer.

Richard, do you have any pictures of yours with the hammer fully cocked?
 

Attachments

  • 80C17B23-0756-4BE9-A6F3-AEC2C227A4D2.jpg
    80C17B23-0756-4BE9-A6F3-AEC2C227A4D2.jpg
    18.8 KB · Views: 18
Last edited:
I have always wondered why the trigger looks “broken” in a SAA and almost as if it can travel no farther back in the trigger guard. (Sorry, I don’t know the proper terminology to describe this).

I looked it up because of this thread. This make sense when you look at notches in the hammer.

Richard, do you have any pictures of yours with the hammer fully cocked?

Being a single action only design, the necessary trigger travel distance to allow the hammer to fall is very small. The tip of the trigger(sear) needs only to clear the sear notch in the hammer to allow the hammer to drop.
So the trigger can be placed far to the rear of the trigger guard with the need for minimal space behind it so it can still do it's job.

Some SAA triggers due to their shape, length, pivot point and the geometry of the gun, hammer notches & trigger guard (repros, other mfg of S/A revolvers) can have the trigger end up further forward.
The Colt Bisley was designed with a trigger to be as far to the rear as possible in the guard.

Standard triggers can also be altered to make them fit better within the guard, part of what a custom project might entail. Sometimes just a small adjustment makes a big difference in both feel and appearance.
Sometimes you make a new trigger.
 

Latest posts

Back
Top