While I won't pretend to have the firearm photography expertise that Terry has, I did do commercial photography for several corporations over a number of years.
Lacking the equipment and lighting systems that my employers provided me in the past, I have attempted some 'work aronds". that you may find useful.
A couple of basics: as a general rule, the brighter the light, the greater the depth of field (the distances that will be in focus); and the steadier the camera (think tripod) the sharper the image.
As mentioned above shooting outdoors in shade or overcast sky is oftenn great because (1) compared to indoor lighting almost any outdoor light is much, much (to the camera more than to the eye) brighter, and (2) the light if more uniform. One problem of outdoor photography is that it is difficult to see the LED scree unless you have a single lens reflex camera.
But, I am too impatient to wait for the perfect overcast sky so I take virtually all of my gun (or eBay, etc) "still life" pictures indoors.
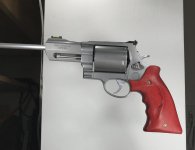
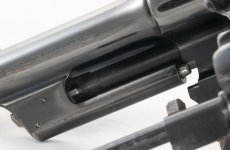
For cameras I mostly use a decade old Kodak digital camera because it has both mechanical zoom AND digital zoom so I can get close up to the gun part I am trying to illustrate. Also, since my vision has become poor, I rely on auto focus and auto exposure. For auto exposure to do a goo job you need to find a background (old Mexican saddle blanket, deer hide, or medium tone cloth) that 'fools' the camera into the exposure you want. Blue vs nickel guns may require different backgrounds
The range of zoom capability your camera has can make a big difference in the amount of time and work you have to put into 'cropping' your photos. I probably don't crop one out of 10 photos I put on the various web sites.
Finally, indoor lighting. While this is something I could never have done back in my Kodachrome days, today I use a variety of light sources--but all of them around the 5500 degree/ daylight color temp. Your sources are: strobe, daylight LEDs or daylight compact fluorescent bulbs. Cheap reflectors can be had from Home Depot: aluminum reflectors. Good lighting require front, side and overhead lighting.
At a local flea market I got a couple of used IV poles. Set up with mid and high aluminum reflectors and 100 equivalent watt daylight CFTs I used the camera's built in strobe for the front light.
Sometime later I found a couple of well used inexpensive photo reflectors with stands at that same flea market. I installed 500 w (equivalent) CFTs from Amazon. And finally, one birthday, my wife gave me a LED ring light like they use for Together, this rig has brightness and flexibility.
Final thought: memory cards are cheap so practice is cheap... not like the days of buying Kodak's best. And one of the most important things any working photographer learns is that you are only known by the photos you publish, NOT what ends up on the cutting room floor! Hope I've offered some thoughts to begin your experiments;
Here's my current rig for what it is worth. I am sure others here can provide their one tips.
And Nickel...


