Won this rusty locked up S&W 1917 snubbie at auction yesterday

has there been anymore progress yet?

Just been busy lately. No time for this project for some days.
Had a death in the family and a friend who just entered Hospice too. Plus other business projects and life has just gotten in the way of finishing this last step in the project lately. But I'll get back on the sight as soon as I can. Might do a little work on it today with milling the flat a little deeper and try to rough up the joining surfaces a bit more so the J&B weld will stick better. Course the J&B weld will just be temporary til I get it hitting at point of aim. Then silver solder the front sight on for permanent.
I'll post again when I've done more.


.
 
Hot-damn Bill you sure like a project. As I've always wanted a big bore cut-down, I'm with Canun on this one. Clean it up, make it safe, shoot it then decide about the front sight, and refinish.

Pleas keep us posted on the project as it moves along.
 
I filed the bottom of the front sight a little more to raise my bullet strike. J&B weld epoxied it on the barrel again. Haven't had a chance to shoot it yet. Last time I must not have gotten a good enough bond with the J&B weld epoxy and the sight flew off when I fired it. Hopefully this time it will stick a bit better. Might put some thin tape around it to help it stay on and not fly away like it did last time. Once I get it to hitting where I want, I'll heat the J&B epoxy and remove it and then silver solder the sight on permanently. Will post more with final finished project pics when I get that done.


.
 
I like the short barreled idea. It would make an ideal carry gun in a shoulder holster.
 
I would convert it to 45 Colt and put a 5 inch barrel on it. But I want a want a piece to carry in a holster with a lanyard. I miss having a 45 N frame. Lucky find and good on you for resurrecting it!
 
Hey Bill, jrhoney makes a good suggestion about 45 Colt.

But there's a professional way that would be able to shot both 45 Colt and ACP from the same cylinder:

All you have to do is "short shoulder" the chamber when reaming the chamber for 45 COLT. The case mouths would headspace on the chamber shoulder (like ACP cases) instead of on the rim. The Colt rounds would stick out of the Chambers .040" (also like ACP cases) and there would be no excessive headspace for the Colt rounds at the breechface.

This is perfectly safe and as safe as shooting ACP, as long as you don't use any 90 year old 45 Colt balloon head cases but I don't think you could find those these days if you wanted to!

You would then have to use moon clips with 45 ACP but who doesn't anyway??
 
All you have to do is "short shoulder" the chamber when reaming the chamber for 45 COLT. The case mouths would headspace on the chamber shoulder (like ACP cases) instead of on the rim. The Colt rounds would stick out of the Chambers .040" (also like ACP cases) and there would be no excessive headspace for the Colt rounds at the breechface.

If your .45 Colt rounds are loaded like an ACP round (taper crimped), it might be safe enough, but a .45 Colt round with a conventional roll crimp that turns the case mouth into the crimping groove of a bullet might not be such a good idea.
 
If your .45 Colt rounds are loaded like an ACP round (taper crimped), it might be safe enough, but a .45 Colt round with a conventional roll crimp that turns the case mouth into the crimping groove of a bullet might not be such a good idea.

Of course! The chamber shoulder should always match the crimp style. if you use factory ammo which is roll crimped, or reload using a roll crimp, you need it reamed with the standard roll crimp shoulder. If you want to taper crimp your rounds get a square cut shoulder like the ACP.
 
Nice job - it's going well. Here's mine:
P1310099.jpg
 
Hey Bill, jrhoney makes a good suggestion about 45 Colt.

But there's a professional way that would be able to shot both 45 Colt and ACP from the same cylinder:

All you have to do is "short shoulder" the chamber when reaming the chamber for 45 COLT. The case mouths would headspace on the chamber shoulder (like ACP cases) instead of on the rim. The Colt rounds would stick out of the Chambers .040" (also like ACP cases) and there would be no excessive headspace for the Colt rounds at the breechface.

This is perfectly safe and as safe as shooting ACP, as long as you don't use any 90 year old 45 Colt balloon head cases but I don't think you could find those these days if you wanted to!

You would then have to use moon clips with 45 ACP but who doesn't anyway??

Thanks for that tip jrhoney and Hondo.
Not a bad idea to ream the cylinders on it so I can use all three of either .45 auto rim, .45 Colt and also moon clipped .45 acp and I'll keep that in mind for a future project. But at least for now I'm going to keep it in .45 acp only. Still haven't had a chance to shoot it since doing more filing on the bottom of the front sight and reattaching it. It's been raining every day here in Florida. Hopefully I'll get a chance to shoot it to test for bullet strike soon.

Also noted below.....

Originally Posted by M29since14 View Post
If your .45 Colt rounds are loaded like an ACP round (taper crimped), it might be safe enough, but a .45 Colt round with a conventional roll crimp that turns the case mouth into the crimping groove of a bullet might not be such a good idea.


.
 
Last edited:
It looks like it's locked up because the ejector rod has unscrewed, binding against the locking lug. Use a scrap of leather and plyers to see if the ejector rod will screw back in some. It's standard right-hand threads.

That may be why it is all rusted up now. Someone who knew just enough to shorten the barrell and didn't care about losing the front sight got frustrated when it locked up and just put it away in disgust and forgot about it, thinking it "was no good.'
 
As a fan of the 1917, I have followed this thread with great interest. Although I am not much into changing a guns original configuration, this gun was already modified and to me is therefore fair game.

Since it is a short barrel gun most likely to be used for carry, the front sight might not be a necessary modification. One could shoot it instinctively as another poster suggested. You really aren't going to shoot this gun at 100 yards anyway.

Any more progress on the refinishing part of the project? After reading through 7 pages of posts, I am kind of looking forward to seeing the final result.:eek:

As I said, I like model 1917's.
 

Attachments

  • Model 1917's.jpg
    Model 1917's.jpg
    63 KB · Views: 79
jsalas2

Here's a pic of my 1917 with 2" 625-10 barrel and cylinder. Lots of hand fitting but I think it turned out great.
IMGP1374.jpg
Like the grips, can you tell me what kind and where to get them. I have a snub that they would great on. I know this is an old thread, just hoping for an answer. Thanks, Jesse.
 
Would like to find out this.....

Someone told me that the Brazilian barrels have a slightly different contour than the U.S. barrels. Is that true?
Any issues different with installing a Brazilian barrel different from installing a U.S. barrel? Brazilian threads match up with U.S. frame threads?.

Hi Bill,
I had meant to respond to your question about barrel contour. I can not tell any difference. However I wonder if the someone that told you that was thinking of the top strap contour which is different on the 1937 guns; they are flattened on top and have a larger rear site sq notch.

They were newer made frames than the 1917. However the 1946 contract Brazilians have the original 1917 rounded top strap w/small u notch site because they were surplus 1917 frames, 10,000 of which S&W purchased back from the government at the end of WW II.

How's the project coming?
 
Well "Webshots.com" where I used to upload and store all my photos and videos, sent me a message saying they were transferring to another site and that site would be a pay site and if I wanted to save my photos from webshots I would have to download them to my computer, save them and then re-upload them back to their new paysite. So I downloaded all my photos and some of my videos and saved them to my computer. But then the former Webshots site sent me another email saying their new site was held up and wouldn't be live for awhile. And that's the last I ever heard from them. So that is why all my previous photos of everything I have posted are absent from my posts. Because they are no longer working at the old webshots site that I linked my posts here to those photos. I'm going to try getting an account with "Photobucket" or some other photo/video hosting site and put all my photos there so I can upload them in posts again. But it won't help me right now for all the posts I've posted that have missing photos now. Anyway.....

I haven't had the time to install the front sight on my bobbed barrel S&W 1917 revolver yet. It's the last thing I need to do to have that project completed. I had tried "J&B weld" epoxy to hold it on, TWICE. But each of the two times I J&B'd it on, it fell off when I fired it. The J&B weld works great on parts that do not flex. But when a projectile goes down a barrel, it causes a very slight flexing of the barrel that goes back down after the projectile has passed through the barrel. That was enough to crack the J&B weld and make the front sight fall off. I was going to silver solder it on myself, but before trying that, I am going to a friend of mine who does precision welding on race cars, and who can do a very small weld bead and see if he can just fine bead weld the front sight on which would be much stronger than silver soldering it on. Then if he can do that, I can file and polish the welded on area to my satisfaction. The only reason I don't go ahead and silver solder it on now, is because I think if my friend can do a fine enough steel weld bead for me, that would be much stronger than just silver soldering it on. But if he can't do a bead that fine, then I won't let him try because that might mess the barrel up and in that case I'll just silver solder it on. By the way, it has been quite some time since I highly polished the revolver free of any rust or blue and it is still "in the white" and hasn't exhibited any pinpricks of rust whatsoever. It looks like it is nickel plated but it's really just very highly polished. Maybe the very high polish has something to do with no rust taking hold.


.
 
Last edited:
Thanks for the information about JB weld, I was about to try that on a project. Hope yours continues to be as much fun as it has been.
Thanks for posting all that you have done on your project.
rayb
 
Okay, finally about got my S&W 1917 snubby project finished. Had one major accident on the mill though that you will see in a minute. Because my old webshots photo upload site closed down, all my previous photos in this thread disappeared, but I've since got an account at photobucket, so here's a quick review of past photos and some quick text on them and my latest work to bring us up to today.

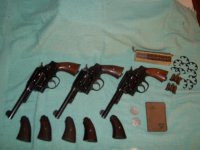
The below two photos were from the auction where I purchased the 1917. As you can see the barrel has been cut, it has no front sight, is rusty and is locked up because of a bent ejector rod. It had genuine India Sambar stag grips on it. So that was a plus. But I don't care for them so I took them off and put some nice fat Jay Scott grips on it to better fill my big hands. Probably will sell the Sambar stags (if anyone here is interested) since they are worth about $150.00
2208717290099763970fvZGtX_ph.jpg


2671763880099763970jhpqLg_ph.jpg


The first thing I did was acquire and install a new (old stock) ejector rod.
2405912590099763970MGqygB_ph.jpg


Then I took it all apart, cleaned it, installed some Wolf replacement springs to lighten the trigger and hammer, and highly polished it as you can see below.....
2253500830099763970lQZCBf_ph.jpg


2256024500099763970KpjvXe_ph.jpg


2418878690099763970KCLvTy_ph.jpg


2856675550099763970qYDjde_ph.jpg


One of the members from this forum (Jack the toad) sent me a shot out rifling snubby barrel from a 1917 he had, and I heated up the front sight and removed it to go onto my snubby barrel. Of course I had to file a flat onto my barrel for it to go on to, just like it had been on the shot out rifling barrel. Here's that front sight removed from the old shot out barrel....
2935256930099763970okGvkT_ph.jpg


I had tried attaching the front sight to my barrel with J&B weld epoxy, but trust me, that doesn't work and it came off the first time I fired the revolver. That brings us up to date on my previous work. Below is my latest progress on the project.

Finally got the front sight tig WELDED (not silver soldered) on. And yes I did remove the ejector rod's front lug's spring before welding and replaced it afterwards. In fact I removed the ejector rod and cylinder too when it was welded. Here's a few pics of that before I ground down, filed, sanded and polished the welds....
20130424_172935.jpg


20130424_172950.jpg


20130424_173013.jpg


Now for the major accident I had in the mill. The end of the barrel was jest a leetle off and not square from where it had been cut, so I was doing a leetle trim on the end of the barrel. Everything else was about done and this accident was right at the end of the project. Isn't that always the way? The revolver slipped in the vice and before I could shut the mill down, the mill bit danced all down the right side of the barrel putting deep multiple cuts in it and took out a chunk of the receiver where the barrel screws in too! Needless to say I was sickened to see that happen.
20130425_065625.jpg


20130425_065612.jpg


But not to worry, about an hour and a half of tig welding later filling in all the cuts on the barrel and the chunk taken out of the receiver, and careful tig welding to preserve the seam where the barrel screws into the receiver at that cut out chunk point on the receiver, and everything was filled in again. Then disk sanding and filing and sandpapering and polishing again until you can't tell that accident ever happened. Whew! I can tell you though,...I was sweating it, those were some bad cuts on the barrel and chunk taken out of the receiver. But the repair came out okay and nothing was deep enough to cause any operational problems, it was mainly cosmetic, but MAJOR league cosmetic. Here's what it looks like now.

Careful tig welding and filing to get the seam of the barrel to the receiver back correct where that chunk had been cut out by the mill accident....
20130428_013617.jpg


20130428_013626.jpg


More of the same from further out....
20130428_012744.jpg


Overall view of previously damaged right side of barrel now fixed....
20130428_012658.jpg


Side views of revolver today.
20130428_011751.jpg


20130428_011807.jpg


It is (in the white) but highly polished. To anyone who doesn't know what (in the white) means, that means it doesn't have any finish of any kind and the metal is bare.

The snubby barrel is exactly 3 & 1/2 inches long.

There are a few little spots I will continue to polish out and later I might even send it out to get it nickel plated. But for the most part, I think now, I can say the project is finished.
I am really happy about how the welding on attaching the front sight came out. If it hadn't been for that bad mill accident I would have been finished a day sooner. I am happy overall with it. Compared to what she looked like when I got her, she's a gem today. I'll post an update on its accuracy when I shoot it soon, and we will see if the welding of the barrel pulled the barrel any, but it was kept cool with a compressed air nozzle between each and every weld on each cut on the barrel and receiver, so it didn't get too overheated. Can't wait to test it out shooting.
 
Last edited:
Back
Top