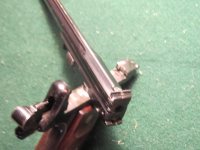
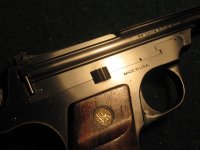
Barrel Latch

Whatever the problem, I doubt that J-B Weld is the answer. You can sort of tap on the "horn" tops toward the rear, deforming them slightly.
 
I don't know how much "slop" you have, but my knee-jerk reaction is to knurl the offending surface----or both surfaces if there are two (back side of frame post and front side of latch??). An excellent poor man's knurling tool is a center punch----an automatic center punch, simply because of the precision with which they may be used. And now that I've thought about it, I'm not quite sure how you're going to go about knurling the front side of the latch with a center punch. With luck it won't be necessary. Without luck, a GOOD machine shop may be able to help.

I think step one would be to determine how much "slop" you have (baby feeler gauge----"plasti-gauge" maybe). Step two is to determine how much "upset" you can create with the punch----repeated applications of the punch (in the same hole) is going to make the hole deeper----and the upset larger/higher.

AND before step one is to determine the wear you're trying to make disappear is between the latch and the post-----and not between the latch and its fastener.

Finally, my cop-out clause: I have never done anything like this to a gun in my life! I have done it to a whole bunch of race engines----where I (rather severely) knurl piston skirts to achieve a very tight (too tight actually) fit in the bore, and let them make their own clearance-----which they do quite nicely with about a twenty minute break-in run on the dyno.

Ralph Tremaine

I've taken a short break to sit and stare at a gun-----pretty much a brand new one. It appears I was correct about the two surfaces being the back of the post and the front of the latch. I was incorrect about it being difficult to get to the front of the latch (I think). It appears the front of the latch is going to be right out in front of God and everybody once you remove it from the barrel. One thing of note: Both these surfaces are radiused (latch in/post out). My (again) knee-jerk reaction is you're going to want to use your punch at the respective apex of each radius----assuming you need to treat with both surfaces. Given what I suppose will be a rather nerve racking, but simple task, I'm inclined to recommend just one hole (center punch hole) on each surface----dead center. It's worth noting you can "move" the hole (and the upset) somewhat (enough) if you're off with your first effort, simply by tilting the punch---point it in the direction you want the hole to move. That's it----I think!

Well, I thought wrong! One hole on each surface pre-supposes the "upset" from one hole will be insufficient. That would be what is known as a fact not in evidence. It may very well be one upset will suffice. If it was me, I'd be making that one upset on the post. And remember those famous words: Measure twice---cut once!!

And do yourself a favor----buy a brand new, first class punch. Don't be borrowing one from your buddy, because it is almost certainly going to be in need of sharpening. Worse yet will be if he's already sharpened it----because it will be wrong. First class automatic center punch bits are "sharpened" by buying new ones----no exceptions!!
 
Last edited:
Punching

Ralph,

Thanks for the suggestions.

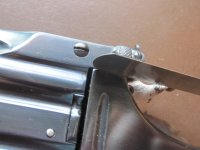
As shown in the pic, the slop is .005". Doesn't seem like much but it's enough to make the gun rattle when shaken.

Punching the back of the posts would be the easiest method but that would detract from the appearance of the gun. Punching the contact surface of the latch would be an invisible fix.

I can see where J-B Weld on the back of the posts would probably wear away in short order. Maybe a thin line of J-B where you see the frame side of the feeler gauge would work. It would be very easy to file/fit for a zero clearance and there's no constant abrasion when opening/closing the barrel.

Punching the outside straps, shown in pic 3665, is another option but that might deform the outside of the strap.

If this were a beat-up old gun, I'd have a lot of room for experimentation. However, this being a rather expensive piece, I have to be very careful.

I'm sure this is a routine operation for David Chicoine and it doesn't involve J-B Weld.................


Ed
 

Attachments

  • IMG_3664.JPG
    IMG_3664.JPG
    79.8 KB
  • IMG_3665.JPG
    IMG_3665.JPG
    69.2 KB
Last edited:
Okay, what we have here (as the man said) is a failure to communicate. Several points--------------- First, the "slop" I'm talking about measuring is between the REAR surface of the post and the FRONT surface of the latch-------which is where the latching/locking appears to take place. Second, any knurling of either of these surfaces will be completley invisible with the gun closed/latched. You are measuring the gap between the barrel and the frame-----which results from the unsatisfactory relationship of these two surfaces (back of post and front of latch). Bottom Line: If----IF you are talking about filling the gap you're measuring, it would appear you are contemplating treating a symptom rather than the illness. Your patient won't die, but neither will your patient get any better.

I indicated earlier that while I might know about knurling, I don't really know diddly about EXACTLY how the lock-up occurs, although the more I sit and stare, the more it occurs to me I'm looking at a gun with no problem---and you're looking at a gun with a problem. This would seem to be a recipe for fun for the feeble minded. I had originally thought the lock-up occurred via the match between the two radii-----in the center/at the respective apexes. Now I've decided that ain't so---and that the lock-up takes place at/towards the bottom of the post----where it appears to be undercut----which means punching/knurling either/both surfaces at their respective apexes may make it some more difficult to close the gun, but it doesn't appear it's going to solve the problem. At this point, I continue to favor knurling as a remedy; but where to knurl is another matter altogether.

There's one thing we can agree on for sure----this is very likely a routine operation for Chicoine. That said, there is the rest of the story to consider. It is my understanding Dave Sr. is not working----hasn't been for a spell. The net effect is I'm told Dave Jr. has a 12 to 18 month backlog. Perhaps there's a middle ground to explore. There's a gunsmithing section on this forum. It pretty much stands to reason there are folks there who have forgotten way more than I know about all this----because they've been there and done that. It also pretty much stands to reason they can/will tell exactly how to diagnose your problem----and then fix it. I wouldn't be the least bit surprised to learn there are folks there who can/will fix the problem for you-----quickly.

RT
 
Last edited:
Loose Screw

The loose barrel-to-frame fit was caused by a loose joint pivot screw. I tightened it and the gun locks up like a vault with zero play.

Now I can give my full attention to tightening up the fit on my Straightline.................

Ed
 
Ralph,

3rd Model Single-Shot: I accidentally noticed the loose joint screw while holding the open action by the barrel and felt the shake. Just lucky.

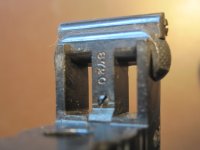
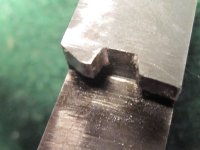
Straightline: The lock-up was okay but not perfect. I oiled all the surfaces that I didn't want the J-B Weld sticking to and applied some J-B to the vertical walls of the notch. I closed the action to let the bolt go into the notch to squeeze out the excess J-B.

After a few hours, I opened the barrel and removed the excess J-B. This step also ensures that the bolt doesn't weld itself closed. I let the J-B cure overnight and now the lock-up has zero play.

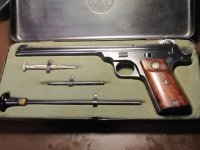
Pics attached for those not familiar with the Straightline. I've never seen such outstanding pistol craftsmanship. The fit of the parts is unmatched.

You have a few of these, Ralph? Mine has the wrong screwdriver.

Ed
 

Attachments

  • IMG_3565.JPG
    IMG_3565.JPG
    104 KB
  • IMG_3675.JPG
    IMG_3675.JPG
    91.1 KB
  • IMG_3676.JPG
    IMG_3676.JPG
    89.8 KB
  • IMG_3679.JPG
    IMG_3679.JPG
    93 KB
Last edited:
Back
Top