Grip blanks

burch

Member
Joined
Feb 13, 2008
Messages
121
Reaction score
22
Location
Cocoa,Fl.
Anyone know where I can find unfinished grips or grip blanks. I'm wanting some custom stocks for my model 10-6
burch
 
Register to hide this ad
Anyone know where I can find unfinished grips or grip blanks. I'm wanting some custom stocks for my model 10-6
burch

Go to a wood working store and buy whatever wood you wish to make the grips from and do it yourself.

And, BTW, home-made is not "custom", simply amateur work!
 
Cruise Ebay and buy over sized aftermarket grips is one way. Mustang grips seam the sell cheap and have enough wood to do as you please with.

Another method is to trace the outline from a pair of magnas on a flat piece of the wood you want to use. First use a small hole saw to make the circle where the medallion back piece goes, then use a small router to carefully cut out the rest to the depth needed. I use my milling machine turned up on high speed and with the wood clamped in my mill vice use the table to follow the lines.

With a router you could first make a circle of wood the OD of your router face with a hole in the center the size of the cutter you would use in router, Glue a piece of dowel in the center hole of circle. Now take a piece of 3/4" ply wood and cut out a hole in the center so you can set a target grip in it frame sidee up and edges all level with the plywood. Now run it around the inside of grip tracing the far outside wedge onto the plywood with a pencil. Use a jig saw to cut that outline from ply wood. Now you can make all the blanks you want. Fix the piece of wood you want to use in place with a few drops of super glue in the center of cut out. Stick spacers the thickness of your blank under the corners of plywood and then plunge into the piece and run your router around until you have the inside of the blank cut out. You will need to mark where the depth needs to be deeper from the frame and make a second pass in that area with your cutter lowered the right amount. Flip over the jig to make to opposite half. If you router base isn't round mark it and use the mark to make jig and keep the mark on edge of jig.

You could do about the same thing smaller by using a roller type router bit. Just make the jig the difference between the cutter and side of bearing.

If you used a 1/4" od cutter you would need to clean up the corners for the very corners of butt to fit.

HbDLuyu.jpg
 
Last edited:
I attached a couple 2x4's at 90 degrees, so that the flat one clamps to my bench and the vertical sticks straight up. U-bolt a dremel to the vertical, cutter pointing down.

Now you can slide a piece of wood under the bit and get a constant depth of cut. Fine tune your depth by putting layers of paper/cardboard under your piece. Use this setup to route the frame recess and so forth.

Outer trimming is pretty easily done with a belt sander and then manually sanding, sneaking up on it.
 
Get a piece of nicely figured wood,,your choice of type of course.
Lots of standard stuff like Walnut, (American & European), or go to the wilder looking 'Rain Forest' woods for some different colors.

If you are not making a Target Style grip and just a flat panel Service styl or Magna style, it's pretty easy to do with hand tools, patience and some skill.
A drill press is a great help and probably the one power tool among many that I would choose if only 1 were available and money was short.
A milling machine of course would be better yet as it can double as a drill press but also do the routing job and precise hold positioning/drilling.

These grips were made by sawing the blanks out of a piece of 1/2" thick English Walnut slab with a coping saw.
Since they are Service Style, they needed only be absolutely flat on the back and the upper portion inletted to meet the rounded frame cut and shoulders.
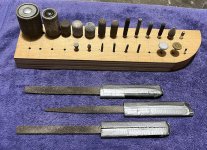
That takes time to do with hand chisels & files but a perfect fit is the result.

Clamp one panel in place and drill a blind hole to correct depth for the 'grip pin'.
Do the same for the other panel.

While the panels are still flat and not contoured,,mark and locate for the grip screw and drill it's location. Make sure it's correct or it may interfere with the mainspring.

Before unclamping &removing each panel, drill the countersink for that side escutcheon as well using the depth gauge stop on the drill press.
Doing it on the one set-up ensures the screwhole and the countersink are lined up/
(A piloted countersink cutter would avoid this but having one handy is not always how life happens.)

Sink the escutcheons into place in the panels. MAke sure you place the correct one on the side you want it to be. (Screw Head side on the correct side R or L)

Now mount the grips and use the grip screw to lock them down.
Then using hand files & rasps, shape them to near final shape,
Then take the last bit down with finer files and then grit paper backed up with a file or felt block.
Keep the bottom outline a smooth semi circle line. Draw one on the wood as a guide.
I often find an odd bottle, small can or other container that when placed on the edges of the frame where they meet the wood, presents the perfect arc line I want for the grips and simply draw a pencil line using the base of that container as the pattern. I think it was some sort of med bottle for this set. Seems to be plenty of those around lately to choose from.

Mark and drill, plunge cut with an end-mill cutter for medalions if using them.
Finish sand the wood. I usually go to 400grit and sand in the finish to 600grit.
Apply finish,, then checker if you like.

These I finished with a oil based varnish and checkered 28LPI in a pre-War Colt style pattern.
A set of orig 1920's 'forward facing' Colt grip medalions completed the grips. Medallions and escutcheons were gold plated.

It takes some work but it's a satisfying project.
Remember that plain fence post appearing wood will take just as long to complete a set of grips (or a gun stock) as a really nice piece of wood will.
It's your time spent.


The lack of really nice escutcheons available commercially
is pitiful. :(
Pic is of one, from a bunch, bought around '80 from Brownells.
The wall is about .020" where the screw head sits.
Would be nice to find some that are a bit more robust or will have to make them.

Custom made grips are those made to fit your hand perfectly and look elegant. :D
Doesn't really matter who made them.

Would be nice if a company made 1911 grips screws that were longer so the screw head would not be set deep in thicker target style grips.
 

Attachments

  • IMG_0753.jpg
    IMG_0753.jpg
    48.3 KB · Views: 5
Last edited:
I just picked up and old Walnut shotgun stock I'm gonna use. It has some nice grain and I'll get a set of matching grips out of it. ��
 
Kutzall makes burrs and files that are great for woodworking.
We most often use handles as opposed to power tools for gunstock work.

They also make bigger wheels for angle grinders.

For wood and fiberglass work in my marine electronics years.
When they gum up we just use a propane torch and a brass brush.
 

Attachments

  • IMG_0764.jpg
    IMG_0764.jpg
    146.4 KB · Views: 15
Last edited:
Thanks!
It was a nice mechanicaly pre-war Police Positive 38 that was worn on the outside. Perfect bore, chambers & timing.
It sat on a local gunshop shelf for a long time. I finally bought it for a project,,couldn't stand to let it go anymore.
Polished it up, engraved and inlayed. Final finish is Rust blue.


Back
Top