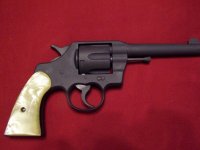
How to Gun-Kote a revolver?

David Sinko

Member
Joined
Feb 12, 2007
Messages
2,186
Reaction score
498
Location
Bethlehem, PA
I have an elderly .38 M&P with a slightly defective action which I plan to use as a project gun. One thing I want to do is Gun-Kote it. Is there a "proper" way to apply this finish to a revolver? Should it be done to the outside only or is it OK to do it to the inside of the frame where the internals will be rubbing? What about the sideplate screw threads and the bore and chambers? Should I take special care to not get any on certain parts?

Dave Sinko
 
Register to hide this ad
I have seen several S&W revolvers that have been "painted" with various gun kote products. My recommendation if you like your gun, don't do it. If you have a tacti-cool semi auto, it may look acceptable, but on a revolver it looks god awful.

I know, to each his own, but do yourself a favor, and try and see what a revolver looks like with this home done process before you do it to your gun.
 
Keep in mind that this is an old beater and it has a slightly defective action which is very difficult to fix properly. I am going to violate my long standing philosophy of never cutting on any S&W revolver (competent gunsmiths have always done this for me) and start with a barrel and possible grip frame reduction. Somebody has already polished this revolver once (poorly, I might add) and the second bluing has largely disappeared as well. Worst case scenario is I really screw it up and then it becomes a dry fire only proposition, which in the grand scheme of things really wouldn't be all that bad. I am leaning toward plugging the bore and chambers before I spray on the Gun Kote but I am wondering if this is necessary or not. And I'm still not sure if it's a good idea to do the inside of the frame or not.

Dave Sinko
 
Dave,
I have seen some of the spray-on finishes applied to gaming revo's that came out quite well.

I would not try to "coat" the inside of the frame, or the bosses where the internals ride. But I would not be overly concerned with incidendal overspray. Coat what you don't want sprayed in some heavy grease.

I would apply some grease to the screw threads, and insert them in the holes while you spray. That way, the heads get covered, but they will come back out of the holes without getting "painted in".

I'm interested to see how it goes.

Eric
 
Baking Lacquer

A few weeks ago, I refinishes a Colt Army Special with Brownell's baking lacquer. I sand blasted everything (after soaking in Hoppe's #9 for 2 months to remove what was left of a nickel finish) except the contact surfaces of the internals. Cleaned with denatured alcohol then heated each part up with a hair dryer and sprayed. Waited 1 hour then baked per instructions.

The finish turned out pretty well. Brownells said it was very thin and could be used on the internals as well, so that's what I did. I then spent the next three days polishing the internals to get the smooth action back.

I chose the gray finish for a park'd look. This was a rusted up, pitted shooter with the best action I had ever seen. It's not the prettiest, but still shoots good. All in all, it was easy, but take your time in the prep stage. Definitely do this outside or in an area with good ventilation.
 

Attachments

  • Picture 001.jpg
    Picture 001.jpg
    37.8 KB · Views: 597
I have a great shooter M15-4, snubby in nickle that has some nickle flaking on the cylinder. I've wanted to try something similiar to the above on just the cylinder.
 
Nickel removal

Duckloads, After I received my Colt I started asking around about having it refinished. Everybody wanted and arm and leg to refinish it, mainly because the nickel is hard to get off. A local guy finally told be about the Hoppes #9 trick. I bought a quart from Brownells and soaked it for a couple months in a tupperware container until it was almost evaporated. Obviously I wasn't in a hurry. After I took it out of the Hoppes, the nickel peeled off in small pieces. I did have some sandblasting to do, but it was pretty easy work. Definitely do it outside and don't use your wife's good tupperware container (ask me how I know).

I guess the process is that Hoppes is a copper solvent, and that the nickel won't adhere to the steel, so it's plated with copper first. The Hoppes gets under the worn nickel and dissolves the copper. Don't know if its right, but it worked. Afterwards, someone told be about putting it in a bucket of water with leads going to a car battery, but wasn't real clear about how not to get shocked.
 
Back
Top