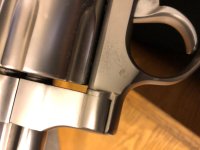
removing scratch from bead blasted 686

Joined
Sep 26, 2020
Messages
47
Reaction score
27
Location
England, U.K.
I have a very nice custom 686 which has been bead blasted. However there is a small scratch on the frame. I'm trying to find a way to remove it without having to re-bead blasted the gun.
This fella did youtube video using 80 grit sand paper ; by placing the 80 grit sand paper on top of scratch and tapping it with a hammer.
Would this work ?

[ame]https://www.youtube.com/watch?v=BmV9el-ogKQ[/ame]

bead blasting repair starts at 3:25

cheers
 
From FAQ...

Polishing stainless

What I found to clean and polish my stainless guns is gray (medium) and finish up with white (very fine) scotch brite pads with a little gun oil to help move the metal. Brush the pads to the original "grain" and you won't need to use any polish at all. The guns will look much better than original. REMEMBER tape over any laser engravings or you will rub them away very easily.

When working with Scotch brite pads always start with the finer grades to test the finishes applied.

Don't use steel wool. it's messy and you run the risk of rubbing carbon into the surface which might rust the finish.

If you don't want the brushed look, Mothers Mag polish is recommended by myself and others here on this forum. This polish applied will make your revolver's finish look like a professional machine buffed job in short order. I tried many polishing compounds and even tried lapping compound on the finish but Mothers is amazing stuff. Again, don't rub the laser markings!

The glass beaded surfaces can be polished off so use care around top straps as well.

Blue guns are not fixable and need to be sent back for a re-blue. Cold blue (over the counter products) will not match the S&W blue finish.

Since the whole gun is bead blasted would that work with mine ?
 
It should, just dont polish unless you want a shiny polished look.
I've done some touch up with this method and it seemed to blend well with the finish but I'm not sure of the extent of the scratch you mentioned.
Let us know how it goes and we like pics...
 
The wet or dry sand cloth and small hammer does work, and works probably better then anything short of re-bead blasting the part.
Metal polishes and Scotchbrite pads will not work on an actual bead blasted surface and will ruin it, leaving a polished or grained look completely unlike bead blasting.

The only tricks are choosing a sand cloth of the right grit and being very careful to fully lift the cloth off the surface between taps and not move it before lifting.

You can use a small steel hammer, but brass or hard plastic has less risk of tilting the hammer and the edge denting the metal.
I've even used the butt of a Brownell's screwdriver handle.

This technique works well on small, shallow scratches but not well on larger areas.
 
Last edited:
Using sandpaper and a small nylon mallet works, and works well.

That said. Not all bead blasted finishes are the same. For a finer S&W finish, you will need a way finer grit of sandpaper. For example, I fixed a couple spots on an L frame and an N frame 627. I used 2000 grit. It was slow and took some time, but it replicated the factory finish well.

If you are working around a straight line without a bead blasted finish, be sure to tape the line.
 
Last edited:
so I decided to give the sandpaper thing ago (80 grit sand paper over the scratch and hammer it ) However i decided to experiment on a bead blasted taurus m44 first which has a little scratch.

The results were not good. It didnt make the scratch go away but instead left more marks. I made sure the sand paper didnt move at all when tapping it with a hammer or when i removed the paper
 

Attachments

  • tr.jpg
    tr.jpg
    54.2 KB · Views: 96
Last edited:
80 grit was obviously too coarse.

Try some finer grits to match the original bead blasted finish.
Also try varying the force of how hard your hammering to find a good fit to the finish.
 
I found grey Scotch Brite pads and a very light touch could be used to blend in the shiny spots on my 639 frame... it was a very lightly bead blasted... not shiny but not totally matte. :D

When I tried the burgundy Scotch Brite on my Model 66 that had a similar finish. I don't know whether I went at it too aggressively, but I got a lot of scratching. :(

I have to admit I've never seen the sandpaper and tack hammer technique used. :confused:

Froggie
 
For me, at least, I have found both the Scotchbrite and the "tapping sandpaper" techniques effective only if nobody looks too closely.

I sure wish there was a more effective solution to the scratch problem other than progressive grit sanding and bead blasting or re-bluing, but until my vision deteriorates, the simple methods just won't do the job.

John
 
I found grey Scotch Brite pads and a very light touch could be used to blend in the shiny spots on my 639 frame... it was a very lightly bead blasted... not shiny but not totally matte. :D

When I tried the burgundy Scotch Brite on my Model 66 that had a similar finish. I don't know whether I went at it too aggressively, but I got a lot of scratching. :(

I have to admit I've never seen the sandpaper and tack hammer technique used. :confused:

Froggie
This worked for me too, but go light, slow and be careful.
 
For me, at least, I have found both the Scotchbrite and the "tapping sandpaper" techniques effective only if nobody looks too closely.

I sure wish there was a more effective solution to the scratch problem other than progressive grit sanding and bead blasting or re-bluing, but until my vision deteriorates, the simple methods just won't do the job.

John

Hang in there, Friend John... you'll get old one of these days and half blind like me! :D You can also look forward to the dreaded "Half Timer's Disorder" where you only remember stuff about half the time, or is it half the stuff all the time?
:confused::confused::confused:

Your Phriendly 'Phibian
 
so I decided to give the sandpaper thing ago (80 grit sand paper over the scratch and hammer it ) However i decided to experiment on a bead blasted taurus m44 first which has a little scratch.

The results were not good. It didnt make the scratch go away but instead left more marks. I made sure the sand paper didnt move at all when tapping it with a hammer or when i removed the paper

That's what I was talking about not all of the finishes being equal. The top of a Colt 1911 slide is coarse enough finished, that 80 grit would probably be the right sand paper for the job.

That Taurus is a very fine finish. You would have needed something like 2000 or 3000 grit sandpaper. I didn't just happen into the correct grit paper when I worked on my guns. I had a cheapo stainless Kbar knife that I worked over first.

Anyone that plans to attempt this owes it to themselves to try it on something sacrificial first.
 
Back
Top