Was this spring change hard to do, or expensive? Thanks!
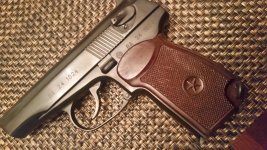
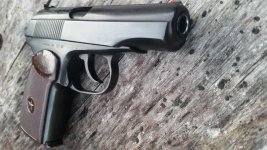
I recently added a PA-63 to my collection of civilian market FEG PP clone pistols (AP9S, APK9S, APK7S, and an SMC).
Unlike the civilian market pistols the DA trigger pull is impressively excessive and it really does benefit from a new set of springs.
But…there are some caveats.
1) Since it’s a blow back operated pistol, the recoil is absorbed by both the recoil spring and the hammer spring. The slide doesn’t have much leverage against the hammer in its initial motion to the rear, so the hammer spring plays a big role in retarding the rearward motion of the slide.
Consequently when you lighten the hammer spring, you must increase the weight of the recoil spring.
The standard PA-63 recoil spring is 11 pounds and the standard hammer spring is 16 pounds.
Wolff Gun Springs has PA-63 recoil springs in 11, 13 and 15 pound weights. They have hammer springs in 9, 11 and 13 pound weights.
Essentially they pair off as:
- 9 pound hammer spring, 15 pound recoil spring;
- 11 pound hammer spring, 13 pound recoil spring; and
- 13 pound hammer spring, 9 pound recoil spring.
Most folks seem to find the 11 pound hammer spring to be the sweet spot, with good reliability for primer ignition and a much lower DA trigger pull weight than the stock 16 pound spring.
That 1 pound spring usually pairs well with a 13 pound recoil spring, although some of the hotter 9mm Mak ammunition needs the 15 pound recoil spring.
As you are no doubt aware, there is a metal block on the end of the pivoting trigger guard on the PP pistols and their FEG derivatives that serves as a stop to keep the slide on the pistol. It’s then pivoted down out of the way so the slide can move far enough back to be removed from the slide for field stripping.
However, you will also notice a gap between the rear of that block and the pistol’s frame. That gap is there as the trigger guard itself flexes and acts as a shock absorber when the slide impacts that block.
If the recoil spring (or the combination of the recoil and hammer springs) is weak, due to either too light an initial weight, or wear over 800-1000 rounds, the slide will hit that block too hard. It will exceed the ability of the trigger guard to absorb the momentum of the slide and the block will impact the frame.
You’ll feel that as a sharp, metallic feel in the recoil and it’s your sign that you need to replace a worn recoil spring, or in the case of lighter springs, a sign that your recoil and hammer spring combination isn’t sufficient for the ammunition you are shooting.
2) The PA-63 is an evolution of the original FEG Police Pistol 48.M, which as a very, very close clone of the Walther PP in .32 ACP, right down to using the same magazine and having a high degree of parts interchangeability.
The 48.M was replaced by the RK-59, which was designed as an PPK sized, lighter aluminum framed replacement for the 48.M and chambered in the much more powerful 9mm Makarov cartridge.
The RK-59 was only produced for a short period as the aluminum frames cracked after a fairly low round count. It was replaced by the R-61 which used an aluminum-titanium alloy frame to get the required service life.
The PA-63 resulted from a request from the Hungarian Army for a pistol based on the R-61 to replace their TT-33 Tokarev pistols. They wanted a PP sized pistol with a 7 round magazine and a 3.9” barrel. These also had the aluminum-titanium alloy frame in order to get the required service life.
But that service life was based on the concept of carrying them a lot and shooting them comparatively little. It’s not a gun you want to take out and shoot 300 rounds through every time you go to the range. (The recoil is snappy enough that you won’t *want* to do that either.)
3) Keep that frame in mind when you start swapping out the springs, and keep in mind there is never a free lunch when it comes to blow back pistol design.
The stock combination of a heavy 16 pound hammer spring and a light 11 pound recoil spring resulted in a very heavy (and arguably
very safe) trigger pull. The heavy hammer spring also kept the slide velocity in check, while the light recoil spring didn’t batter the frame when the slide came back into battery.
When you install a lighter hammer spring, you increase the amount of recoil energy that has to be stored by the recoil spring, and when the slide comes back into battery, that heavier recoil spring puts more of that stored recoil energy back into the frame. That increases wear on the frame.
So…don’t get too crazy with the lighter hammer spring, and only use as much recoil spring weight as the ammo requires. You want the sweet spot where a) the recoil spring is heavy enough that the block on the end of the trigger guard isn’t bottoming out on the frame, but b) the recoil spring is light enough that the frame isn’t getting beaten any more than necessary when the slide comes back into battery.
——
My preference is to use the 11 pound hammer spring (the middle choice) along with a 13 or 15 pound recoil spring, depending on how the ammunition is loaded. European loaded 9mm Mak is generally loaded to higher levels than US loaded ammo, where it’s neutered a bit to basically .380 ACP level performance. There are however exceptions to that rule in both directions.
—-
Changing the recoil spring is simple. Just remove the slide, pull the old one off the barrel, and slide the new one on. Just remember the small/tight end goes on first so that it’s on the breech end of the barrel.
Replacing the hammer spring isn’t hard, but it’s a little more involved.
- Remove the grips;
- press the base of the grip frame down on a hard surface to depress the hammer spring retainer slightly to take pressure off the pin, and then press the pin out with a small punch (finger pressure is all that is required, do not use a hammer);
- continue to press down on the grip frame to hold the spring tension and then remove the punch letting the retainer slide out of the grip slowly, and then remove the hammer spring;
- when you install the new hammer spring, there is a hammer strut that has to go inside the new spring, so take care to get the spring centered on the hammer strut;
- install the retainer over the hammer spring;
- align the holes as closely as you can and press the bottom of the grip frame and hammer spring retainer on a hard surface to align the holes and insert a punch to keep the retainer in the frame;
- insert the pin from the other side and while pressing the base of the grip frame down on a hard surface;
- wiggle the punch slightly to adjust the hole alignment while pressing on the pin until it slides into place. It’s held in place by spring pressure and is a finger press fit. No hammer required.


") .
.