HomeSmith Trainwreck: The Tetanus Special

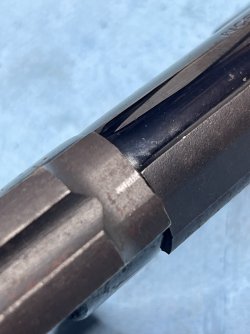
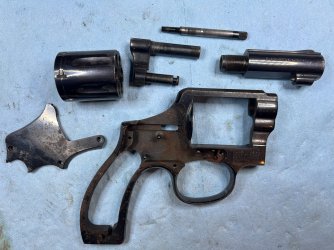
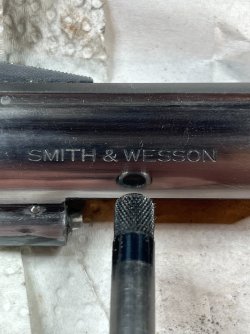
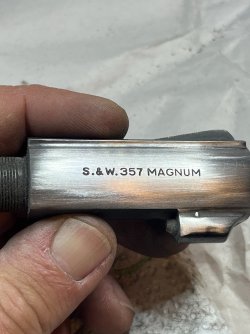
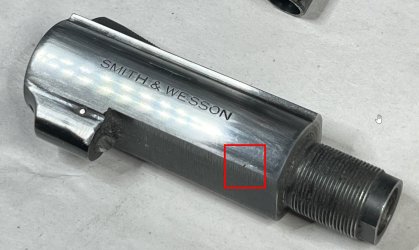
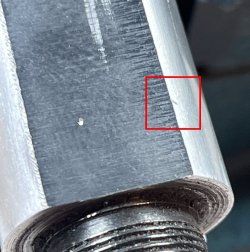
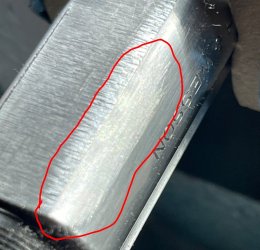
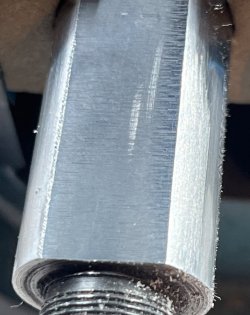
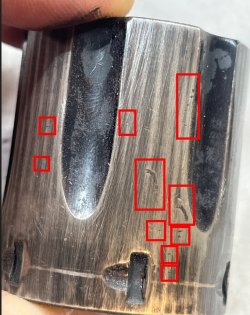
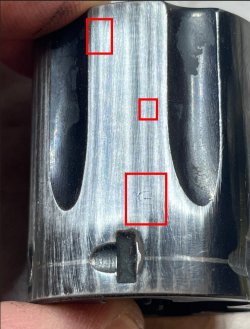
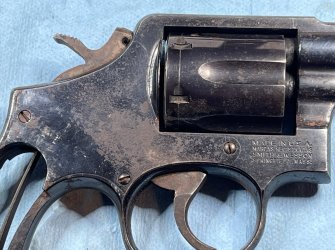
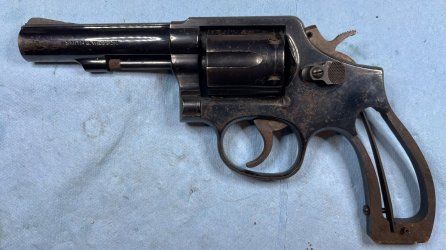
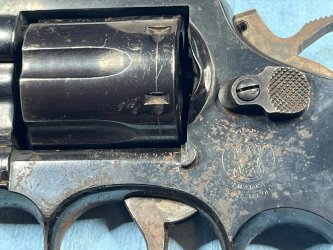
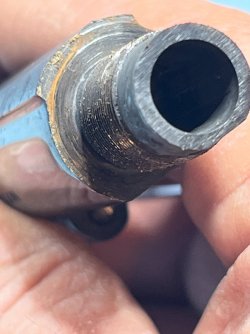
The Tetanus Special went to the range today and performed admirably....especially considering how rusted up the internal mechanism is. My shootin' buddy for the day couldn't believe at first that I was even going to shoot it, but after he saw what it could do he had to try it.......and shot better with the rusty old Smith then he did with his expensive foreign crunchentickers.

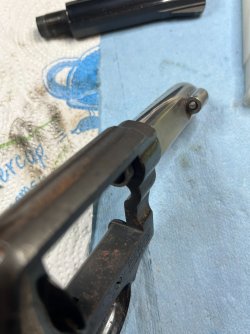
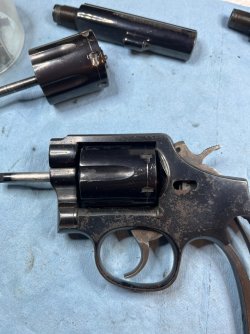
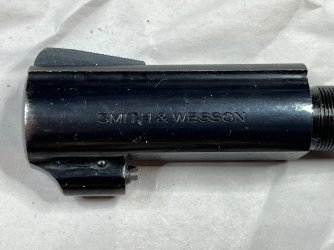
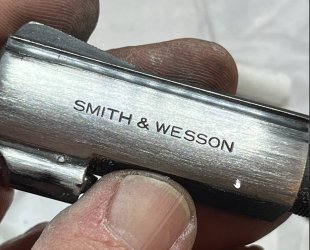
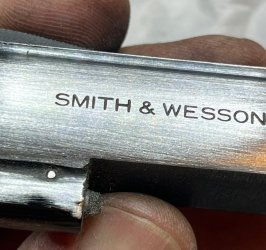
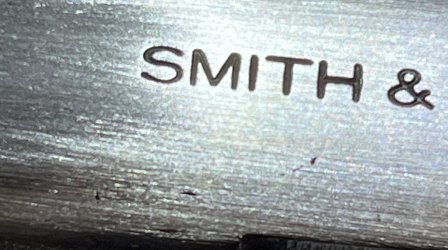
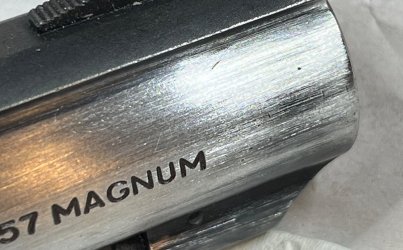
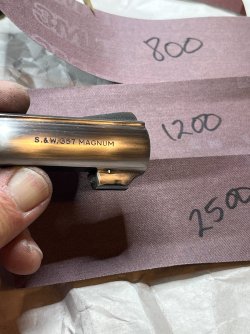
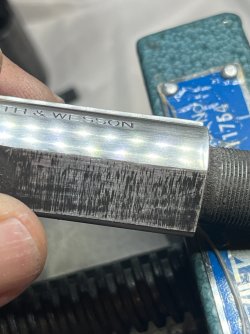
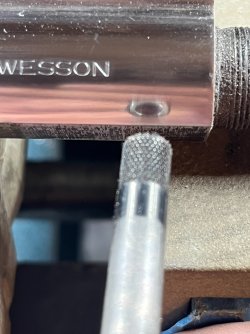
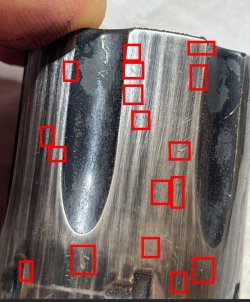
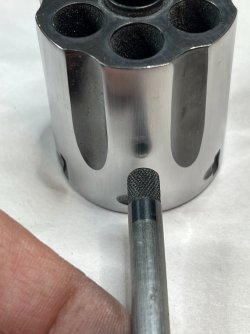
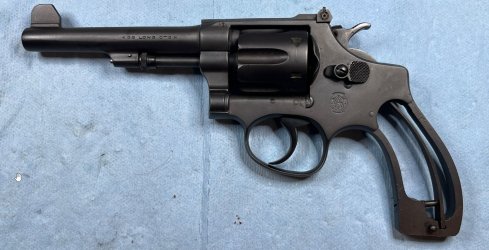
The big surprise of the day is that the Tetanus Special has a sequel: Tetanus Special II came home with us. Number 2 is a round butt 10-8 that looks to have been stored exactly the same was as the original Tetanus Special. You'll be seeing more of Number 2 in the next few weeks.

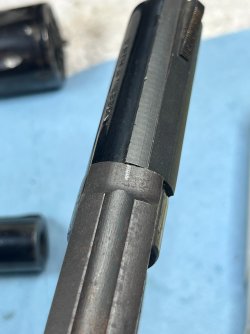
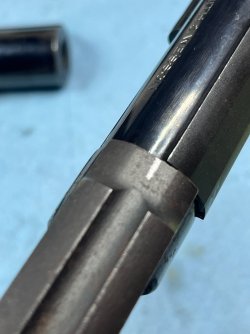
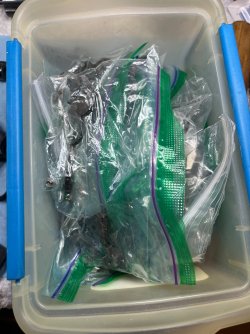
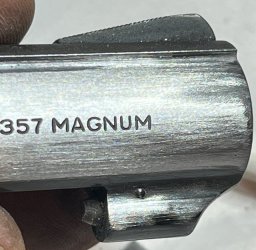
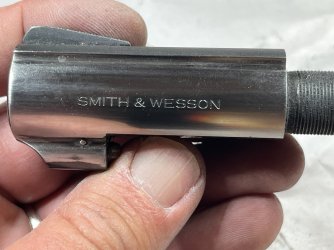
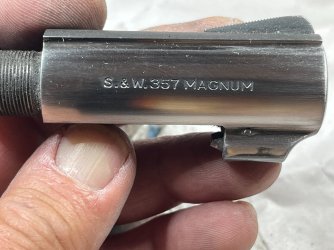
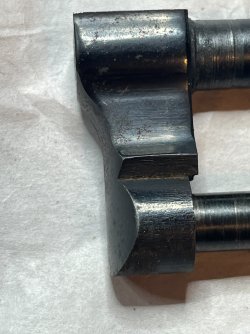
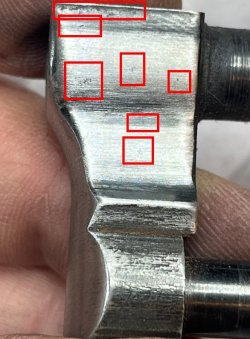
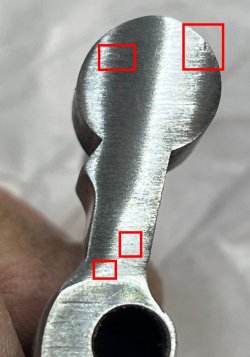
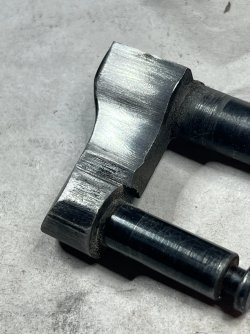
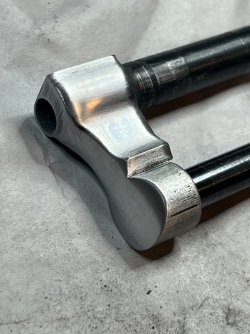
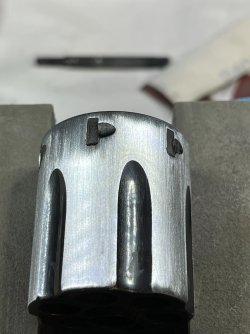
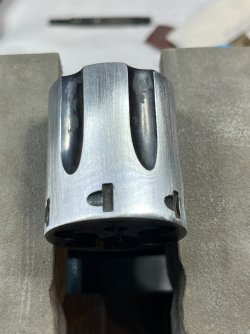
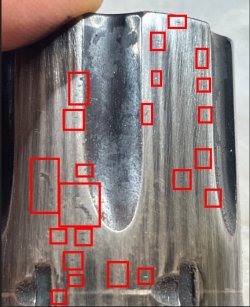
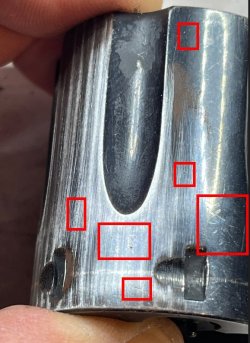
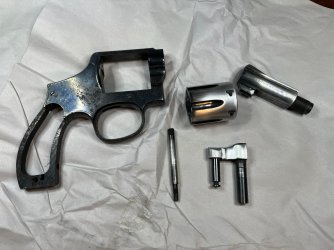
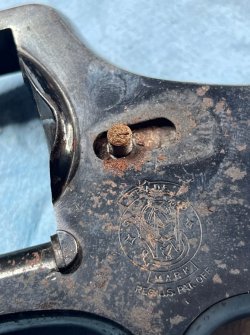
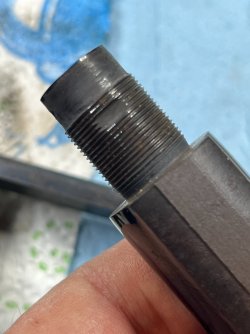
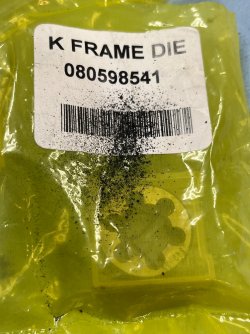
The other big surprise of the day is that an I-frame frankengun also followed me home. That one will get it's own thread, but there's a teaser in the attachments.
 

Attachments

  • IMG_6123a.jpg
    IMG_6123a.jpg
    228.3 KB · Views: 44
  • IMG_6109a.jpg
    IMG_6109a.jpg
    124.6 KB · Views: 48
  • IMG_6128a.jpg
    IMG_6128a.jpg
    243.3 KB · Views: 50
  • IMG_6124a.jpg
    IMG_6124a.jpg
    233.6 KB · Views: 41
  • IMG_6127a.jpg
    IMG_6127a.jpg
    240 KB · Views: 43
  • IMG_6130a.jpg
    IMG_6130a.jpg
    314.7 KB · Views: 48
Life is strange sometimes......

My shootin' buddy from yesterday had what my Grandma would have called a 'powerful hankerin' for a project of his own, and because he shot better with the as-is Tetanus Special than he did with his plastic-fantastics, he made me an offer I couldn't refuse....and the Tetanus Special is now his.

Of all the work I've put into various trainwrecks over the last 18 months, the first one that I actually sell turns out be rusty, nasty, Model 10 with a total hands-on time of less than 15 minutes and a total effort of a 30 day soak in Ed's Red.

Anyway....back to the subject at hand. We're moving on to Tetanus Special Number 2.

Number 2 is actually in better shape than the original Tetanus Special. It still qualifies as a rusty hunk but not quite as bad.
 

Attachments

  • IMG_6148a.jpg
    IMG_6148a.jpg
    321.6 KB · Views: 25
  • IMG_6150a.jpg
    IMG_6150a.jpg
    139.3 KB · Views: 25
  • IMG_6151a.jpg
    IMG_6151a.jpg
    27.5 KB · Views: 24
  • IMG_6152a.jpg
    IMG_6152a.jpg
    132.3 KB · Views: 25
After moving all the insides to the outside, the handy-dandy MGW action wrench was installed and the barrel was removed. This one took a pretty good yank to pop loose due to rust between the barrel and the frame.

Interestingly, the frame is not drilled for a barrel pin but the barrel does have the pin notch. The bluing on the barrel and the frame don't quite match, so it's possible that I'm not the first person to be in here.....

A K-frame tap was oiled up and used to chase the threads, which produced another pile of Tetanus Special glop. The tap didn't cut the threads - it just forced out the accumulated glock that had built up over the years.
 

Attachments

  • IMG_6154.JPG
    IMG_6154.JPG
    811.5 KB · Views: 27
  • IMG_6155.JPG
    IMG_6155.JPG
    1.1 MB · Views: 26
  • IMG_6156.JPG
    IMG_6156.JPG
    576.7 KB · Views: 25
  • IMG_6160.JPG
    IMG_6160.JPG
    838.4 KB · Views: 26
  • IMG_6161.JPG
    IMG_6161.JPG
    690.8 KB · Views: 27
  • IMG_6158.JPG
    IMG_6158.JPG
    885.1 KB · Views: 27
  • IMG_6159.JPG
    IMG_6159.JPG
    1.1 MB · Views: 28
With our barrel removed and our threads cleaned up, it was time to find out what Number 2 would become.....

Yes, I can fit a barrel to a frame by cutting the shoulder back, but it's much easier (and faster) to just find a barrel in the pile that times correctly without modification. My method begins with threading the original barrel back on using my calibrated fingers to detect the first contact with the frame. Heavy barrel Model 10's usually end up with the leading edge of the barrel rib in the middle of the rear sight channel, which is exactly where this one stopped. I make a mark on the frame using a pencil to use as a reference, and then spin on different barrels until I find one that times correctly.

Cheating? You betcha. And I'm gonna do it again. ;)

The Model 65 barrels that I have all clocked too far (I guess you could say they didn't clock far enough too) and wouldn't tighten up properly without moving the shoulder. No pinto this time.

The ghost of Daniel B. smiled on me in the form of a pair of 3" Model 13 barrels. One clocked just slightly too far, the other one just barely not enough. The one that didn't clock quite enough has some ridges on the face of the shoulder, and after cleaning those up it should be perfect. Five minutes with a stone and we'll be in business.
 

Attachments

  • IMG_6172.JPG
    IMG_6172.JPG
    699.1 KB · Views: 29
  • IMG_6168.JPG
    IMG_6168.JPG
    792.8 KB · Views: 26
  • IMG_6175.JPG
    IMG_6175.JPG
    681.7 KB · Views: 25
  • IMG_6176.JPG
    IMG_6176.JPG
    673.5 KB · Views: 28
  • IMG_5718a.jpg
    IMG_5718a.jpg
    120.6 KB · Views: 30
Last edited:
So now we know that Number 2 is going to transition (yes, we're modern around here) from a 4 inch .38 Special into a 3 inch .357 Magnum. Now we need to find the rest of the parts....

It's easy to tell the Model 13 internal kits from the others in my stash because the 13's all have the smooth .312 trigger. I like that trigger, so an appropriate internal kit (hammer, trigger, hand, rebound slide, cylinder stop) was pulled out of my fancy filing system (a tote full of sandwich bags) and installed into Number 2's frame.

A couple of cylinders from destroyed Model 13-3's (we needed non-recessed chambers to work with Number 2's frame) were pulled from the rack and tested for timing. The first one was marginally OK but slightly slow on one chamber, but the second one was perfect all the way around. There was much rejoicing.

HomeSmith Tip of the day: if you put a cylinder assembly into a frame and then realize that you didn't install the bolt and cylinder release, you can reach in through the hole in the frame and hit the center pin with a hooked tool to release the cylinder.

All of the old pieces were dumped carefully placed into a container labeled with the Number 2's serial number, and the new pieces that are not going to be refinished were placed into a sandwich bag in the same container. That left us with just the parts that need refinishing. It's a good time to call it a night...
 

Attachments

  • IMG_6178.JPG
    IMG_6178.JPG
    1 MB · Views: 23
  • IMG_6181.JPG
    IMG_6181.JPG
    940.3 KB · Views: 22
  • IMG_6179.JPG
    IMG_6179.JPG
    1.1 MB · Views: 23
  • IMG_6186.JPG
    IMG_6186.JPG
    927.4 KB · Views: 22
  • IMG_6190.JPG
    IMG_6190.JPG
    1.4 MB · Views: 25
I think a pinned barrel in a non-pinned frame is a lot more common than most S&W revolver owners ever knew. S&W did not waste parts and with an engineering change that called for the elimination of the barrel pin went into effect, it was simple to skip drilling the frame for the pin, but there was likely a large supply of barrels with the flat spot for the pin already milled into the barrel shank.
 
I've resurrected some relics in my time and resurrected around 200 salvaged vehicles so I could drive for free (rebuilt wrecks). First was a Chevy G10 van, 1966 in 1973. Last was in 2011, a Nissan Altima coupe, sold it to my son in law who got hit in the rear end and got twice what he paid me for the car. Motorcycles for a few hundred, new batteries and a carb cleaning and it was worth 3 times what I paid for it. I love reading this post Shotguncoach. Thanks for the time and effort to make it available to us.
 
Well, now I know why 3” barrels are hard to find.

I recall reading somewhere that the barrel pin was kinda transitioned out, where it was still pinned but more cosmetic as the barrel was cut for it before fitting.

Had to include these additions to my barrel pile: hope I don’t get them mixed up
 

Attachments

  • IMG_0210.jpeg
    IMG_0210.jpeg
    2.4 MB · Views: 11
While SWMBO was figuring out which chickens were going to sleep in the coop and which ones wanted to sleep in the trees, I was at the bench playing with working on TS2. Tonight we started our metal prep.

The first task was to clean up the work area, gather the tools (or 'mise en place' as our chef friends would say), and to throw away every used piece of sandpaper I found. Yes, they're handy for minor cleaning and polishing, but we're in metal prep now and we don't want to introduce anything that wasn't already on the gun.

I started with the barrel because it was closest to my hands in the pile. The first step was to take a good look at it under magnification. The zoom feature on your phone camera is an excellent tool for inspection, but for working I prefer to use a Donegan DA-4 Optivisor so that my hands are free.

Initial inspection of the "Smith & Wesson" side of the barrel showed some dog hair, some paper towel lint, a V shaped scratch below the word Smith and some slight roughness on the edge of the barrel rib. The "S.&W. 357 Magnum" side showed the same barrel rib roughness, a scratch above the U in Magnum, a few divots between the muzzle and the stamping, and an assortment of freckles that may just be powder residue.

Most of us would be ok with these defects on a carry gun, with maybe a touch of cold blue here and there. At the Wile E. Coyote School Of Gunsmithing, they taught us that the finish will hide everything that other people do but nothing that you do, so let's take off that blue and see what is underneath.
 

Attachments

  • IMG_6202.JPG
    IMG_6202.JPG
    830.8 KB · Views: 26
  • IMG_6204.JPG
    IMG_6204.JPG
    632.9 KB · Views: 26
For hand sanding I like to use a small, slightly flexible sanding block that I got from the jungle website. It's made to use special velcro-backed pieces of sandpaper, but there is enough surface area on attachment side of the block that peel-and-stick sandpaper sheets will stick to it.

I started with 220 grit paper just to see what was underneath the blue. Why not dip the barrel to remove the blue? Two reasons: the old bluing gives me a sanding guide at first and I'm lazy.

The 220 grit revealed that what I thought were just finish scratches were actually slight and scattered areas of damage. I count 24 spots in the first picture of the Magnum side and 10 in the second picture on the Smith side. Switching to 180 grit paper didn't even touch the small pits on either side, so it was time to get serious.

A 6" safe sided file was chalked up and and we started draw filing. A couple of things about draw filing a round barrel with a flat file: move the file A LOT (including areas that don't have pits) so that the metal removal blends together and you don't end up with flat spots, always (always!) work in the same direction, and clean the file every time you stop to look at the work. Every time. Yes, you'll go through a lot of chalk but the end result is better. It took about 10 minutes to clean up the Smith side of the barrel and another 20 minutes to get the Magnum side in shape.

Lots of light strokes, lots of cleaning, lots of chalk, and lots of movement are your friends here. Every stroke over a pit needs to have a set of lighter strokes on each side to blend the cutting and retain the barrel profile.
 

Attachments

  • IMG_6231a.jpg
    IMG_6231a.jpg
    130 KB · Views: 19
  • IMG_6216a.jpg
    IMG_6216a.jpg
    148.1 KB · Views: 18
  • IMG_6212a.jpg
    IMG_6212a.jpg
    138.1 KB · Views: 18
  • IMG_6218a.jpg
    IMG_6218a.jpg
    161 KB · Views: 18
  • IMG_6209a.jpg
    IMG_6209a.jpg
    154.6 KB · Views: 18
  • IMG_6208a.jpg
    IMG_6208a.jpg
    170.3 KB · Views: 18
  • IMG_6205a.jpg
    IMG_6205a.jpg
    228 KB · Views: 18
My goal was to have all the pits that were going to be removed gone before I went back to the sandpaper. There's a gouge on the Smith side of the barrel that crosses the transition from round to flat near the bottom that I decided not to address tonight. That one is going to need fresh eyes to retain the transition line, so I'll start with it tomorrow. By getting rid of the pits with the file, all we had to do with the sandpaper was to remove lines left by the file.

Going back to the small sanding block, I worked through 180, 220, 320, and 400 grit paper before taking a break, then 600, 800, 1000, 1200, and 2500 grit after the break. The higher numbered grits go very quickly and put a nice polish on the metal. They are also very frustrating because as the surface gets smoother it starts to show every little movement of the paper if you're not going perfectly straight with the strokes.

Tomorrow I'll start over on the barrel by cleaning it with denatured alcohol so that I don't confuse dog hair and fingerprints with scratches, then do another inspection with fresh eyes to find anything that was missed today, the round-to-flat transition gouge will get taken care of, and we'll work on the yoke and perhaps the cylinder.

No powered tools have been used so far....just a file and sandpaper. Total time invested tonight (including clean up) was 1 hour and 25 minutes.
 

Attachments

  • IMG_6237.JPG
    IMG_6237.JPG
    845.9 KB · Views: 28
  • IMG_6234.JPG
    IMG_6234.JPG
    1 MB · Views: 29
  • IMG_6236.JPG
    IMG_6236.JPG
    770.5 KB · Views: 27
  • IMG_6235.JPG
    IMG_6235.JPG
    834.5 KB · Views: 26
  • IMG_6226.JPG
    IMG_6226.JPG
    750 KB · Views: 24
  • IMG_6230.JPG
    IMG_6230.JPG
    787.2 KB · Views: 25
  • IMG_6225.JPG
    IMG_6225.JPG
    775.7 KB · Views: 27
I really enjoy all your posts and the detailed work you do on all these projects. I have definitely learned a few things, thank you!!

You are more brave than I on some of these projects, namely the rust-buckets you purchase. If I knew how to hot blue I might be more tempted to purchase a project gun like that, but I simply pass them by currently.
 
Kind of a short session tonight because I have other things I need to do, but I did manage to get the ugly ding that wasn't addressed yesterday taken care of. It's in the red square in the first pic attached to this post. It jumps out in every picture of the Smith side once you've seen it....

For this operation I locked the barrel into a vise with the ejector rod flat facing up (front sight down). 180 grit sandpaper didn't even touch it, so it was back to the file. To keep the strokes straight, I locked my wrists and used my elbows to provide all the motion. The 4th attached picture shows the "do more to blend it" file marks.

To retain the edge of the flat, the rounded area was filed first and then the flat was draw filed to recover the edge. The file marks were sanded with 180, 220, 320, and 400 grit paper, then the entire Smith side of the barrel was sanded with 600, 800, 1200, and 2500 grit.

Total time to remove this ding: 19 minutes and 52 seconds. I know the exact time because there was 8 seconds left on the timer for my frozen pizza when I walked into the kitchen after finishing. ;)

More to come tomorrow....
 

Attachments

  • IMG_6240a.jpg
    IMG_6240a.jpg
    185 KB · Views: 19
  • IMG_6245.JPG
    IMG_6245.JPG
    561.5 KB · Views: 20
  • IMG_6246a.jpg
    IMG_6246a.jpg
    141.5 KB · Views: 20
  • IMG_6247a.jpg
    IMG_6247a.jpg
    143.8 KB · Views: 20
  • IMG_6248a.jpg
    IMG_6248a.jpg
    108 KB · Views: 20
  • IMG_6249.JPG
    IMG_6249.JPG
    794.8 KB · Views: 19
  • IMG_6252.JPG
    IMG_6252.JPG
    726.7 KB · Views: 19
Slow and steady progress....

During the week my project time is limited because I still have to do that work thing, and since the wife unit is chicken sitting this week I also have to do all the things she would normally take care of. A little bit still gets done every night though.

A quick side story about the wife unit's adventures: she is finding it difficult to get things done outside because she has been adopted by a pair of 6 year old yellow Labs, an 18 month old Great Pyrenees, a mature male peacock (!!) and several chickens. The menagerie follows her around any time she is outside and they all want to be in the middle of everything. The peacock is especially annoying because it keeps stealing ice cubes out of her drink.

She doesn't find it nearly as funny as I do. I'll try to get some pictures when I'm out there this weekend.

Tonight I tackled the yoke. There isn't much metal there, but there are a lot of swoops and curves in tight places. The first step was to hit it with a random piece of sandpaper that was on the bench (I think it was 400 grit) to remove the fluffy rust and the bluing in order to see what was underneath: a fair amount of pinpricks, but no major pitting. I'm hoping the frame turns out to be the same.
Dropping down to 180 grit paper took care of a couple of the markings but didn't get everything. It was time to go back to the file. The 6" safe sided file I used on the barrel wouldn't fit into the swoopy parts of the yoke so I dug out a needle file and chalked it up. It only took a few minutes with the needle file to remove the blemishes and nicks, and then it was back to the sandpaper. 180 grit cleaned up the file marks, and then it was on through the progression up to 2500 grit.

I went back to check after looking at the pictures and the two side by side dots near the top of the yoke in the last picture were pieces of sanding residue.

Tomorrow evening we'll tackle the cylinder.
 

Attachments

  • IMG_6261.JPG
    IMG_6261.JPG
    790.4 KB · Views: 14
  • IMG_6262.JPG
    IMG_6262.JPG
    629.4 KB · Views: 14
  • IMG_6263a.jpg
    IMG_6263a.jpg
    121.8 KB · Views: 14
  • IMG_6264a.jpg
    IMG_6264a.jpg
    88.5 KB · Views: 14
  • IMG_6267.JPG
    IMG_6267.JPG
    1.2 MB · Views: 14
  • IMG_6269.JPG
    IMG_6269.JPG
    979.5 KB · Views: 14
  • IMG_6270.JPG
    IMG_6270.JPG
    961.6 KB · Views: 14
  • IMG_6271.JPG
    IMG_6271.JPG
    994.3 KB · Views: 14
  • IMG_6272.JPG
    IMG_6272.JPG
    1,003.5 KB · Views: 14
  • IMG_6273.JPG
    IMG_6273.JPG
    1.1 MB · Views: 14
  • IMG_6275.JPG
    IMG_6275.JPG
    879.6 KB · Views: 14
Another Friday evening alone, just hanging around and sanding my cylinder.

Wait......let's say that differently.

Tonight's project segment was to clean up the cylinder. At first glance the cylinder looked very nice and I expected this to be a quick operation.

Yeah. About that. When I write the story of my life I'm going to title it "Why should this be different?"

With my woefully incorrect assumption of an easy task still firmly grasped by my feeble mind, I snagged a piece of leftover sandpaper and gave the cylinder a light buff to confirm (uh huh) that I would be able to whip through this with no trouble. Oh boy. I stopped trying to count the spots that needed correction when I ran out of fingers and toes.

Gathering up what was left of my hopes and dreams, I placed the cylinder in my traveling workbench vise and went to work with 180 grit paper on the small block. Nope. Not a chance.

The safe-sided file went much faster, even though I had to draw file almost the entire surface to keep the highs and lows balanced. By the time the cylinder was ready to progress through the higher numbered grits we had gone back and forth between the file and the 180 grit paper 4 times. Like every other piece, all of the ding/scratch/dent/divot removal was done with the file and the 180 grit paper so that the other grits only had to remove the scratches from the previous grit. With each grit, the full circumference of the cylinder was sanded and then it was flipped and sanded again the other direction to make sure I didn't favor one end.

One reminder about doing it this way: you cannot skip a grit until you get above 400. 4-6-8 is fine, but you have to do 1-2-3-4 in order to get there.

Something I learned tonight: the vise is wonderful for draw filing, but I had to stop using it once I got above 320 grit because the magnetic jaw inserts were picking up the filings and leaving visible scratches every time I moved the cylinder.

Sharp eyed readers will notice that I did not sand inside the cylinder flutes. There are reasons....

  1. I'm lazy
  2. There was no visible damage inside the flutes - it was all on top
  3. The bluing provided a sanding indicator when I was working near the edges
  4. I'm hoping that leaving the factory blue in place will allow me to back into a multi-hued effect when I blue the rest
We'll find out later how well that plan works out.

Total touch time tonight was a little over an hour. On Saturday we'll attack the frame, which leaves Sunday for...


......wait for it.....


A day of rust.


Pictures of the frame clean-up coming tomorrow.
 

Attachments

  • IMG_6279.JPG
    IMG_6279.JPG
    894 KB · Views: 12
  • IMG_6313.JPG
    IMG_6313.JPG
    812.6 KB · Views: 12
  • IMG_6303.JPG
    IMG_6303.JPG
    901.7 KB · Views: 11
  • IMG_6286a.jpg
    IMG_6286a.jpg
    118.9 KB · Views: 13
  • IMG_6284a.jpg
    IMG_6284a.jpg
    134.8 KB · Views: 13
  • IMG_6283a.jpg
    IMG_6283a.jpg
    106.7 KB · Views: 13
  • IMG_6282a.jpg
    IMG_6282a.jpg
    101.4 KB · Views: 12
  • IMG_6281a.jpg
    IMG_6281a.jpg
    111.1 KB · Views: 12
  • IMG_6280a.jpg
    IMG_6280a.jpg
    127.2 KB · Views: 12
  • IMG_6322.JPG
    IMG_6322.JPG
    658.2 KB · Views: 13
  • IMG_6323.JPG
    IMG_6323.JPG
    1.2 MB · Views: 13
Trying a different method of posting to see how it works. If the pictures don't end up in the right place I'll fix it later.

After lots of build up with the small pieces, today the frame had it's turn in the spotlight. Here's where we started:

IMG_6127a.jpg

IMG_6128a.jpg

IMG_6150a.jpg


To get ready for sanding, the sideplate was put in place and 3 flat-head sideplate screws (the one that normally goes under the stocks) were used. The screws were tightened to fully seat the sideplate and then backed off until they were flush with the surface of the sideplate.

IMG_6325.JPG


Next, a piece of 220 grit paper was used to clean off all the mung and most of the original finish so that we could see what was underneath. On the left side, there were some manageable rust pits and one very deep ding between the logo and the cylinder window.

IMG_6326.JPG

The area just above the trigger guard on the left side had some bad pitting present, but that's a flat area so it should be relatively easy to clean up. The only real concern were the parts that wrapped around and broke the edge between the frame and the trigger guard opening.

IMG_6327.JPG

The bottom of the trigger guard and the front of the frame on the right side had some minor pitting, and so did the backstrap. All workable. Things didn't really get ugly until we got around to the sideplate. There's some pretty good pitting going on here.

IMG_6330.JPG


Let's jump in....
 

Latest posts

Back
Top