Crowning walk-thru

mikerjf

Member
Joined
Sep 19, 2018
Messages
2,192
Reaction score
3,532
Shortening a barrel and am ready to crown it. I’d like something similar to the J frame shown.

I assume I should start with a 90 degree cleanup? Then a… dish crown reamer? And how do I do the outer circumference radius?
 

Attachments

  • 4A38CAD3-2493-4C32-93D7-7BFFF8A3BD45.jpg
    4A38CAD3-2493-4C32-93D7-7BFFF8A3BD45.jpg
    57.6 KB · Views: 125
  • D9DFFE26-43FF-4790-8E99-BADABBE5B628.jpg
    D9DFFE26-43FF-4790-8E99-BADABBE5B628.jpg
    50.5 KB · Views: 133
Register to hide this ad
You need to take the barrel off and set up on a lathe to do the outer chamfer and sight rib setback. For that setup, I chuck the threaded end of the barrel in a collet, and the muzzle on a live center.

You can do the inner chamfer and face the end with simple piloted hand tools. Brownell's sells those. The pilot fits in the bore to guide the cutters.

The inner chamfer needs to be exactly true to the bore for good accuracy. You can use an unpiloted countersink for that, but the results won't be as good. Many people don't shoot well enough or at a far enough distance to tell the difference, though.
 
Yes, I to use a lathe. First turning back the rib. then the OD of muzzle.

IF your good with a file, you could set it up in a padded vise, muzzle up. file back the rib, then carefully work the OD. I use the Brownell tool to start the inner crown the a ball bearing welded to a shaft with emery cloth on face and work it in a fairly random manner to smooth it out evenly
 
Last edited:
Yeah, I was kinda thinking I might have to go file… was thinking I’d handle the rib by arranging some kind of guide fixed to the vise to protect the muzzle. But the outer radius stumps me, not sure I’ve got the chops for that freehand.

If I go with a radius-type crown, does that reamer automatically cut the rib back too? The tool almost looks like it might.
 
The crown cutters I've seen are basically recess cutters. Squaring the barrel you can use the cutters for squaring the forcing cone. So, no, you have to trim the rib back by other means.

Putting a mild chamfer on the OD of the barrel with a file doesn't take major skill. Just go slow and be as careful as you can.

A lathe can be a wonderful thing, but sometimes the proper setup takes darn near as long as doing the job by hand. If I can't put the barrel in a chuck, I put the forcing cone on a center and stabilize the barrel on a steady rest. Can't do that on a ribbed barrel. Well, you could by using a spider but that's a whole 'nother thing.
 
Last edited:
I use a file for the outside crown.
Cut the rib back first.
Then holding the bbl vertical in the vise. Drop the bbl down till the rib is below the top of the vise jaws and the bbl itself protrudes just the amt you want to file your crown radius over to.

The vise jaws won't let you get at the rib at all with your file and also will help keep your crown nice and even around the circumference of the bbl.

Helps to darken the steel and use a dividers to scribe a mark on the side of the bbl where you want the crown to come down to as well.
Vise jaws aren't always perfectly straight,,at least they aren't on my vises.

If you feel comfortable doing it w/o the vise jaws as a safety shield, then just lock the bbl in place at a comfortable height and file the crown contour down to the scribed mark

Use a fine cut flat file and keep going around the bbl. Use the flat top of the vise jaws as a starting point for the file edge and roll it up onto the bbl to produce the rounded contour as you work around the bbl.

If you need to go over the top and back down in toward the bore a little to finish it up, I use a fine cut half round pointed file by hand for that to cut and blend the contour in.
Choke up on the file and use just the tip for this. Short carefully controlled strokes does it. Not a lot of room for arm movement using the file here.
To avoid a slip and having the file tip striking the bore on the opposite side you are filing on,, you can push a wooden plug into the bore so the file will hit that instead. Doesn't need to be very tight , just snug.
Push the plug out when done filing.

Finish the whole thing off with some 280 or 320 grit paper pressed into the crown with your thumb and twisted back and forth. Change position and do it again and it'll leave a nice finish w/o damaging the edges of the rifling.
 
Idea to file back the rib. Go to the hardware store and get some 5/16" plastic tubing then some all thread that will fit inside it. Then 2 nuts and small washers, selecting washers that have the same OD as you new muzzle. Cut a piece of tubing length of barrel and stick it on all thread and stick that down barrel and put a washer and nut on inside the frame. You may have to file a flat on washer to clear top strap. Now stack some barrel OD washers on muzzle, then nut and tighten it up. Safe (grind teeth off) on edge of file then file rib back flat using the safe edge of foe against washers which will act as a guide and stop you from digging into muzzle
 
I want to put more likes on that! Might use a variation far rounding the exterior too. Could see a rubber donut that expands with tension for a variable guide… :)
 
Last edited:
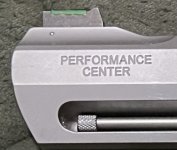
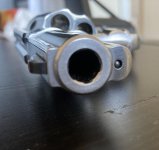
Maybe just angle the rib back like the
muzzle end of this 460.

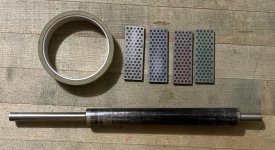
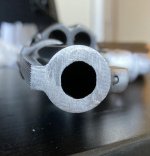
Had to crown my 458 No.1H after two local smiths
could not get it done, after I cut it down.
Long sad story.

Had cut it to 16.5" and got it close with files.
The steel rod with detailing tape, wrapped almost
all the way around in four places, offset the spaces,
fit in perfectly as a pilot.
Glued each diamond stone on and turned it by hand
until it was right.
Fine 45 degree round stone dressed the bore at
the muzzle.

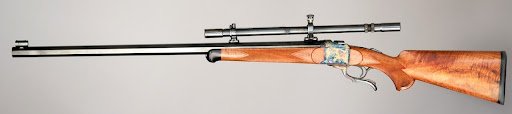
The sight was a chore, but it shoots great and swings nice.
Goal was to have a 34" barrel installed, but back in the early
'80s, none of the nation's top Smiths, could get a high quality
barrel that would finish at 34", just 30".
Navy Arms had one but not of high quality.
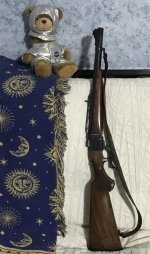
Doable now but I might keep it like this and the plan was always
to make white stocks, long forearm, carved and name it the
Snow Dragon.
 

Attachments

  • FullSizeRender.jpeg
    FullSizeRender.jpeg
    75.1 KB · Views: 18
  • FullSizeRender.jpg
    FullSizeRender.jpg
    83.1 KB · Views: 16
  • IMG_8019.jpg
    IMG_8019.jpg
    69.4 KB · Views: 24
  • IMG_8029.jpeg
    IMG_8029.jpeg
    15.9 KB · Views: 19
Last edited:
That’s a thought, I saw a PC 681 that was similar and looked good. Great project you have there!
 
Back
Top