- Joined
- Sep 16, 2023
- Messages
- 723
- Reaction score
- 1,439
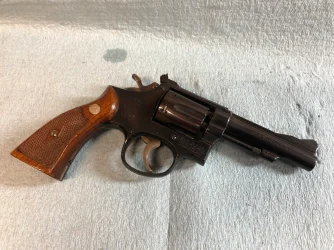
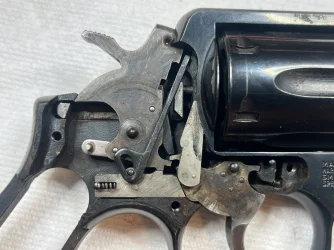
Inspired by @Shotguncoach 's postings in the 'smithing forum, as noted in a previous thread, I secured a correct matched trigger and hammer for my K38 that had been blued at some point in its life. I did a complete tear down and cleaning of the insides (and outsides ) and swapped in the new set of parts. After a light lube and reassembly, I dry cycled it 100 plus times and ended up with a 3.5# single action pull and a 9.8# double action pull. Hammer weight was 2.8#.
I did not take a full series of photos, as he does, as I really don't know what I'm doing and I would not want the crowd to see evidence of how often I dropped a part. (I really prefer the 5-screw cylinder stop mechanism, but why does that little pin and spring seem to have a larger attachment to my garage floor than my table saw?)
In homage to my inspiration, here are the gratuitous blue shop towel "beauty shots." (I think this is a 1954-55 vintage)


For those that have done it, how complex is the fitting of the hammer block safety bar? I figure I'll do that and re-test the trigger pull just to see what impact it has.
I did not take a full series of photos, as he does, as I really don't know what I'm doing and I would not want the crowd to see evidence of how often I dropped a part. (I really prefer the 5-screw cylinder stop mechanism, but why does that little pin and spring seem to have a larger attachment to my garage floor than my table saw?)
In homage to my inspiration, here are the gratuitous blue shop towel "beauty shots." (I think this is a 1954-55 vintage)


For those that have done it, how complex is the fitting of the hammer block safety bar? I figure I'll do that and re-test the trigger pull just to see what impact it has.

