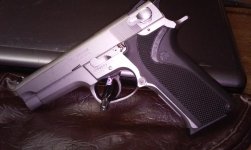
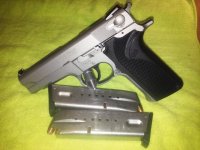
The M5906 Project

Ahoy there Shipmates,

Still fiddling with the frame today...

This thingamabob here is a hammer handpiece. It's made in Switzerland by Badeco. It's essentially a little tiny jackhammer.
IMG_3119.jpg


You cannot run a hammer handpiece on a normal flexshaft motor because of the speed limitation. Anything over 5k rpm will wreck the tool. The common Foredom SR motor runs up to 18k rpm and low torque. What we want is high torque and low speed so...
IMG_3121.jpg

We plug this too into a LX motor. High torque & top speed of 5k. Using a speed control, I run the hammer at 1/3 to 1/2 of the motor speed.

On the business end is a HSS (high speed steel) tool bit I ground to a blunted 100+° angle...
IMG_3120.jpg


It's kinda tedious work, noisy as well. Little tiny jackhammer you hold like a pencil. It wants to bounce all over the place so you have to keep very strict control over the tool to keep it from beating up an area you hadn't intended. Imagine holding a pencil in the same manner you'd write something but you're gripping it with near your maximum hand strength. Then drawing little tiny overlapping circlesoooooooooooooooooo. Hand and forearm starts to cramp up after about 10 minute of that so we take a break and go do something else for an hour or so. Anyhow, it's coming along nicely, no boo boos thus far (knock knock knock:rolleyes:)
IMG_3122.jpg


I'll apply this treatment clear on up the underside of the trigger guard and on up to the bottom of the dust cover. Basically anywhere my hand or hands interface with the weapon there will be some texture to enhance the grip.

Cheers
Bill

Stippling is not something that is seen very often these days. It does provide a secure gripping surface without the skin irritation that can occur with checkering. The process of stippling is a good recipe for carpal tunnel problems.
 
And all this time, I've been thinking that stippling was done with a hammer and a center punch and more patience than I could muster in a year! :D :o
 
Stippling is not something that is seen very often these days. It does provide a secure gripping surface without the skin irritation that can occur with checkering. The process of stippling is a good recipe for carpal tunnel problems.
I see it a fair amount but it's usually someone sloppily taking a dremel to a Glock frame which generally results in some trypophobia inducing abomination.
 
And all this time, I've been thinking that stippling was done with a hammer and a center punch and more patience than I could muster in a year! :D :o

One can do it that way. It would take a long time to finish a large area such as the front strap of a pistol, but it can be done... with the patience of Job.
 
Clark Custom, way back in their heyday when Mr. Clark Senior was putting together his famous “Hardball” guns would use a grip stippling that honestly looked, at least to me, as if he was using a hardened nail and a solid (but always exactly the same) whack with a hammer. The resulting look was odd to my eye but the feel in my hands is VERY good.

I’m sure that someone must know better than I do exactly how Clark executed this stippling, but I sure do like it.

No, I don’t own a Clark pistol. One of them is on my list.
 
I have a Clark Colt 1911 whose serial number indicates manufacture in 1969, although I don't know when Mr. Clark did his magic on it.

Your description of the stippling is accurate! It is sharp, even after all these years. I think I've heard it referred to as Shark's Tooth stippling.
 
Good Afternoon Gents,

I hope everyone is well on this fine Easter Sunday, and indeed 'tis my hope ya'll stay that way;)

Spent this afternoon playing with the mini jackhammer. I have nearly all the coverage done except for out on the dust cover where it's not quite done. Anyway I've had about enough of messing with that noisy gizmo for today so I'm putting my toys away and gonna go do soething utterly unproductive for the rest of the day:rolleyes:

So, here's where we're at...
IMG_3171.jpg


Just about done with the coverage on the frame, A wee bit more to do out here on the dust cover...
IMG_3172.jpg


Once I get it all covered I'll examine the surface under magnification checking for any areas that need to be hit again. I want the surface texture to be as uniform as possible.

Then there are a few spots that need a little more contouring like this here at the trigger guard root...
IMG_3173.jpg


And, I think I'm going to blunt this "chin" a little more...
IMG_3174.jpg


There is also ahead going to be a little woodworking happening.

These are the stocks I'm going to use...
IMG_3182.jpg


Those have several minor issues with fitment that will require a little bit of modification for this project.

Note the raise boss on each scale that keys into the window on the sides of the mag well...
IMG_3178.jpg


On our project 5906 the windows are about 3/8" longer that the boss on the scales at the bottom end. I do not want the fixing screws to be the sole means of keeping the grips in position plus that is not how the grips were designed. I already have a proven method of addressing this developed in fitting Nills 4506 stocks to a 1006 which had the exact same issue and I will share that when we get there...
IMG_3179.jpg


Were we to not take care of that gap, the scales are free to slip downward about 1/8" without the screws in place...
IMG_3180.jpg


But first I'll need to transfer the holes on the scales to the frame then fixture the frame on the mill table for drilling & tapping. Then there are a few more things to tend to.


Back here the steel is slightly proud of the wood so a touch more metal work is needed here...
IMG_3176.jpg


Then, along the front of the mag well, the wood is proud of the steel a bit. So a little trim is in order here too...
IMG_3177.jpg


And lastly on the starboard side scale... Since were installing a spring loaded decocker body on this gun we must have an ambi lever on the decocker body to keep it aligned laterally in the slide and not potentially interfere with the firing pin. So, we'll need to fixture the starboard scale in some fashion and mill this area to match the port side scale to permit free movement of the ambi lever...
IMG_3181.jpg


That's all for now. Got some work coming in so my personal fun projects get put on the 'back burner' for a spell.

A couple other things I'm contemplating;

I recall seeing some custom job where the shoulders on the slide were stippled too. I don't remember exactly, might have been a Novak or a Nighthawk but anyway I'm thinking of doing that too.

And once all the metal work is done on the frame & slide I'm considering sending those up to H&M for a dunk in the molten salt bath:eek::cool:

Stay well

Cheers
Bill
 
Those are NOT inexpensive hunks of wood you've got! And the "Target Champion" notation on the packaging refers to the series of Performance Center pistols made for the European market and shipped to WISCHO, many of which (most, even?) came with Nill grips that were likely teamed up with the pistol when it got to Germany.

The Target Champion 9mm guns were very, very much like the Performance Center PPC-9 pistols. Double-stack 9mm.
 
Bill, your work looks great and I like the stocks you'll be using. What will a "dunk in the molten salt bath" accomplish?

Thanks... And the dunk yields a extraordinarily tough satin black case hardened finish. Ferritic nitrocarburizing aka, Nitron, Isonite, Tenifer, Melonite and several other trade names I don't recall at the moment.

Cheers
Bill
 
Awesome stuff here! I really enjoy reading about and seeing work done by the owners who are not gunsmiths but have a helluva lot of talent. Nothing like watching a piece of functional artwork come to life out of a pile of parts, tools, and whatever else is needed for the build. I can’t wait till this is finished!!

BMCM.....the only question I have for you is......when are you gonna work ME in for one like yours??

:)
 
Such an improvement upon its as received condition.
It looked like the previous owner cleaned and lubed it with used chewing tobacco.

Your stippling is gorgeous. I have an early 5906 that wants to be the twin of what yours is going to be.
I'm only two states east of you, so shipping shouldn't be too much.
 
BMCM does great armorers work. He took my 5906 completely apart, cleaned every nook and crannie, went over all the internal parts and springs, bead blasted the frame, lubed all the parts, and it was a totally different 5906 when he was done.
Below is the only before pic (1st pic) and after.
 

Attachments

  • 59061.jpg
    59061.jpg
    69.3 KB · Views: 250
  • 59062.jpg
    59062.jpg
    100.5 KB · Views: 276
Back
Top