4013 to 1013 Project Begins

mitchjt

Member
Joined
Nov 23, 2012
Messages
184
Reaction score
157
All, I am starting my third conversion of a 4013 to 10MM. The last two functioned very good. The first one I did for myself and made numerous changes to the look and function. The second one I did with my son and made it just plane Jane. This next one I will change the look of the frame and Cerakote. But what I really want to do is modify the slide as we have all seen BCM perform his magic. I can't mill it myself so I will go to a machine shop for help. And for the life of me I can't find his old post with photos of his slide work. Can someone please help me find is photos? I will need them for the machine shop. Thanks in advance.
 
Last edited:
Register to hide this ad
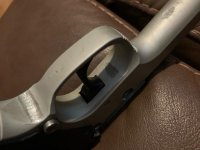
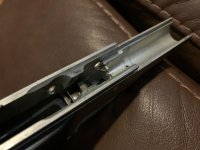
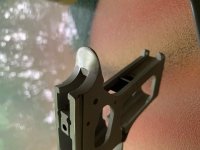
I received the advise I need to proceed and I received the host pistol for the project. The great news is that this is the perfect 4013 for the project. After shooting a couple rounds for function I field striped it and was shocked to see how great the frame looked. This gun has hardly ever been shot. The inside was clean and in perfect condition. The strange thing is that the outside of the pistol looks terrible with what may be handling, dropping, stored in the bottom of a tool box and whatever. The frame has some strange scrapping areas that look like the gun was stored on threaded rod hooks. But all of this is good since now I don't have to feel bad about taking tools onto a collectable old Smith. I will try to post a few pictures.
 

Attachments

  • IMG_4967.jpg
    IMG_4967.jpg
    44.1 KB · Views: 76
Last edited:
  • Like
Reactions: wmb
Let try another picture.
 

Attachments

  • IMG_4968.jpg
    IMG_4968.jpg
    46.2 KB · Views: 73
I am going to try something a little different this time. The grip is as beat up as the underside of the frame. Instead of installing a new grip I will sand, file, blast and Cerakote a light gray like the old Lady Smith grips. Anybody out there restore a 3rd Gen grip?
 
Yes, that is the same advice BMCM gave me and I respect his judgment on the slide mass issue.
On another subject, does anyone remember someone using a single flat wire recoil spring instead of the two nested round wire springs?
 
Yes, that is the same advice BMCM gave me and I respect his judgment on the slide mass issue.
On another subject, does anyone remember someone using a single flat wire recoil spring instead of the two nested round wire springs?

Exactly what I have in mine, BMCM did my entire conversion, from night sights to a flatwire conversion W/new guide rod, duty action trigger job and a decocker only conversion...

I can send you some pictures if you like, just send me a email
 
Yes, please send pictures.
There will be a delay in my progress because I am having total shoulder replacement surgery in a couple of days. At least is ins't my gun hand side. Honey, load me up a pistol I want to shoot!
 
On another subject, does anyone remember someone using a single flat wire recoil spring instead of the two nested round wire springs?

I used to use the ISMI flat wire springs in my 4013/4013TSW's but once I did a test & found they did not exert as much force as the S&W dual nested springs or Sprinco's nested springs I quit using them.

I'd certainly never put them in my 1013 using full power 10AUTO loads. :eek:

.


.
.


.


.
 
Last edited:
I used to use the ISMI flat wire springs in my 4013/4013TSW's but once I did a test & found they did not exert as much force as the S&W dual nested springs or Sprinco's nested springs I quit using them.

I'd certainly never put them in my 1013 using full power 10AUTO loads. :eek:

.


.
.


.


.

This is interesting... my understanding only goes so far, but what I gather the dual nested is very best to use runing full blast 10mm in the 1013?
 
1013 spring options

...but what I gather the dual nested is very best to use runing full blast 10mm in the 1013?

As far as a stock recoil spring arrangement, I agree.

But I use a variation on it.

I'm using a S&W factory inner spring (#108670000) with a Wolff extra power recoil spring as the "outer" spring.

I tested the force with a Wolff 19# & a 21# as the outer & decided to go with the lighter one, which still has plenty of power but a 17# or a 15# would be a more conservative choice.

In my test chart below, the top half was to show what you gain by using a heavier main/hammer spring (blue circled) -vs- the standard main/hammer spring (green circled) in conjunction with the factory dual/nested recoil springs.

You don't gain anything fully compressed, with the slide fully rearward. You gain in the middle where the hammer is resisting the slide's movement.

The bottom half shows the 21# outer (dark red circled) -vs- the 19# outer (light red circled), in conjunction with the heavier (23#) mainspring, where you gain (additionally) with the slide fully rearward & fully compressed recoil springs.

.

1013 recoil spring option:
----------------------------
S&W #108670000, inner spring
Wolff #47719, outer spring
.


.
.

.

Test chart: 1013 spring force measurements
.

.


.
 
Last edited:
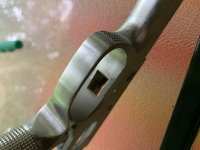
The shoulder replacement surgery is three weeks behind me now and my wife has allowed me to work one handed in the man cave. The first project was to get rid of the three bad marks on the frame.
 

Attachments

  • IMG_4990.jpg
    IMG_4990.jpg
    46.5 KB · Views: 37
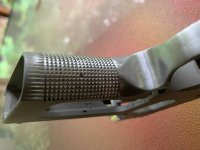
Next I pointed Smith and Wessons flat top checkering on the front strap. IMHO the only damage I could not get rid of was one broken point that was already on the frame from whatever horrible life this frame went through. But like I said earlier, the inside is perfect! After flat black Cerakote it may not show this missing point.
 

Attachments

  • IMG_4992.jpg
    IMG_4992.jpg
    45.5 KB · Views: 56
So before being run out of the shop, I rechecked and sanded the grip. Yes you can buy new but I wanted to save this one. The next step well be to blast it and give it a Glock gray Cerakote finish. This will take two arms and I have two weeks to wait to get the left arm into light duty.
 

Attachments

  • IMG_4983.jpg
    IMG_4983.jpg
    53.7 KB · Views: 60
Next I pointed Smith and Wessons flat top checkering on the front strap. IMHO the only damage I could not get rid of was one broken point that was already on the frame from whatever horrible life this frame went through. But like I said earlier, the inside is perfect! After flat black Cerakote it may not show this missing point.

Or, you could remove all of the points...

That machine cut checkering S&W did on those is something like 17 lines per inch. When pointed up it gets rather unpleasant in hand to shoot with and is unnecessarily aggressive in my view.

IMG_6559.jpg


So I sorted that out by filing down the pattern into a sort of 'grenade grip' profile. Plenty of grip/traction and no bleeding;):D

IMG_6702.jpg


Cheers
Bill
 
BMCM, that looks (ahem).... beautiful! Did you just take a file to the points, or is there a secret you would care to share?
 
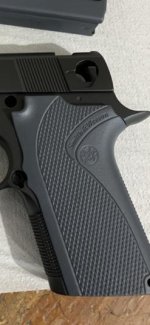
I am far enough along in this project to Cerakote a few parts. I decided to salvage the beat up grips on this LE pistol instead of buying new. After a lot of sanding and filing the grip looked ok. The color is Glock Gray. Kind of wanted a Lady Smith gray but couldn't identify suck a Cerakote color.
 

Attachments

  • IMG_5035.jpg
    IMG_5035.jpg
    21.9 KB · Views: 30

Latest posts

Back
Top