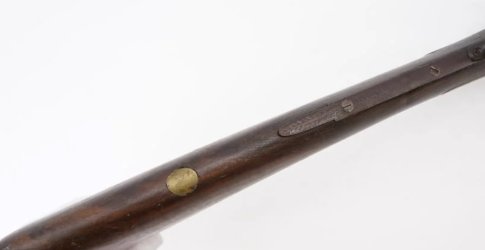
Many of the plates are gold..usually 10, 14 and 18k were mostly used as they are harder alloys and can take some wear and handling. So engraving detail doesn't wear off too easily.
24k is popular now but it wears extremely easily.
Many were silver. But brass and even copper was occasionally used.
Initials of owners. Sometimes a special event engraved or presentation/date.
The engraving is done on the plate after it is installed in the stock.
The initial plate generally goes in about 4 to 5" up from the toe
A sling swivel ,,about 2" up from the toe of the stock (just average measurements)
Sometimes an Initial Plate is used to cover an unwanted removed sling swivel hole in a stock.
If the Plate is down close to the toe of the stock, it's likely covering an old sling swivel hole.
Many were held with small 'nails' made of the same material as the plate itself. The nail formed from wire (gold, silver, ect) with one end clipped to a point and the other curled to a small ball by melting the wire in a torch flame. The holes for the nails in the plate very shallow countersinks. The nails driven in carefully. Then the plate with nails faced off, the attachment nails pretty much disappear from view.
Over time, movement of the piece in the wood usually reveals some or all of the attachment points but barely.
Parker for one installed all of their initial plates by this method
Another way was the sink a wood screw into the recess cut in to the wood for the initial plate.
The head of the screw sunken just below contact with the backside of the plate when in place.
The back side of the plate is 'tinned' with soft solder. The head of the wood screw is also tinned and left with a bit of generous solder on its surface.
The plate and wood screw fluxed, the plate laid in place over the screw and a soldering iron placed onto the front of the plate.
It heats the solder on the backside quickly as does the solder on the woodscrew below it. The two melt and flow together bonding the plate to the imbedded wood screw.
The plate is then faced off carefully to the stock surface.
Now, most are just epoxied into place, some with a small nail soldered to the back side for some extra holding strength,,many don't have even that.
For a time the quicky method of installing an initial plate was to inlet it, then drip some stick shellac into the recess. Drop the initial plate into place and hold a soldering iron on the surface to melt the shellac stick dribble underneath and settle the plate into it. It would stick to it pretty well.
But many of those have popped free after some time and are lost. Leaving a shellac imprint in the wood where it was.


