HomeSmith Trainwreck: Leroy Brown

The small amt of silver added to the tin (sometimes lead/tin) alloy in soft solder increases it's strength quite a bit (shear strength?)
It can lower the melting point of the alloy as well.

One thing I don't care for when using it is that the Silver in the mix makes the solder stay visible as a bright white substance.
Usually the 'soldering line' where the parts are joined together.
It makes little difference in most applications but on a firearm that is blued finished, that bright white line is not appreciated by customers.
I did a couple re-rib jobs some yrs ago when the stuff first came around and though it worked just fine, that white thin line up and down both sides of the rib in many places didn't look good at all.
So I stripped them and re-did them with 50-50 lead/tin and continue to use that. Plenty strong for that job and the Lead/Tin solder does oxidize down to a dark grey color in short order, So against a blued surface it does't scream 'look at me'

I used the same paste flux for either and seemed to work just fine.

The Tin/Silver hides very nicely on Stainless work.
If the OP plans to make a front sight of silver with 3 pieces sandwiched together, the Tin/Silver solder would likely hide quide nicely against the Silver Dime metal where soldered to the steel bbl when blued.

Fixing up those old hard rubber grips, grip caps and butt plates is easily done with black colored epoxy.
On the grip frame as here, I usually take a piece of Saran Wrap and place it over the grip frame first.
Stretch it tight so there are no wrinkles in it where it lays on the frame, then place the broken grip down onto it on one side. Clamp in place.

Then pull the wrap over the backstrap, grip strap and butt away from the grip panel. That will protect those metal surfaces from the epoxy and give a nice clean sharp edge to the casting for those shapes.

Scotch tape down the wrap to hold it in place if needed.

..I usually do only one side at a time so I can be sure the Wrap isn't wrinkled underneath the grip.

Support the pistol in a vise so when the epoxy is added to area, it does run away on you and let it set up.

It helps to rough up the inner surfaces of the broken panel where the epoxy is to attach to. Old breaks usually are coated with dirt and oil from decades of cary and use.
Scrape them clean with the point of a pocket knife carefully is my usual method. Directional lines mean nothing, just get the surface clean and roughed up.
The stuff will usually have a brown color underneath.
 
Last edited:
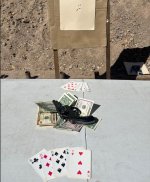
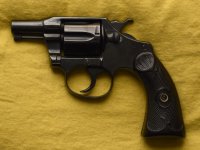
So there I was at the range, enjoying a quiet game of cards when things suddenly went bad and Leroy was pressed into action. He may be almost 120 years old, but when the time came he took care of business across that card table with no problems at all.

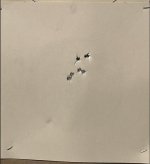
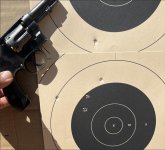
After the excitement was over, I stepped back to the 5 yard line and gave Leroy a try just to see if I really needed that front sight. Yes...I do. :rolleyes: Trying to align things using just the groove in the top strap didn't work well at all.

It's time to start scrounging for dimes.....

On a different note, I think I remember reading somewhere on this forum that the stocks for the small frame top break revolvers were the same size as the I frame, but darned if I can find that statement now. Is my memory correct on that one?
 

Attachments

  • IMG_5214a.jpg
    IMG_5214a.jpg
    76.9 KB · Views: 74
  • IMG_5211a.jpg
    IMG_5211a.jpg
    81 KB · Views: 74
  • IMG_5216a.jpg
    IMG_5216a.jpg
    38.7 KB · Views: 73
  • IMG_5217a.jpg
    IMG_5217a.jpg
    79.9 KB · Views: 78
Last edited:
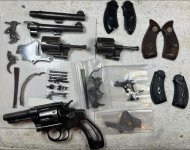
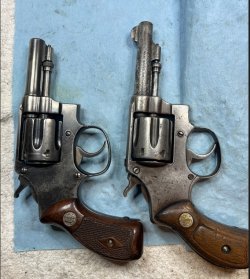
Thanks to the magic of the interwebs, Leroy now has not one but two full sets of spare parts and a set of I-frame wood magna stocks.

Now the fun can really begin.

The bores are all in similar shape so there isn't a lot to be gained by doing a barrel swap....other than getting a front sight again. :rolleyes:

I kinda like Leroy with the short barrel so it will stay for the moment. What the extra barrels do provide is a measurement of the front sight height so that I can do the maths to figure out how tall my 30 cent front sight should be.

For those keeping track at home, yes the money spent on Leroy and two parts kits would have bought a much better gun to begin with. This way is much more fun. :cool:
 

Attachments

  • IMG_5422a.jpg
    IMG_5422a.jpg
    140.9 KB · Views: 65
I am not sure you need a front sight if you keep your shooting to 5 yards. If you go to 7 however I vote for a front sight.
 
Leroy's most obvious issue is that he's missing his front sight blade due to a barrel amputation.

I kinda like how it looks without the front sight. Makes it look like one of those old-time prize fighters with the busted-up, flattened nose.

Makes it look mean and business like.

But yea. If it was mine I'd put a front sight on it.
 
I love a good restoration project!

On a side note I really wish S&W or any of the other companies would bring back the I frame or make a true pocket revolver. The J frame can be made to work but not like the LCP. With metallurgy what it is today there's no reason we shouldn't have a true pocket revolver wether in 38 special, or even 32 or 380 auto. I want a true double action pocket revolver, the NAA guns are cool but they're just not practical.
 
A multi-part article on the development of the 1903 through about 1945 will be in the next three issues of the SWCA Journal.

The authors place the second change, with the rebound slide, as starting in 1906 at about serial number 51,000. [The rebound slide also replaced the overly complex rebound catch attached to the hammer.]
 
Before I get too far into tonight's adventure, I want to make it clear that the abomination that was attached to Leroy Brown this evening is not intended in any way to be permanent....it is a proof of concept and a learning exercise so that I know what to do (and more importantly what not to do) when I do this for real.

Leroy needs a front sight and a modern "off the shelf" front sight just wouldn't look right. So, I invested 20 cents and about an hour into making one.

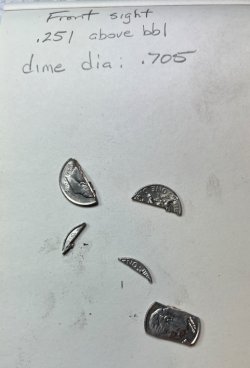
Step one was to measure the front sight on Larry Brown, Leroy's inbred cousin from back in the hills. (Larry will get his own write up someday...). Larry's front sight measured .251" tall, but Larry has a 3 1/4" barrel while Leroy's barrel is only 2 1/2-ish. A .250" sight will probably be a smidge too tall but it's a good starting point.

IMG_7423a.jpg

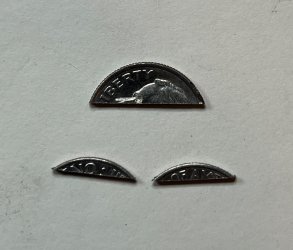
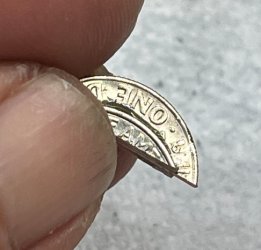
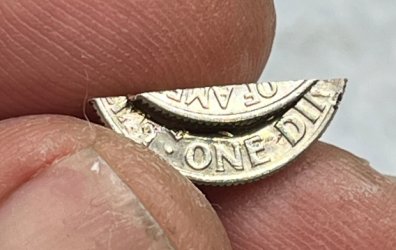
Step two was to mangle a couple of dimes into some rough pieces that would eventually form our proof of concept front sight.

IMG_7403a.jpg

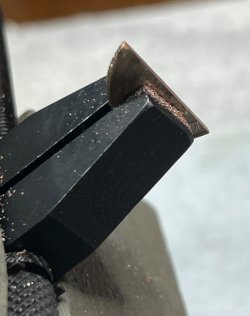
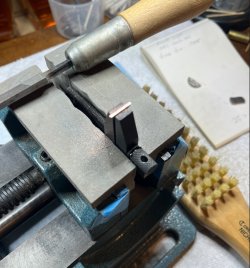
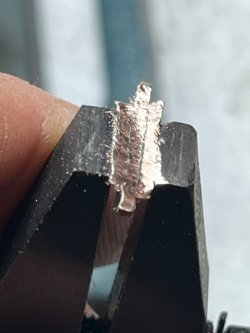
The main piece that would form the "blade" was clamped into a parallel clamp, which was then mounted in the bench vise and the bottom of the cut was trued up with a file.

IMG_7404a.jpg

IMG_7406a.jpg

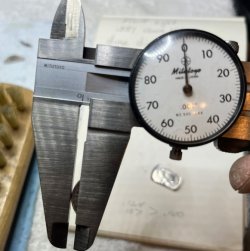
After a few minutes with the file and several measurements (you don't really want pictures of every measurement, do you?) we ended up with our .250-ish front sight blade. Yes, I went just a bit too far. Trust me - it gets much worse.

IMG_7410a.jpg

The two smaller pieces that would make up the "base" of the front sight were vastly different sizes due to the fast-n-sloppy way I cut them with a pair of tin snips. One was .107" tall, the other was .124" tall. In order to make them match, I decided to file them both to .100". In retrospect, this was way too small. The next iteration needs to have these pieces be more in the .140" to .150" range.

IMG_7416a.jpg

IMG_7418a.jpg

Here are our 3 pieces after sizing....

IMG_7419a.jpg

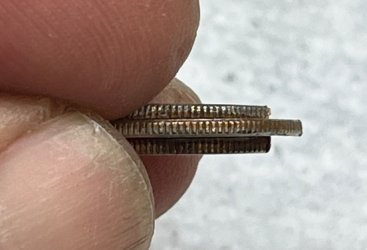
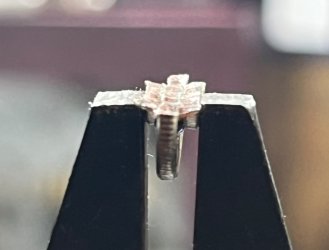
The 3 pieces were expoxied together to form a sandwich with the tall piece in the middle.

IMG_7430a.jpg
IMG_7431a.jpg
IMG_7433a.jpg

This worked, but the next time I do this I won't be so cheap and I'll spend 30 cents and use 3 full size dimes. They'll be attached to each other with solder and then I'll shape the unit instead of the individual pieces.
 
Here's where it all goes to heck in a handbasket....

My dime sandwich front sight had a mostly flat bottom and Leroy has a round barrel (shocking, I know).

IMG_7437a.jpg

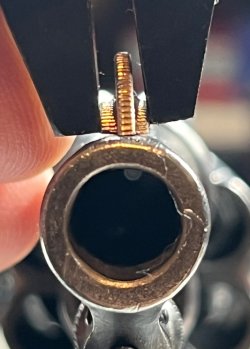
I needed to cut a round channel into the bottom of the sandwich to shape it to the barrel. Instead of spending the time with a round file, or setting up the drill press with a sanding drum the same diameter as the barrel and feeding the sight into the sanding drum a little at a time with the drill press vise, I did the intelligent thing and grabbed the rotary tool of destruction.....and proceeded to completely mung up the bottom of my dime sandwich.

It started out mostly ok and looked like this after the first pass:

IMG_7438a.jpg

But it needed just a bit more to match the barrel profile, so out came El Destructo again and I leaned in a bit too hard......

IMG_7440a.jpg

Five seconds with the Dremel destroyed an hour of filing and measuring. I deserve that for even thinking about using that cursed thing. I almost started over at that point, but I reminded myself that it didn't have to look pretty - it just had to work for a shot or two. So let's see what we can salvage....

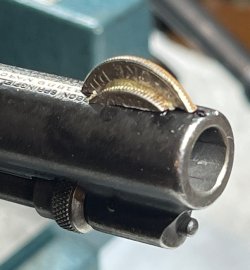
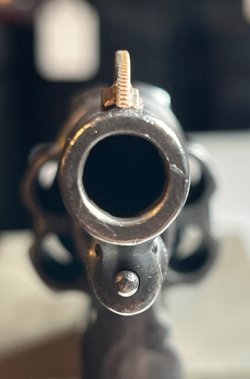
The "sight" did fit onto the barrel even though it looked like hammered dog poop.

IMG_7443a.jpg

IMG_7442a.jpg

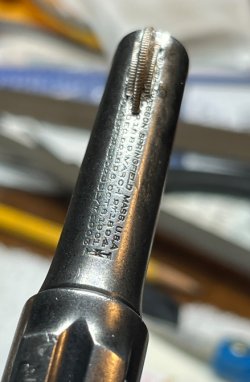
To find the centerline of the barrel, I used the extremely scientific method of laying a straightedge between the dingbats at each end of the top barrel stampings and drawing a line with a sharpie. The dime sandwich was then epoxied to the barrel. Removal is going to be with a big hammer when it's time to make the real front sight.

I don't need this sight to be regulated properly....I just need it to stay on the barrel long enough for me to fire 1 or 2 shots so that I can get some data to do the mathing required to find the correct front sight height.

We'll see how it works soon....I'll measure the height before the range trip just in case the "sight" decides to depart for the hinterlands on the first shot. The epoxy is still drying so I don't want to mess with it right now.

IMG_7446a.jpg
 
Hi Shotguncoach,

The barrel is tapered and increases in diameter going in the direction of the frame. I measured my .32 HE with 3 1/4" barrel and got a barrel diameter of .492" right at the back edge of the front sight. Moving back more or less 1 1/4" the barrel diameter had increased to .5135". To keep the original sight regulation, it appears to me that you would need to subtract this difference in barrel diameter from your new front sight. In my example, that would be .5135" - .492" = .0215". This amount subtracted from your original front sight measurement would then be .251" - .0215" or .2295" for your new sight.

Your measurements will probably not be the same, but it seems to me that you should take the increased barrel diameter into account.
 
Good morning D Brown - I concur about the taper being important, and if this was a “needs to be right the first time” operation I would have put a pin gauge in the barrel and done the measurements/calculations to base everything off of the calculated distance from the centerline of the bore to the top of the sight.

My plan for know is to shoot from a rest at a measured distance and use the point of impact to determine what changes need to be made to version 2. The sight height calculator from Dawson Precision has worked well for me in the past when changing sights on 1911’s.

Assuming that the “sight” didn’t fall off overnight, I’ll go measure the final installed height after breakfast.
 
Ok…I find this amusing. D Brown is an educated man who did a bunch of mathing and came up with .2295” as a proposed starting height for the new front sight.

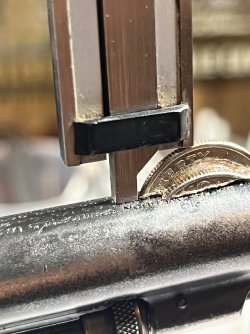
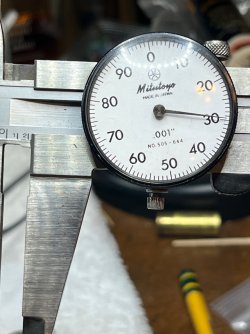
The pictures above show how badly I butchered the “sight” by trying to freehand it…..and here’s the measurement of the installed piece:

IMG_7451.jpeg

IMG_7453.jpeg
 
Maybe next time bevel the inner edges of the outer pieces first then clamp the center dime up a bit to create a shallow channel. Might save time and provide a guide for a round file.

Also don’t forget the groove needs to be .0358 wider at the back due to barrel taper.
 

Latest posts

Back
Top