Patrick L
Member
Really really fine job!


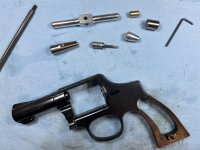
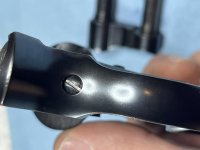
Turned out great and looks like a revolver intended for serious uses, not just a toy or show piece. Well done!So here we are.....not quite done because of the push-off issue, but other than that I'm happy with the way it turned out. I realized as I was taking the final pictures that I forgot to reblue the ejector rod. Not a big deal. That's probably the easiest piece to do, so I'll just toss it in the next time I have the deep fryer out.
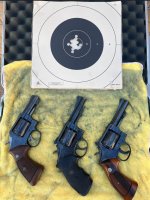
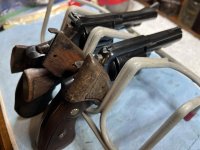
But what about the wood? That thought had been wandering around inside the empty space between my ears for over a week. I had mostly settled on using a set of PC Magna's and a grip adapter, but I really wanted something more substantial now that magnum loads were on the table.
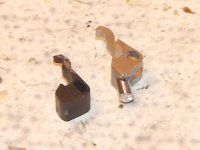
The answer presented itself in the form of a set of stocks in my reject pile: a set of diamond target stocks that had been butchered by rounding off all the sharp edges. The emotional support llama helped out by suggesting that they weren't butchered, they were a set of one-of-a-kind plain clothes target stocks!
I wasn't sure how they would work, but the more I look at it the more they grow on me. I may even shorten them a bit more on the bottom and emphasize the rounding to be closer to the bevel on the bottom of the PC Magna stocks.
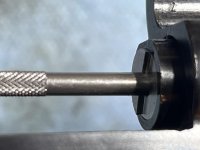
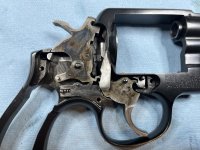
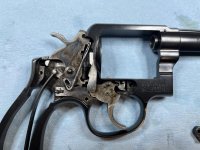
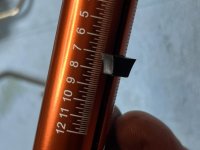
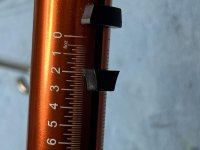
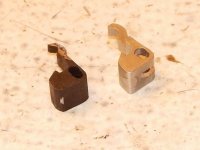
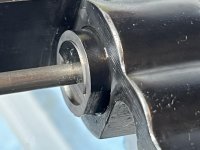
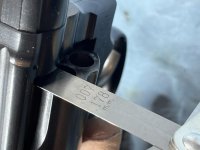
How did our home blue job come out? It isn't quite as shiny as the original finish but the color is reasonably close. I didn't reblue any of the screws or the thumbpiece and they are decently close to matching. I've included a picture of the installed cylinder stop screw to show the color comparison. I'll get some pictures in natural light when I have a chance.
Remaining tasks:
- Fix the push off
- Ren-wax everything
- Front sight orange paint
- Re-profile the bottom of the stocks (maybe)
- Reblue the ejector rod when convenient
- Range test
- Possible cylinder gap/endshake work (depends on the range results)
For now everything is back at home inside the work-in-progress Crown Royal bag. I'll fix the push off some night this week after work.
More to come.....

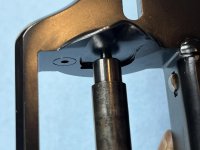
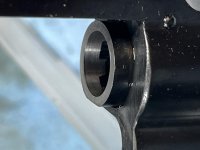
....and there wasn't any choice on the cylinder stop because of the 4-screw frame.
.
Looks very nice, I wish the factory always did it that nice.
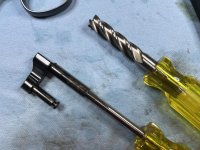
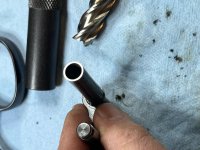
What angle cutter are you using for the FC?