Snapsafe Super Titan: assembly and review

Joined
Jan 7, 2017
Messages
3,131
Reaction score
10,329
Location
Whiskey Hill Ma.
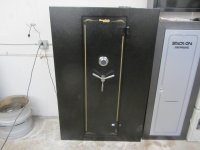
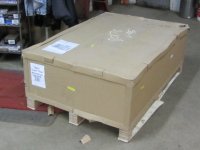
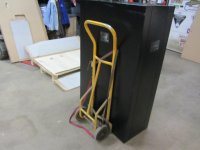
I ordered a Snapsafe on May 5th along with some accessories. The accessories arrived on May 10th. I had to call and ask when to expect the safe.I was told not for a month,maybe more.No warning about a "backorder". Tempted to cancel..but decided to wait it out. The safe came in last Friday the 16th. Yay! Time to unpack it and assemble. The instructions said it would take "minutes" to assemble. I've heard that before.Took me 180 minutes. Hey..I'm old,I guess. I've pulled engines in less time..

Got the assembly manual out..it's one page and it's basically a picture of the parts.Videos are available on their site..but they would not work for me.They are on Youtube. Baah! How hard can it be? Hmm..

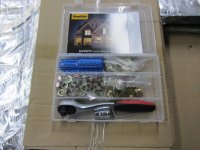
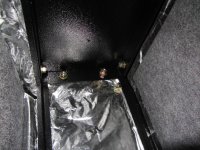
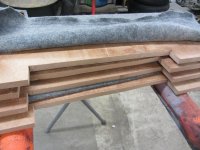
Got the hardware out and the supplied wratchet/socket,but it was so big you had to jam it into position into the insulation. I used one of my own smaller units.
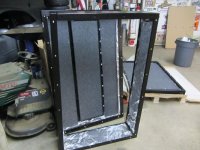
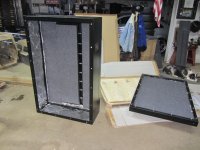
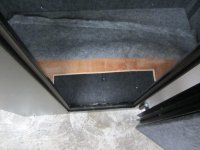
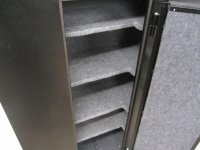
Lots of nuts and washers.Lots. You have to construct the center section first. Sometimes the studs spin and you need to hold the back side with a 9/16" wrench. Sure could use that third hand about now..

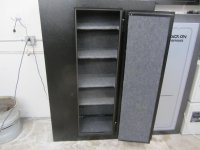
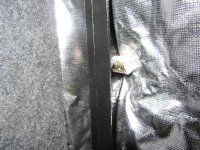
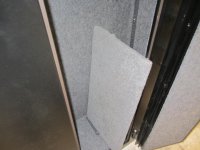
Next you stand up the 150lb. front section/door and dance it onto the center section holes/studs. Don't forget to remove ALL the plastic stud protectors or you will be cursing.
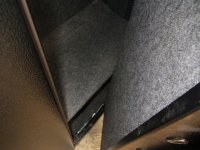
Next is the backside.Same dance it into position and onto the holes/studs.
Then the bolting begins. Lots of them.
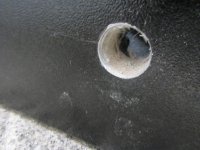
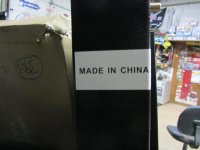
Made in China. Swell..
 

Attachments

  • IMG_2095.jpg
    IMG_2095.jpg
    70.6 KB · Views: 123
  • IMG_2096.jpg
    IMG_2096.jpg
    89 KB · Views: 115
  • IMG_2097.jpg
    IMG_2097.jpg
    90.9 KB · Views: 112
  • IMG_2098.jpg
    IMG_2098.jpg
    88.7 KB · Views: 123
  • IMG_2099.jpg
    IMG_2099.jpg
    58.9 KB · Views: 124
Last edited:
Register to hide this ad
Sections together. Time to wheel the safe into position.Weighs about 500lbs. No problem.. :)
 

Attachments

  • IMG_2101.jpg
    IMG_2101.jpg
    98.1 KB · Views: 116
  • IMG_2102.jpg
    IMG_2102.jpg
    100.4 KB · Views: 111
  • IMG_2103.jpg
    IMG_2103.jpg
    55.1 KB · Views: 113
  • IMG_2107.jpg
    IMG_2107.jpg
    177.2 KB · Views: 112
  • IMG_2109.jpg
    IMG_2109.jpg
    169.7 KB · Views: 104
Last edited:
Next it's time to put in the shelves which were an option I bought. Damn..too deep! Guess I ordered the XL shelves by mistake. Oh well...the felt was falling off them anyways (cheap glue) and I'll just rip them to fit. Let's see...interior depth is 14.5" so that must be the number. Nope. The door intrudes and you either must cut them to 10.5" like the factory does,or I could notch them. I need all the shelf space I can get! Got the jig saw out..notched them and used a staple gun to reattach the felt. Much better than messy glue. Now all I need to do is put the dehumidifier in..where is the plug hole? They must have forgot that detail. Hmm..guess I'll have to drill one.

I got the mechanical lock as I don't trust electronics. It's an OK tumbler lock assy...but not the quality of my Liberty safe. Not even close. Feels like a school locker unit.

Overall an ok "fireproof" safe, but not very roomy considering how HUGE the exterior is vs. what little space you have left inside,and the quality is not what I expected.The sections are not airtight when bolted together.It really should have a seal of some sort between them (RTV?)
The main advantage is it comes in sections, and you can pretty much assemble it anywhere without too much bother and have a fairly rugged fire rated safe.
Now to go find my 5/8" drill and hole saw. :)
 

Attachments

  • IMG_2110.jpg
    IMG_2110.jpg
    76.2 KB · Views: 83
  • IMG_2112.jpg
    IMG_2112.jpg
    111.8 KB · Views: 86
  • IMG_2113.jpg
    IMG_2113.jpg
    83 KB · Views: 88
  • IMG_2115.jpg
    IMG_2115.jpg
    97.4 KB · Views: 85
  • IMG_2116.jpg
    IMG_2116.jpg
    82.7 KB · Views: 96
Last edited:
Define "good deal"...:) Let's just say I won't do it again.

Hole drilled..not exactly confidence inspiring wall construction..but it is what it is. Some of you eagle eyed may notice the shelves aren't level..that's because the shelf brackets that were factory assembled were not evenly attached. Ug. I'm not fixing that.

Oh well..at least the guns won't roll off.

For the same money I could have bought a dozen of the Stack-On cabinets and although they aren't "fireproof" they are almost as roomy.

I think they should rename it "Boltsafe" or "Frankeinsafe" as there are no snaps involved in putting this thing together.

Time for a drink! ;)
 

Attachments

  • IMG_2117.jpg
    IMG_2117.jpg
    75.9 KB · Views: 99
  • IMG_2118.jpg
    IMG_2118.jpg
    58.2 KB · Views: 95
  • IMG_2119.jpg
    IMG_2119.jpg
    64.7 KB · Views: 98
Last edited:
"Why the big hole in back?"

^ I've hired the local mice to pull guard duty.

Not really as big as it looks. My camera does funny things at times. Mind of its own. I had to get a power line in for the Goldenrod dehumidifier and lights.
 
Last edited:
"Why the big hole in back?"

^ I've hired the local mice to pull guard duty.

Not really as big as it looks. My camera does funny things at times. Mind of its own. I had to get a power line in for the Goldenrod dehumidifier and lights.

My goldenrod cord fit in a 1/4 in hole. The cord end should terminate after you feed cord threw a tiny hole.
Might want to apply some fire sealant after your done.
 
Thanks for the review, i've been thinking about ordering one so i could have a better safe in my apartment. I don't think i could get one that would weigh much more than 350 pounds with guns included in my apartment without the floor giving way.
 
Glad you posted your snap safe trials and tribulations. Was giving some serious thought to getting one. But after what you went through no way no how. Thanks,Frank
 
If you require a modular, go Zanotti Armor. They are USA-made and customer service is exemplary.
 
Back
Top