HomeSmith Trainwreck: Model 10-3 Fifty Seven

Joined
Jul 25, 2017
Messages
1,230
Reaction score
7,332
Location
Arizona
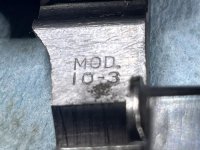
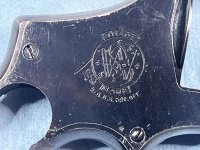
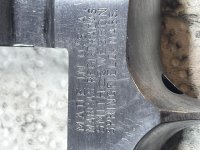
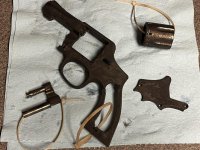
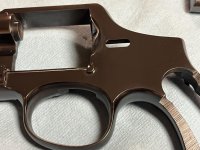
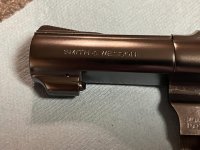
Perusing the for sale ads looking for broken and/or ugly guns is one of my favorite ways to pass the time. This 4-screw model 10-3 was advertised as "does not function" and was cheap, so it became the latest resident for the Shotguncoach Home for Wayward Smiths.

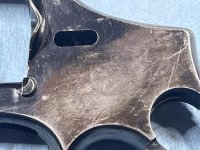
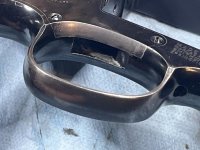
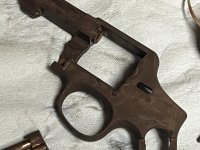
The 'does not function' part was easy to figure out: there was no spring inside the rebound slide. Easy peasy, 5 minute fix......but oh my was it ugly, and the more I looked at it the uglier it got.

This simply will not do. It was time to jump down the rabbit hole again.
 

Attachments

  • IMG_4503.jpg
    IMG_4503.jpg
    127.1 KB · Views: 389
  • IMG_4505.jpg
    IMG_4505.jpg
    105.3 KB · Views: 288
  • IMG_4516.jpg
    IMG_4516.jpg
    137 KB · Views: 301
  • IMG_4525.jpg
    IMG_4525.jpg
    128.6 KB · Views: 307
  • IMG_4520.jpg
    IMG_4520.jpg
    96.4 KB · Views: 290
Last edited:
Register to hide this ad
Step one, as usual, was to move all the insides to the outside and place them in the patent pending small parts storage container.

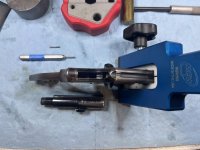
I knew that I wasn't going to be able to get into the area where the barrel meets the frame without causing some serious corner-rounding with the buffer, so the barrel pin joined the other parts in the storage container, the handy-dandy MGW frame wrench was installed, and poof - the barrel magically fell off.

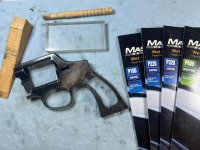
Stirring the spare parts pile with an old Sears cleaning rod caused two additional flat-topped sideplate screws to float to the top. The dome-topped screws went into the storage container and the flat-topped screws were installed in the sideplate so that I could do the metal prep without having to work around the screw heads.

I gathered up a variety of sanding blocks and sandpaper, hit play on Pink Floyd's 'Wish You Were Here' album, and went to work.
 

Attachments

  • IMG_4509.jpg
    IMG_4509.jpg
    98.2 KB · Views: 238
  • IMG_4515.jpg
    IMG_4515.jpg
    84 KB · Views: 236
  • IMG_4535.jpg
    IMG_4535.jpg
    130.1 KB · Views: 222
  • IMG_4536.jpg
    IMG_4536.jpg
    136.9 KB · Views: 233
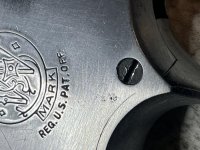
Why do it the hard way with sandpaper when I have a shiny new buffer sitting in the garage? We've all seen guns that look like they are melted on the corners with washed out logos from someone getting a little to enthusiastic with the buffer and I didn't want that. I wanted my edges to be as crisp as possible and I wanted to keep the logo and other stampings as intact as I could.

Logic told me that the best way to keep the edges sharp-ish was to sand the round areas first and then block sand the flats last. I still planned on using the buffer as a final step prior to bluing. The main thing was to use the buffer as a buffer and not a grinder.

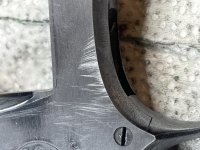
Wish You Were Here had run out and Dark Side Of The Moon was mostly finished when I decided that I had done enough. Did all the pits and scratches go away? No, they didn't. I made a judgement call on that when it became clear just how deep they actually were and how much I would have to take off the entire right side of the gun in order to keep it flat. We'll live with a couple of pits and a scratch under the finish.

During this little adventure I learned the hard way NOT to let the tail end of your sandpaper flop around while you were concentrating on a specific area. I probably spent as much time on do-overs fixing errant sanding scratches and mis-matched scratch directions as I did improving things.

The frustration helps make the lesson permanent....
 

Attachments

  • IMG_4551.jpg
    IMG_4551.jpg
    130.8 KB · Views: 219
  • IMG_4545.jpg
    IMG_4545.jpg
    120.7 KB · Views: 212
  • IMG_4552.jpg
    IMG_4552.jpg
    114.1 KB · Views: 203
  • IMG_4553.jpg
    IMG_4553.jpg
    113.2 KB · Views: 208
  • IMG_4549.jpg
    IMG_4549.jpg
    132.9 KB · Views: 180
Last edited:
We've all heard stories about people showing up in the emergency room with odd things in odd places and an explanation of "I fell on it", and reacted with "Yeah right. That never happens."

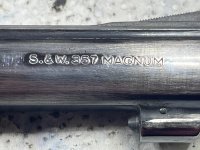
Well folks, I can tell you it's all true. Part way through the process of metal prep, the 10-3 frame fell from my hand and landed in the parts pile. When I picked it up again, a 3" barrel had somehow become attached to the frame! And horror of horrors, it wasn't a .38 special barrel!

This wasn't exactly what I had planned when I started the project. The way it really happened is that I opened a drawer to get a tool, my eye fell on a 13-3 parts kit, and I said "Hmmmm..."

My original intention was to fit a stainless barrel and cylinder from a 64-3, but the stainless barrel indexed at about 8'oclock when I did a test fit. I was digging for the barrel set-back fixture when I saw the other parts kit. The barrel from the model 13 indexed perfectly at 11 o'clock. Hmmmm indeed.

Before the barrel went on I did a mock up assembly to make sure the model 13 cylinder would also work. Using the model 10 yoke, cylinder stop, and trigger with the model 13 cylinder assembly and hand resulted in good carry-up and timing all the way around. We were in business. There was absolutely no end-shake, so that will have to be dealt with. There is also one extractor lug that is just a bit long. I could feel the hand shaving that lug and fitting itself as I was testing the timing. A few hundred cycles of dry firing will fit that up nicely.

So anyway, that's how we ended up with Project 10-3 Fifty Seven.
 

Attachments

  • IMG_4555.jpg
    IMG_4555.jpg
    114.3 KB · Views: 203
  • IMG_4554.jpg
    IMG_4554.jpg
    166.6 KB · Views: 241
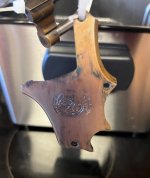
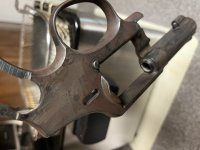
My previous adventures in stove-top bluing involved rusting the parts hanging from wires on my back porch. The low desert humidity made the rusting process take a long time. :rolleyes:

This time around, in addition to several hours of metal prep that I hadn't done on the earlier iterations, I changed both the application of the bluing solution and the rusting location.

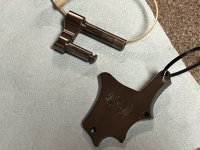
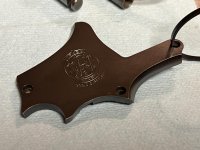
The first guns had the bluing solution applied while they were hanging on the porch using a big cotton swab dipped into the jar of solution. LOTS of solution got on the parts and would form drips at the lowest edge that made the rust layer inconsistent. This time I applied the solution using a piece of an old t-shirt and wiped on just enough to wet the part without forming drips.

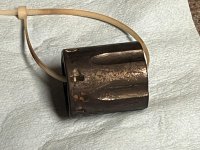
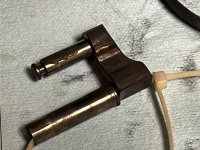
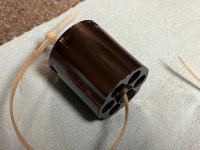
The wires that were previously used were replace by zip ties for several reasons. Primarily the wires were rusting and introducing contaminants into the boiling water, and secondarily the length of the wires was a pain to deal with while trying to boil the parts. The zip ties are much shorter and can stay on everything except the sideplate while they are being carded.

The biggest change was the location. Instead of hanging redneck wind chimes on the back porch, I took over the guest bathroom. :D A long steel rod was placed on top of the bathroom shelf so that the parts could hang out of the way of normal bathroom activities and the bathtub was filled with hot water to raise the humidity.

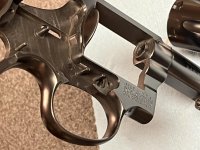
The result was a very consistent layer of rust in less than half the time it used to take on the back porch. I was able to get two 4-hour rusting sessions completed today, with boiling and carding after each session.

This will be a long one. There is still a week of rust cycles ahead, followed by a 24 hour soak in an oil bath, then we have to do the final fit on all the internals, and there's going to be a week of traveling in the middle of it all. If all goes well the test fire will be around the first of the month.
 

Attachments

  • IMG_4556a.jpg
    IMG_4556a.jpg
    50.9 KB · Views: 232
  • IMG_4561a.jpg
    IMG_4561a.jpg
    50.4 KB · Views: 231
  • IMG_4563a.jpg
    IMG_4563a.jpg
    57 KB · Views: 226
  • IMG_4564a.jpg
    IMG_4564a.jpg
    41.7 KB · Views: 210
  • IMG_4568a.jpg
    IMG_4568a.jpg
    178.4 KB · Views: 251
Last edited:
Good call on the M13 parts. As for the sanding, half of what I know is what not to do. That is valuable information, gained in the usual way, over a long period of time. Experience is what you get right after you need it. You are doing a great service to many on this forum with the showing and telling of your adventures. :)
 
Thank you all for the positive feedback. I'm getting ready to start the 3rd boil now.

Something else I learned that probably has many other applications, is that when I think I'm done with a task put the work away, come back later, and re-examine it with fresh eyes. Now that it's too late I'm finding flaws that I could have corrected but didn't notice simply because I had been staring at it too long.

It's not a new concept - I do it at my day job. I don't know why it took me so long to remember to apply it here also.
 
Doing this in the evenings after work limits the rusting time somewhat, but that seems to be offset by the must faster paced action in the steamy bathroom. Ummm....that doesn't sound quite right. Offset by the more energetic activity? No, not that either. :o

Anyway, rust forms faster in the high humidity environment than it does in my low humidity back yard. Go figure. I do kinda need to sleep once in a while so I'm going with a 3 hour rust cycle each night on the hope that this will work like paint: many light applications gives a better final product than a few heavy applications. We'll find out....

The rust coat tonight is lighter than the second one, but I expected that from the shorter rusting time and the more protected finish. We still have a good coating to work with.
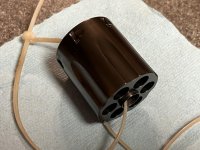
I did notice that this time around I applied too much of the solution to the yoke and cylinder which caused puddles to form. The puddles dried and turned into floaties when the parts went into the boiling water. The good news is that the floaties stayed on top. I just have to make sure I don't draw the parts up through the floaties when I take everything out.
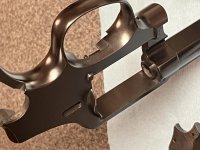
Time to fire up the carding wheel....back in a few minutes.
 

Attachments

  • IMG_4592.jpg
    IMG_4592.jpg
    69.9 KB · Views: 168
  • IMG_4593.jpg
    IMG_4593.jpg
    73.2 KB · Views: 148
  • IMG_4594.jpg
    IMG_4594.jpg
    71 KB · Views: 149
  • IMG_4595.jpg
    IMG_4595.jpg
    205.6 KB · Views: 158
  • IMG_4596.jpg
    IMG_4596.jpg
    64.7 KB · Views: 136
Back
Top